AG Neovo NSD-4301Q Manual
Læs nedenfor 📖 manual på dansk for AG Neovo NSD-4301Q (99 sider) i kategorien overvåge. Denne guide var nyttig for 35 personer og blev bedømt med 4.5 stjerner i gennemsnit af 2 brugere
Side 1/99

NSD-4301Q & NSD-5501Q LCD Display
User Manual
www.agneovo.com

TABLE OF CONTENTS
SAFETY INFORMATION 1 ..............................................................................
Federal Communications Commission (FCC) Notice (U.S. Only) 1 ............................................................
CE 1 ............................................................................................................................................................
Electric, Magnetic and Electromagnetic Fields (“EMF”) 2 ...........................................................................
Information for U.K. only 3 ...........................................................................................................................
North Europe (Nordic Countries) Information 4 ...........................................................................................
End-of-Life Disposal 5 .................................................................................................................................
Waste Electrical and Electronie Equipment-WEEE 5 ..................................................................................
Turkey RoHS ............................................................................................................................................ 6
Ukraine RoHS 6 ..........................................................................................................................................
PRECAUTIONS 7 ............................................................................................
Cautions When Setting Up 7 .......................................................................................................................
Cautions When Using 8 ...............................................................................................................................
Cleaning and Maintenance 8 .......................................................................................................................
Notice for the LCD Display 9 .......................................................................................................................
CHAPTER 1: PRODUCT DESCRIPTION 10 .....................................................
1.1 Unpacking 10 ..........................................................................................................................................
1.2 Package Contents 10 ..............................................................................................................................
1.3 Preparing for the Installation .............................................................................................................. 11
1.4 Wall Mounting Installation ................................................................................................................... 11
1.4.1 VESA Grid 12 ...............................................................................................................................
1.4.2
Ventilation Requirements for Enclosure Locating 12 .......................................................................
1.5 Using the Remote Sensor and Power Status Indicator 13 ......................................................................
1.6 LCD Display Overview 14 .......................................................................................................................
1.6.1 Control Panel 14 ...........................................................................................................................
1.6.2 Input/Output Terminals ............................................................................................................ 16
1.7 Remote Control 18 ..................................................................................................................................
1.7.1 General Functions 18 ...................................................................................................................
1.7.2 ID Remote Control 20 ...................................................................................................................
1.7.3 Remote Control buttons on Android source 21 ............................................................................
1.7.4 Inserting the Batteries in the Remote Control 23 .........................................................................
1.7.5 Handling the Remote Control 23 ..................................................................................................
1.7.6 Operating Range of the Remote Control 23 .................................................................................
CHAPTER 2: MAKING CONNECTIONS 25 ......................................................
2.1 Connecting the Power 25 ........................................................................................................................
2.2 Connecting a Computer 26 .....................................................................................................................
2.2.1 Using VGA Input 26 .....................................................................................................................
2.2.2 Using DVI Input 27 .......................................................................................................................
2.2.3 Using HDMI Input 28 ....................................................................................................................
2.3 Connecting External Equipment (Video Player) 29 .................................................................................
2.3.1 Using HDMI Video Input 29 ..........................................................................................................

TABLE OF CONTENTS
2.4 Connecting Audio Equipment 30 .............................................................................................................
2.4.1 Connecting an External Audio Device 30 .....................................................................................
2.5 Using the Card Reader 31 .......................................................................................................................
2.6 Connecting Multiple Displays in a Daisy-chain Conguration ............................................................ 32
2.6.1 Display Control Connection 32 .....................................................................................................
2.7 IR Connection 33 .....................................................................................................................................
2.8 IR Pass-Through Connection 33 .............................................................................................................
CHAPTER 3: USING THE LCD DISPLAY 34 ....................................................
3.1 Turning on the Power 34 .........................................................................................................................
3.1.1 Initial Setup 34 ..............................................................................................................................
3.2 Selecting the Input Source Signal 35 ......................................................................................................
3.3 Adjusting the Volume 35 ..........................................................................................................................
3.4 Changing the Picture Format 36 .............................................................................................................
CHAPTER 4: MULTIMEDIA MENU 37 ..............................................................
4.1 Accessing the Multimedia Menu 37 .........................................................................................................
4.2 Media Player 38 ......................................................................................................................................
4.2.1 Creating a Playlist 38 ...................................................................................................................
4.2.2 Modifying a Playlist 40 ..................................................................................................................
4.2.3 Playing Files in a Playlist 40 .........................................................................................................
4.2.4 Media Player Settings 41 .............................................................................................................
4.3 Browser 42 ..............................................................................................................................................
4.3.1 Adding an URL ........................................................................................................................ 42
4.3.2 Managing URLs List 44 ................................................................................................................
4.4 Cloud Content Management Software (Cloud CMS) 45 .........................................................................
4.5 PDF Player 46 .........................................................................................................................................
4.5.1 Creating a Playlist 46 ...................................................................................................................
4.5.2 Modifying a Playlist 48 ..................................................................................................................
4.5.3 Displaying PDF Files in a Playlist 48 ............................................................................................
4.5.4 PDF Player Settings 48 ................................................................................................................
4.6 Custom 49 ...............................................................................................................................................
4.6.1 Entering the Admin Mode 49 ........................................................................................................
4.6.2 System Settings 50 ......................................................................................................................
4.6.3 Accessing Apps in Admin Mode .............................................................................................. 52
4.6.4 Displaying Content via CMS App 52 ............................................................................................
4.6.5 Installing Apps to the LCD Display 55 ..........................................................................................
4.6.6 Accessing Network Settings in Admin Mode 55 ...........................................................................
4.6.7 Managing Storage in Admin Mode 56 ..........................................................................................
CHAPTER 5: ON SCREEN DISPLAY MENU 57 ...............................................
5.1 Using the OSD Menu 57 .........................................................................................................................
5.2 OSD Menu Tree 59 .................................................................................................................................

TABLE OF CONTENTS
CHAPTER 6: ADJUSTING THE LCD DISPLAY 61 ..........................................
6.1 Picture Settings 61 ..................................................................................................................................
6.2 Screen Settings 65 ..................................................................................................................................
6.3 Audio Settings .................................................................................................................................... 67
6.4 Conguration1 Settings ...................................................................................................................... 69
6.5 Conguration2 Settings ...................................................................................................................... 73
6.6 Advanced option Settings 75 ...................................................................................................................
CHAPTER 7: APPENDIX .............................................................................. 86
7.1 Warning Messages 86 .............................................................................................................................
7.2 Supported Media Formats 86 ..................................................................................................................
7.3 Input Mode 88 .........................................................................................................................................
7.4 Cleaning 90 .............................................................................................................................................
7.5 Troubleshooting .................................................................................................................................. 91
7.6 Transporting the LCD Display 92 ............................................................................................................
CHAPTER 8: SPECIFICATIONS 94 ..................................................................
8.1 Display Specications ........................................................................................................................ 94
8.2 Display Dimensions 95 ............................................................................................................................

1
Federal Communications Commission (FCC) Notice (U.S. Only)
This equipment has been tested and found to comply with the limits for a Class A digital
device, pursuant to part 15 of the FCC Rules. These limits are designed to provide reasonable
protection against harmful interference when the equipment is operated in a commercial
environment. This equipment generates, uses, and can radiate radio frequency energy
and, if not installed and used in accordance with the instruction manual, may cause harmful
interference to radio communications. Operation of this equipment in a residential area is likely
to cause harmful interference in which case the user will be required to correct the interference
at his own expense.
Changes or modifications not expressly approved by the party responsible for compliance
could void the user’s authority to operate the equipment.
Use only an RF shielded cable that was supplied with the display when connecting this display to a computer
device.
To prevent damage which may result in re or shock hazard, do not expose this appliance to rain or excessive
moisture.
THIS CLASS A DIGITAL APPARATUS MEETS ALL REQUIREMENTS OF THE CANADIAN INTERFERENCE
CAUSING EQUIPMENT REGULATIONS.
This device complies with part 15 of the FCC Rules. Operation is subject to the following two
conditions: (1) This device may not cause harmful interference, and (2) this device must accept
any interference received, including interference that may cause undesired operation.
CE
WARNING: This equipment is compliant with Class A of EN55032/CISPR 32. In a residential
environment this equipment may cause radio interference.
SAFETY INFORMATION
2
SAFETY INFORMATION
Electric, Magnetic and Electromagnetic Fields (“EMF”)
• We manufacture and sell many products targeted at consumers, which, like any electronic apparatus, in
general have the ability to emit and receive electromagnetic signals.
• One of our leading Business Principles is to take all necessary health and safety measures for our
products, to comply with all applicable legal requirements and to stay well within the EMF standards
applicable at the time of producing the products.
• We are committed to develop, produce and market products that cause no adverse health effects.
• We conrm that if its products are handled properly for their intended use, they are safe to use according to
scientic evidence available today.
• We play an active role in the development of international EMF and safety standards, enabling us to
anticipate further developments in standardization for early integration in its products.

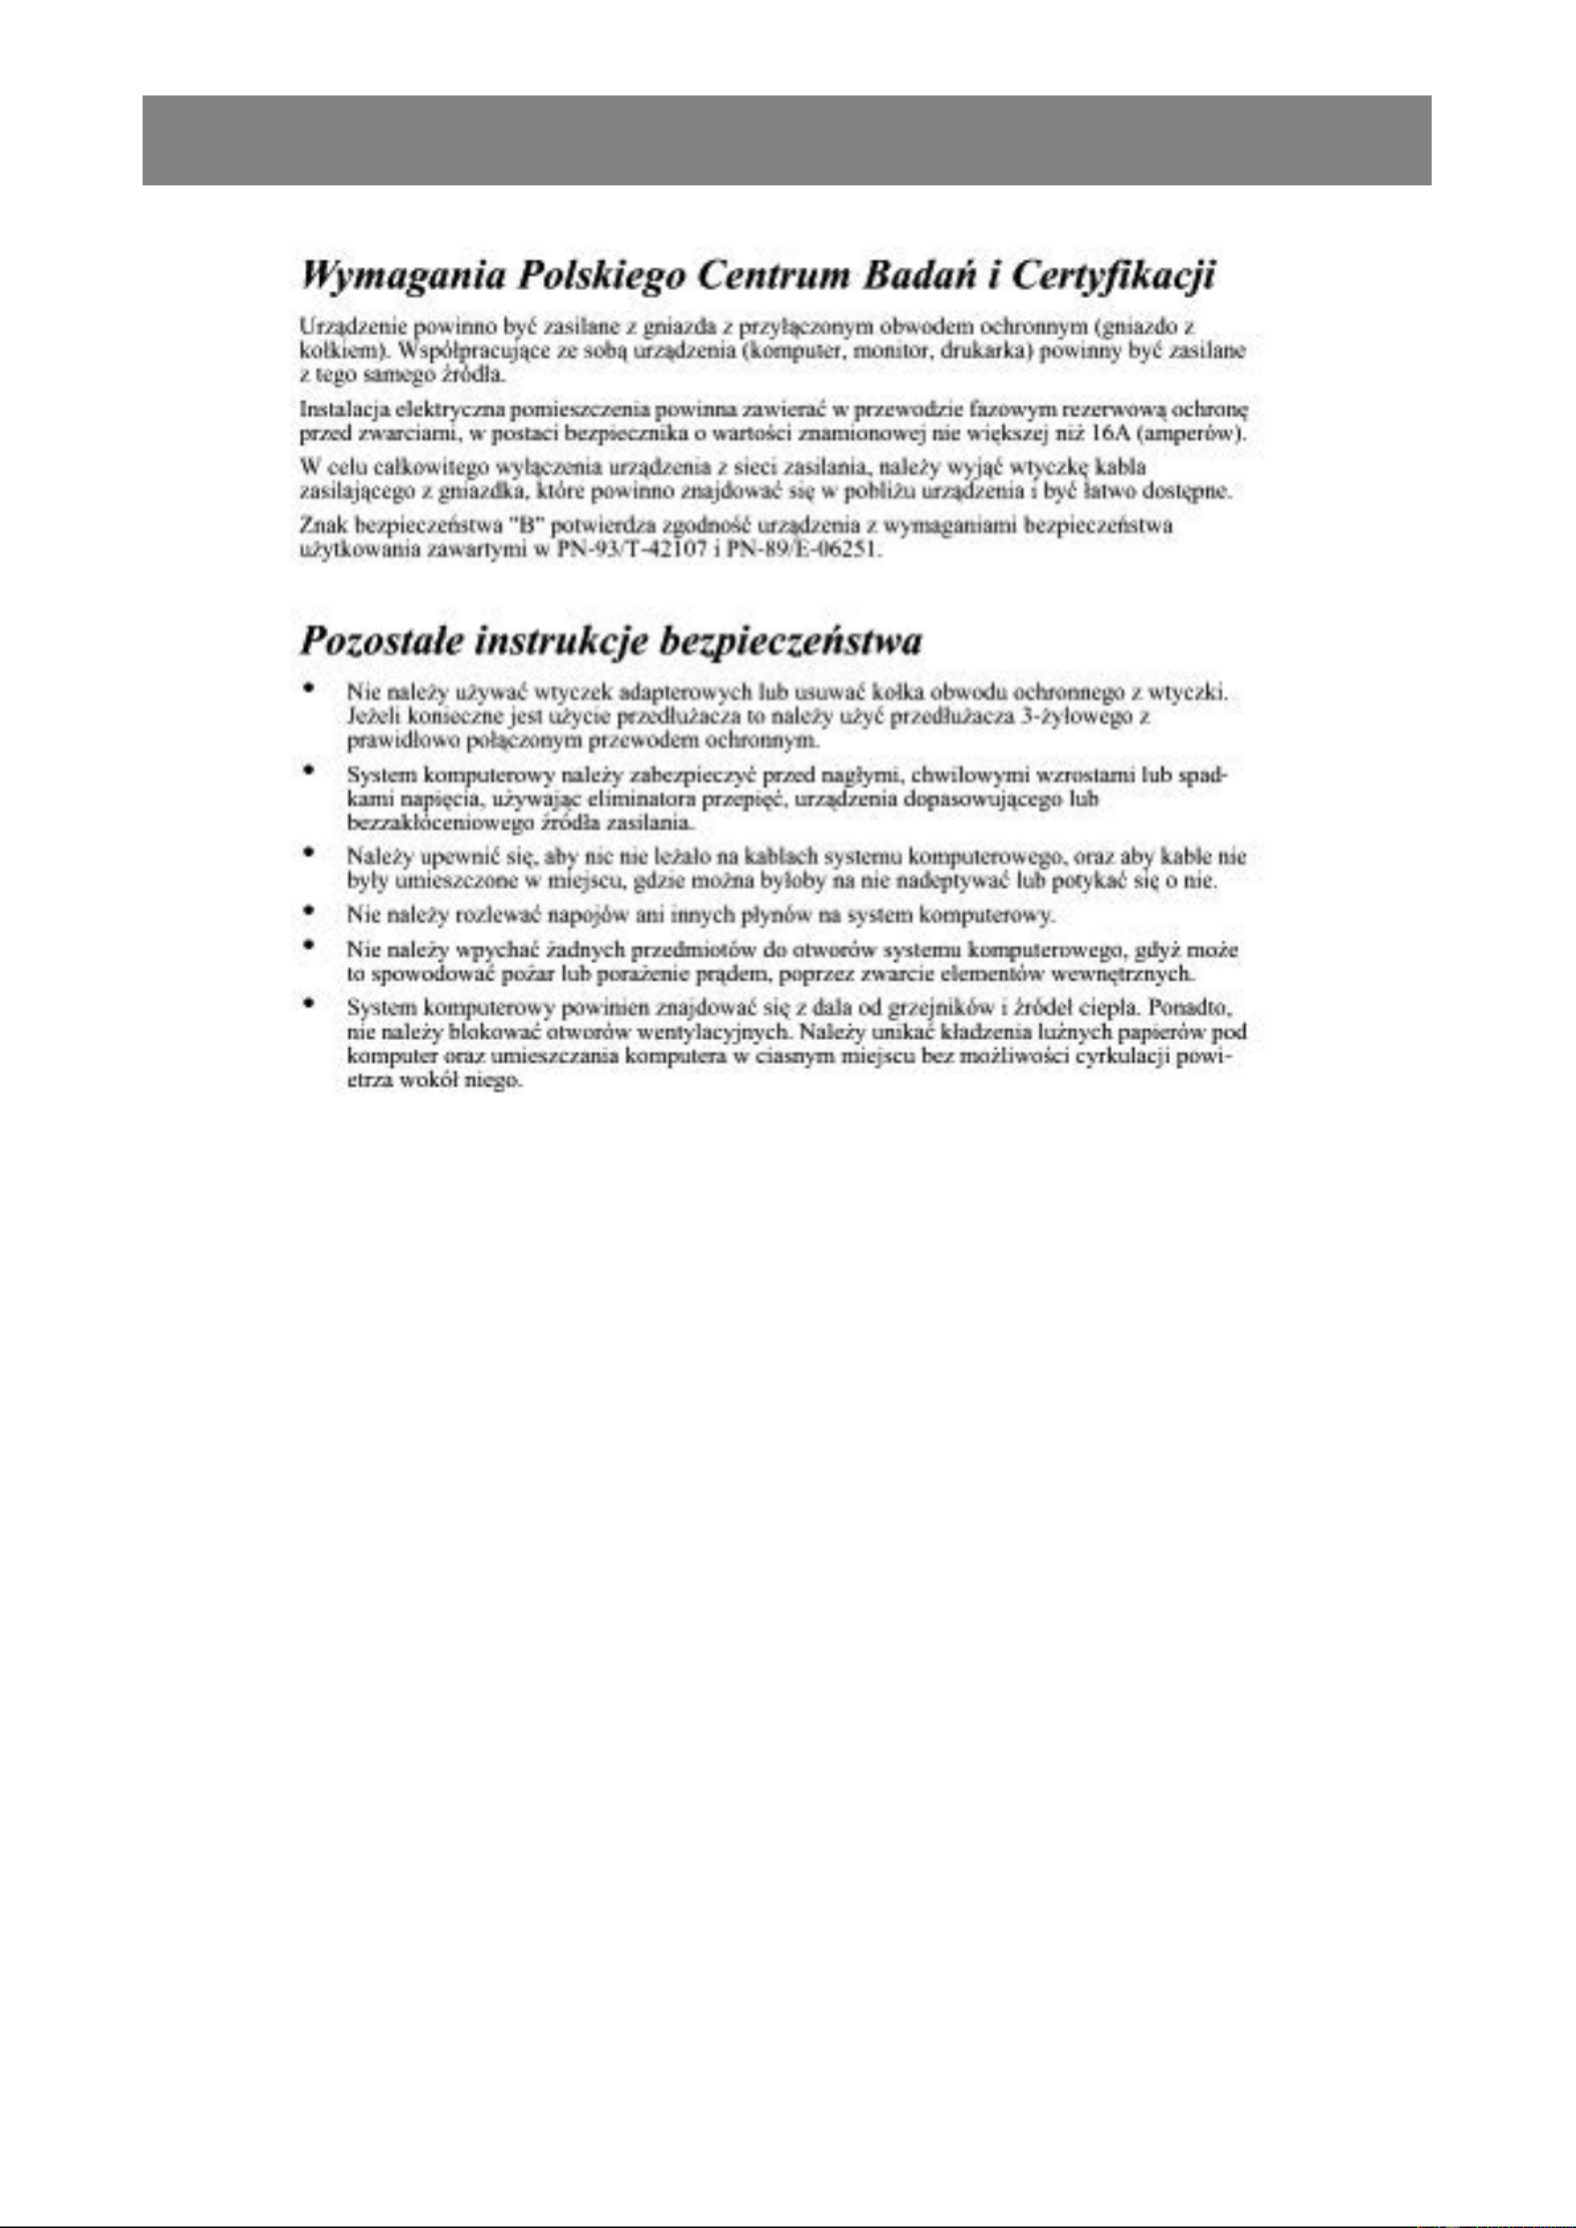
4
SAFETY INFORMATION
How to connect a plug
The wires in the mains lead are coloured in accordance with the following code:
BLUE - “NEUTRAL” (“N”)
BROWN - “LIVE” (“L”)
GREEN & YELLOW - “EARTH” (“E”)
• The GREEN & YELLOW wire must be connected to the terminal in the plug which is marked with the letter
“E” or by the Earth symbol or coloured GREEN or GREEN & YELLOW.
• The BLUE wire must be connected to the terminal which is marked with the letter “N” or coloured BLACK.
• The BROWN wire must be connected to the terminal which marked with the letter “L” or coloured RED.
Before replacing the plug cover, make certain that the cord grip is clamped over the sheath of the lead - not
simply over the three wires.
North Europe (Nordic Countries) Information
Placering/Ventilation
VARNING: FÖRSÄKRA DIG OM ATT HUVUDBRYTARE OCH UTTAG ÄR LÄTÅTKOMLIGA, NÄR DU
STÄLLER DIN UTRUSTNING PÅPLATS.
Placering/Ventilation
ADVARSEL: SØRG VED PLACERINGEN FOR, AT NETLEDNINGENS STIK OG STIKKONTAKT ER NEMT
TILGÆNGELIGE.
Paikka/Ilmankierto
VAROITUS: SIJOITA LAITE SITEN, ETTÄ VERKKOJOHTO VOIDAAN TARVITTAESSA HELPOSTI
IRROTTAA PISTORASIASTA.
Plassering/Ventilasjon
ADVARSEL: NÅR DETTE UTSTYRET PLASSERES, MÅ DU PASSE PÅ AT KONTAKTENE
FOR STØMTILFØRSEL ER LETTE Å NÅ.
5
SAFETY INFORMATION
End-of-Life Disposal
Your new Public Information Display contains materials that can be recycled and reused. Specialized
companies can recycle your product to increase the amount of reusable materials and to minimize the amount
to be disposed of.
Please nd out about the local regulations on how to dispose of your old display from your local dealer.
(For customers in Canada and U.S.A.)
This product may contain lead and/or mercury. Dispose of in accordance to local-state and federal regulations.
For additional information on recycling contact www.eia.org (Consumer Education Initiative).
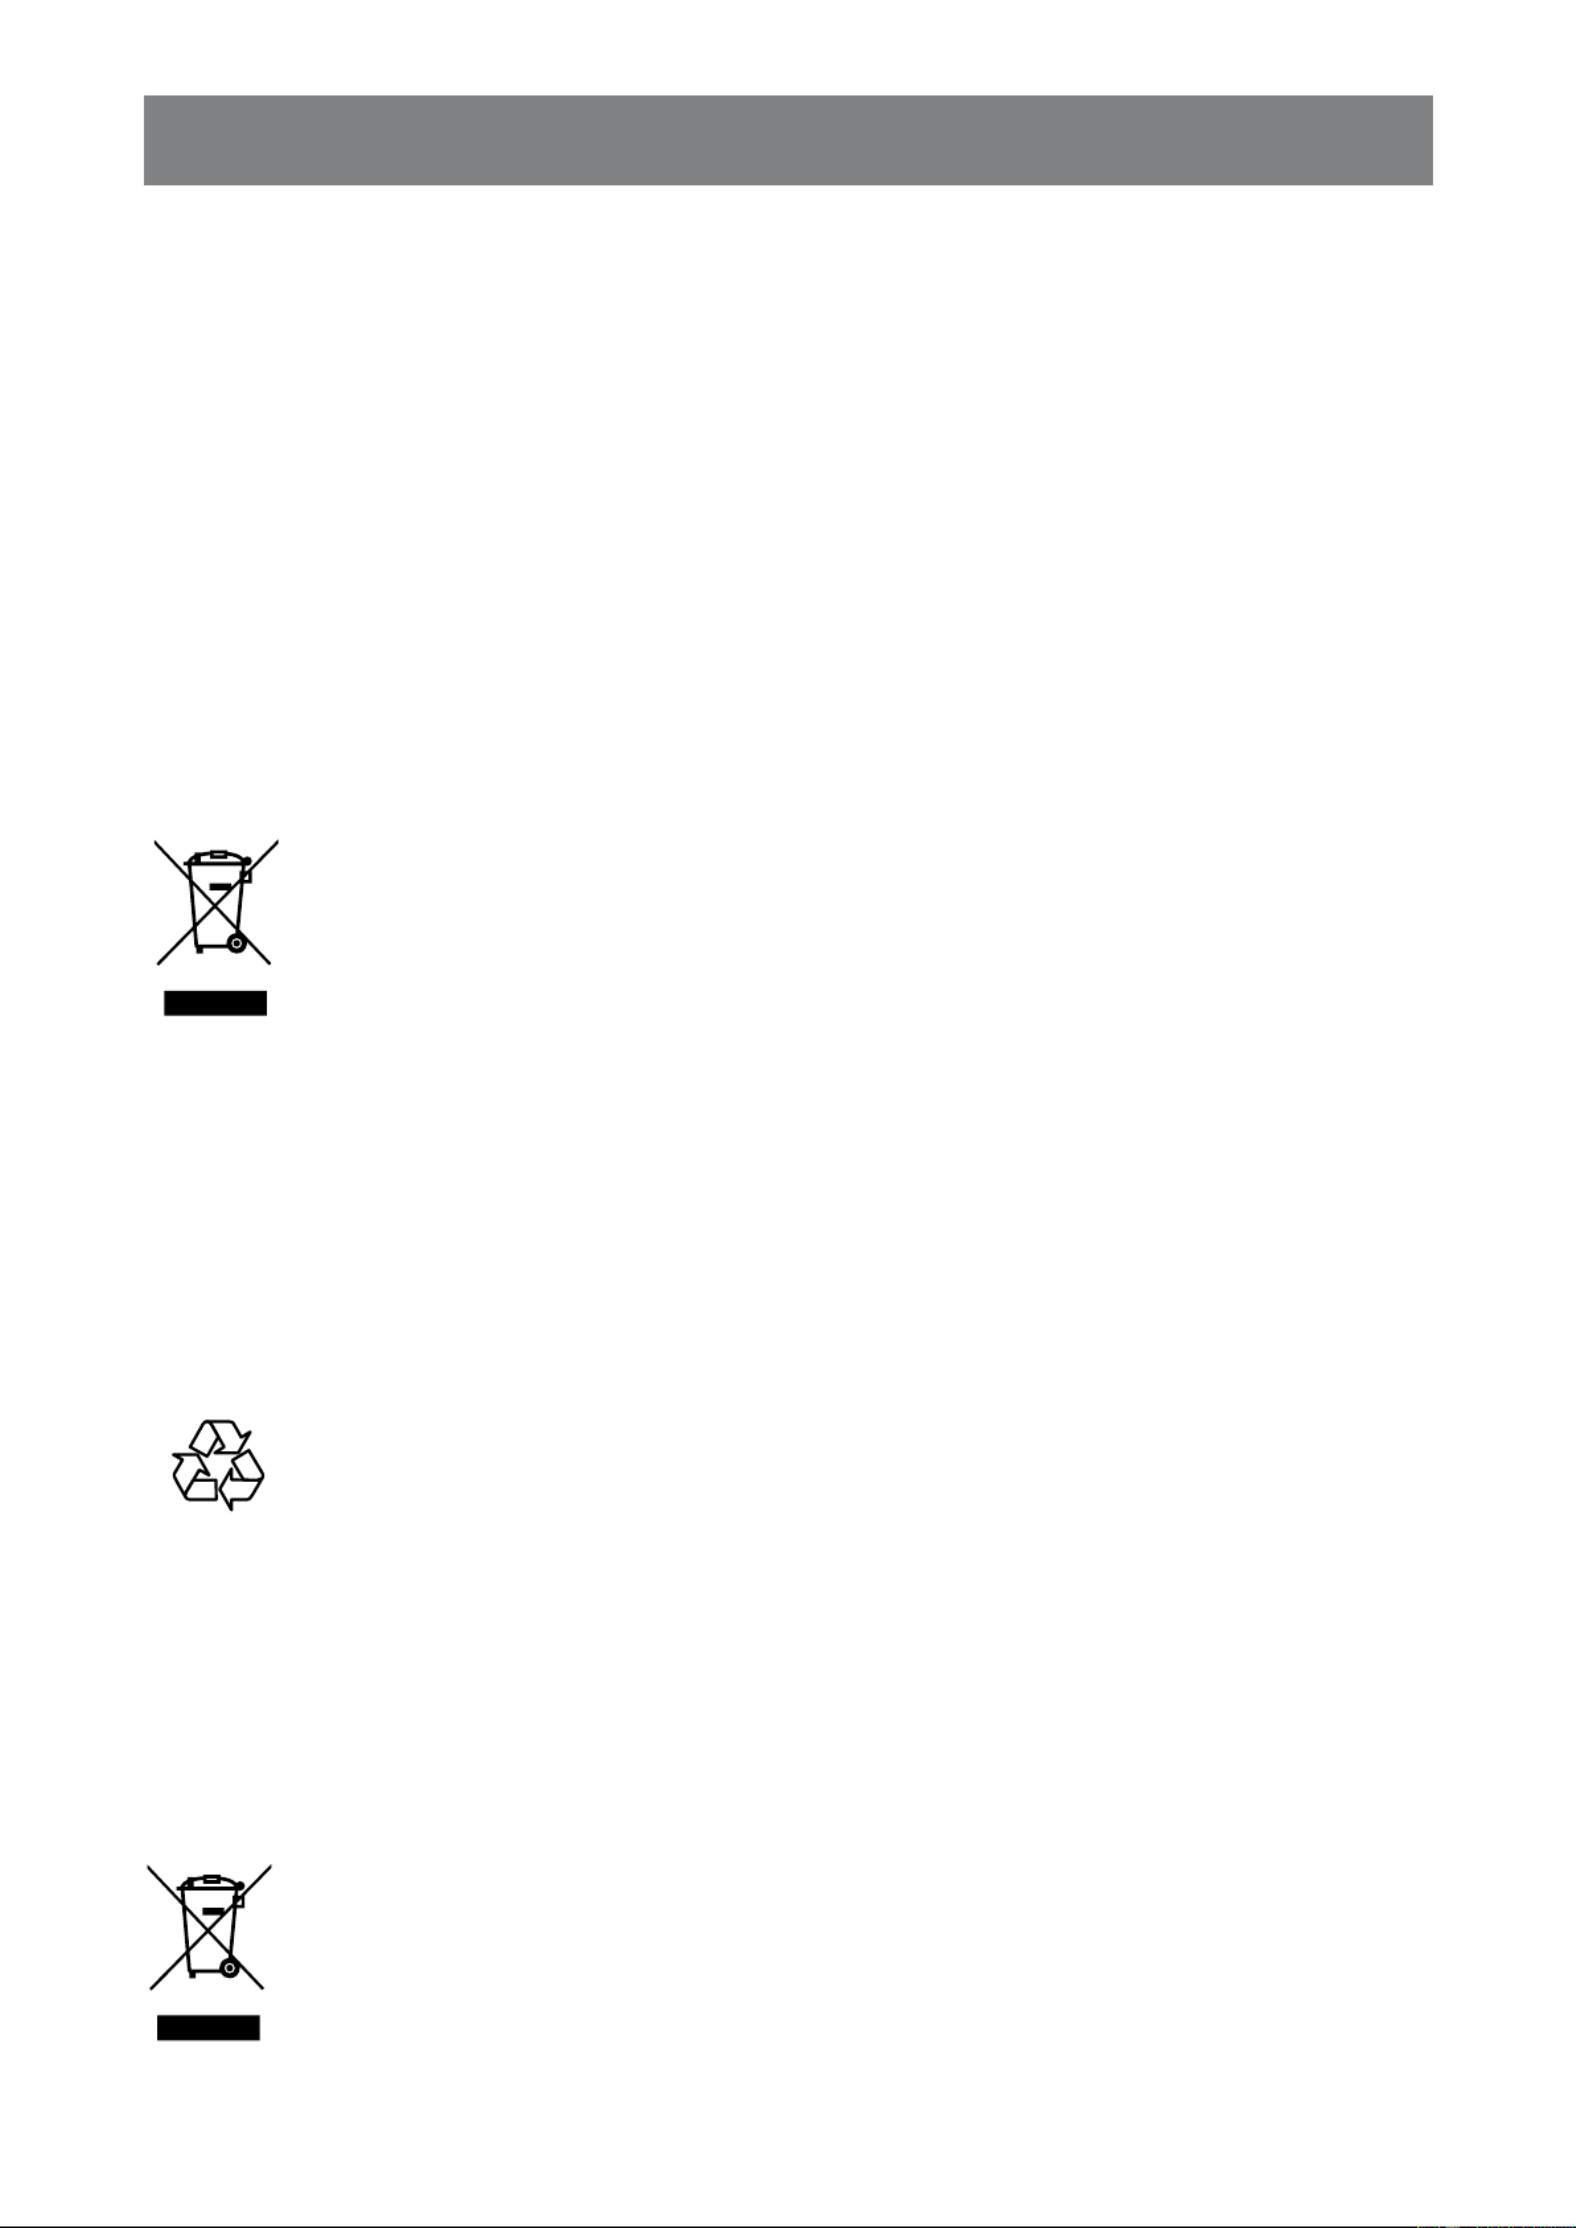
Waste Electrical and Electronie Equipment-WEEE
Attention users in European Union private households
This marking on the product or on its packaging illustrates that, under European Directive
2012/19/EU governing used electrical and electronic appliances, this product may not be
disposed of with normal household waste. You are responsible for disposal of this equipment
through a designated waste electrical and electronic equipment collection. To determine the
locations for dropping o such waste electrical and electronic, contact your local government
ofce, the waste disposal organization that serves your household or the store at which you
purchased the product.
Attention users in United States:
Please dispose of according to all Local, State and Federal Laws. For the disposal or recycling information,
contact: www.mygreenelectronics.com or www.eiae.org.
End of Life Directives-Recycling
Your new Public Information Display contains several materials that can be recycled for new
users.
Please dispose of according to all Local, State, and Federal laws.
Restriction on Hazardous Substances statement (India)
This product complies with the “India E-waste Rule 2011” and prohibits use of lead, mercury, hexavalent
chromium, polybrominated biphenyls or polybrominated diphenyl ethers in concentrations exceeding 0.1
weight % and 0.01 weight % for cadmium, except for the exemptions set in Schedule 2 of the Rule.
E-Waste Declaration for India
This symbol on the product or on its packaging indicates that this product must not be disposed
of with your other household waste. Instead it is your responsibility to dispose of your waste
equipment by handing it over to a designated collection point for the recycling of waste electrical
and electronic equipment . The separate collection and recycling of your waste equipment at
the time of disposal will help to conserve natural resources and ensure that it is recycled in a
manner that protects human health and the environment.

6
SAFETY INFORMATION
Batteries
For EU: The crossed-out wheeled bin implies that used batteries should not be put to the
general household waste! There is a separate collection system for used batteries, to allow
proper treatment and recycling in accordance with legislation.
Please contact your local authority for details on the collection and recycling schemes.
For Switzerland: The used battery is to be returned to the selling point.
For other non-EU countries: Please contact your local authority for correct method of
disposal of the used battery.
According to EU directive 2006/66/EC, the battery can’t be disposed improperly. The battery shall be
separated to collect by local service.
Turkey RoHS
Türkiye Cumhuriyeti: EEE Yönetmeliğine Uygundur.
Ukraine RoHS
Обладнання відповідає вимогам Технічного регламенту щодо обмеження використання деяких
небезпечних речовин в електричному та електронному обладнанні, затвердженого постановою Кабінету
Міністрів України від 3 грудня 2008 № 1057.

7
CAUTION
RISK OF ELECTRIC SHOCK
DO NOT OPEN
Symbols used in this manual
This icon indicates the existence of a potential hazard that could result in personal injury
or damage to the product.
This icon indicates important operating and servicing information.
Notice
• Read this User Manual carefully before using the LCD display and keep it for future reference.
•The product specifications and other information provided in this User Manual are for reference only All.
information is subject to change without notice. Updated content can be downloaded from our web site at
www.agneovo.com.
• o protect your rights as a consumer, do not remove any stickers from the LCD display. Doing so mayT
aect the determination of the warranty period.
Cautions When Setting Up
• Do not place the LCD display near heat sources, such as a heater, exhaust vent, or in direct sunlight.
• Do not cover or block the ventilation holes in the housing.
• Place the LCD display on a stable area. Do not place the LCD display where it may subject to vibration or
shock.
• Place the LCD display in a well-ventilated area.
• Do not place the LCD display outdoors.
• To avoid the risk of shock or permanent damage to the set, do not expose the display to dust, rain, water or
an excessively moist environment.
• Do not spill liquid or insert sharp objects into the LCD display through the ventilation holes. Doing so may
cause accidental re, electric shock or damage the LCD display.
PRECAUTIONS

8
PRECAUTIONS
Warning:
Unplug the power cord
from the power outlet and
refer to qualied service
personnel under the following
conditions:
♦When the power cord is
damaged.
♦If the LCD display has been
dropped or the housing has
been damaged.
♦If the LCD display emits smoke
or a distinct odor.
Cautions When Using
• Use only the power cord supplied with the LCD display.
• The power outlet should be installed near the LCD display and
be easily accessible.
• If an extension cord is used with the LCD display, ensure that the
total current consumption plugged into the power outlet does not
exceed the ampere rating.
• Do not allow anything to rest on the power cord. Do not place the
LCD display where the power cord may be stepped on.
• If the LCD display will not be used for an indenite period of time,
unplug the power cord from the power outlet.
• To disconnect the power cord, grasp and pull by the plug head.
Do not tug on the cord; doing so may cause re or electric shock.
• Do not unplug or touch the power cord with wet hands.
• When turning o the display by detaching the power cord, wait 6
seconds before re-attaching the power cord for normal operation.
• Do not knock or drop the display during operation or
transportation.
Cleaning and Maintenance
• To protect your display from possible damage, do not put
excessive pressure on the LCD panel. When moving your
display, grasp the frame to lift; do not lift the display by placing
your hand or ngers on the LCD panel.
• Unplug the display if you need to clean it with a slightly damp
cloth. The screen may be wiped with a dry cloth when the power
is o. However, never use organic solvent, such as, alcohol, or
ammonia-based liquids to clean your display.
• If your display becomes wet, wipe it with dry cloth as soon as
possible.
• If a foreign substance or water gets in your display, turn the
power o immediately and disconnect the power cord. Then
remove the foreign substance or water, and send the unit to the
maintenance center.
• In order to maintain the best performance of your display and
ensure a longer lifetime, we strongly recommend using the
display in a location that falls within the following temperature
and humidity ranges.
♦Temperature: 5°C-40°C (41°F-104°F)
♦Humidity: 20-80% RH

9
PRECAUTIONS
Notice for the LCD Display
• In order to maintain the stable luminous performance, it is recommended to use low brightness setting.
• Due to the lifespan of the lamp, it is normal that the brightness quality of the LCD display may decrease
with time.
• When static images are displayed for long periods of time, the image may cause an imprint on the LCD
display. This is called image retention or burn-in.
♦To prevent image retention, do any of the following:
• Set the LCD display to turn o after a few minutes of being idle.
• Use a screen saver that has moving graphics or a blank white image.
• Execute the ANTI-BURN-IN function of the LCD display. See Conguration 1 > > Panel Saving
ANTI-BURN-IN section.
• Switch desktop backgrounds regularly.
• Adjust the LCD display to low brightness settings.
• Turn o the LCD display when the system is not in use.
♦Things to do when the LCD display shows image retention:
• Turn o the LCD display for extended periods of time. It can be several hours or several days.
• Use a screen saver and run it for extended periods of time.
• Use a black and white image and run it for extended periods of time.
• There are millions of micro transistors inside the LCD display. It is normal for a few transistors to be
damaged and to produce spots. This is acceptable and is not considered a failure.
• IMPORTANT: Always activate a moving screen saver program when you leave your display unattended.
Always activate a periodic screen refresh application if the unit will display unchanging static content.
Uninterrupted display of still or static images over an extended period may cause “burn in”, also known
as “after-imaging” or “ghost imaging”, on your screen. This is a well-known phenomenon in LCD panel
technology. In most cases, the “burned in” or “after-imaging” or “ghost imaging” will disappear gradually
over a period of time after the power has been switched o.
• WARNING: Severe “burn-in” or “after-image” or “ghost image” symptoms will not disappear and cannot be
repaired. This is also not covered under the terms of your warranty.

11
PRODUCT DESCRIPTION
1.4 Wall Mounting Installation
To mount this display to a wall, you will have to obtain a standard
wall-mounting kit (commercially available). We recommend using
a mounting interface that complies with TUV-GS and/or UL1678
standard in North America.
To wall-mount the LCD display, screw the mounting bracket to the
VESA holes at the rear of the LCD display.
NSD-4301Q
200mm
200mm
400mm
400mm
NSD-5501Q
200mm
400mm
400mm
1.3 Preparing for the Installation
• Due to the high power consumption, always use the plug
exclusively designed for this product. If an extended line is required,
please consult your service agent.
• The product should be installed on a at surface to avoid tipping.
The distance between the back of the product and the wall should
be maintained for proper ventilation. Avoid installing the product in
the kitchen, bathroom or any other places with high humidity so as
not to shorten the service life of the electronic components.
• The product can normally operate only under 3000m in altitude. In
installations at altitudes above 3000m, some abnormalities may be
experienced.
Warning:
♦Do not press too hard on the
LCD panel or edge of the
frame, as this may cause the
device to malfunction.
Note:
♦Avoid the wall-mounting kit to
block the ventilation holes on
the back of the display.
♦Secure the LCD display on a
solid wall strong enough to bear
its weight.
♦Lay a protective sheet on a
table, which was wrapped
around the display when it was
packaged, beneath the screen
surface so as not to scratch the
screen face.
♦Ensure you have all
accessories for mounting this
display (wall mount, ceiling
mount, etc).
♦Follow the instructions that
come with the base mounting
kit. Failure to follow correct
mounting procedures could
result in damage to the
equipment or injury to the user
or installer. Product warranty
does not cover damage caused
by improper installation.

13
PRODUCT DESCRIPTION
1.5 Using the Remote Sensor and Power Status Indicator
• If you want to obtain a better reception of remote control function, please adjust the indicator location to
easily check the power status indicator.
• If you want to mount the display to the wall, please push the indicator switch inward (NSD-4301Q) or upwards
(NSD-5501Q) before installation.
• When adjusting the indicator location, make sure to push/pull the indicator switch rmly until it clicks into
place.
NSD-4301Q
Push outward to
reveal the indicator
Pull inward to hide the
indicator
NSD-5501Q
Push downward to
reveal the indicator
Pull upward to hide
the indicator

14
PRODUCT DESCRIPTION
1.6 LCD Display Overview
1.6.1 Control Panel
NSD-4301Q
MUTE INPUT MENU
1
9
2345678
NSD-5501Q
MUTE INPUT MENU
1
9
2 3 4 5 6 7 8

15
PRODUCT DESCRIPTION
1[ ] Power
Turn the display on or put the display
to standby.
2MUTE
Switch the audio mute ON/OFF.
3INPUT
Choose the input source.
4[ ] Increase
• Enter the submenu.
• Increase the audio output level while
OSD menu is o.
5[ ] Decrease
• Return to the previous menu.
• Decrease the audio output level
while OSD menu is o.
6[ ] Up
Move the highlight bar up to select an
option or increase the adjustment while
OSD menu is on.
7[ ] Down
Move the highlight bar down to select an
option or decrease the adjustment while
OSD menu is on.
8MENU
• Activate the OSD menu when OSD menu
is o.
• Hide the OSD menu while OSD menu is
on.
9Remote control sensor and power
status indicator
• Receive command signals from the
remote control.
• Indicate the operating status of the
display:
- Lights green when the display is turned
on
- Lights red when the display is in
standby mode
- Blinks green and red when “Advanced
option, Schedule” is enabled
- Blinks red when a failure has been
detected
- Lights o when the main power of the
display is turned o
16
PRODUCT DESCRIPTION
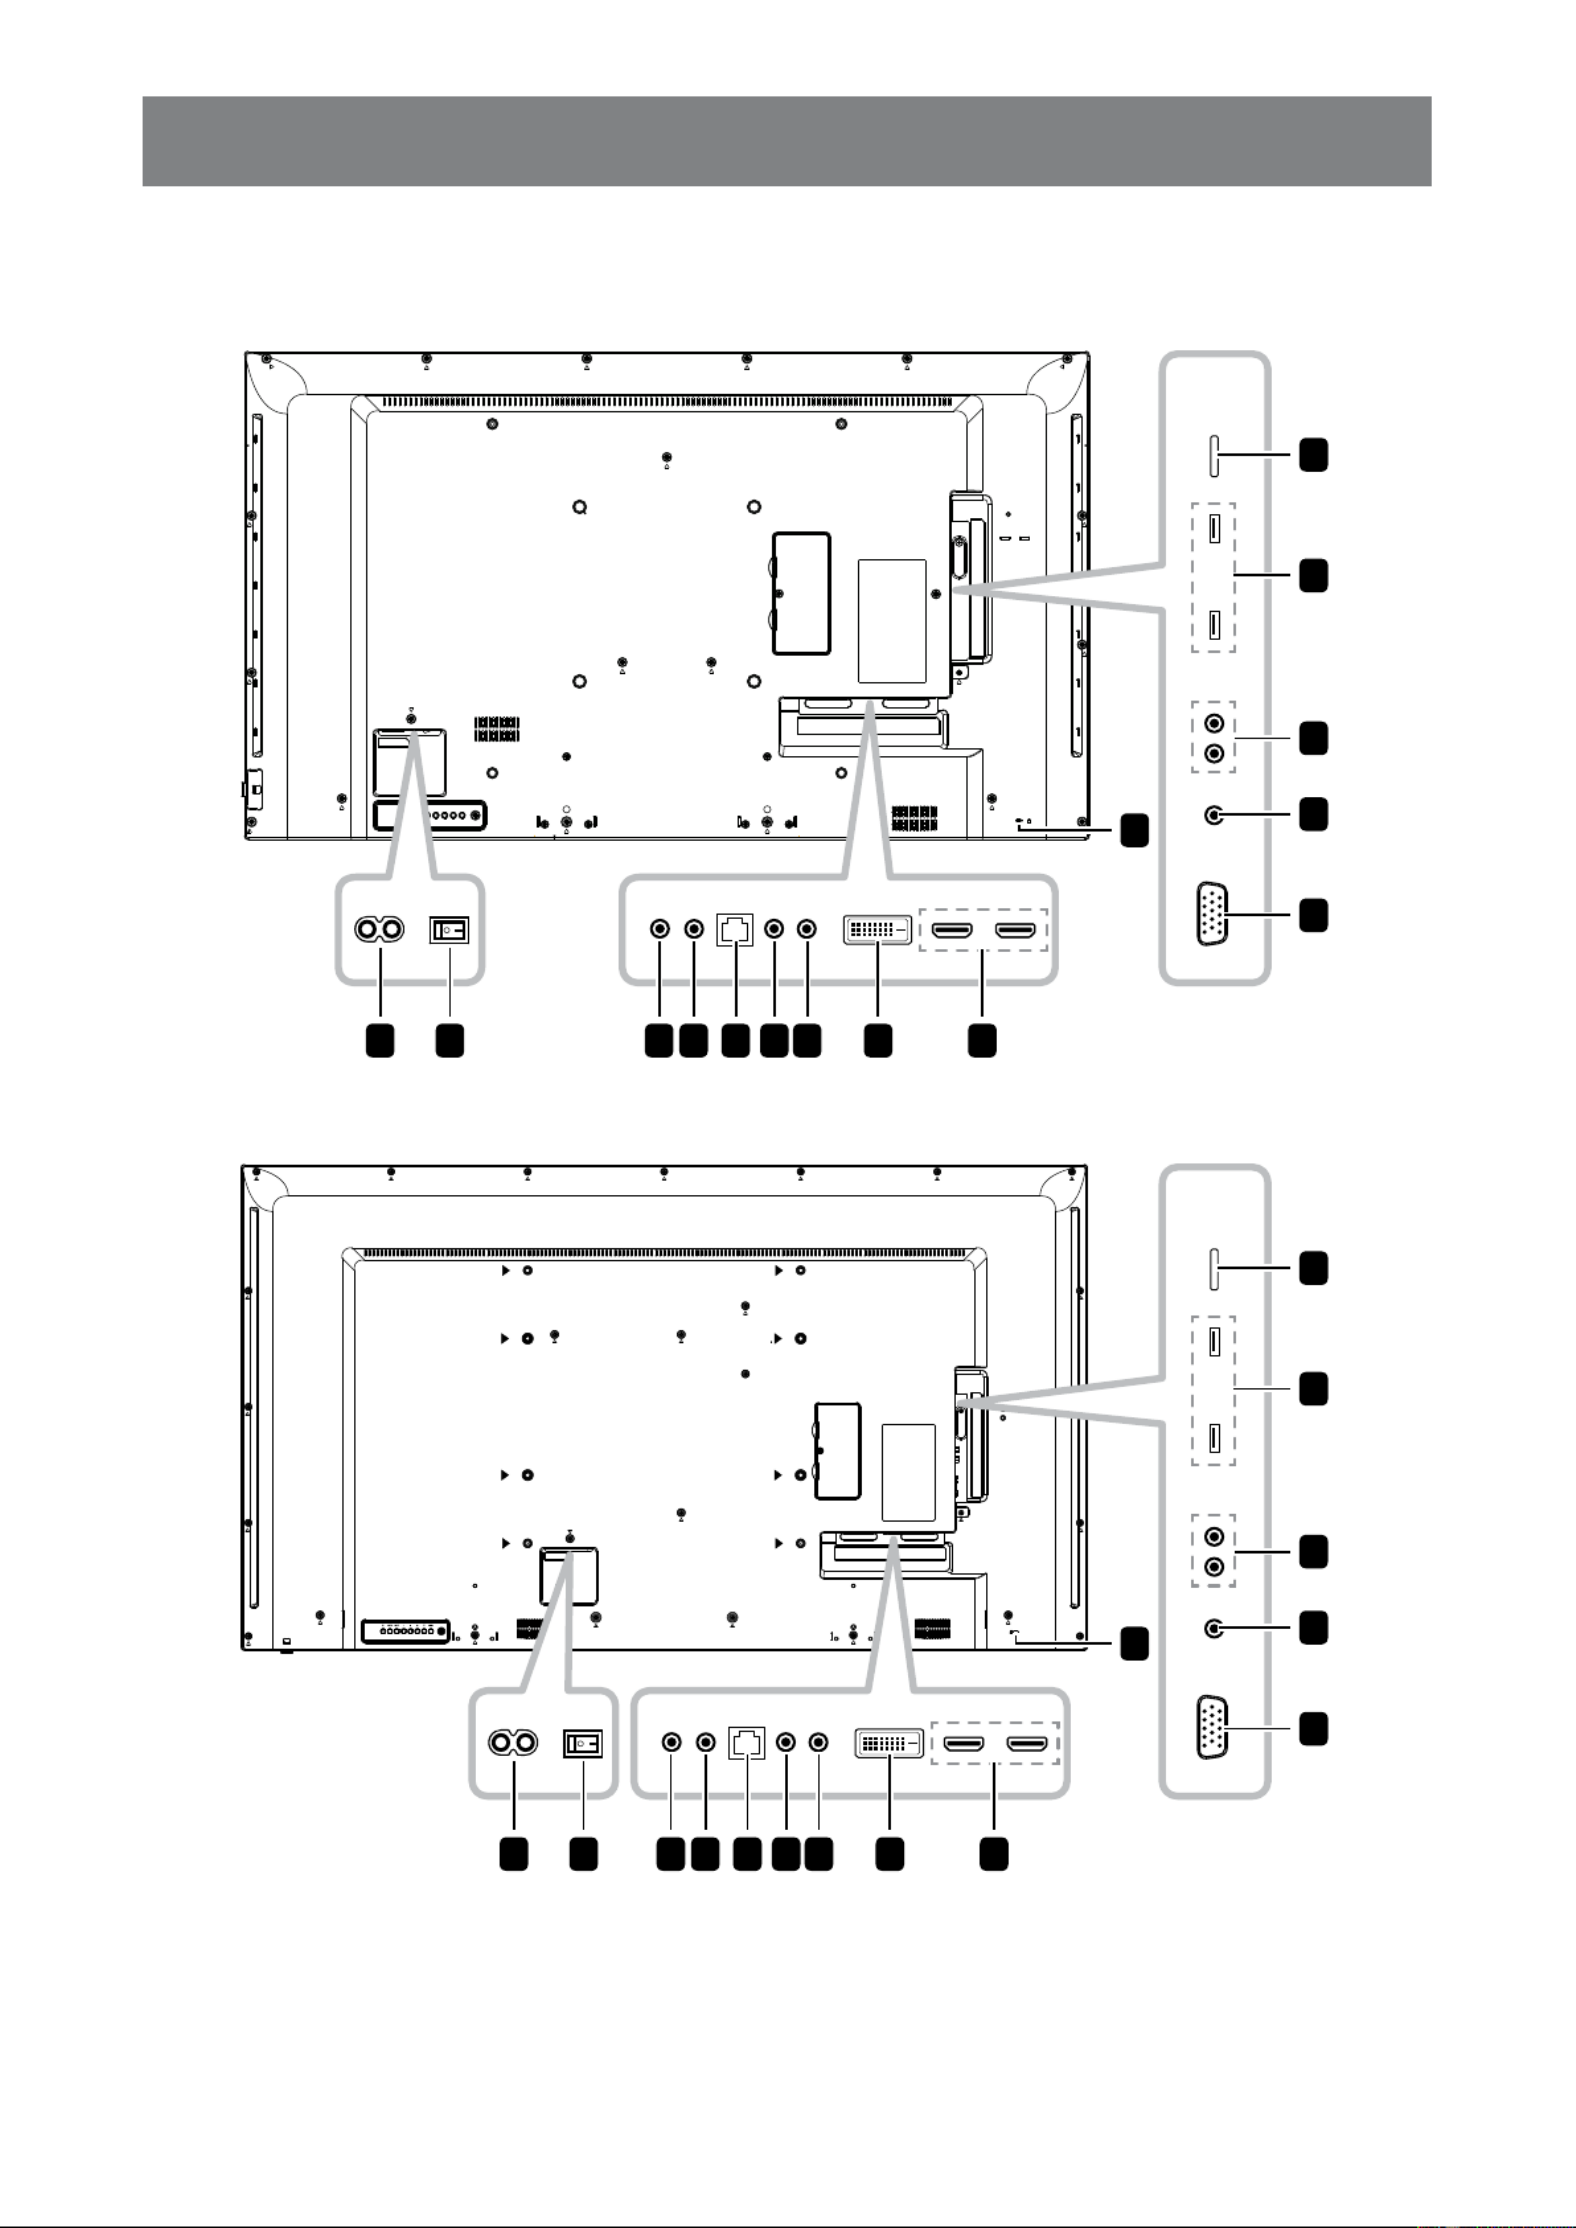
1.6.2 Input/Output Terminals
NSD-4301Q
1 2 3 4 5 6 7 8
10
11
14
15
12
13
9
NSD-5501Q
1 2 3 4 5 6 7 8
10
11
14
15
12
13
9

17
PRODUCT DESCRIPTION
1AC IN
AC power input from the wall outlet.
2Main power switch
Switch the main power on/o.
3RS232 IN
RS232 network input for the loop-
through function.
4RS232 OUT
RS232 network output for the loop-
through function.
5RJ45
LAN control function for the use of
remote control signal from the control
center.
6IR IN
IR signal input for the loop-through
function.
Note:
♦This display’s remote control sensor
will stop working if the [IR IN] jack is
connected.
♦To remotely control your A/V device via
this display, see page 33 for IR Pass-
Through connection.
7IR OUT
IR signal output for the loop-through
function.
8DVI IN
DVI-D video input.
9HDMI1/HDMI2 IN
HDMI video/audio input.
10 VGA IN (D-Sub)
VGA video input.
11 AUDIO IN
Audio input from external AV device
(3.5mm phone jack).
12 AUDIO OUT
Audio output to external AV device (RCA).
13 USB 2.0/3.0 PORT
Connect your USB storage device.
14 MICRO SD CARD SLOT
Insert a micro SD card into the slot.
15 SECURITY LOCK
Used for security and theft prevention.

18
PRODUCT DESCRIPTION
1.7 Remote Control
1.7.1 General Functions
12
13
14
15
16
1
2
3
5
6
8
9
10
11
7
4
1
[ ] POWER
Turn the display on or to put the display into
standby mode.
2 PLAY
• Control playback in multimedia mode.
• Freeze feature
- : Freeze hot key for all inputs content.
- : Unfreeze hot key for all input content.
3 [ ] SOURCE
Root Menu: Go to Video source OSD.
4 [ ] HOME
• Root Menu: Access the OSD menu.
• Others: Exit the OSD menu.
5 [ ] LIST
No function.
6 NAVIGATION buttons
[ ]
• Root Menu: Go to Smart picture OSD.
• Main Menu: Move the highlight bar up to
adjust the selected item.
• IR Daisy Chain Menu: Increase controlled
Group ID number.
[ ]
• Root Menu: Go to Audio source OSD.
• Main Menu: Move the highlight bar down to
adjust the selected item.
• IR Daisy Chain Menu: Decrease controlled
Group ID number.
[]
• Main Menu: Return to the previous menu
page.
• Source Menu: Exit the source menu.
• Volume Menu: Decrease the volume level.
[ ]
• Main Menu: Enter the submenu or conrm a
selection.
• Source Menu: Conrm the selected source.
• Volume Menu: Increase the volume level.
7 [ ] OK
• Root Menu: Go to IR daisy chain OSD in
Primary/Secondary mode.
• Main Menu: Conrm an entry or selection.
8 [ ] ADJUST
Go to Auto Adjust OSD (for VGA input only).

19
PRODUCT DESCRIPTION
9
[ ] MUTE
Turn the mute function on/o.
10 [ ] [ ] [ ] [ ] COLOR
• Choose tasks or options.(for Media Input only).
• : Hot key for Window selection function.
11 [Number/ ID SET/ ENTER]
• Enter text for network setting.
• Set the display ID. See 1.7.2 ID Remote Control for more detail.
12 [ ] FORMAT
Change the aspect ratio.
13 [ ] BACK
Return to the previous menu or exit from the previous function.
14 [ ] INFO
View the information about the display.
15 [ ] OPTIONS
No function.
16 [ ] [ ] VOLUME
Adjust the volume level.

20
PRODUCT DESCRIPTION
1.7.2 ID Remote Control
You can set the remote control ID when you
want to use this remote control on one of several
dierent displays.
To set the remote control ID:
1 ID Press the button. The red LED blinks
twice.
2 ID SET Press the button for more than
1 second to enter the ID mode. The red
LED lights up.
Press the button again will exit ID SET
the ID mode. The red LED lights off.
3 Press the digit numbers [0] ~ [9] to
select the display you want to control.
For example:
• Display ID #1: press [0], [1]
• Display ID #11: press [1], [1]
The numbers available are from [01] ~
[255].
• Not pressing any button within 10
seconds will exit the ID mode.
• If an error pressing of buttons other
than the digits occured, wait 1
second after the red LED lights o
and then lights up again, then press
the correct digits again.
4 Press the button ENTER to conrm.
The red LED blinks twice and then
lights o.
Note:
♦Press the button. The green LED NORMAL
blinks twice, indicating the remote control
returns to normal operation.
♦It is necessary to set up the ID number for
each display before selecting its ID number.

21
PRODUCT DESCRIPTION
1.7.3 Remote Control buttons on Android source
12
13
14
15
16
1
2
3
5
6
8
9
10
11
7
4
1
[ ] POWER
Turn the display on or to put the display into
standby mode.
The button is only controlled by Scalar.
2 PLAY
• Control playback of media (video/photo/
music) les.
There are 4 ways to play media les
1) File Manager
Find the media le from the File Manager
and select it to play.
2) > > edit or new Media Player Compose
add playlist > choose any media les >
press the button to play the media le
directly.
3) > > choose non-Media Player Play
empty playlist > press the button to
play all the media les in the playlist.
4) Set media playlist in Boot on Source or
Schedule by OSD menu.
• Play PDF le
There are 3 ways to play media les.
1) File Manager
Find the pdf le from the File Manager
and select it to play.
2) > > choose non-empty PDF Player Play
playlist > press the button to play all
the PDF les in the playlist.
3) Set pdf playlist in Boot on Source or
Schedule by OSD menu.
• When playing the PDF or video le, press
the button to stop playing. Press the
button to replay the media le from the
beginning.
• When playing PDF or video le, press the
button to pause playing.
• All media les should be put at the folder,
which is named “agn” with sub-folder, under
the root directory of the specied storage
(internal/USB/SD Card). All sub-folders
(video/photo/music/pdf) are named by
media types and should not be changed.
videos: {root dir of storage}/agn/video/
photos: {root dir of storage}/agn/photo/
music: {root dir of storage}/agn/music/
pdfs : {root dir of storage}/agn/pdf/
Note that the root directories of three
storages are:
Internal storage: /sdcard
USB storage: /mnt/usb_storage
SD card: /mnt/external_sd

23
PRODUCT DESCRIPTION
1.7.4 Inserting the Batteries in the Remote Control
The remote control is powered by two 1.5V AAA batteries.
To install or replace batteries:
1 Press and then slide the cover to open it.
2 Align the batteries according to the (+) and (-) indications
inside the battery compartment.
3 Replace the cover.
1.7.5 Handling the Remote Control
• Do not subject to strong shock.
• Do not allow water or other liquid to splash the remote control. If
the remote control gets wet, wipe it dry immediately.
• Avoid exposure to heat and steam.
• Other than to install the batteries, do not open the remote control.
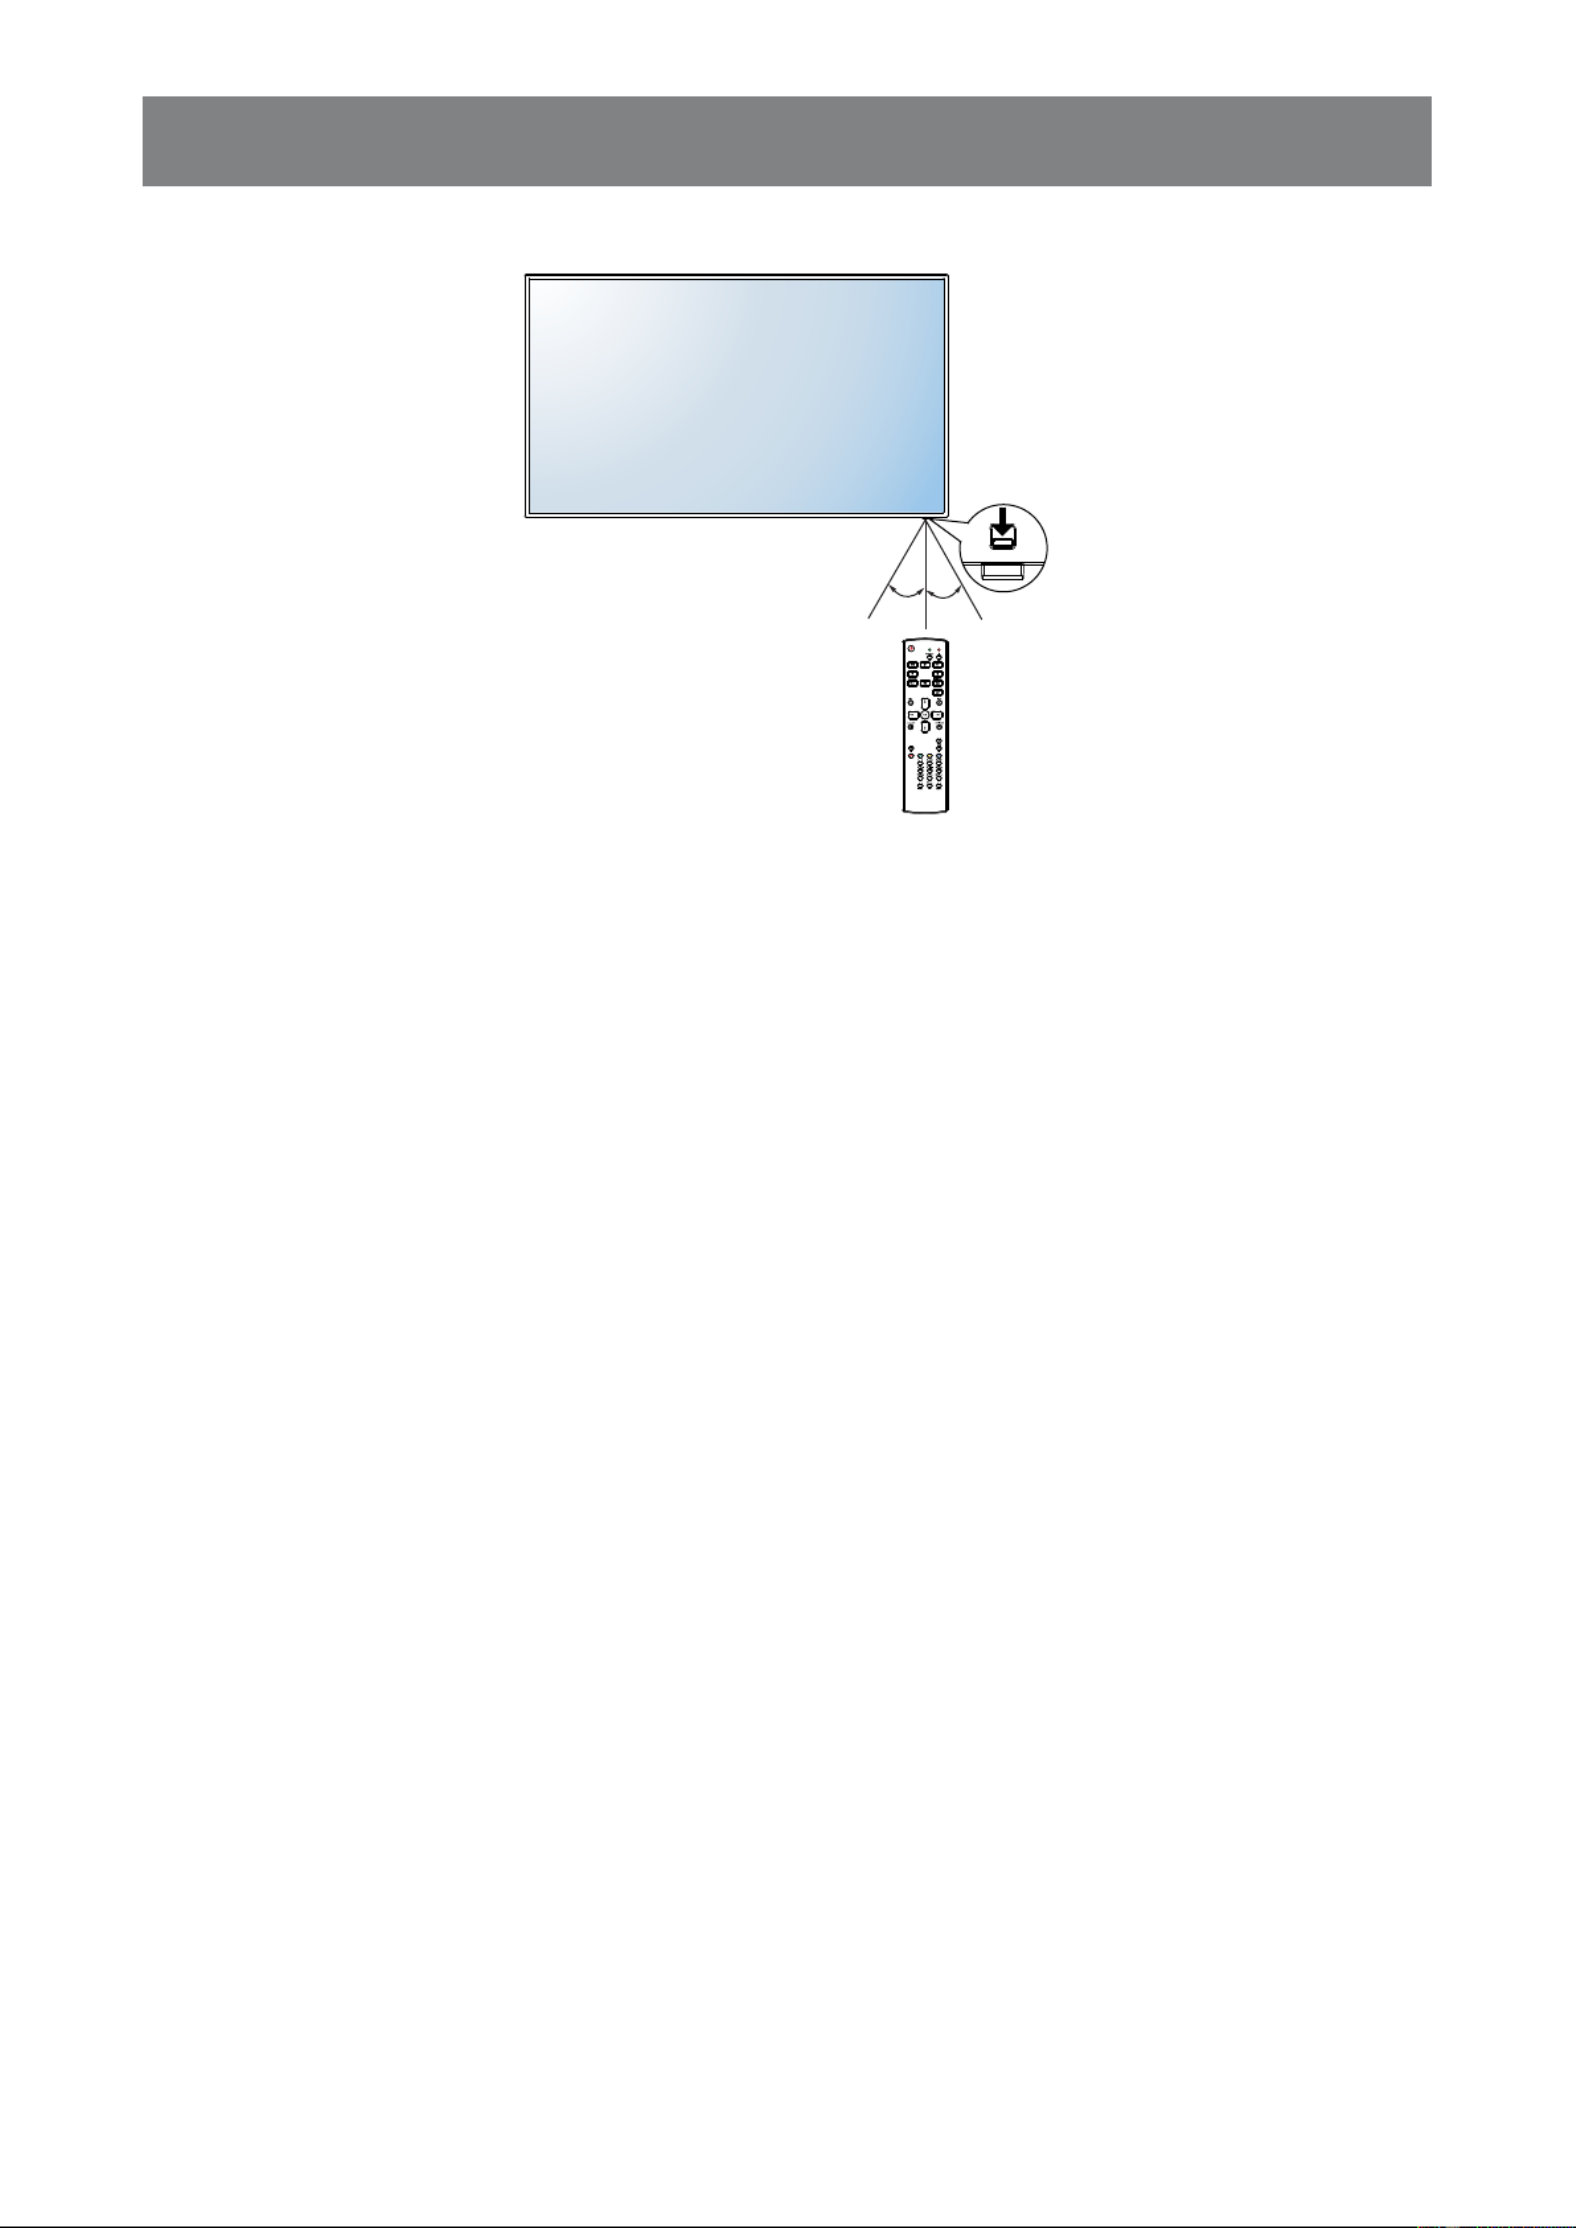
1.7.6 Operating Range of the Remote Control
Point the top of the remote control toward the display’s remote control
sensor (on the left or right side) when pressing a button.
When using the remote control, the distance from the remote control
to the sensor on the display should be less than 8m/26ft, and the
horizontal and vertical angles should be less than 30˚.
NSD-4301Q
30° 30°
Caution:
The incorrect use of batteries can
result in leaks or bursting. Be sure
to follow these instructions:
♦Place “AAA” batteries
matching the (+) and (–) signs
on each battery to the (+)
and (–) signs of the battery
compartment.
♦Do not mix battery types.
♦Do not combine new batteries
with used ones. It causes
shorter life or leakage of
batteries.
♦Remove the dead batteries
immediately to prevent them
from liquid leaking in the
battery compartment. Don’t
touch exposed battery acid, as
it can damage your skin.
Note:
♦If you do not intend to use
the remote control for a long
period, remove the batteries.
♦The remote control may not
function properly when the
remote control sensor on this
display is under direct sunlight
or strong illumination, or when
there is an obstacle in the path
of signal transmission.
24
PRODUCT DESCRIPTION
NSD-5501Q
30° 30°
25
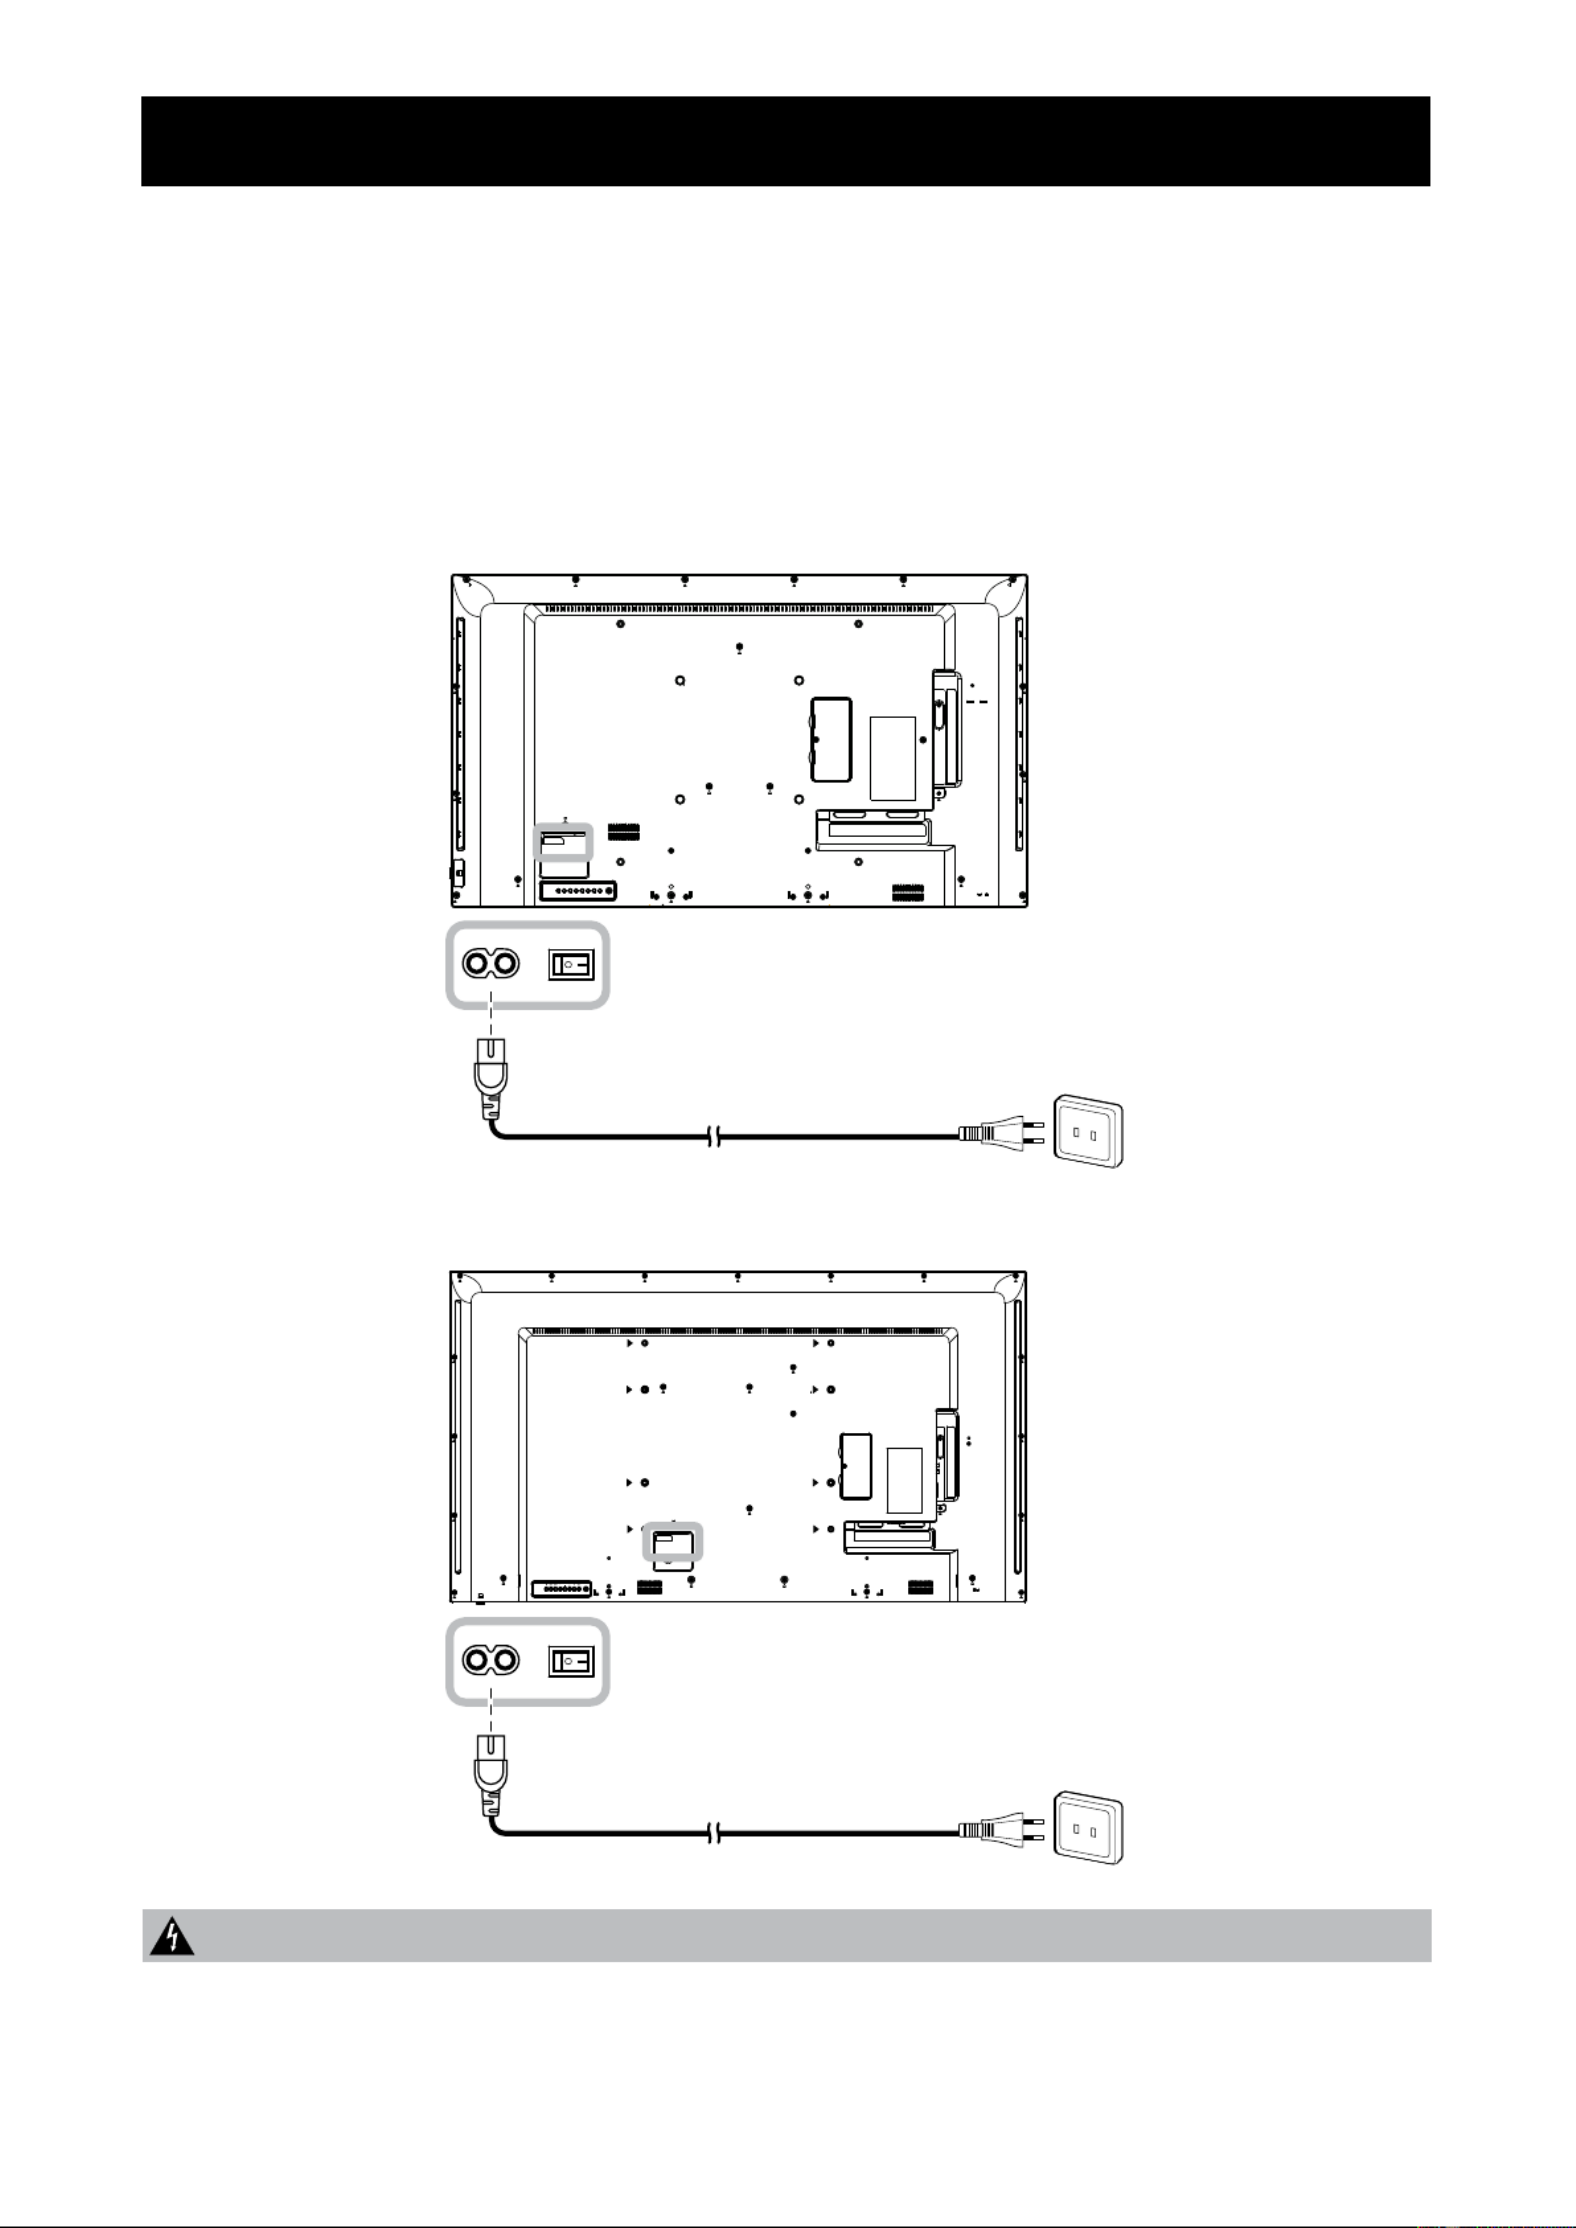
2.1 Connecting the Power
1 Connect one end of the power cord to the AC IN connector at the rear of the LCD display.
2 Connect the other end of the power cord to a power outlet or a power supply.
3 Main Power Set the switch to ON.
Caution:
♦Make sure that the LCD display is not connected to the power outlet before making any connections.
Connecting cables while the power is ON may cause electric shock or personal injury.
♦When unplugging the power cord, hold the power cord by the plug head. Never pull by the cord.
CHAPTER 2: MAKING CONNECTIONS
NSD-4301Q
NSD-5501Q

26
MAKING CONNECTIONS
2.2 Connecting a Computer
2.2.1 Using VGA Input
Connect one end of a D-sub cable to the VGA IN connector of the LCD display and the other end of a D-sub
cable to the VGA OUT (D-Sub) connector of the computer.
For audio input, connect one end of an audio cable to the AUDIO IN connector of the LCD display and the
other end of an audio cable to the AUDIO OUT connector of the computer.
VGA OUT
D-Sub 15 pin
VGA IN
AUDIO
OUT
AUDIO IN
Computer
NSD-4301Q
VGA OUT
D-Sub 15 pin
VGA IN
AUDIO
OUT
AUDIO IN
Computer
NSD-5501Q

28
MAKING CONNECTIONS
2.2.3 Using HDMI Input
Connect one end of an HDMI cable to the HDMI IN connector of the LCD display and the other end of an
HDMI cable to the HDMI OUT connector of the computer.
HDMI IN
Computer
HDMI OUT
NSD-4301Q
HDMI IN
Computer
HDMI OUT
NSD-5501Q

29
MAKING CONNECTIONS
HDMI IN
HDMI OUT
Video Player
2.3 Connecting External Equipment (Video Player)
2.3.1 Using HDMI Video Input
Connect one end of an HDMI cable to the HDMI IN connector of the LCD display and the other end of an
HDMI cable to the HDMI OUT connector of the video player.
NSD-4301Q
HDMI IN
HDMI OUT
NSD-5501Q
Video Player
30
MAKING CONNECTIONS
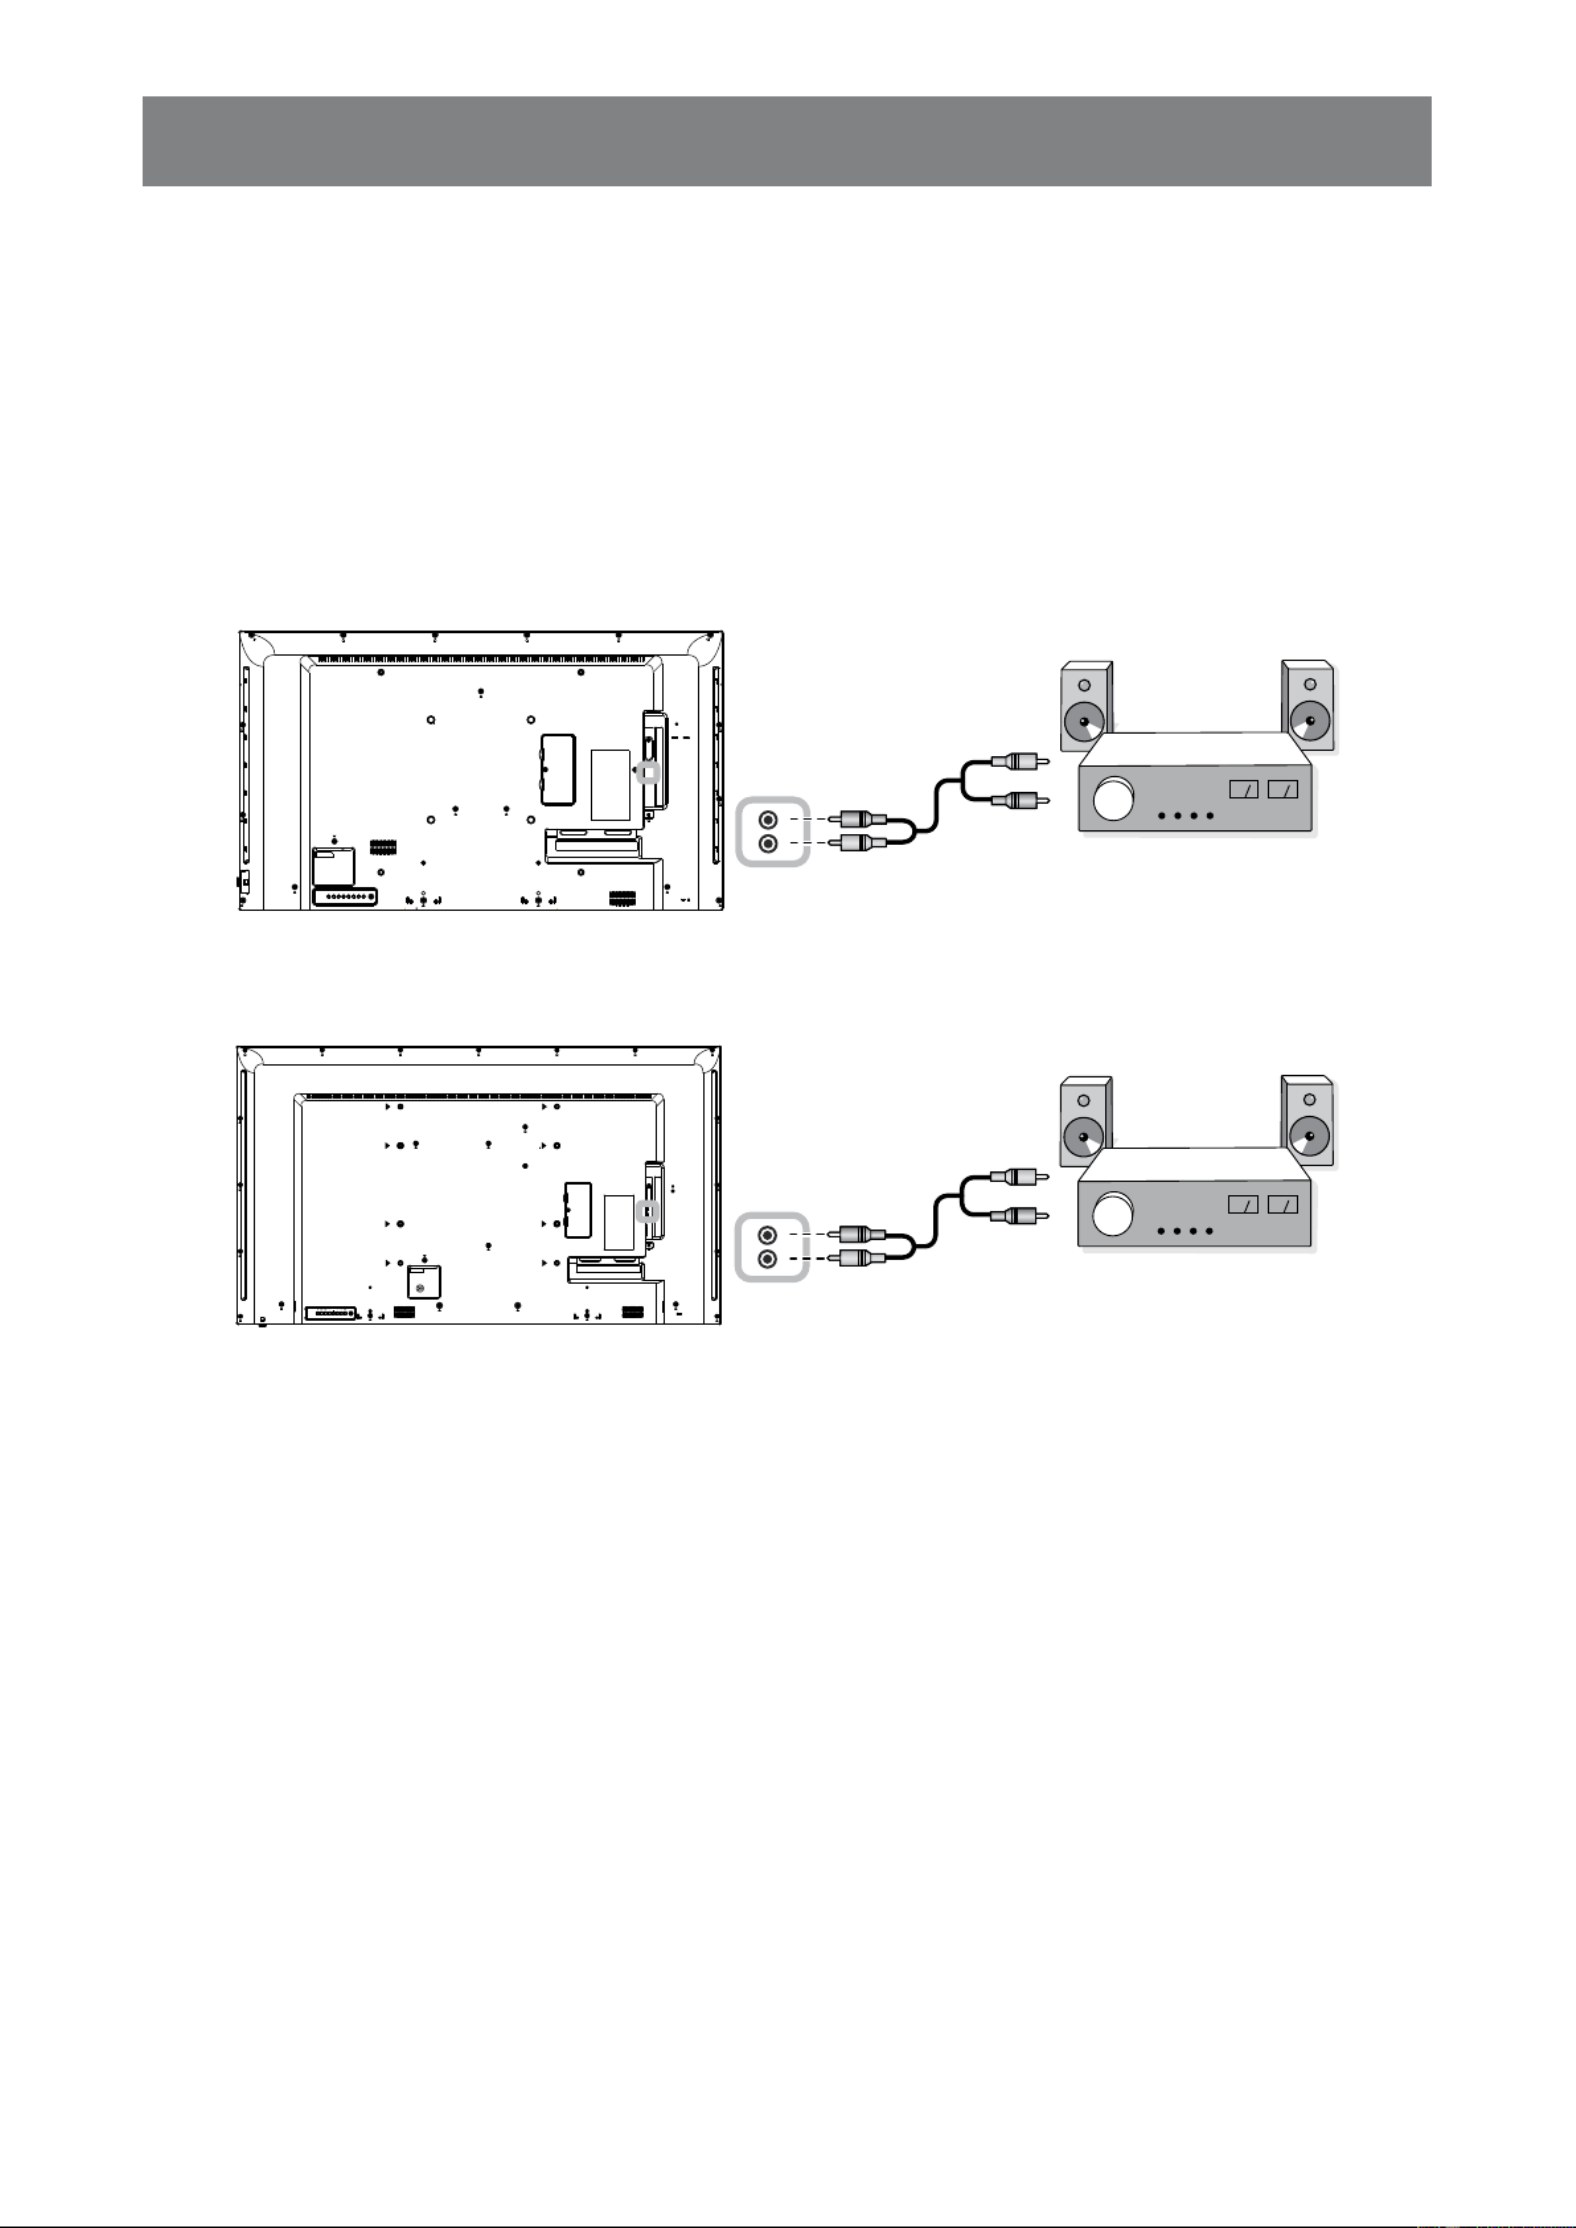
2.4 Connecting Audio Equipment
2.4.1 Connecting an External Audio Device
Connect one end of an audio cable to the AUDIO OUT connectors of the LCD display and the other end of an
audio cable to the AUDIO IN connectors of the audio device.
AUDIO
OUT
Audio Device
AUDIO
IN
NSD-4301Q
AUDIO
OUT
Audio Device
AUDIO
IN
NSD-5501Q

31
MAKING CONNECTIONS
2.5 Using the Card Reader
Insert a micro SD card into the slot.
MICRO
SD CARD
SLOT
Micro SD
NSD-4301Q
MICRO
SD CARD
SLOT
Micro SD
NSD-5501Q

32
MAKING CONNECTIONS
2.6 Connecting Multiple Displays in a Daisy-chain Conguration
You can interconnect multiple displays to create a daisy-chain conguration for applications such as a video
wall.
Caution:
To avoid unnecessary strain on the bezel, it is highly recommended to keep a minimum space of 0.5mm in
which a business card is able to slip between all displays on all sides.
0.5 mm
2.6.1 Display Control Connection
Connect the RS232 OUT connector of DISPLAY 1 to the RS232 IN connector of DISPLAY 2.
DISPLAY 1
PC
DISPLAY 2
[RS232 IN]
[RS232]
[RS232 OUT] [RS232 IN]
Produkt Specifikationer
| Mærke: | AG Neovo |
| Kategori: | overvåge |
| Model: | NSD-4301Q |
Har du brug for hjælp?
Hvis du har brug for hjælp til AG Neovo NSD-4301Q stil et spørgsmål nedenfor, og andre brugere vil svare dig
overvåge AG Neovo Manualer

14 Januar 2025
4 September 2024
3 September 2024
3 September 2024
2 September 2024
2 September 2024
2 September 2024
2 September 2024
21 August 2024
21 August 2024
overvåge Manualer
- overvåge Bosch
- overvåge SilverCrest
- overvåge Acer
- overvåge Denver
- overvåge TCL
- overvåge Sony
- overvåge Samsung
- overvåge Panasonic
- overvåge Philips
- overvåge Vitek
- overvåge IFM
- overvåge LG
- overvåge Pioneer
- overvåge Mitsubishi
- overvåge Sharp
- overvåge Behringer
- overvåge Emos
- overvåge Epson
- overvåge Neumann
- overvåge Smart
- overvåge HP
- overvåge AOC
- overvåge Sanyo
- overvåge Akuvox
- overvåge Asus
- overvåge Gigabyte
- overvåge Toshiba
- overvåge Pyle
- overvåge InFocus
- overvåge Lenovo
- overvåge Asrock
- overvåge Yamaha
- overvåge Abus
- overvåge Optoma
- overvåge Da-Lite
- overvåge Westinghouse
- overvåge Element
- overvåge Thomson
- overvåge Hyundai
- overvåge Yorkville
- overvåge JBL
- overvåge Hisense
- overvåge DataVideo
- overvåge RCF
- overvåge Maxell
- overvåge Hannspree
- overvåge Omron
- overvåge Blaupunkt
- overvåge JVC
- overvåge Honeywell
- overvåge Hitachi
- overvåge Medion
- overvåge Citizen
- overvåge Haier
- overvåge Huawei
- overvåge König
- overvåge ProXtend
- overvåge Deltaco
- overvåge NewStar
- overvåge Alpine
- overvåge 3M
- overvåge Festo
- overvåge Danfoss
- overvåge Sunny
- overvåge BlueBuilt
- overvåge Tripp Lite
- overvåge BenQ
- overvåge Packard Bell
- overvåge Mad Catz
- overvåge Jensen
- overvåge Plantronics
- overvåge Xiaomi
- overvåge Peerless-AV
- overvåge Viewsonic
- overvåge Dell
- overvåge Schneider
- overvåge ELO
- overvåge Fujitsu
- overvåge Cooler Master
- overvåge Zalman
- overvåge PreSonus
- overvåge MSI
- overvåge Ricoh
- overvåge NEC
- overvåge Godox
- overvåge APC
- overvåge CTOUCH
- overvåge Ikan
- overvåge AJA
- overvåge GlobalTronics
- overvåge Velleman
- overvåge Marshall
- overvåge JUNG
- overvåge Fostex
- overvåge Salora
- overvåge Focal
- overvåge Genelec
- overvåge KRK
- overvåge NZXT
- overvåge Newline
- overvåge Hikvision
- overvåge Samson
- overvåge Yealink
- overvåge Allen & Heath
- overvåge Midas
- overvåge Simrad
- overvåge Renkforce
- overvåge Marshall Electronics
- overvåge Caliber
- overvåge I3-Technologies
- overvåge Viessmann
- overvåge Brandson
- overvåge Orion
- overvåge QSC
- overvåge BOOX
- overvåge Hanwha
- overvåge LaCie
- overvåge ARRI
- overvåge Onyx
- overvåge ITek
- overvåge Prowise
- overvåge Seiki
- overvåge Ozone
- overvåge M-Audio
- overvåge Bauhn
- overvåge Christie
- overvåge V7
- overvåge Provision-ISR
- overvåge Vorago
- overvåge Atomos
- overvåge EMachines
- overvåge Eurolite
- overvåge Mackie
- overvåge ACTi
- overvåge Faytech
- overvåge Krom
- overvåge Voxicon
- overvåge Chauvet
- overvåge Shure
- overvåge Vimar
- overvåge Continental Edison
- overvåge Dynaudio
- overvåge Iiyama
- overvåge PeakTech
- overvåge Dahua Technology
- overvåge Speco Technologies
- overvåge Prestigio
- overvåge Joy-It
- overvåge Boss
- overvåge IStarUSA
- overvåge Crestron
- overvåge SPL
- overvåge Kogan
- overvåge Barco
- overvåge SMART Technologies
- overvåge Insignia
- overvåge LC-Power
- overvåge AMX
- overvåge Tannoy
- overvåge Qian
- overvåge Xoro
- overvåge HyperX
- overvåge TVLogic
- overvåge Geovision
- overvåge Postium
- overvåge Planar
- overvåge Ernitec
- overvåge Bearware
- overvåge Sonifex
- overvåge TV One
- overvåge AVer
- overvåge Alienware
- overvåge Aputure
- overvåge Maxdata
- overvåge Sunstech
- overvåge Marquant
- overvåge Kubo
- overvåge Swissonic
- overvåge IHealth
- overvåge Peaq
- overvåge Avocor
- overvåge Interlogix
- overvåge Eizo
- overvåge Kindermann
- overvåge EverFocus
- overvåge POSline
- overvåge Peerless
- overvåge Monoprice
- overvåge Promethean
- overvåge Odys
- overvåge HKC
- overvåge Ibm
- overvåge Drawmer
- overvåge Iadea
- overvåge Advantech
- overvåge Kali Audio
- overvåge Ganz
- overvåge Extron
- overvåge Legamaster
- overvåge Ikegami
- overvåge Pelco
- overvåge Approx
- overvåge Belinea
- overvåge Palmer
- overvåge Adam
- overvåge GVision
- overvåge Posiflex
- overvåge Jay-tech
- overvåge MicroTouch
- overvåge X-Rite
- overvåge EKO
- overvåge IBoardTouch
- overvåge Mirai
- overvåge Elite Screens
- overvåge Hollyland
- overvåge Mitsai
- overvåge Skytronic
- overvåge COMMBOX
- overvåge Yiynova
- overvåge Lilliput
- overvåge LightZone
- overvåge AOpen
- overvåge Planet Audio
- overvåge EC Line
- overvåge Datacolor
- overvåge Fluid
- overvåge Atlona
- overvåge HELGI
- overvåge Desview
- overvåge Syscom
- overvåge Allsee
- overvåge Alogic
- overvåge Night Owl
- overvåge ProDVX
- overvåge Varad
- overvåge DoubleSight
- overvåge CTL
- overvåge Game Factor
- overvåge Nixeus
- overvåge Chimei
- overvåge Blue Sea
- overvåge AMCV
- overvåge Hamlet
- overvåge Wyse - Dell
- overvåge SWIT
- overvåge Feelworld
- overvåge GeChic
- overvåge Oecolux
- overvåge ADS-TEC
- overvåge Casalux
- overvåge Positivo
- overvåge Jupiter
- overvåge Transvideo
- overvåge Innocn
- overvåge KeepOut
- overvåge Shimbol
- overvåge Raysgem
- overvåge Motrona
- overvåge AORUS
- overvåge Elvid
- overvåge Wohler
- overvåge Portkeys
- overvåge Mimo Monitors
- overvåge Gamber-Johnson
- overvåge Enttec
- overvåge American Dynamics
- overvåge AIS
- overvåge Eve Audio
- overvåge Wortmann AG
- overvåge Viotek
- overvåge Vidi-Touch
- overvåge KTC
- overvåge CoolerMaster
- overvåge Atlantis Land
- overvåge HEDD
- overvåge Colormetrics
- overvåge Monkey Banana
- overvåge SmallHD
- overvåge UPERFECT
- overvåge Freedom Scientific
- overvåge OSEE
- overvåge CSL
- overvåge Mybeo
- overvåge IOIO
- overvåge DTEN
- overvåge Cocopar
- overvåge Titan Army
- overvåge Delvcam
- overvåge Xenarc
- overvåge Wimaxit
Nyeste overvåge Manualer

4 April 2025
5 Marts 2025
5 Marts 2025

27 Februar 2025

21 Februar 2025

18 Februar 2025
11 Februar 2025
11 Februar 2025
11 Februar 2025
11 Februar 2025