GE JGP337SEJSS Manual
Læs nedenfor 📖 manual på dansk for GE JGP337SEJSS (68 sider) i kategorien Ovn. Denne guide var nyttig for 14 personer og blev bedømt med 4.5 stjerner i gennemsnit af 2 brugere
Side 1/68

ge.com
183D5580P179 49-85093 11-05 JR
JGP337
Cooktops
Built-In Gas
Safety Instructions . . . . . . . . 2–6
Operating Instructions
Cookware . . . . . . . . . . . . . . . . . . 8
Flame Size . . . . . . . . . . . . . . . . . 7
To Light a Burner . . . . . . . . . . . 7
Care and Cleaning
Burner Assemblies . . . . . . . . . . . .9
Burner Caps and Heads . . . . . .10
Burner Grates . . . . . . . . . . . . . .11
Control Knobs . . . . . . . . . . . . . . .9
Glass Cooktop . . . . . . . . . . .12, 13
Stainless Steel Surfaces . . . . . . .11
Installation Instructions . .14–26
Troubleshooting Tips . . . . . . .27
Consumer Support
Canada Warranty . . . . . . . . . . . .33
Consumer Support . . . . . . . . . .34
Product Registration . . . . . .29, 30
U.S. Warranty . . . . . . . . . . . . . .32
Write the model and serial
numbers here:
Model # ________________
Serial # ________________
You can find them on a label
under the cooktop.
Owner’s Manual and
Installation Instructions

2
IMPORTANT SAFETY INFORMATION.
READ ALL INSTRUCTIONS BEFORE USING.
Safety InstructionsOperating InstructionsCare and CleaningTroubleshooting TipsConsumer Support
– Do not store or use gasoline or other
flammable vapors and liquids in the
vicinity of this or any other appliance.
–WHAT TO DO IF YOU SMELL GAS
■Do not try to light any appliance.
■ Do not touch any electrical switch;
do not use any phone in your building.
■ Immediately call your gas supplier
from a neighbor’s phone. Follow the
gas supplier’s instructions.
■ If you cannot reach your gas supplier,
call the fire department.
– Installation and service must be
performed by a qualified installer,
service agency or the gas supplier.
WARNING: If the information in this
manual is not followed exactly, a fire or
explosion may result causing property
damage, personal injury or death.
IMPORTANT SAFETY NOTICE
The California Safe Drinking Water and Toxic Enforcement Act requires the Governor of California to
publish a list of substances known to the state to cause cancer, birth defects or other reproductive
harm, and requires businesses to warn customers of potential exposure to such substances.
Gas appliances can cause minor exposure to four of these substances, namely benzene, carbon
monoxide, formaldehyde and soot, caused primarily by the incomplete combustion of natural gas or
LP fuels. Properly adjusted burners, indicated by a bluish rather than a yellow flame, will minimize
incomplete combustion. Exposure to these substances can be minimized by venting with an open
window or using a ventilation fan or hood.

3
ge.com
WARNING!
For your safety, the information in this manual must be followed to minimize the risk of fire or
explosion, electric shock, or to prevent property damage, personal injury, or loss of life.
Have the installer show you the location of the cooktop gas shut-off valve and how to shut it
off if necessary.
■Have your cooktop installed and properly
grounded by a qualified installer, in
accordance with the Installation
Instructions. Any adjustment and service
should be performed only by qualified gas
cooktop installers or service technicians.
■Do not attempt to repair or replace any
part of your cooktop unless it is specifically
recommended in this manual. All other
service should be referred to a qualified
technician.
■Plug your cooktop into a 120-volt
grounded outlet only. Do not remove
the round grounding prong from the
plug. If in doubt about the grounding
of the home electrical system, it is your
personal responsibility and obligation to
have an ungrounded outlet replaced with
a properly grounded, three-prong outlet
in accordance with the National Electrical
Code. Do not use an extension cord with
this appliance.
■Let the burner grates and other surfaces
cool before touching them or leaving
them where children can reach them.
■Be sure all packaging materials are
removed from the cooktop before
operating it to prevent fire or smoke
damage should the packaging material
ignite.
■Be sure your cooktop is correctly
adjusted by a qualified service technician
or installer. This counter unit, as shipped
from the factory, can only be operated
with natural gas. Do not try to operate it
with LP gas unless you follow the LP
conversion instructions packed with
your cooktop.
SAFETY PRECAUTIONS
Safety Instructions Operating Instructions Care and Cleaning Troubleshooting Tips Consumer Support

■Do not leave children alone or unattended
where a cooktop is hot or in operation.
They could be seriously burned.
■Do not allow anyone to climb, stand or
hang on the cooktop.
■CAUTION: Items of interest to children
should not be stored in cabinets above a
cooktop—children climbing on the
cooktop to reach items could be seriously
injured.
■Always keep wooden and plastic utensils
and canned food a safe distance away from
your cooktop.
■Always keep combustible wall coverings,
curtains or drapes a safe distance from
your cooktop.
■Never wear loose-fitting or hanging
garments while using the appliance.
Be careful when reaching for items stored
in cabinets over the cooktop. Flammable
material could be ignited if brought in
contact with flame or hot oven surfaces
and may cause severe burns.
■Teach children not to play with the controls
or any other part of the cooktop.
■For your safety, never use your appliance
for warming or heating the room.
■Always keep dish towels, dishcloths, pot
holders and other linens a safe distance
from your cooktop.
■Do not store flammable materials near
a cooktop.
■If cooktop is located near a window, do not
hang long curtains that could blow over the
top burners and create a fire hazard.
■Do not store or use combustible materials,
gasoline or other flammable vapors and
liquids in the vicinity of this or any other
appliance.
■Do not let cooking grease or other
flammable materials accumulate near
the cooktop.
■Do not operate the burner without all
burner parts in place.
■Do not place hot cookware on the glass
cooktop. This could cause glass to break.
■Do not clean the cooktop with flammable
or volatile cleaning fluids.
■Do not clean the cooktop when the
appliance is in use.
■Avoid scratching the cooktop with sharp
instruments, or with rings and other jewelry.
■Never use the cooktop as a cutting board.
■Do not use water on grease fires. Never
pick up a flaming pan. Turn the controls
off. Smother a flaming pan on a surface
burner by covering the pan completely with
a well-fitting lid, cookie sheet or flat tray.
Use a multi-purpose dry chemical or foam-
type fire extinguisher.
■Flaming grease outside a pan can be put
out by covering it with baking soda or, if
available, by using a multi-purpose dry
chemical or foam-type fire extinguisher.
SAFETY PRECAUTIONS
IMPORTANT SAFETY INFORMATION.
READ ALL INSTRUCTIONS BEFORE USING.
4
Safety InstructionsOperating InstructionsCare and CleaningTroubleshooting TipsConsumer Support

5
Safety Instructions Operating Instructions Care and Cleaning Troubleshooting Tips Consumer Support
ge.com
Use proper pan size—avoid pans that are unstable or easily tipped. Select cookware having flat
bottoms large enough to cover burner grates. To avoid spillovers, make sure cookware is large
enough to contain the food properly. This will both save cleaning time and prevent hazardous
accumulations of food, since heavy spattering or spillovers left on cooktop can ignite. Use pans
with handles that can be easily grasped and remain cool.
WARNING!
SURFACE BURNERS
■Always use the LITE position when igniting
the top burners and make sure the burners
have ignited.
■Never leave the surface burners
unattended at high flame settings.
Boilovers cause smoking and greasy
spillovers that may catch on fire.
■Use only dry pot holders—moist or damp
pot holders on hot surfaces may result in
burns from steam. Do not let pot holders
come near open flames when lifting
cookware. Do not use a towel or other
bulky cloth in place of a pot holder. Such
cloths can catch fire on a hot burner.
■When using glass cookware, make sure it
is designed for cooktop cooking.
■To minimize the possibility of burns,
ignition of flammable materials and
spillage, turn cookware handles toward
the side or back of the cooktop without
extending over adjacent burners.
■Always turn the surface burner controls
off before removing cookware.
■Carefully watch foods being fried at a high
flame setting.
■Always heat fat slowly, and watch as it heats.
■Do not leave any items on the cooktop.
■If a combination of oils or fats will be used
in frying, stir together before heating or as
fats melt slowly.
■Do not use a wok on the cooking surface
if the wok has a round metal ring that is
placed over the burner grate to support
the wok. This ring acts as a heat trap, which
may damage the burner grate and burner
head. Also, it may cause the burner to work
improperly. This may cause a carbon
monoxide level above that allowed by
current standards, resulting in a health
hazard.
■Foods for frying should be as dry as
possible. Frost on frozen foods or moisture
on fresh foods can cause hot fat to bubble
up and over the sides of the pan.
■Use the least possible amount of fat for
effective shallow or deep-fat frying. Filling
the pan too full of fat can cause spillovers
when food is added.
■Use a deep fat thermometer whenever
possible to prevent overheating fat beyond
the smoking point.
■Never try to move a pan of hot fat,
especially a deep fat fryer. Wait until the fat
is cool.
■Do not flame foods on the cooktop. If you
do flame foods under the hood, turn the
fan on.
■Large scratches or impacts to glass
cooktops can lead to broken or shattered
glass.

Your cooktop is shipped from the factory set to operate only with Natural Gas.
If you wish to use your cooktop with Liquefied Petroleum Gas, you must follow the LP
conversion instructions packed with your cooktop.
■Keep all plastics away from the surface
burners.
■If you smell gas, turn off the gas to the
cooktop and call a qualified service
technician. Never use an open flame to
locate a leak.
■To avoid the possibility of a burn, always be
certain that the controls for all burners are
at the off position and all grates are cool
before attempting to remove them.
■Never clean the cooktop surface when it is
hot. Some cleaners produce noxious fumes
and wet cloths could cause steam burns if
used on a hot surface.
■Never leave jars or cans of fat drippings
on or near your cooktop.
■Don’t use aluminum foil to line burner
bowls. Misuse could result in a fire hazard
or damage to the cooktop.
■Do not cover or block the area around
the cooktop knobs. This area must be kept
clear for proper ventilation and burner
performance.
■Clean only parts listed in this Owner’s
Manual.
■Do not lift the cooktop. Lifting the
cooktop can lead to damage and improper
operation of the cooktop.
LP CONVERSION KIT
IMPORTANT SAFETY INFORMATION.
READ ALL INSTRUCTIONS BEFORE USING.
Adjust the top burner flame size so it does not extend beyond the edge of the cookware. Excessive
flame is hazardous.
SURFACE BURNERS
Cook meat and poultry thoroughly—meat to at least an INTERNAL temperature of 160°F and poultry to at least
an INTERNAL temperature of 180°F. Cooking to these temperatures usually protects against foodborne illness.
COOK MEAT AND POULTRY THOROUGHLY…
READ AND FOLLOW THIS SAFETY INFORMATION CAREFULLY.
SAVE THESE INSTRUCTIONS
6
Safety InstructionsOperating InstructionsCare and CleaningTroubleshooting TipsConsumer Support
7
Safety Instructions Care and Cleaning Troubleshooting TipsOperating Instructions Consumer Support
Using the cooktop burners. ge.com
Throughout this manual, features and appearance may vary from your model.
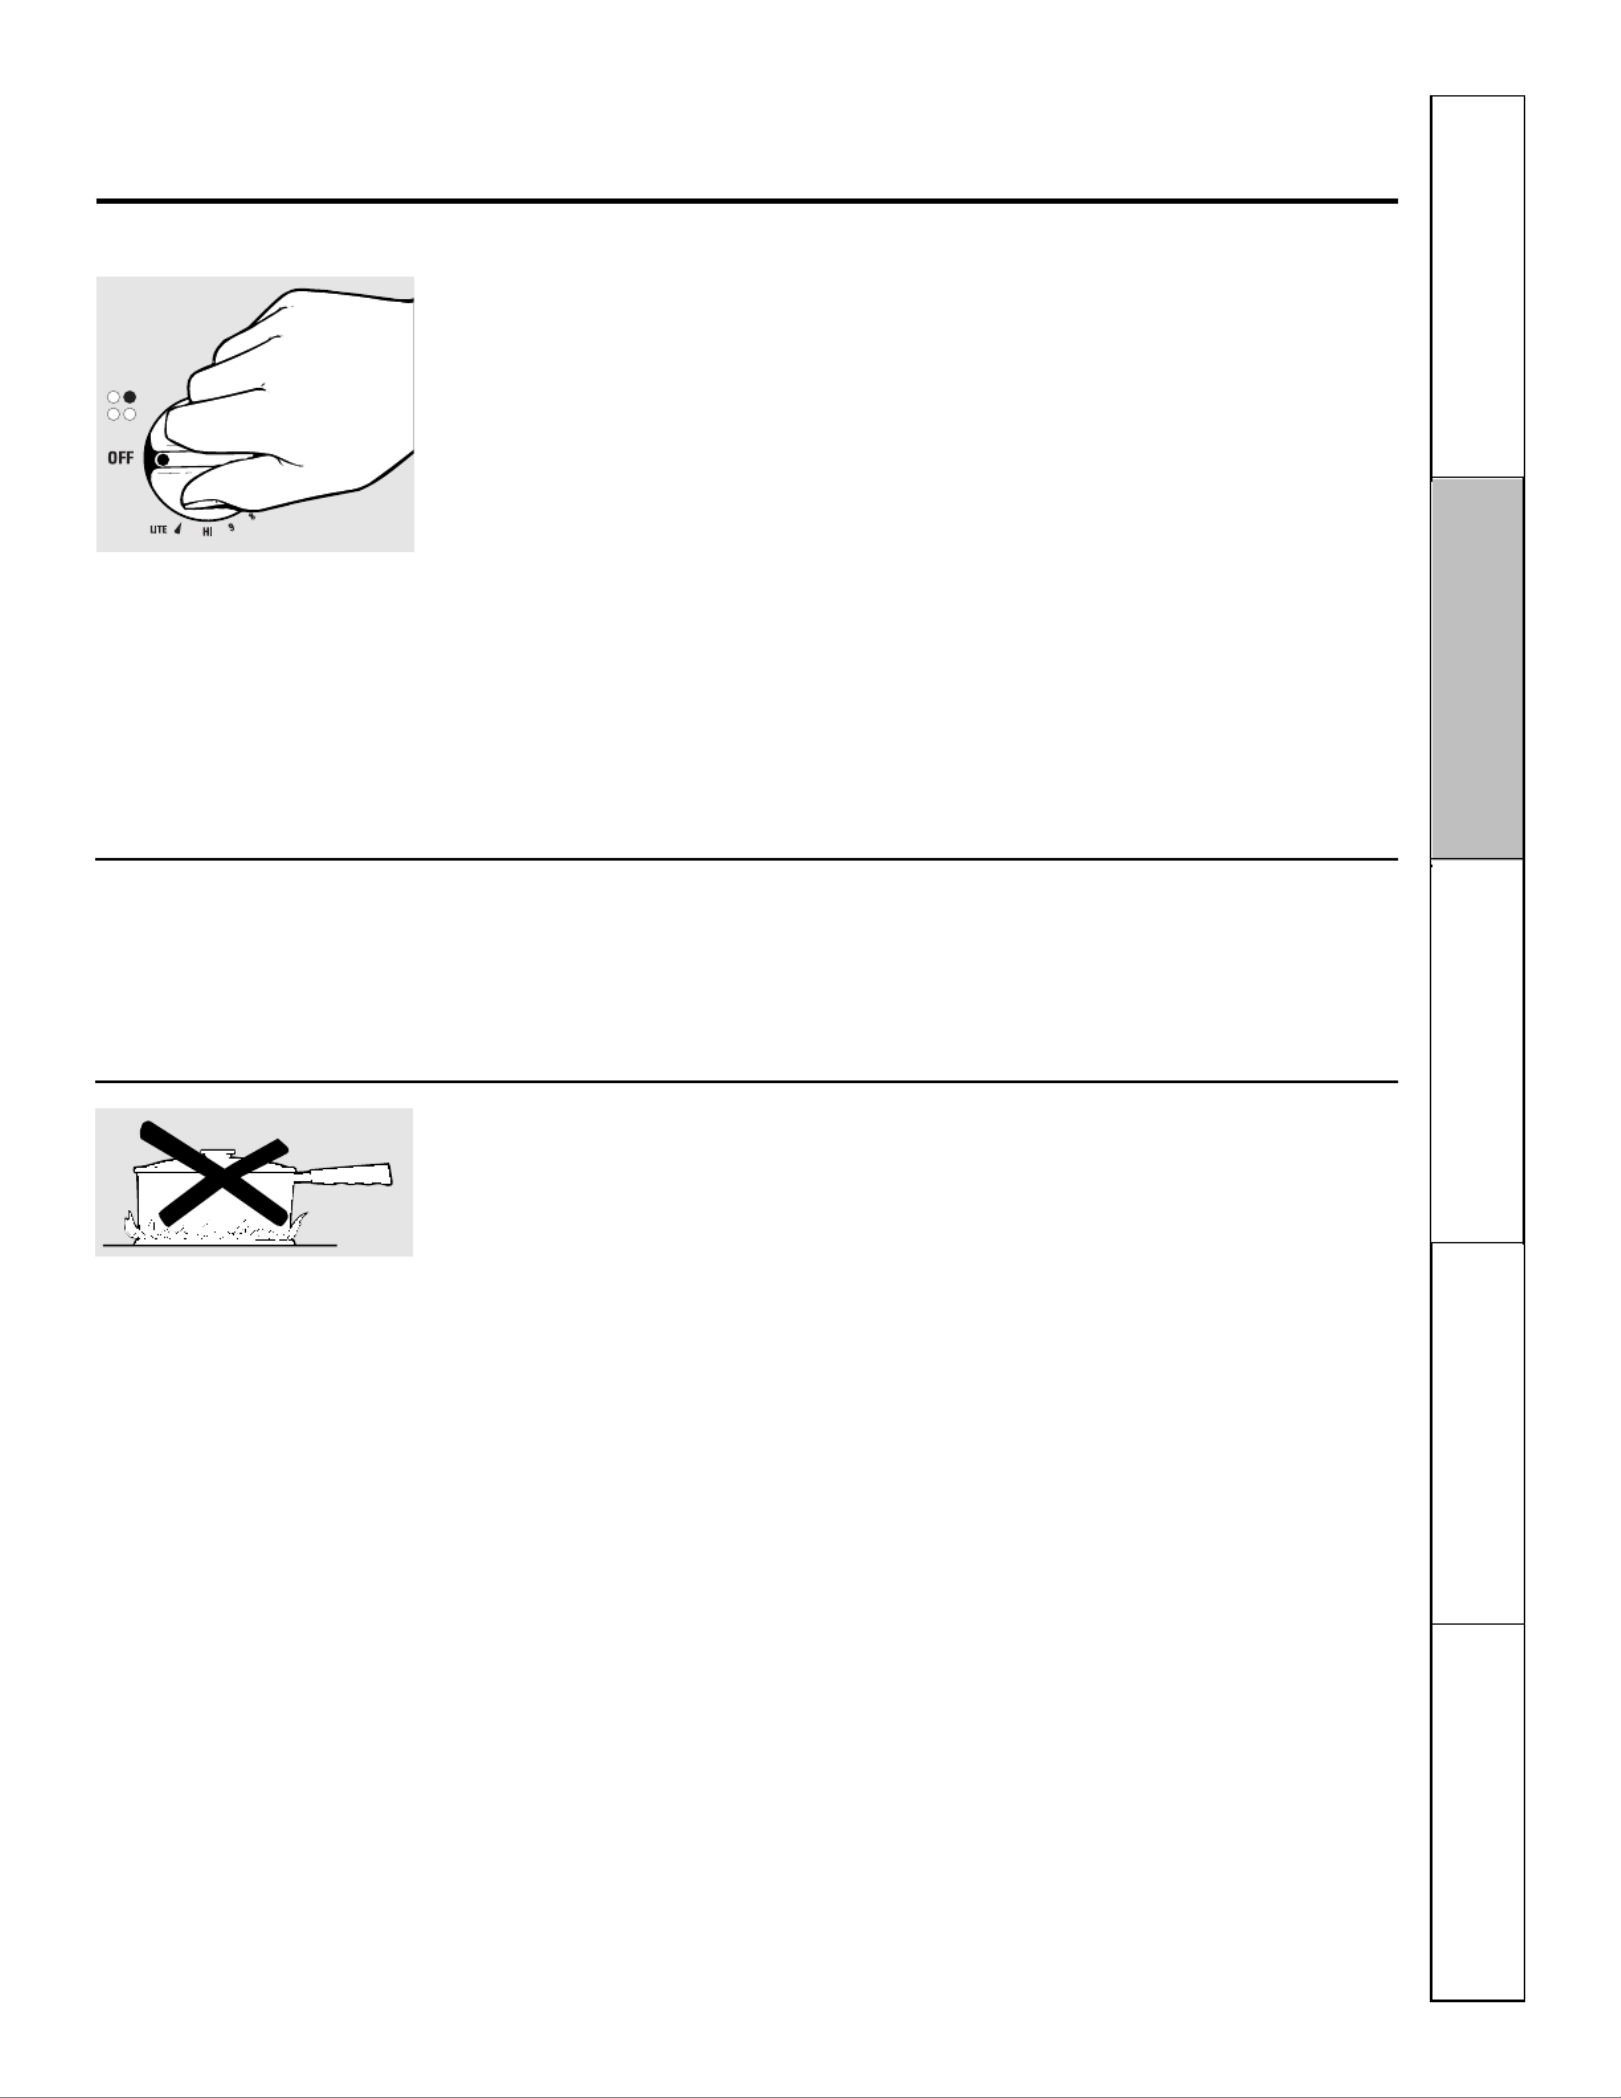
How to Light a Burner
Your cooktop burners are lit by electric
ignition, eliminating the need for
standing pilot lights with constantly
burning flames.
Push the control knob in and turn it
counterclockwise to the LITE position.
After the burner ignites, turn the knob to
adjust the flame size. To turn the burner
off, turn the knob clockwise as far as it
will go, to the OFF position.
■In case of a power failure, you can light the
burners with a match. Hold a lit match to the
burner, then push in and turn the control knob
to the LITE position. Use extreme caution when
lighting burners this way. Burners in use when
an electrical power failure occurs will continue
to operate normally.
■Do not operate the burner for an extended
period of time without cookware on the grate.
The finish on the grate may chip without
cookware to absorb the heat.
■Check to be sure the burner you turn on is the
one you want to use.
■Be sure the burners and grates are cool before
you place your hand, a pot holder, cleaning
cloths or other materials on them.
Be sure you turn the control knob
to OFF when you finish cooking.
How to Select Flame Size
For safe handling of cookware, never let the
flames extend up the sides of the cookware.
Watch the flame, not the knob, as you
reduce heat. When fast heating is
desired, the flame size on a gas burner
should match the cookware you are
using.
Flames larger than the bottom of the
cookware will not result in faster heating
of the cookware and could be hazardous.
Simmer and Power Burners (on some models)
The right rear burner is best for smaller
pans and cooking operations requiring
carefully controlled simmering conditions.
The front right burner is a high power
burner for larger pans and fast boiling
operations.

Using the cooktop burners.
Cookware
Aluminum: Medium-weight cookware is
recommended because it heats quickly
and evenly. Most foods brown evenly in
an aluminum skillet. Use saucepans with
tight-fitting lids when cooking with
minimum amounts of water.
Enamelware: Under some conditions,
the enamel of some cookware may
melt. Follow cookware manufacturer’s
recommendations for cooking methods.
Glass: There are two types of glass
cookware: those for oven use only
and those for cooktop cooking
(saucepans, coffee and tea pots).
Glass conducts heat very slowly.
Cast Iron: If heated slowly, most
skillets will give satisfactory results.
Heatproof Glass Ceramic: Can be used
for either surface or oven cooking.
It conducts heat very slowly and cools
very slowly. Check cookware
manufacturer’s directions to be sure it
can be used on a gas cooktop.
Stainless Steel: This metal alone has
poor heating properties and is usually
combined with copper, aluminum
or other metals for improved heat
distribution. Combination metal skillets
usually work satisfactorily if they are used
with medium heat as the manufacturer
recommends.
Safety InstructionsOperating InstructionsCare and CleaningTroubleshooting TipsConsumer Support
Home Canning Tips
Be sure the canner is centered over
the burner.
Make sure the canner is flat on the
bottom.
To prevent burns from steam or heat,
use caution when canning.
Use recipes and procedures from
reputable sources. These are available
from manufacturers such as Ball®and
Kerr®and the Department of Agriculture
Extension Service.
Flat-bottomed canners are
recommended. Use of water bath
canners with rippled bottoms may
extend the time required to bring
the water to a boil.
Use a flat-bottomed wok.
Wok This Way
We recommend that you use a 14 or smaller ″
flat-bottomed wok. Make sure the wok bottom
sits flat on the grate. They are available at your
local retail store.
Only a flat-bottomed wok should be used.
Do not use a flat-bottomed wok on a
support ring. Placing the ring over the
burner or grate may cause the burner
to work improperly, resulting in carbon
monoxide levels above allowable
standards. This could be dangerous
to your health.
Stove Top Grills
Do not use stove top grills on your sealed
gas burners. If you use the stove top grill
on the sealed gas burner, it will cause
incomplete combustion and can result
in exposure to carbon monoxide levels
above allowable current standards.
This can be hazardous to your health.
8

9
Care and cleaning of the cooktop. ge.com
Be sure electrical power is off and all surfaces are cool before cleaning any part of the cooktop.
How to Remove Packaging Tape
Carefully grasp a corner of the protective
shipping film with your fingers and slowly
peel it from the appliance surface. Do
not use any sharp items to remove the
film. Remove all of the film before using
the appliance for the first time.
To assure no damage is done to the finish
of the product, the safest way to remove
the adhesive from packaging tape on new
appliances is an application of a household
liquid dishwashing detergent. Apply with
a soft cloth and allow to soak.
NOTE: The adhesive must be removed from all
parts. It cannot be removed if it is baked on.
Control Knobs
The control knobs may be removed for easier
cleaning.
Make sure the knobs are in the OFF
positions and pull them straight off the
stems for cleaning.
The knobs can be cleaned in a
dishwasher or they may also be washed
with soap and water. Make sure the insides
of the knobs are dry before replacing.
Replace the knobs in the OFF position
to ensure proper placement.
Pull the knob straight off the stem.
Sealed Burner Assemblies
Turn all controls OFF before removing
the burner parts.
The burner grates, caps and burner
heads can be lifted off, making them
easy to clean.
CAUTION: Do not operate the
burner without all burner parts in place.
CAUTION: DO NOT OPERATE THE
BURNER WITHOUT ALL BURNER
PARTS IN PLACE.
Grate
Burner cap
Burner head
Spark igniter
Burner bowl
Safety Instructions Operating Instructions Care and Cleaning Troubleshooting Tips Consumer Support
The electrode of the spark igniter is exposed when
the burner head is removed. When one burner is
turned to LITE, all the burners spark. Do not attempt
to disassemble or clean around any burner while
another burner is on. An electric shock may result,
which could cause you to knock over hot cookware.
Electrode

Safety InstructionsOperating InstructionsCare and CleaningTroubleshooting TipsConsumer Support
10
Burner Caps and Heads
Burner caps
Lift off when cool. Wash burner caps
in hot, soapy water and rinse with clean
water. You may scour with a plastic
scouring pad to remove burned-on
food particles.
Burner heads
For proper ignition, make sure the
small hole in the section that fits over the
electrode is kept open. A sewing needle
or wire twist-tie works well to unclog it.
The slits in the burner heads must be kept clean
at all times for an even, unhampered flame.
Clogged or dirty burner ports or
electrodes will not allow the burner
to operate properly.
Any spill on or around an electrode must
be carefully cleaned. Take care to not hit
an electrode with anything hard or it
could be damaged.
You should clean the burner caps and
burner heads routinely, especially after
bad spillovers, which could clog the
openings in the burner heads. Lift off
when cool.
To remove burned-on food, soak the
burner heads in a solution of mild liquid
detergent and hot water for 20–30
minutes. For more stubborn stains, use
a toothbrush.
After cleaning
Before putting the burner caps and
heads back, shake out excess water and
then dry them thoroughly by setting in
a warm oven for 30 minutes.
NOTE: Do not use steel wool or scouring
powders to clean the burners.
Replacement
Replace burner heads over the electrodes
on the cooktop, in the correct locations
according to their size.
Make sure the slot in the burner head is
positioned over the electrode.
Replace the matching size caps onto the
heads. There is one large, one small and
two medium caps.
Make sure that the heads and caps are
replaced in the correct locations.
NOTE: Before removing the burner caps
and heads, remember their size and
location. Replace them in the same location
after cleaning.
Medium head
Front of cooktop
Medium head
Small head
Large head
Care and cleaning of the cooktop.
Use a sewing needle or twist-tie
to unclog the small hole in the
burner head.
Medium cap
Front of cooktop
Medium cap
Small cap
Large cap

ge.com
Burner Grates
Lift out when cool. Grates should be
washed regularly and, of course, after
spillovers. Wash them in hot, soapy water
and rinse with clean water. When
replacing the grates, be sure they are
positioned securely over the burners.
Do not operate a burner for an extended
period of time without cookware on the
grate. The finish on the grate may chip
without cookware to absorb the heat.
To get rid of burned-on food, place the
grates in a covered container. Add 1/4
cup ammonia and let them soak several
hours or overnight. Wash, rinse well
and dry.
Although they are durable, the grates
will gradually lose their shine, regardless
of the best care you can give them. This is
due to their continual exposure to high
temperatures. You will notice this sooner
with lighter color grates.
NOTE: Do not clean the grates in a self-cleaning
oven.
When replacing the grates, be sure
they’re positioned securely over the
burners.
11
Safety Instructions Operating Instructions Troubleshooting TipsCare and Cleaning Consumer Support
Stainless Steel Surfaces (on some models)
Do not use a steel wool pad; it will scratch
the surface.
To clean the stainless steel surface,
use warm sudsy water or a stainless steel
cleaner or polish. Always wipe the surface
in the direction of the grain. Follow the
cleaner instructions for cleaning the
stainless steel surface.
To inquire about purchasing stainless
steel appliance cleaner or polish, or to
find the location of a dealer nearest you,
please call our toll-free number:
National Parts Center 800.626.2002 (U.S.)
888.261.3055 (Canada)
ge.com (U.S.)
www.GEAppliances.ca (Canada)
IMPORTANT: Do not lift the cooktop. Lifting
the cooktop can lead to damage and improper
operation of the cooktop.

Safety InstructionsOperating InstructionsCare and CleaningTroubleshooting TipsConsumer Support
12
Allow the cooktop to cool.
Use the CERAMA BRYTE®
Ceramic Cooktop Scraper at
approximately a 45° angle against
the glass surface and scrape the
soil. It will be necessary to apply
pressure to the razor scraper in
order to remove the residue.
After scraping with the
CERAMA BRYTE®Ceramic
Cooktop Scraper, spread a few
drops of CERAMA BRYTE®
Ceramic Cooktop Cleaner on the
entire burned residue area. Use the
CERAMA BRYTE®Cleaning Pad to
remove any remaining residue.
For additional protection,
after all residue has been
removed, polish the entire
surface with CERAMA BRYTE®
Ceramic Cooktop Cleaner
and a paper towel.
Cleaning the glass cooktop. (on some models)
Burned-On Residue
WARNING: DAMAGE to your glass surface
may occur if you use scrub pads other than
those recommended.
Allow the cooktop to cool.
Remove the burner grates and
spread a few drops of CERAMA
BRYTE®Ceramic Cooktop Cleaner
on the entire burned residue area.
Using the included CERAMA
BRYTE®Cleaning Pad for Ceramic
Cooktops, rub the residue area,
applying pressure as needed.
If any residue remains, repeat the
steps listed above as needed.
For additional protection, after
all residue has been removed,
polish the entire surface with
CERAMA BRYTE®Ceramic
Cooktop Cleaner and a paper towel.
The CERAMA BRYTE®Ceramic
Cooktop Scraper and all
recommended supplies are
available through our Parts Center.
See instructions under “To Order
Parts” section on next page.
NOTE: Do not use a dull or
nicked blade.
Heavy, Burned-On Residue
Use a CERAMA BRYTE
®Cleaning
Pad for Ceramic Cooktops.
Normal Daily Use Cleaning
ONLY use CERAMA BRYTE®Ceramic
Cooktop Cleaner on the glass cooktop.
Other creams may not be as effective.
To maintain and protect the surface of
your glass cooktop, follow these steps:
Before using the cooktop for the
first time, remove the burner grates
and clean it with CERAMA BRYTE®
Ceramic Cooktop Cleaner. This
helps protect the top and makes
cleanup easier.
Daily use of CERAMA BRYTE®
Ceramic Cooktop Cleaner will help
keep the cooktop looking new.
Shake the cleaning cream well.
Apply a few drops of CERAMA
BRYTE®Ceramic Cooktop Cleaner
directly to the cooktop.
Use a paper towel or CERAMA
BRYTE®Cleaning Pad for Ceramic
Cooktops to clean the entire
cooktop surface.
Use a dry cloth or paper towel
to remove all cleaning residue.
No need to rinse.
NOTE: It is very important that you DO NOT
heat the cooktop until it has been cleaned
thoroughly.
IMPORTANT: Do not lift the cooktop. Lifting
the cooktop can lead to damage and improper
operation of the cooktop.
Clean your cooktop after
each spill. Use CERAMA
BRYTE®Ceramic Cooktop
Cleaner.

ge.com
Be careful not to slide pots and
pans across your cooktop. It will
leave metal markings on the
cooktop surface.
These marks are removable using
the CERAMA BRYTE®Ceramic
Cooktop Cleaner with the CERAMA
BRYTE®Cleaning Pad for Ceramic
Cooktops.
If pots with a thin overlay of
aluminum or copper are allowed
to boil dry, the overlay may leave
black discoloration on the
cooktop.
This should be removed
immediately before heating
again or the discoloration
may be permanent.
WARNING: Carefully check the bottom of
pans for roughness that would scratch
the cooktop.
Metal Marks and Scratches
Safety Instructions Operating Instructions Troubleshooting Tips Consumer SupportCare and Cleaning
13
Turn off all surface burners and,
with an oven mitt, remove hot
pans and grates.
Wearing an oven mitt:
a. Use the CERAMA BRYTE®
Ceramic Cooktop Scraper
to move the spill to a cool area
on the cooktop.
b. Remove the spill with
paper towels.
Any remaining spillover should be
left until the surface of the cooktop
has cooled.
Don’t use the surface units again
until all of the residue has been
completely removed.
NOTE: If pitting or indentation in the glass
surface has already occurred, the cooktop
glass will have to be replaced. In this case,
service will be necessary.
Damage from Sugary Spills and Melted Plastic
Our testing shows that if
you are cooking high sugar
mixtures such as jelly or
fudge and have a spillover,
it can cause permanent
damage to the glass surface
unless the spillover is
immediately removed.
To order CERAMA BRYTE ®Ceramic
Cooktop Cleaner and the CERAMA
BRYTE®Ceramic Cooktop Scraper,
please call our toll-free number:
National Parts Center 800.626.2002
CERAMA BRYTE®Ceramic
Cooktop Cleaner . . . . . . . . .# WX10X300
CERAMA BRYTE®Ceramic
Cooktop Scraper . . . . . . . .# WX10X0302
Kit . . . . . . . . . . . . . . . . . . . . .# WB50T10054
(Kit includes cream, cleaning pad and
cooktop scraper)
CERAMA BRYTE ®Cleaning Pads for
Ceramic Cooktops . . . . . . .# WX10X350
To Order Parts
Glass surface—potential for permanent damage.

30″Sealed Gas Cooktop
Installation
Instructions
CAUTION: Before you begin—read these
instructions completely and carefully.
• IMPORTANT—Save these instructions for
local inspector’s use.
• IMPORTANT—OBSERVE ALL GOVERNING
CODES AND ORDINANCES.
• Note to Installer—Be sure to leave these
instructions with the Consumer.
• Note to Consumer—Keep these instructions
for future reference.
• Note—This appliance must be properly
grounded.
• IMPORTANT: Leak testing of the appliance
shall be conducted according to the
manufacturer’s instructions.
• Skill level—Installation of this appliance
requires basic mechanical skills.
•Proper installation is the responsibility of
the installer.
•Product failure due to improper installation
is not covered under the Warranty.
PARTS INCLUDED
1/8″Drill Bit &
Electric or
Hand Drill
Phillips
Head
Screwdriver
Pencil Ruler or
Straightedge
Joint Sealant
Saber Saw
TOOLS YOU WILL NEED
14
Pipe Fittings
MATERIALS YOU MAY NEED
Shut Off
Valves
Pipe WrenchFlat-Blade Screwdriver
In the Commonwealth of Massachusetts:
•This product must be installed by a
licensed plumber or gas fitter.
•When using ball-type gas shut-off valves,
they shall be the T-handle type.
•A flexible gas connector, when used,
must not exceed 3 feet.
2 screws 2 Hold
Down
Brackets
Foam
Tape
If you have questions, call 1.800.GE.CARES or visit our Website at: ge.com

WARNING!!
If the information in this manual
is not followed exactly, a fire, explosion
or gas leak may result, causing property
damage, personal injury or death.
• Be sure your cooktop is installed properly
by a qualified installer or service technician.
• To eliminate reaching over surface burners,
cabinet storage above burner should be avoided.
• Do not install the unit near an outside door or
where a draft may affect its use.
Do not store or use gasoline or other
flammable vapors and liquids in the vicinity
of this or any other appliance!
STOP!
STOP!
STOP!
STOP!
STOP!
Installation Instructions
IMPORTANT SAFETY INSTRUCTIONS
FOR YOUR SAFETY
• Open windows.
• Extinguish any open flame.
• Do not try to light any appliance. Do not touch
any electrical switch; do not use any phone in
your building.
• Immediately call your gas supplier from a
neighbor’s phone. Follow the gas supplier’s
instructions.
• If you cannot reach your gas supplier, call the
fire department.
Installation and service must be performed
by a qualified installer, service agency or the
gas supplier.
15
WHAT TO DO IF YOU SMELL
GAS:
Installation of this cooktop must conform with
local codes, or in the absence of local codes,
with the National Fuel Gas Code, ANSI
Z223.1/NFPA.54, latest edition. In Canada,
installation must conform with the current
Natural Gas Installation Code, CAN/CGA-
B149.1 or the current Propane Installation
Code, CAN/CGA-B149.2, and with local
codes where applicable. This cooktop has
been design-certified by CSA International
according to ANSI Z21.1, latest edition and
Canadian Gas Association according to
CAN/CGA-1.1 latest edition.
As with any appliance using gas and
generating heat, there are certain safety
precautions you should follow. You will find
these precautions in the Important Safety
Information section in the front of this manual.
Read them carefully.
BEFORE YOU BEGIN

• The ventilating hood must be constructed of
sheet metal not less than 0.0122″thick. Install
above the cooktop with a clearance of not less
than 1/4″between the hood and the underside
of the combustible material or metal cabinet.
The hood must be at least as wide as the
appliance and centered over the appliance.
Clearance between the cooking surface and
the ventilation hood surface MUST NEVER BE
LESS THAN 24 INCHES.
EXCEPTION: Installation of a listed microwave
oven or cooking appliance over the cooktop shall
conform to the installation instructions packed with
that appliance.
• If cabinets are placed above the cooktop,
allow a minimum clearance of 30″between the
cooking surface and the bottom of unprotected
cabinets.
• If a 30″clearance between cooking surface
and overhead combustible material or metal
cabinets cannot be maintained, protect the
underside of the cabinets above the cooktop
with not less than 1/4 insulating millboard″
covered with sheet metal not less than 0.0122″
thick. Clearance between the cooking surface
and protected cabinets MUST NEVER BE
LESS THAN 24 INCHES.
• The vertical distance from the plane of the
cooking surface to the bottom of adjacent
overhead cabinets extending closer than 1″to
the plane of the cooktop sides must not be less
than 18″. (See the Preparing the Opening
section.)
•CAUTION: Items of interest to children
should not be stored in cabinets above a
cooktop—children climbing on the cooktop
to reach items could be seriously injured.
Installation Instructions
IMPORTANT SAFETY INSTRUCTIONS
WARNING!
INSTALLATION SAFETY
INSTRUCTIONS (cont.)
16
This Appliance must be electrically
grounded. Check with your local codes which
apply in your area. If no local codes apply, the
National Electrical Code, ANSI/NFPA No.
70–Latest Edition must be followed. Write to:
National Fire Protection Association
Batterymarch Park
Quincy, MA 02269
In Canada, electrical grounding must be in
accordance with the current CSA C22.1
Canadian Electrical Code Part 1 and/or local
codes. See Installation—Electrical Connections
in this section.
Be sure the installation of this cooktop in a
mobile home conforms with the Manufactured
Home Construction and Safety Standard, Title
24 CFR, Part 3280. If this standard does not
apply, you must follow the standard for
Manufactured Home Installations, ANSI
A225.1 and Manufactured Home Installations,
Sites and Communities and ANSI/NFPA 501A
or with local codes. You can get a copy of the
Federal Standard by Writing:
Office of Mobile Home Standards
HUD Building
451 7th Street, S.W.
Washington, D.C. 24010
ELECTRICAL REQUIREMENTS
• Make sure the wall coverings, countertop and
cabinets around the cooktop can withstand heat
generated by the cooktop up to 200°F.
• Avoid placing cabinets above the cooktop. To
reduce the hazard caused by reaching over
the open flames of operating burners, install a
ventilation hood over the cooktop that projects
forward at least 5″beyond the front of the
cabinets.
WARNING!
INSTALLATION
SAFETY INSTRUCTIONS

Be sure to place all literature
in a safe place for future reference.
Make sure you have all the tools and
materials you need before starting the
installation of the cooktop.
Your home must provide the adequate
electrical service needed to safely and
properly use your cooktop. (Refer to
section on electrical requirements.)
Remove packaging materials and
literature package from the cooktop
before beginning installation.
When preparing cooktop opening,
make sure the inside of the cabinet
and the cooktop do not interfere with
each other. (See section on preparing
the opening.)
When installing your cooktop in your
home, make sure all local codes and
ordinances are followed exactly as
stated.
Pre-Installation Checklist
17
Installation Instructions
Remove packaging tape. To assure
no damage is done to the finish of the
product, the safest way to remove the
adhesive left from packaging tape on
new appliances is an application of
a household liquid dishwashing
detergent, mineral oil or cooking oil.
Apply with a soft cloth and allow to
soak. Wipe dry and then apply an
appliance polish to thoroughly clean
and protect the surface.
NOTE: The plastic tape must be
removed from all chrome trim. It
cannot be removed if it is baked on.
Make sure the wall coverings,
countertop and cabinets around the
cooktop can withstand heat (up to
200°F) generated by the cooktop.
Styrofoam
Packaging
Literature Package
Cooktop

A2
A1 The following MINIMUM clearance
dimensions must be maintained.
A3
To insure accuracy, it is best to make
a template when cutting the opening
in the counter.
A4 The recommended Gas Supply
Location from the backwall.
Overall cooktop dimensions
Cutout dimensions
of the countertop
18
Installation Instructions
A5 Make sure the wall coverings,
countertop and cabinets around the
cooktop can withstand heat (up to
200°F) generated by cooktop.
Wall covering,
cabinets and
countertop
must withstand
heat up to 200°F.
COOKTOP
30" 21"
19 1/2" 28 3/8"
3"
2 1/4" Min.
Between cutout
and the wall behind
the cooktop
19 5/8" width of cut
28 1/2"
length of
cut
2 1/2" Min.
from front edge
of cutout
and front edge
of countertop
14 1/4"
3 3/4" MIN.
clearance from
cutout to side
wall on the left
of the unit
30" MIN.
clearance from
countertop to
unprotected
overhead surface
3 3/4 MIN.
clearance from
cutout to side
wall on the right
of the unit
13" MAX. Depth
of unprotected
overhead cabinets
18" MIN.
height from
countertop to
nearest cabinet on
either side of unit
13 1/4"
From Cutout
Center Line
1" Min. From Backwall
Recommended
gas supply
location.
PREPARING THE OPENING
A

19
Installation Instructions
B3 Attach Brackets
Insert the hold down brackets in the slots on
each side of the unit.
B1 Protect the Surface
of the Cooktop
Place a towel or tablecloth onto the countertop.
Lay the cooktop upside down onto the protected
surface.
Bottom of cooktop
Cloth under Cooktop
B2 Locate The Mounting Parts
Remove the hold down brackets from the
literature package.
B4 Insert Cooktop Into Cutout
Insert the cooktop centered into the cutout
opening. Make sure the front edge of the
countertop is parallel to the cooktop. The unit
must rest on the metal flange around the
burner box. Make final check that all required
clearances are met.
Mounting
Slot
Burner Box
Sides
COOKTOP
B5 Secure Cooktop to Cabinet
Once the unit is in place, screw the hold
down bracket into the cabinet sides to secure
the unit into place.
Mounting
Slot
Burner Box
Sides
Use suitable
fasteners for
anchoring in
cabinet sides
Cabinet
Sides
Installing the Cooktop Unit
B

C1 C3
20
Installation Instructions
This cooktop is designed to operate on natural
gas at 4 of water column pressure. It is″
shipped from the factory set for natural gas.
The convertible pressure regulator supplied
with the unit must be connected in series with
the manifold of the cooktop and must remain
in series with the supply line regardless of
whether natural or L.P. gas is being used.
FOR PROPER OPERATION, THE MAXIMUM
INLET PRESSURE TO THE REGULATOR
MUST BE NO MORE THAN 14″OF WATER
COLUMN PRESSURE. For checking the
regulator, the inlet pressure must be at least
1″(or 3.4 KPA) greater than the regulator
output setting. If the regulator is set for 4″of
water column pressure, the inlet pressure
must be at least 5 . If the regulator is set for″
10″, the inlet pressure must be at least 11″.
The gas supply line to the cooktop should be
1/2″or 3/4″pipe.
Provide Adequate Gas
Supply Installing the Regulator
WARNING: Never reuse old flexible
connectors. The use of old flexible
connectors can cause gas leaks and
personal injury. Always use new
flexible connectors when installing
a gas appliance.
Screw a section of pipe
onto each end of the
pressure regulator.
C4 Install the regulator onto
the burner box bottom
Pressure
Regulator
Shut Off
Valve Electrical
Outlet
12" Below
Countertop
Screw the
regulator and
pipe connection
into the burner
box bottom.
Make sure the
top of the
regulator is
facing toward
the cabinet front,
easily accessible
through the
cabinet doors.
NEVER REUSE OLD CONNECTORS
WHEN INSTALLING THIS COOKTOP.
To reduce the likelihood of gas leaks, apply
teflon tape or a thread compound approved
for use with LP or natural gases to all
threaded connections.
Pressure
Regulator
Installing the Cooktop
C
C2
Locate the electrical outlet
and the Gas Shut Off valve
beneath the cabinet.
Shut Off
Valve Electrical
Outlet
12" Below
Countertop
Install a manual shutoff valve in the gas line
in an easily accessible location outside the
cooktop. Be sure you know how and where to
shut off the gas supply to the cooktop. Install
the electrical outlet 12 below the countertop.″
NEVER REUSE
OLD CONNECTORS
WHEN INSTALLING
THIS UNIT.

21
Installation Instructions
C6 Check for Leaks
After connecting the cooktop to gas, check
system for leaks with a manometer. If a
manometer is not available, turn the gas
supply on to the cooktop and use a liquid
leak detector at all joints and connections
to check for leaks.
Tighten all connections if necessary to
prevent gas leakage in the cooktop or
supply line.
Check alignment of valves after connecting
the cooktop to the gas supply to be sure the
manifold pipe has not been moved. A
misalignment could cause the valve knob
stem to rub on the control panel, resulting
in a gas leak at the valve.
DO NOT USE OPEN FLAME TO
CHECK FOR LEAKS!
Disconnect this cooktop and its individual
shutoff valve from the gas supply piping
system during any pressure testing of that
system at test pressures greater than 1/2
″
psig.
Isolate the cooktop from the gas supply
piping system by closing its individual shutoff
valve during any pressure testing of the gas
supply system at test pressures equal to or
less than 1/2
″
psig.
INSTALLATION OVER
BUILT-IN OVEN
See built-in oven installation for complete
installation instructions.
90°
STREET EL
CABINET SIDES
2" DIA. HOLE (20 7/8"
FROM FRONT OF
COUNTERTOP TO
HOLE CENTER)
5" TO CENTER
OF 2" DIA. HOLE
FROM COUNTERTOP
C7
Installing the Cooktop cont.
C
C5 Complete the connection
with a coupling
Install a coupling
between the
regulator and the
shutoff valve to
complete the
connection.
Pressure
Regulator
Shut Off
Valve
Coupling
Electrical
Outlet
12" Below
Countertop

22
D1
D2
Installation Instructions
Because of potential safety hazards
under certain conditions, we strongly
recommend against the use of an
extension cord. However, if you still elect
to use an extension cord, it is absolutely
necessary that it be a UL listed 3-wire
grounding type appliance extension cord
and that the current carrying rating of
the cord in amperes be equivalent to
or greater than the branch circuit rating.
Such extension cords are obtainable
through your local appliance dealer.
IMPORTANT: (Please read carefully) FOR
PERSONAL SAFETY, THIS APPLIANCE
MUST BE PROPERLY GROUNDED.
An adequate electrical supply and outlet
must be used to operate the electrical
parts of your cooktop.
Insure proper
ground and
firm connection
before use
L
N
D3 Where a standard two-prong wall
receptacle is encountered, it is the
personal responsibility and obligation
of the customer to have it replaced
with a properly grounded three-prong
wall receptacle.
Do not under any circumstances cut or
remove grounding prong from the
cooktop cord. Failure to provide proper
polarization may create a hazardous
condition.
a. The power cord of this appliance is
equipped with a three-prong (grounding)
plug which must be used with a properly
grounded three-hole outlet with a standard
120 Volt, 60 cycle AC household current.
b. If you do not have a three-hole grounded
outlet, have a qualified electrician change
your old one.
c. A grounding adaptor will be needed to
convert the old one until the outlet can be
replaced. This method is only temporary,
and a qualified electrician should test it to
be sure it meets requirements.
Installation—Electrical Connections
D

Usage situations where
appliance power cord will be
disconnected infrequently.
D4
Temporary Method
(Adaptor plugs not permitted
in Canada)
Align large
prongs/slots
Insure proper ground
and firm connection
before use
For 15 amp circuit only. Do not use an adaptor
on a 20 amp circuit. Where local codes permit,
a TEMPORARY CONNECTION may be made
to a properly grounded two-prong wall
receptacle by the use of a UL listed adaptor
available at most hardware stores. The larger
slot in the adaptor must be aligned with the
large slot in the wall receptacle to provide
proper polarity in the connection of the
power cord.
Installation Instructions
CAUTION: Attaching the adaptor
ground terminal to the wall
receptacle cover screw does not
ground the appliance unless the
screw is metal, and not insulated,
and the wall receptacle is grounded
through the house wiring. The
customer should have the circuit
checked by a qualified electrician
to make sure the receptacle is
properly grounded.
When disconnecting the power cord from the
adaptor, always hold the adaptor with one
hand. If this is not done, the adaptor ground
terminal is very likely to break with repeated
use. Should this happen, DO NOT USE the
appliance until a proper ground has again
been established.
Usage situations where appliance power
cord will be disconnected frequently.
Do not use an adaptor plug in these situations
because disconnection of the power cord
places undue strain on the adaptor and leads
to eventual failure of the adaptor ground
terminal. The customer should have the two-
prong receptacle replaced with a three-prong
(grounding) receptacle by a qualified
electrician before using the appliance.
23
Installation—Electrical Connections
D

E1
Installation Instructions
24
The electrode of the spark igniter is exposed. Be careful not to push any cooktop controls while
the top of the burner is removed. Do not remove the top or touch the electrode of any burner
while another burner is turned on. Electrical shock might result.
Assembling the Cooktop Burners
a. Place the burner head on the burner bowl, so that the location of the spark igniter matches up
with the opening in the burner head.
b. Position the burner cap on the burner head. Make sure all burner heads and burner caps are
placed onto the correct base locations. See the Care and cleaning of the cooktop section for
correct locations of the burner parts.
c. Place the burner grate over the burner assembly and into the burner bowl. The bottoms of the
burner grates have fingers that fit into the corresponding indentations in the burner bowl.
Cooktop Burners
E
BURNER GRATE
BURNER CAP
BURNER HEAD
SPARK IGNITER
BURNER
BOWL

E2
Installation Instructions
25
Checking the Igniters
Operation of the electric igniters should
be checked after the cooktop and supply
line have been carefully checked for leaks
and the cooktop has been connected to
the electrical power.
a. Push and turn a burner valve to the LITE
position.
•The burner valve should light when gas
is available to the burner
•Once the burner lights, it should be
turned out of the LITE position.
b. Try each valve separately until all burners
have been checked.
E3
Cooktop Spark Ignition When you turn the—
cooktop knob to LITE, the spark igniter
makes a series of electric sparks (ticking
sounds) which light the burner.
During a power failure, the burners will not
light automatically. In an emergency, a
cooktop burner may be lit with a match by
following the steps below.
WARNING: Lighting gas burners with a
match is dangerous. You should match
light the cooktop burners only in an
emergency.
Burner Ignition
a. Light a match and hold the flame near the
burner you want to light. Wooden matches
work best.
b. Push in and turn the control knob slowly.
Be sure you are turning the correct knob
for the burner you are lighting.
NOTE: If the burner does not light within five
seconds, turn the knob off and wait one minute
before trying again.
E4
The Burner Flames
Turn each burner on. Flames should be blue
in color with no trace of yellow. The burner
flames should not flutter or blow away from
the burner. The inner cone of the flame
should be between 1/2
″
and 3/4
″
long.
Burners should be checked frequently
WARNING: If you attempt to measure
the inner cone of the flame, please use
caution. Burns could result.
Cooktop
Burner
1/2" to 3/4"
Cooktop Burners cont.
E

26
Installation Instructions
Operation Checklist
Double check to make sure
everything in this manual has been
completed. Rechecking steps will
ensure safe use of the cooktop.
Make sure all controls are left in
the OFF position.
Make sure the flow of
combustion and ventilation air
to the cooktop is unobstructed.
The serial plate for your cooktop
is located on the bottom of the
burner box. In addition to the
model and serial numbers, it tells
you the ratings of the burners
and the type of fuel and pressure
the cooktop was adjusted for
when it left the factory.
Recheck Steps:
Double check to make sure
everything in this manual has been
completed. Rechecking steps will
ensure safe use of the cooktop.
When ordering parts, always
include the serial number, model
number and a code letter to
ensure proper replacement parts.
CONVERTING TO LP GAS
(or converting back to natural
gas from LP)
This cooktop leaves the factory set for use
with natural gas. If you want to convert to LP
gas, the conversion must be performed by a
qualified LP gas installer.
The conversion instructions and LP orifices
can be found in the accessories bag, close
to the pressure regulator.
Keep these instructions and the orifices
in case you want to convert back to
natural gas.

27
Before you call for service… ge.com
Troubleshooting Tips
Save time and money! Review the chart on this page first
and you may not need to call for service.
Problem Possible Causes What To Do
Burners have yellow or The combustion quality of •Use the illustrations below to determine if your burner
yellow-tipped flames burner flames needs to be flames are normal. If burner flames look like A, call for
determined visually. service. Normal burner flames should look like Bor C,
depending on the type of gas you use. With LP gas, some
yellow tipping on outer cones is normal.
A–Yellow flames B–Yellow tips C–Soft blue flames
Call for service Normal for natural on outer cones
Normal for LP gas gas
Control knobs Controls improperly set. •To turn from the position, push the knob in and OFF
will not turn then turn.
Burners do Plug on cooktop is not •Make sure electrical plug is plugged into a live, properly
not light completely inserted in the grounded outlet.
electrical outlet.
Gas supply not connected •See the Installation Instructions section.
or turned on.
A fuse in your home may be •Replace the fuse or reset the circuit breaker.
blown or the circuit breaker
tripped.
Igniter orifice in burner body •Remove the obstruction. See the Care and cleaning of
may be clogged. the cooktop section.
Burner parts not replaced •See the Care and cleaning of the cooktop section.
correctly.
Hole in burner top behind •Use a small sewing needle to unplug.
the igniter may be clogged.
Ticking sound of spark Control knob is still •Turn the knob out of the LITE position to the desired
igniter persists after in the LITE position. setting.
burner lights •Turn the burner off and relight. If ticking is still
present, call for service.
Ticking sound persists Be sure the knob is in the •Remove knob by pulling it straight off the stem and
after burner is turned off OFF position. check the bottom of the knob for any buildup of soil.
Burner flames very Improper air to gas ratio. •If cooktop is connected to LP gas, check all steps
large or yellow in the Installation Instructions section.
Safety Instructions Operating Instructions Care and Cleaning Troubleshooting Tips Consumer Support

Safety InstructionsOperating InstructionsCare and CleaningTroubleshooting TipsConsumer Support
Notes.
28

29
General Electric Company
Warranty Registration Department
P.O. Box 32150
Louisville, KY 40232-2150
GE Service Protection Plus™
GE, a name recognized worldwide for quality and dependability, offers you
Service Protection Plus ™—comprehensive protection on all your appliances—
No Matter What Brand!
Benefits Include:
•Backed by GE
•All brands covered
•Unlimited service calls
•All parts and labor costs included
•No out-of-pocket expenses
•No hidden deductibles
•One 800 number to call
You will be completely satisfied with our service protection or you may request your money back
on the remaining value of your contract. No questions asked. It’s that simple.
Protect your refrigerator, dishwasher, washer and dryer, range, TV, VCR and much more—any brand!
Plus there’s no extra charge for emergency service and low monthly financing is available. Even icemaker
coverage and food spoilage protection is offered. You can rest easy, knowing that all your valuable
household products are protected against expensive repairs.
Place your confidence in GE and call us in the U.S. toll-free at 800.626.2224
for more information.
*All brands covered, up to 20 years old, in the continental U.S.
We’ll Cover Any Appliance.
Anywhere. Anytime.*
Please place in envelope and mail to:
✁Cut here

Consumer Product Ownership Registration
Important
Mail
Today!
First
Name
Mr. ■
■
■
■
■Ms. ■
■
■
■
■Mrs. ■
■
■
■
■Miss ■
■
■
■
■
Street
Address
City State
Date Placed
In Use
Month Day Year
Zip
Code
Apt. #
Last
Name
Phone
Number _ _
Consumer Product Ownership Registration
Dear Customer:
Thank you for purchasing our product and thank you for placing your confidence in us.
We are proud to have you as a customer!
Follow these three steps to protect your new appliance investment:
Important: If you did not get a registration card with your
product, detach and return the form below to
ensure that your product is registered, or register
online at ge.com.
12 3
Model Number Serial Number
✁Cut here
Complete and mail
your Consumer
Product Ownership
Registration today.
Have the peace of
mind of knowing we
can contact you in
the unlikely event of
a
safety modification.
After mailing the
registration below,
store this document
in a safe place. It
contains information
you will need should
you require service.
Our service number is
800.GE.CARES
(800.432.2737).
Read your Owner’s
Manual carefully.
It will help you
operate your new
appliance properly.
Model Number Serial Number
E-mail Address*
30
GE Consumer & Industrial
Appliances
General Electric Company
Louisville, KY 40225
ge.com
* Please provide your e-mail address to receive, via e-mail, discounts, special offers and other
important communications from GE Appliances (GEA).
■
■
■
■
■ Check here if you do not want to receive communications from GEA’s carefully selected
partners.
FAILURE TO COMPLETE AND RETURN THIS CARD DOES NOT DIMINISH YOUR
WARRANTY RIGHTS.
For information about GEA’s privacy and data usage policy, go to ge.com and click on “Privacy
Policy” or call 800.626.2224.

31
Notes.
Safety Instructions Operating Instructions Care and Cleaning Troubleshooting Tips Consumer Support

GE Gas Cooktop Warranty. (For Customers in the United States)
All warranty service provided by our Factory Service Centers,
or an authorized Customer Care®technician. To schedule
service, on-line, 24 hours a day, visit us at ge.com, or call
800.GE.CARES (800.432.2737). Please have serial number and
model number available when calling for service.
For The Period Of: GE Will Replace:
One Year Any part of the cooktop which fails due to a defect in materials or workmanship.
From the date of the During this limited one-year warranty, GE will also provide, free of charge, all labor
original purchase and related service costs to replace the defective part.
■Service trips to your home to teach you how to use
the product.
■Improper installation, delivery or maintenance.
■Failure of the product if it is abused, misused,
or used for other than the intended purpose or
used commercially.
■Replacement of house fuses or resetting of circuit
breakers.
■Damage to the product caused by accident, fire, floods
or acts of God.
■Incidental or consequential damage caused by possible
defects with this appliance.
■Damage caused after delivery.
■Product not accessible to provide required service.
What GE Will Not Cover:
This warranty is extended to the original purchaser and any succeeding owner for products purchased for
home use within the USA. If the product is located in an area where service by a GE Authorized Servicer is
not available, you may be responsible for a trip charge or you may be required to bring the product to an
Authorized GE Service Location for service. In Alaska, the warranty excludes the cost of shipping or service
calls to your home.
Some states do not allow the exclusion or limitation of incidental or consequential damages. This warranty
gives you specific legal rights, and you may also have other rights which vary from state to state. To know
what your legal rights are, consult your local or state consumer affairs office or your state’s Attorney General.
Warrantor: General Electric Company, Louisville, KY 40225
32
Staple your receipt here.
Proof of the original purchase
date is needed to obtain service
under the warranty.
Safety InstructionsOperating InstructionsCare and CleaningTroubleshooting TipsConsumer Support
EXCLUSION OF IMPLIED WARRANTIES—Your sole and exclusive remedy is product repair as provided
in this Limited Warranty. Any implied warranties, including the implied warranties of merchantability
or fitness for a particular purpose, are limited to one year or the shortest period allowed by law.

33
Safety Instructions Operating Instructions Care and Cleaning Troubleshooting Tips Consumer Support
GE Gas Cooktop Warranty. (For Customers in Canada)
All warranty service provided by our Factory Service Centers
or an authorized Customer Care
®technician. For service,
call 1.800.361.3400. Please have serial number and model
number available when calling for service.
For The Period Of: GE Will Replace:
One Year Any part of the cooktop which fails due to a defect in materials or workmanship.
From the date of the During this limited one-year warranty, GE will also provide, free of charge, all labor
original purchase and related service costs to replace the defective part.
■Service trips to your home to teach you how to use
the product.
■Improper installation, delivery or maintenance.
■Failure of the product if it is abused, misused,
or used for other than the intended purpose or
used commercially.
■Replacement of house fuses or resetting of circuit
breakers.
■Damage to the product caused by accident, fire, floods
or acts of God.
■Incidental or consequential damage caused by possible
defects with this appliance.
■Damage caused after delivery.
■Product not accessible to provide required service.
What GE Will Not Cover:
WARRANTOR IS NOT RESPONSIBLE FOR CONSEQUENTIAL DAMAGES.
Warrantor: CAMCO INC.
Staple your receipt here.
Proof of the original purchase
date is needed to obtain service
under the warranty.
EXCLUSION OF IMPLIED WARRANTIES—Your sole and exclusive remedy is product repair as provided
in this Limited Warranty. Any implied warranties, including the implied warranties of merchantability
or fitness for a particular purpose, are limited to one year or the shortest period allowed by law.

Register Your Appliance In the U.S.: ge.com
Register your new appliance on-line—at your convenience! Timely product registration will allow for enhanced
communication and prompt service under the terms of your warranty, should the need arise. You may also mail
in the pre-printed registration card included in the packing material. In Canada: geappliances.ca
34
Consumer Support.
GE Appliances Website In the U.S.: ge.com
Have a question or need assistance with your appliance? Try the GE Appliances Website 24 hours a day,
any day of the year! For greater convenience and faster service, you can now download Owner’s Manuals,
order parts, catalogs, or even schedule service on-line. You can also “Ask Our Team of Experts
™” your questions,
and so much more... In Canada: geappliances.ca
Schedule Service In the U.S.: ge.com
Expert GE repair service is only one step away from your door. Get on-line and schedule your service at your
convenience 24 hours any day of the year! Or call 800.GE.CARES (800.432.2737) during normal business hours.
In Canada, call 1.800.361.3400
Real Life Design Studio In the U.S.: ge.com
GE supports the Universal Design concept—products, services and environments that can be used by people of all
ages, sizes and capabilities. We recognize the need to design for a wide range of physical and mental abilities and
impairments. For details of GE’s Universal Design applications, including kitchen design ideas for people with
disabilities, check out our Website today. For the hearing impaired, please call 800.TDD.GEAC (800.833.4322).
In Canada, contact: Manager, Consumer Relations, Camco, Inc.
Suite 310, 1 Factory Lane
Moncton, N.B. E1C 9M3
Extended Warranties In the U.S.: ge.com
Purchase a GE extended warranty and learn about special discounts that are available while your warranty is still
in effect. You can purchase it on-line anytime, or call 800.626.2224 during normal business hours. GE Consumer
Home Services will still be there after your warranty expires. In Canada, call 1.888.261.2133
Parts and Accessories In the U.S.: ge.com
Individuals qualified to service their own appliances can have parts or accessories sent directly to their homes
(VISA, MasterCard and Discover cards are accepted). Order on-line today, 24 hours every day or by phone at
800.626.2002 during normal business hours.
Instructions contained in this manual cover procedures to be performed by any user. Other servicing generally should be
referred to qualified service personnel. Caution must be exercised, since improper servicing may cause unsafe operation.
Customers in Canada should consult the yellow pages for the nearest Camco service center, or call 1.888.261.3055.
Contact Us In the U.S.: ge.com
If you are not satisfied with the service you receive from GE, contact us on our Website with all the details
including your phone number, or write to: General Manager, Customer Relations
GE Appliances, Appliance Park
Louisville, KY 40225
In Canada: geappliances.ca, or write to: Director, Consumer Relations, Camco, Inc.
Suite 310, 1 Factory Lane
Moncton, N.B. E1C 9M3
Printed in Mexico

Impreso en México
Soporte al Consumidor.
Página Web de GE Appliances ge.com
¿Tiene alguna pregunta sobre su electrodoméstico? ¡Pruebe la página Web de GE Appliances 24 horas al
día, cualquier día del año! Para mayor conveniencia y servicio más rápido, p35-ya puede descargar los Manuales
de los Propietarios, pedir piezas o incluso hacer una cita en línea para que vengan a realizar una
reparación. También puede “Ask Our Team of Experts™” (Preguntar a nuestro equipo de expertos)
sobre cualquier cuestión y mucho más...
Solicite una reparación ge.com
El servicio de expertos GE está a tan sólo un paso de su puerta. ¡Entre en línea y solicite su reparación
cuando le venga bien 24 horas al día cualquier día del año! O llame al 800.GE.CARES (800.432.2737)
durante horas normales de oficina.
Real Life Design Studio (Estudio de diseño para la vida real)
ge.com
GE apoya el concepto de Diseño Universal—productos, servicios y ambientes que pueden usar gente de
todas las edades, tamaños y capacidades. Reconocemos la necesidad de diseñar para una gran gama de
habilidades y dificultades físicas y mentales. Para más detalles cobre las aplicaciones de GE Diseño Universal,
incluyendo ideas de diseño para la cocina para personas con discapacidades, mire nuestra página Web hoy
mismo. Para personas con dificultades auditivas, favor de llamar al 800.TDD.GEAC (800.833.4322).
Garantías ampliadas ge.com
Compre una garantía ampliada y obtenga detalles sobre descuentos especiales disponibles mientras su
garantía está aún activa. Puede comprarla en línea en cualquier momento, o llamar al 800.626.2224
durante horas normales de oficina. GE Consumer Home Services estará aún ahí cuando su garantía termine.
Piezas y accesorios ge.com
Aquellos individuos con la calificación necesaria para reparar sus propios electrodomésticos pueden
pedir que se les manden las piezas o accesorios directamente a sus hogares (aceptamos las tarjetas
VISA, MasterCard y Discover). Haga su pedido en línea hoy, 24 horas cada día o llamar por teléfono
al 800.626.2002 durante horas normales de oficina.
Las instrucciones descritas en este manual cubren los procedimientos a seguir por cualquier usuario. Cualquier
otra reparación debería, por regla general, referirse a personal calificado autorizado. Debe ejercerse precaución
ya que las reparaciones incorrectas pueden causar condiciones de funcionamiento inseguras.
Póngase en contacto con nosotros ge.com
Si no está satisfecho con el servicio que recibe de GE, póngase en contacto con nosotros en nuestra página
Web indicando todos los detalles así como su número de teléfono o escríbanos a:
General Manager, Customer Relations
GE Appliances, Appliance Park
Louisville, KY 40225
Registre su electrodoméstico ge.com
¡Registre su nuevo electrodoméstico en línea—cuando usted prefiera! El registrar su producto a tiempo le
proporcionará, si surgiera la necesidad, una mejor comunicación y un servicio más rápido bajo los términos
de su garantía. También puede enviar su tarjeta de registro pre-impresa que se incluye en el material
de embalaje.
34

33
Seguridad Operación Cuidado y limpieza Solucionar problemas Apoyo al consumidor
Garantía de GE para su estufa a gas.
■Viajes de servicio a su casa para mostrarle cómo
funciona el equipo.
■Instalación, entrega o mantenimiento inapropriada.
■Fallo del producto resultante de modificaciones al
producto o debido a uso incorrecto incluyendo no
proporcionar mantenimiento razonable y necesario.
■Reemplazo de fusibles de la casa o reajuste del sistema
de circuitos.
■Daño al producto causado por accidentes, incendios,
inundaciones o actos de la naturaleza de fuerza mayor.
■Daños incidentales o consecuenciales causados por
defectos posibles con este aparato.
■Daños causados después de la entrega.
■Producto no accesible para facilitar el servicio requerido.
Lo que no está cubierto por GE:
Esta garantía se extiende al comprador original y cualquier comprador posterior de productos comprados para
uso residencial dentro des Estados Unidos. Si el producto está situado en un área que no dispone de servicio
por parte de un proveedor de servicio autorizado de GE, podría tener que hacerse cargo de los costes de envío
o bien podría solicitársele que lleve el producto a una centro de servicio de GE autorizado para realizar
la reparación. En Alaska, la garantía excluye el costo de envío o las visitas de servicio a su casa.
Algunos estados no permiten la exclusión o las limitaciones de daños incidentales o consecuenciales. Esta garantía
da derechos legales específicos, y usted podría tener otros derechos que variarán de estado a estado. Para saber
cuáles son sus derechos legales, consulte a la oficina de asuntos del consumidor local o la oficina del Prucurador
(Attorney General) en su localidad.
Garante: General Electric Company. Louisville, KY 40225
Todos los servicios de garantía los proporcionan nuestros Centros
de Reparación de Fábrica o nuestros técnicos Customer Care®
autorizados. Para concertar una cita de reparación, en línea,
24 horas al día, visítenos en ge.com, o llame al 800.GE.CARES
(800.432.2737). Cuando llame para solicitar servicio, por favor
tenga a mano el número de serie y el número de modelo.
Pegue aquí su recibo.
Se requiere facilitar prueba
de la fecha de compra original
para obtener un servicio
bajo la garantía.
Por el período de: GE reemplazará:
Un año Cualquier parte de la estufa a gas que falle debido a defectos en los materiales o en
A partir de la fecha la fabricación. Durante este garantía limitada de un año, GE también proporcioná, sin costo
de la compra original alguno, toda la mano de obra y servicio relacionado para reemplazar partes defectuosas.
EXCLUSIÓN DE GARANTÍAS IMPLÍCITAS—Su único y exclusivo derecho es la reparación del producto, tal
y como se indica en esta Garantía limitada. Cualquier garantía implícita, incluyendo las garantías implícitas
de comerciabilidad o adecuación para un fin determinado, están limitadas a un año o el período de tiempo
más breve permitido por la ley.

SeguridadOperaciónCuidado y limpiezaSolucionar problemasApoyo al consumidor
Notas.
32

31
Apoyo al consumidorSolucionar problemasOperaciónSeguridad Cuidado y limpieza
Notas.

SeguridadOperaciónCuidado y limpiezaSolucionar problemasApoyo al consumidor
Notas.
30

29
Apoyo al consumidorSolucionar problemasOperaciónSeguridad Cuidado y limpieza
Notas.

SeguridadOperaciónCuidado y limpiezaSolucionar problemasApoyo al consumidor
Notas.
28

Antes de llamar para solicitar servicio… ge.com
Solucionar problemas
¡Ahorre dinero y tiempo! Revise la siguiente tabla primero y
quizás no tenga que llamar para solicitar servicio.
Problema Causas posibles Qué hacer
Los quemadores tienen La calidad de la combustión •Use las siguientes ilustraciones para determinar si las
llamas amarillas o de las llamas del quemador llamas de su quemador son normales. Si las llamas del
con puntas amarillas se debe determinar quemador tienen el aspecto de A, llame al servicio.
visualmente. Las llamas normales de los quemadores deben parecerse
a Bo C, según el tipo de gas que se esté utilizando. Con
gas LP, es normal que las puntas de las llamas sean amarillas.
A–Llamas amarillas B–Llamas con C–Llamas azules
Llame al servicio Normales para puntas amarillas
Normales para LP gas natural
Las perillas de control Los controles se instalaron •Para girar de la posición , empuje la perilla y OFF
no giran incorrectamente. luego gire.
Los quemadores El enchufe de la estufa no está •Cerciórese de que el enchufe esté conectado en un
no encienden completamente conectado en tomacorriente activo, correctamente conectado a tierra.
el tomacorriente.
El suministro de gas no está •Consulte la sección Instrucciones de instalación.
conectado o encendido.
Es posible que un fusible o el •Reemplace el fusible o vuelva a establecer el interruptor
interruptor de circuitos se de circuitos.
haya saltado en su casa.
Es posible que el orificio del •Retire la obstrucción. Consulte la sección
ignitor en la caja del Cuidado y limpieza.
quemador esté obstruido.
Las partes del quemador no •Consulte la sección Cuidado y limpieza.
se reemplazaron correctamente.
El orificio en el quemador •Use una aguja de coser pequeña para destaparlo.
superior detrás del ignitor
puede estar obstruido.
El sonido de chispa La perilla de control todavía •Gire la perilla de la posición LITE y ajústela en
persiste después de se encuentra en la posición LITE.la posición deseada.
que el quemador enciende •Apague el quemador y vuelva a encenderlo. Si todavía
se escucha el sonido de chispa, llame al servicio técnico.
El sonido de chispa Cerciórese de que la perilla •Retire la perilla halándola en línea recta fuera del
persiste después de esté en la posición OFF.vástago y revise la parte de abajo de la perilla en
haber apagado el busca de cualquier acumulación de suciedad.
quemador
Las llamas de los Una proporción incorrecta •Si la estufa está conectada a gas LP, verifique todos los
quemadores son muy de aire y gas. pasos en la sección Instrucciones de instalación.
grandes o amarillas
Seguridad Operación Cuidado y limpieza Solucionar problemas Apoyo al consumidor
27

26
Instrucciones de instalación
Lista de control de operación
Cerciórese de que todo lo contenido
en esta guía ha sido completado.
Repasar los pasos garantizará el
uso seguro de la estufa.
Cerciórese de que todos los
controles se encuentran en la
posición OFF (APAGADO).
Cerciórese de que el flujo de
combustión y el aire de ventilación
hacia la estufa no está obstruido.
Una placa con el número de serie
está localizada en la parte inferior
de la caja de los quemadores.
Además de los números de
modelo y serie, esta placa le indica
los índices de los quemadores y
el tipo de combustible y presión a
que la estufa fue ajustada cuando
salió de la factoría.
Reinspección de los pasos:
Inspeccione otra vez que todo
lo contenido en esta guía se haya
completado. Repasar los pasos
garantizará el uso seguro de
la estufa.
Cuando se disponga a ordenar
partes, siempre incluya el número
de serie, el número del modelo y
una letra código para garantizar que
las partes de repuesto serán las
apropiadas.
CÓMO CONVERTIR A GAS LP
(o convertir de gas LP a gas
natural)
Esta estufa sale de fábrica lista para
utilizarse con gas natural. Si desea
convertirla a gas LP, sólo un gasista
calificado de gas LP debe realizarlo.
Las instrucciones de conversión y los orificios
de gas LP se encuentran en la bolsa de
accesorios, cerca del regulador de presión.
Guarde las instrucciones y los orificios en
caso de que desee convertir la estufa de
nuevo a gas natural.

E2
Instrucciones de instalación
Cómo inspeccionar
los encendedores
La operación de los encendedores eléctricos
debería ser inspeccionada después de que
la estufa y la línea de suministro han sido
cuidadosamente inspeccionadas en busca
de fugas y la estufa p44-ha sido conectada a la
fuente eléctrica.
a. Empuje y encienda una válvula de uno
de los quemadores hasta la posición LITE
(Encendido)
• La válvula del quemador deberá
encenderse cuando el gas comienza a
estar disponible en el quemador.
• Una vez el quemador se enciende,
debe girarse hasta alcanzar la posición
LITE (Encendido).
b. Pruebe cada válvula individualmente
hasta que todos los quemadores hayan
sido inspeccionados.
E3
Ignición de Chispa de la Estufa—Cuando gire
la perilla hacia la posición LITE de la estufa, el
encendedor a chispa hace una serie de chispas
eléctricas (un sonido intermitente) el cual
enciende el quemador. Durante una interrupción
del suministro eléctrico, los quemadores no se
encenderán automáticamente. En una
emergencia, los quemadores pueden encenderse
con cerillas siguiendo los pasos abajo.
ADVERTENCIA: Encender un quemador
de gas con cerillas es peligroso.
Solamente encienda los quemadores de
esta manera en casos de emergencia.
Ignición de los quemadores
a. Encienda una cerilla y sostenga la llame cerca
del quemador que desea encender. Las
cerillas de madera son más recomendables.
b. Acérquelo y gire lentamente el botón del
quemador que desea encender. Cerciórese
de que está girando el botón correspondiente
al quemador que desea encender.
NOTA: Si el quemador no enciende dentro de cinco
segundos, gire el botón hasta la posición de apagado
y espere un minuto antes de intentarlo de nuevo.
E4
Las llamas del quemador
Encienda cada uno de los quemadores. Las
llamas deberían ser azules sin evidencias de
amarillo en lo absoluto. Las llamas de los
quemadores no deberían
ondear ni agitarse hacia el
exterior de los quemadores. El
cono interno de la llama debería
ser de 1/2 a 3/4 de largo.″ ″
Se deberán inspeccionar los
quemadores con frecuencia
ADVERTENCIA: Si intenta medir el
cono interno de la llama, por favor,
tenga cuidado. Podría quemarse.
Quemadores de la estufa cont.
E
25
Quemador 1/2″
a
3/4″

E1
Instrucciones de instalación
24
El electrodo del encendedor a chispa está descubierto. Tenga cuidado de no empujar ninguno de
los controles de la estufa mientras la parte superior del quemador se retira. No retire la parte superior
ni toque el electrodo de ninguno de los quemadores mientras otro quemador está encendido. Esto
podría resultar en una descarga eléctrica.
Cómo ensamblar los quemadores de la estufa
a. Coloque la cabeza del quemador sobre el recipiente del quemador, de manera que la ubicación
del encendedor a chispa quede en línea con la abertura en la cabeza del quemador.
b. Coloque la tapa del quemador en la cabeza del quemador. Asegúrese de que todas las cabezas
y tapas de los quemadores estén colocadas en las ubicaciones correctas. Ver la sección de
Cuidado y limpieza de la estufa para las ubicaciones correctas de las piezas de los quemadores.
c. Coloque la parrilla sobre la ensambladura del quemador y dentro del recipiente del quemador.
Los fondos de las parrillas de los quemadores tiene puntas que encajan en las indenciones
correspondientes en el recipiente del quemador.
Quemadores de la estufa
E
PARRILLA DEL QUEMADOR
TAPA DEL QUEMADOR
CABEZA DEL QUEMADOR
ENCENDEDOR A CHISPA
RECIPIENTE
DEL QUEMADOR

Situaciones de uso
donde el cable eléctrico
del electrodom stico seré á
desconectado con poca
frecuencia.
D4
Método temporal
(los adaptadores de enchufe
no est n permitidos en Canad )á á
Alinee las
ranuras/
puntas grandes
Aseg rese de que existe ú
una conexi n a tierra apropiada ó
y firme antes de usar.
Para circuitos de 15 amperios solamente.
No use un adaptador en un circuito de 20
amperios. Donde los códigos locales lo
permitan, una CONEXIÓN TEMPORAL puede
hacerse a un tomacorriente de pared
apropiadamente conectado a tierra usando un
adaptador UL disponible en la mayoría de las
tiendas ferreterias. La ranura mayor en el
adaptador debe estar alineada con la ranura
mayor en el tomacorriente de pared para
proporcionar la polaridad apropiada en la
conexión del cable eléctrico.
Instrucciones de instalación
PRECAUCIÓN: El hecho de adherir
el terminal a tierra del adaptador a la
cubierta del tornillo del tomacorriente
de la pared no conecta el
electrodoméstico a tierra a no ser que el
tornillo sea metálico, y no esté aislado,
y el tomacorriente de pared esté
conectado a tierra a través del cableado
de la casa. El cliente debe solicitar que
el circuito sea inspeccionado por un
electricista calificado para cerciorarse
de que el tomacorriente está conectado
a tierra apropiadamente.
Cuando usted desconecte el cable eléctrico del
adaptador, siempre sostenga el adaptador con
una mano. Si no lo hace, es posible que los
terminales de tierra del adaptador se rompan
por el uso repetido. Si esto sucediera, NO USE
el electrodoméstico hasta que la conexión a
tierra haya sido restablecida.
Situaciones de uso donde el cable eléctrico
del electrodoméstico ser desconectado coná
frecuencia. No use un enchufe adaptador en
estas situaciones p46-ya que la desconexión del
cable eléctrico ejerce tensión indebida en el
adaptador y podría finalmente causar un fallo
en el terminal conectado a tierra del adaptador.
El cliente debería hacer los arreglos para que
sus tomacorrientes de dos puntas sean
reemplazados calificado antes de usar el
electrodoméstico.
23
Instalación—Conexiones Eléctricas
D

22
D1 D2
Instrucciones de instalación
Debido a los peligros potenciales bajo ciertas
condiciones, no recomendamos el uso de
una extensión eléctrica. Sin embargo, si no
obstante nuestra recomendación decide usar
una extensión eléctrica, es absolutamente
necesario que la misma sea una extensión
especial para electrodomésticos tipo UL con
3 alambres, uno conectado a tierra, y que el
nivel de amperios que pueda transportar sea
mayor que el nivel de amperios del circuito.
Tales extensiones eléctricas las puede
adquirir en sus distribuidores de
electrodomésticos locales.
IMPORTANTE: (Por favor, lea cuidadosamente)
PARA SEGURIDAD PERSONAL, ESTE
ELECTRODOMÉSTICO DEBE ESTAR
CONECTADO A TIERRA DE MANERA
APROPIADA.
Un suministro eléctrico apropiado y un
tomacorriente deben ser usados para
operar las partes eléctricas de su estufa.
L
N
D3 Donde se encuentre un tomacorriente
de pared estándar de dos puntas, será
responsabilidad personal y obligación
del cliente hacer los arreglos para que
el mismo sea cambiado por uno de tres
puntas y apropiadamente conectado
a tierra.
Bajo ninguna circunstancia corte o
remueva la punta de conexión a tierra
del cable el ctrico de la estufa. Noé
proporcionar polarizaci n apropiadaó
podría causar condiciones peligrosas.
a. El cable eléctrico de este electrodoméstico
está equipado con un enchufe de tres
puntas (con conexión a tierra), el cual debe
ser usado para que esté apropiadamente
conectado a tierra en un tomacorriente de
120 voltios estándar, y con corriente normal
de 60 ciclos de corriente alterna.
b. Si no tiene un tomacorriente de tres puntas
conectado a tierra, haga que un electicista
calificado le instale uno.
c. Un adaptador de tierra será necesario para
convertir el viejo hasta que el tomacorriente
pueda ser reemplazado. Este método es
solamente temporal, y un electricista
calificado debe probarlo para cerciorarse
de que el mismo cumple con las
especificaciones.
Instalación—Conexiones Eléctricas
D
Asegúrese de que
exista una conexión
a tierra apropiada y
firme antes de usar

21
Instrucciones de instalación
C6 Inspeccione en búsqueda
de fugas
Después de conectar la estufa al gas,
inspeccione el sistema en búsqueda de fugas
con un manómetro disponible. Si un manómetro
no está disponible, conecte la línea de gas hacia
la estufa y use un detector de fugas líquido en
todas las juntas y las conexiones para verificar
que no existen fugas. Apriete todas las
conexiones si es necesario para prevenir fugas
de gas en la estufa o en la línea de suministro.
Inspeccione la alineación de las válvulas
después de conectar la estufa al suministro de
gas para cerciorarse de que la tubería del
colector no p48-ha sido movida. Una alineación
inapropiada podría causar que el vástago de
la válvula haga fricción en el panel de control,
resultando en una fuga de gas en la válvula.
¡NO USE LA LLAMA ABIERTA PARA
INSPECCIONAR SI EXISTEN FUGAS!
Desconecte esta estufa y su válvula de
desconexión individual del sistema de tubería
de suministro de gas durante cualquier prueba
de presión del sistema a presiones de prueba
superiores a los 1/2″ psig.
Aíla estufa del suministro de las tuberías de gas
natural cerrando la válvula de desconexión
individual durante cualquier prueba de presión
del sistema de suministro de gas a presiones
de prueba igual o menor de 1/2″ psig.
INSTALACIÓN SOBRE
UN HORNO EMPOTRADO
Ver las instrucciones de instalación de
hornos empotrados para instrucciones
de instalación completas.
90°
DE ELEVACIÓN
COSTADOS
DEL GABINETE
AGUJERO DE 2"
DE DIÁMETRO (20 7/8"
DESDE LA PARTE
DELANTERA DE LA
ENCIMERA HASTA
EL CENTRO DEL
AGUJERO)
5" AL CENTRO
DE UN AGUJERO
DE 2" DE DIÁMETRO
DESDE LA ENCIMERA
C7
Cómo instalar la estufa cont.
C
C5 Complete la conexión
con un acoplador
Instale un
acoplador entre
el regulador y
la válvula de
desconexión
para completar
la conexión.
Regulador
de presi nó
V lvula de á
desconexi nó
Acoplador
Tomacorriente
el ctrico a 12" é
por debajo de
la encimera

C1 C3
20
Instrucciones de instalación
Esta estufa está diseñada para operar con gas
natural a una presión de columna de agua de
4". Es transportada desde la factoría con sus
ajustes para funcionar con gas natural.
El regulador de presión convertible
proporcionado con el electrodoméstico debe
ser conectado en serie con el colector de la
estufa y debe permanecer en serie con la
línea de suministro sin importar si se está
usando gas natural o gas LP. PARA UNA
OPERACIÓN APROPIADA, LA PRESIÓN DE
ADMISIÓN MÁXIMA DEL REGULADOR NO
DEBE SER MAYOR DE 14 DE PRESIÓN DE″
COLUMNA DE AGUA. Para inspeccionar el
regulador, la presión de admisión debe ser de
por lo menos 1 (ó 3,4 KPA) por encima de″
los ajustes de salida del regulador. Si el
regulador está ajustado para una presión de
columna de agua de 4 , la presión de″
admisión debe ser de por lo menos 5 . Si el″
regulador está ajustado para 10 , la presión″
de admisión debe ser de por lo menos 11″.
La línea de suministro de gas hacia la estufa
debe ser de tuberías de 1/2″ ó 3/4″.
Proporcione un suministro
de gas adecuado Cómo instalar el regulador
ADVERTENCIA: Nunca reutilice
conectores flexibles viejos. El uso de
conectores flexibles viejos puede causar
fugas de gas y lesiones personales.
Siempre use conectores flexibles
nuevos cuando se disponga a instalar
un electrodom stico de gas.é
Atornille una sección
de la tubería en cada uno
de los extremos del
regulador de presión.
C4 Instale el regulador en el
fondo de la caja del quemador
Regulador
de presión
Válvula de
desconexión Tomacorriente
eléctrico a 12"
por debajo
del acoplador
Atornille el
regulador y la
conexión de la
tubería en el
fondo de la caja
del quemador.
Cerciórese de que
la parte superior
del quemador
esté orientada
hacia el frente
del gabinete,
con acceso fácil
a través de
las puertas
del gabinete.
NUNCA REUTILICE CONECTORES
VIEJOS CUANDO INSTALE ESTA ESTUFA
Para reducir la posibilidad de fugas de gas,
aplique cinta teflon o un compuesto para
roscas aprobado para ser usado con LP o
con Gases Naturales en todas las conexiones
que incluyen roscas.
Regulador
de presi nó
Cómo instalar la estufa
C
C2
Localice el tomacorriente
eléctrico y la válvula de
desconexión de gas debajo
de gabinete
V lvula de á
desconexi nó Tomacorriente
el ctrico a 12" é
por debajo de
la encimera
Instale una válvula de desconexión manual en
la línea de gas en un lugar de fácil acceso fuera
de la estufa. Cerciórese de que sabe cómo y
dónde desconectar el suministro de gas hacia
la estufa. Instale el tomacorriente eléctrico a
12″ por debajo de la encimera.
NUNCA REUTILICE
CONECTORES
VIEJOS CUANDO
INSTALE ESTA
ESTUFA.
Produkt Specifikationer
| Mærke: | GE |
| Kategori: | Ovn |
| Model: | JGP337SEJSS |
Har du brug for hjælp?
Hvis du har brug for hjælp til GE JGP337SEJSS stil et spørgsmål nedenfor, og andre brugere vil svare dig
Ovn GE Manualer

27 Februar 2025
13 Januar 2025
13 Januar 2025
13 Januar 2025
12 Januar 2025
11 Januar 2025
27 December 2024
27 December 2024
27 December 2024
15 December 2024
Ovn Manualer
- Ovn DeLonghi
- Ovn Sinbo
- Ovn Ikea
- Ovn Bosch
- Ovn SilverCrest
- Ovn PKM
- Ovn Gram
- Ovn Sencor
- Ovn Krups
- Ovn Maxxmee
- Ovn Wolkenstein
- Ovn Siemens
- Ovn Day
- Ovn Samsung
- Ovn Scandomestic
- Ovn Breville
- Ovn Zanussi
- Ovn Cylinda
- Ovn Panasonic
- Ovn Candy
- Ovn Fisher & Paykel
- Ovn Gorenje
- Ovn AENO
- Ovn Husqvarna
- Ovn VOX
- Ovn Miele
- Ovn Ninja
- Ovn Silverline
- Ovn Blomberg
- Ovn Philips
- Ovn Caso
- Ovn Concept
- Ovn Gastroback
- Ovn Steba
- Ovn Teka
- Ovn Rommelsbacher
- Ovn OK
- Ovn LG
- Ovn AEG
- Ovn Electrolux
- Ovn Thetford
- Ovn Bauknecht
- Ovn Elica
- Ovn Whirlpool
- Ovn Vestfrost
- Ovn Mitsubishi
- Ovn Sharp
- Ovn Hotpoint
- Ovn Dacor
- Ovn Melissa
- Ovn Atag
- Ovn Kenwood
- Ovn Sage
- Ovn Omega
- Ovn Qlima
- Ovn Hoover
- Ovn Daewoo
- Ovn Korona
- Ovn Arçelik
- Ovn Junker
- Ovn JennAir
- Ovn Sanyo
- Ovn Grundig
- Ovn Falmec
- Ovn Progress
- Ovn Presto
- Ovn De Dietrich
- Ovn Witt
- Ovn Indesit
- Ovn GYS
- Ovn Hotpoint Ariston
- Ovn Livoo
- Ovn Toshiba
- Ovn Klarstein
- Ovn Tracer
- Ovn Brother
- Ovn Ardo
- Ovn Furrion
- Ovn Etna
- Ovn Tefal
- Ovn Infiniton
- Ovn Trisa
- Ovn Princess
- Ovn Matsui
- Ovn Biltema
- Ovn Emerio
- Ovn Severin
- Ovn Scholtès
- Ovn Hansa
- Ovn Logik
- Ovn Hendi
- Ovn Bartscher
- Ovn Moulinex
- Ovn Sunbeam
- Ovn Sauber
- Ovn Westinghouse
- Ovn Ilve
- Ovn Eico
- Ovn Element
- Ovn Thomson
- Ovn Constructa
- Ovn Hyundai
- Ovn Proctor Silex
- Ovn Hisense
- Ovn TriStar
- Ovn Clas Ohlson
- Ovn Weber
- Ovn Brandt
- Ovn Airforce
- Ovn Adler
- Ovn Black And Decker
- Ovn Campingaz
- Ovn Camry
- Ovn Dometic
- Ovn Mestic
- Ovn Barbecook
- Ovn Eurom
- Ovn Blaupunkt
- Ovn Tomado
- Ovn Ariston
- Ovn Asko
- Ovn Atlas
- Ovn Becken
- Ovn BEKO
- Ovn Gaggenau
- Ovn Helkama
- Ovn Hoover-Helkama
- Ovn Iberna
- Ovn Ignis
- Ovn Küppersbusch
- Ovn Leonard
- Ovn Neff
- Ovn Privileg
- Ovn Smeg
- Ovn Viva
- Ovn Alpina
- Ovn Clatronic
- Ovn Mesko
- Ovn Quigg
- Ovn SEB
- Ovn Hitachi
- Ovn Buffalo
- Ovn Proficook
- Ovn Rowenta
- Ovn Dualit
- Ovn Medion
- Ovn Liebherr
- Ovn Ariston Thermo
- Ovn Fagor
- Ovn Haier
- Ovn König
- Ovn Cramer
- Ovn AFK
- Ovn Bifinett
- Ovn Bomann
- Ovn Morphy Richards
- Ovn Redmond
- Ovn Russell Hobbs
- Ovn WMF
- Ovn Ariete
- Ovn Innoliving
- Ovn KitchenAid
- Ovn Zelmer
- Ovn Luxor
- Ovn Rosieres
- Ovn Boretti
- Ovn FIAP
- Ovn Vivax
- Ovn Mora
- Ovn Thermex
- Ovn Crosley
- Ovn UPO
- Ovn Zanker
- Ovn George Foreman
- Ovn Galanz
- Ovn Maginon
- Ovn Amana
- Ovn Amica
- Ovn Arthur Martin-Electrolux
- Ovn Euromaid
- Ovn Merrychef
- Ovn KKT Kolbe
- Ovn Comfee
- Ovn Wolf
- Ovn Dimplex
- Ovn Finlux
- Ovn Telefunken
- Ovn Micromaxx
- Ovn Kernau
- Ovn Bertazzoni
- Ovn Caple
- Ovn SIBIR
- Ovn Zerowatt
- Ovn Thane
- Ovn Cuisinart
- Ovn Tiger
- Ovn Primo
- Ovn Orbegozo
- Ovn AGA
- Ovn Viking
- Ovn Emax
- Ovn CaterChef
- Ovn Franke
- Ovn Optimum
- Ovn Cadac
- Ovn Char-Broil
- Ovn Jamie Oliver
- Ovn Koenig
- Ovn Landmann
- Ovn OutdoorChef
- Ovn Rösle
- Ovn Taurus
- Ovn Veripart
- Ovn Zenith
- Ovn Faber
- Ovn Westfalia
- Ovn Balay
- Ovn Cata
- Ovn Exquisit
- Ovn Falcon
- Ovn Pelgrim
- Ovn Elba
- Ovn Elektra Bregenz
- Ovn ELIN
- Ovn Faure
- Ovn Juno
- Ovn Nodor
- Ovn Pyramis
- Ovn Respekta
- Ovn Rommer
- Ovn Stoves
- Ovn Schneider
- Ovn MPM
- Ovn Profilo
- Ovn Tesla
- Ovn Hanseatic
- Ovn G3 Ferrari
- Ovn Thor
- Ovn V-Zug
- Ovn Diplomat
- Ovn Maytag
- Ovn Gourmetmaxx
- Ovn Domo
- Ovn Mellerware
- Ovn BEEM
- Ovn Xblitz
- Ovn Atlantic
- Ovn Saro
- Ovn Thomas
- Ovn Bush
- Ovn Hamilton Beach
- Ovn Ambiano
- Ovn Binatone
- Ovn Unold
- Ovn Aspes
- Ovn Bellini
- Ovn Unox
- Ovn Scancool
- Ovn Nevir
- Ovn Imperial
- Ovn Techwood
- Ovn Inventum
- Ovn Edilkamin
- Ovn Swan
- Ovn Khind
- Ovn Midea
- Ovn Napoleon
- Ovn CDA
- Ovn Laica
- Ovn Frigidaire
- Ovn Frilec
- Ovn Bimar
- Ovn Ardes
- Ovn Suntec
- Ovn Esatto
- Ovn SVAN
- Ovn Everglades
- Ovn Danby
- Ovn Sogo
- Ovn RCA
- Ovn Koenic
- Ovn Scarlett
- Ovn Izzy
- Ovn Currys Essentials
- Ovn Cotech
- Ovn Lofra
- Ovn ECG
- Ovn Nova
- Ovn Saturn
- Ovn Eurochef
- Ovn Trebs
- Ovn Wamsler
- Ovn Fritel
- Ovn General Electric
- Ovn Eldom
- Ovn Navitel
- Ovn H.Koenig
- Ovn Proline
- Ovn Termozeta
- Ovn Hobart
- Ovn Stirling
- Ovn RGV
- Ovn Eta
- Ovn Bella
- Ovn Lynx
- Ovn Kalorik
- Ovn ILive
- Ovn Gemini
- Ovn Cecotec
- Ovn Berg
- Ovn Cosori
- Ovn Rinnai
- Ovn Solac
- Ovn Roadstar
- Ovn Royal Catering
- Ovn Friac
- Ovn Technika
- Ovn Efbe-Schott
- Ovn Seiki
- Ovn Baumatic
- Ovn Sirius
- Ovn Frifri
- Ovn Barazza
- Ovn Palson
- Ovn Chefman
- Ovn Traeger
- Ovn Meireles
- Ovn Steinberg
- Ovn Axis
- Ovn PowerXL
- Ovn Emeril Lagasse
- Ovn Tower
- Ovn Team
- Ovn Kenmore
- Ovn Brentwood
- Ovn Avanti
- Ovn Vestel
- Ovn Continental Edison
- Ovn Cookology
- Ovn Corbero
- Ovn Artusi
- Ovn Aurora
- Ovn La Germania
- Ovn Orima
- Ovn Lenoxx
- Ovn Magic Chef
- Ovn Duronic
- Ovn Lamona
- Ovn Bestron
- Ovn Philco
- Ovn Zanussi-Electrolux
- Ovn Waring Commercial
- Ovn Benavent
- Ovn Sôlt
- Ovn Novy
- Ovn Rex
- Ovn Classique
- Ovn TurboTronic
- Ovn Kunft
- Ovn Euro Appliances
- Ovn Summit
- Ovn Kogan
- Ovn LERAN
- Ovn DCG
- Ovn Coyote
- Ovn New Pol
- Ovn Delta
- Ovn Ravanson
- Ovn Matrix
- Ovn Fulgor Milano
- Ovn BLANCO
- Ovn Airlux
- Ovn Foster
- Ovn Sam Cook
- Ovn Oster
- Ovn Mach
- Ovn Consul
- Ovn Jocel
- Ovn Heller
- Ovn Kayoba
- Ovn Bourgini
- Ovn Signature
- Ovn Ufesa
- Ovn InAlto
- Ovn Manta
- Ovn Dash
- Ovn Tepro
- Ovn Vitrokitchen
- Ovn Comelec
- Ovn Orava
- Ovn Kaiser
- Ovn IFB
- Ovn Esperanza
- Ovn Arctic Cooling
- Ovn Haeger
- Ovn Linarie
- Ovn DPM
- Ovn Create
- Ovn Nutrichef
- Ovn Mistral
- Ovn Glem Gas
- Ovn Flama
- Ovn ARC
- Ovn Chef
- Ovn Thermador
- Ovn Kambrook
- Ovn Atosa
- Ovn Hestan
- Ovn Acec
- Ovn Kluge
- Ovn Leisure
- Ovn AYA
- Ovn Vedette
- Ovn Aroma
- Ovn Salton
- Ovn Arthur Martin
- Ovn Jata
- Ovn BlueStar
- Ovn Mabe
- Ovn Monogram
- Ovn Valberg
- Ovn Castor
- Ovn Heinner
- Ovn Nabo
- Ovn Guzzanti
- Ovn Defy
- Ovn Premium
- Ovn Blokker
- Ovn First Austria
- Ovn Nordmende
- Ovn Rangemaster
- Ovn Drew & Cole
- Ovn Kubo
- Ovn WLA
- Ovn Kelvinator
- Ovn Steel Cucine
- Ovn Jenn-Air
- Ovn Limit
- Ovn Freggia
- Ovn Listo
- Ovn Edesa
- Ovn Milectric
- Ovn EAS Electric
- Ovn Zavor
- Ovn New World
- Ovn Bompani
- Ovn Porter & Charles
- Ovn M-System
- Ovn Koblenz
- Ovn German Pool
- Ovn Creda
- Ovn Godrej
- Ovn Ices
- Ovn Belling
- Ovn Conrad
- Ovn Mx Onda
- Ovn Igenix
- Ovn Kleenmaid
- Ovn Essentiel B
- Ovn Montiss
- Ovn Schock
- Ovn Edy
- Ovn Altus
- Ovn Parmco
- Ovn Zephir
- Ovn Eurotech
- Ovn Café
- Ovn Equator
- Ovn Brixton
- Ovn Superior
- Ovn Smev
- Ovn ZLine
- Ovn Grunkel
- Ovn Belion
- Ovn Nesco
- Ovn Coline
- Ovn White And Brown
- Ovn Home Electric
- Ovn Bora
- Ovn Imarflex
- Ovn Sauter
- Ovn Flavel
- Ovn Bluesky
- Ovn Instant
- Ovn Tecnolux
- Ovn Fratelli Onofri
- Ovn Ronco
- Ovn Premier
- Ovn Marynen
- Ovn Therma
- Ovn Luxell
- Ovn Krefft
- Ovn Girmi
- Ovn Mayer
- Ovn Solitaire
- Ovn Oranier
- Ovn Leventi
- Ovn James
- Ovn Roadeyes
- Ovn Globe
- Ovn Esmaltec
- Ovn Riviera And Bar
- Ovn Apelson
- Ovn Dominox
- Ovn Thermomate
- Ovn Melchioni
- Ovn Tisira
- Ovn Fine Dine
- Ovn Venga
- Ovn Everdure
- Ovn OBU
- Ovn Rival
- Ovn Eudora
- Ovn Hiberg
- Ovn Steelmatic
- Ovn Wells
- Ovn Kucht
- Ovn Avantco
- Ovn Mibrasa
- Ovn Bizerba
- Ovn Vulcan
- Ovn Romo
- Ovn Lacanche
- Ovn Verona
- Ovn Riviera Bar
- Ovn LotusGrill
- Ovn APW Wyott
- Ovn SPT
- Ovn Pit Boss
- Ovn Hatco
- Ovn High One
- Ovn Capital
- Ovn WestBend
- Ovn Companion
- Ovn XO
- Ovn NU-VU
- Ovn Curtiss
- Ovn Blodgett
- Ovn Nemco
- Ovn K&H
- Ovn Winia
- Ovn Bakers Pride
- Ovn Alto-Shaam
- Ovn TurboChef
- Ovn Simfer
- Ovn Firefriend
- Ovn Robinhood
- Ovn LAFE
- Ovn Promis
- Ovn Inno-Hit
- Ovn Fisher Paykel
- Ovn Brock
- Ovn Cosmo
- Ovn Arda
- Ovn Casselin
- Ovn Ferrari
- Ovn Americana
- Ovn Petromax
- Ovn YUNA
- Ovn Spring USA
- Ovn BioChef
- Ovn Forge Adour
- Ovn Blow
- Ovn Chef-Master
- Ovn UGo
- Ovn Eltac
- Ovn Kitchenware
- Ovn Novamatic
- Ovn Emilia
- Ovn VENINI
- Ovn Buschbeck
- Ovn Blackstone
- Ovn Beautiful
- Ovn BSK
- Ovn New.Up!
- Ovn Roller Grill
- Ovn Germanica
- Ovn Studio
- Ovn Adora
- Ovn Sunpentown
- Ovn Backyard Pro
- Ovn Brastemp
- Ovn Ribimex
- Ovn BAXTER
- Ovn Longvie
- Ovn Gasmate
- Ovn Triomph
- Ovn PITT
- Ovn KB Elements
- Ovn TZS First Austria
- Ovn Electroline
- Ovn Pando
- Ovn Wiggo
- Ovn Nestor Martin-Electrolux
- Ovn Thermarest
- Ovn HomeCraft
- Ovn La Cornue
- Ovn Master Kitchen
- Ovn Goldbrunn
- Ovn PITSOS
- Ovn Yamazen
- Ovn St George
- Ovn Fratelli
- Ovn Bröhn
- Ovn Platypus
- Ovn Sheffield
Nyeste Ovn Manualer

9 April 2025

6 April 2025
6 April 2025
6 April 2025
6 April 2025
6 April 2025
6 April 2025
6 April 2025
5 April 2025

5 April 2025