Pentax Optio T30 Manual
Læs nedenfor 📖 manual på dansk for Pentax Optio T30 (192 sider) i kategorien Kamera. Denne guide var nyttig for 11 personer og blev bedømt med 4.5 stjerner i gennemsnit af 2 brugere
Side 1/192

Digital Camera
Operating Manual
To ensure the best performance from
your camera, please read the Operating
Manual before using the camera.
Zoom lever (p.50)
Front
Power switch, power indicator (green) (p.20)
Flash (p.62)
Remote control receiver (p.80)
Shutter release button (p.24)
Lens
Microphone (p.30)
Back
Touch display (LCD monitor) (p.34, p.85, p.162)
Q button (p.25)
DC input terminal (p.167)
3 button (p.34, p.145)
Tripod socket
Battery/card compartment cover
(p.15, p.17)
Names of Parts
Self-timer lamp/AF illuminator
(Orange) (p.79, p.75)
PC/AV terminal (p.100, p.160)
Strap lug (p.13)
Speaker (p.151)

Simply press the Q button or 3 button, or touch the LCD monitor
to set up and operate the camera.
Use the touch display by directly touching the LCD monitor with your
finger. It is recommended that you use the stylus when precise operations
are required such as editing images after shooting.
Touch
This refers to touching the touch display with
your finger or the stylus and then releasing it.
Touch an icon to select it, and release to set that option (a guide display
may appear describing the function of the selected icon before it is set).
Touch an item for more than two seconds to cancel the selection.
Use this to display toolbars or select icons.
Press and hold down an arrow icon (
suqr
) to change the
setting or switch screens in some menus.
Double-touch
This refers to touching the touch display twice
quickly.
Use this to directly set a function without having to display
the guide display.
Drag
This refers to touching and moving your finger
or stylus across the touch display.
Use this to change the displayed portion of an image or to
change a setting by sliding the cursor along a setting bar.
If you inadvertently select the wrong icon, drag your finger
or the stylus from that icon to the desired icon, and then
release your finger or the stylus to reselect.
Accessing the Camera Settings
Press the Q button.
This switches the camera to Playback
mode to play back captured images and
sound files (p.25).
Press the 3 button.
This displays menus to adjust the
recorded pixels, EV compensation, and
other advanced shooting settings (p.34,
p.145).
Touch the LCD monitor.
This displays the [Capture Toolbar] ([Playback Toolbar] in Playback mode) to set
the flash, self-timer, and other frequently used functions (p.34, p.85).
Using the touch display
These are the indications on the monitor during Capture or Playback mode.
Capture Mode
A1 Shooting mode ........................... 43
A2 Flash mode.................................. 62
A3 Drive mode .................................. 35
A4 Focus mode................................. 72
A5 Focus frame................................. 74
A6 Camera shake warning................ 71
A7 Shutter speed .............................. 53
A8 Aperture....................................... 53
A9 Digital zoom................................. 51
A10 Memory status ............................. 20
A11 Remaining image storage
capacity ................................. 55, 58
A12 Battery level................................. 16
A13 Current date and time................ 149
A14 World time setting...................... 153
A15 EV compensation value............... 59
B1 Recorded pixels........................... 54
B2 Quality level ................................. 54
B3 White balance.............................. 64
B4 AE metering................................. 61
B5 Sensitivity .................................... 76
B6 Histogram .................................... 60
Playback Mode
C1 Voice memo...............................130
C2 Memory status .............................20
C3 Folder name............................... 158
C4 File number
C5 Battery level .................................16
C6 Protect .......................................105
C7 Voice memo playback..................95
C8 Shooting date and time
C9 Previous/Next ..............................25
D1 Recorded pixels ...........................54
D2 Quality level .................................54
D3 White balance ..............................64
D4 AE metering .................................61
D5 Sensitivity.....................................76
D6 Shutter speed ..............................53
D7 Aperture .......................................53
D8 Histogram ....................................60
* D1 to D8 only appear when the display
is set to [Standard+Histogram] (p.88).
* B1 to B6 only appear when the display is set to [Standard+Histogram] (p.41).
* The screen images are examples to indicate the position of the icons.
Displaying “Bright Portions” and “Dark Portions” (Standard + Histogram Display)
When the subject you are photographing has portions that are too bright, they are
displayed as a flashing red warning. If there are portions that are too dark, they are
displayed as a flashing yellow warning.
Monitor Indications
ISO400
I
I
I
IS
S
S
SO
O
O
O4
4
4
40
0
0
00
0
0
0
F2.7
F
F
F
F2
2
2
2.
.
.
.7
7
7
7
1/250
1
1
1
1/
/
/
/2
2
2
25
5
5
50
0
0
0
01/26/2007
0
0
0
01
1
1
1/
/
/
/2
2
2
26
6
6
6/
/
/
/2
2
2
20
0
0
007
07
07
07
14:25
1
1
1
14
4
4
4:
:
:
:2
2
2
25
5
5
5
+1.0
+
+
+
+1
1
1
1.
.
.
.0
0
0
0
38
3
3
3
38
8
8
8
F2.7
1/250
14:25+1.0
38
7
M
AUTO
P I C T
01/26/2007
ISO400
A13
A14A15
A
1
A
2
A
3
A12
B1
B2
B4
B5
A11A10A9
A
4
A
5
A6
A7
A8
B6
B3
14:25
1
1
1
14
4
4
4:
:
:
:2
2
2
25
5
5
5
100-0038
1
1
1
10
0
0
00
0
0
0-
-
-
-0
0
0
00
0
0
03
3
3
38
8
8
8
30
3
3
3
30
0
0
0
1/250
1
1
1
1/
/
/
/2
2
2
25
5
5
50
0
0
0
F2.7
F
F
F
F2
2
2
2.
.
.
.7
7
7
7
ISO400
I
I
I
IS
S
S
SO
O
O
O4
4
4
40
0
0
00
0
0
0
ISO400
14:25
100-003830
7
M
1/250 F2.7
01/26/2007
0
0
0
01
1
1
1/
/
/
/2
2
2
26
6
6
6/
/
/
/2
2
2
20
0
0
007
07
07
07
01/26/2007
D1 C5
C7
D8
D2
D3
D4
D6
D5
D7
C6
C1 C2 C3 C4
C9C8C9

3
Contents
Overview of the Operating Manual.................................................................. 1
Contents .......................................................................................................... 3
USING YOUR CAMERA SAFELY .................................................................. 7
About the Camera .................................................................................... 7
About the Battery Charger and the AC Adapter ....................................... 9
Care to be Taken During Handling................................................................ 10
1 Getting Started......................................................12
Checking the Contents of the Package ......................................................... 12
Attaching the Strap........................................................................................ 13
Installing the Battery...................................................................................... 14
Charging the Battery............................................................................... 14
Installing the Battery ............................................................................... 15
Removing the Battery ............................................................................. 15
Installing the SD Memory Card ..................................................................... 17
Removing the SD Memory Card............................................................. 18
Turning the Camera On and Off .................................................................... 20
Checking the Memory Card.................................................................... 20
Initial Settings ................................................................................................ 21
Setting the Language and the Date and Time........................................ 21
2 Camera Features...................................................24
Enjoy Taking Pictures.................................................................................... 24
Enjoy Recording Movies................................................................................ 28
Enjoy Recording Sounds............................................................................... 30
Enjoy Printing Images ................................................................................... 32
3 Taking Pictures .....................................................34
Setting the Shooting Functions ..................................................................... 34
Calling Up Frequently Used Functions ................................................... 37
Saving the Current Camera Settings...................................................... 39
Displaying Shooting Information in Capture Mode ................................. 41
Selecting a Shooting Mode ........................................................................... 43
Selecting the Shooting Mode in the Capture Palette.............................. 43
Composing Your Shot ................................................................................... 50
Using the Zoom ...................................................................................... 50
Taking Pictures with the Built-in Photo Frames...................................... 52

Contents
4
Adjusting the Size, Quality Level, Brightness, and Color Tone ..................... 53
Setting the Recorded Pixels, Quality Level, and Frame Rate ................ 54
Setting the Exposure (EV Compensation).............................................. 59
Selecting the AE Metering...................................................................... 61
Using the Flash....................................................................................... 62
Adjusting the Color Balance (White Balance)......................................... 64
Adjusting the Sharpness, Saturation, and Contrast................................ 66
Automatically Changing the Shooting Settings When Taking Pictures
(Auto Bracket)......................................................................................... 67
Focusing........................................................................................................ 70
Selecting the Focus Mode...................................................................... 72
Setting the Autofocus Conditions ........................................................... 74
Setting the Sensitivity ............................................................................. 76
Taking Pictures.............................................................................................. 78
Using the Self-timer ................................................................................ 79
Using the Remote Control ...................................................................... 80
Taking Continuous Pictures.................................................................... 82
Setting the Instant Review Time............................................................. 83
Using the Memo Pad.............................................................................. 84
4 Playing Back and Editing Images .......................85
Setting the Playback Functions ..................................................................... 85
Displaying Shooting Information............................................................. 88
Playing Back Images, Movies, and Sound Files ........................................... 90
Turning on the Camera in Playback Only Mode..................................... 90
Rotating Images ..................................................................................... 90
Magnifying Images ................................................................................. 92
Nine-image Display ................................................................................ 93
Switching between folder and calendar display...................................... 93
Playing Back an Image with a Voice Memo ........................................... 95
Playing Back Movies .............................................................................. 96
Playing Back Sound ............................................................................... 97
Slideshow ............................................................................................... 98
Playing Back on a TV ........................................................................... 100
Deleting Images and Sound Files ............................................................... 102
Deleting One Image or Sound File ....................................................... 102
Deleting All Images and Sound Files.................................................... 103
Deleting Selected Images and Sound Files.......................................... 104

Contents
5
Protecting Images and Sound Files from Deletion ............................... 105
Recovering Deleted Images ................................................................. 106
Editing Images and Movies ......................................................................... 108
Changing the Image Size and Quality (Resize).................................... 108
Deleting Unwanted Parts of an Image (Cropping)................................ 109
Making Drawings and Adding Stamps.................................................. 111
Rotating Stamps and My Stamp........................................................... 116
Adding a Frame to an Image (Frame Composite) ................................ 119
Creating Your Own Frame.................................................................... 121
Changing the Image Color Tone (Color Filter) ..................................... 124
Making Pictures Look As If They Have Been Taken with a Fish-eye
Lens (Fish-eye Filter)............................................................................ 125
Changing the Image Brightness (Bright Filter) ..................................... 126
Digital Filter Effects............................................................................... 127
Removing Red-eye............................................................................... 128
Adding Sound to an Image (Voice Memo)............................................ 130
Setting an Image for the Start-up Screen ............................................. 131
Saving a Frame from a Movie as a Still Image..................................... 132
Divide Movies into Two or More Parts.................................................. 133
Stich Movies Together.......................................................................... 134
Copying Images and Sound Files......................................................... 135
5 Printing Images...................................................137
Printing with DPOF...................................................................................... 137
Applying the DPOF Settings to Each Image......................................... 137
Applying the DPOF Settings to All Images ........................................... 139
Direct Printing with PictBridge ..................................................................... 140
Connecting the Camera to the Printer .................................................. 140
Printing Single Image ........................................................................... 141
Printing All Images................................................................................ 143
Printing Using the DPOF Settings ........................................................ 143
Disconnecting the USB Cable .............................................................. 144
6 Settings................................................................145
Using the Setting Menu ............................................................................... 145
Formatting an SD Memory Card and the Built-in Memory .......................... 147
Changing the Date and Time ...................................................................... 149
Changing the Sound Settings...................................................................... 151

Contents
6
Setting the World Time................................................................................ 153
Changing the Display Language ................................................................. 157
Changing a Folder Name ............................................................................ 158
Changing the USB Connection Mode ......................................................... 160
Changing the Video Output Format............................................................. 161
Adjusting the Brightness of the LCD Monitor .............................................. 162
Using the Power Saving Function ............................................................... 163
Setting Auto Power Off................................................................................ 164
Setting the Guide Display............................................................................ 165
Returning Changed Settings to Their Defaults (Reset) ............................... 166
7 Appendix .............................................................167
Using the AC Adapter.................................................................................. 167
Optional Accessories................................................................................... 169
Messages .................................................................................................... 170
Troubleshooting........................................................................................... 172
Main Specifications ..................................................................................... 176
WARRANTY POLICY.................................................................................. 181
Index............................................................................................................ 185
Regarding Product Registration
In order to service you better, we request that you complete the product registration,
which can be found on the CD-ROM supplied with the camera or the PENTAX
website. Thank you for your cooperation.
Refer to the PC Connection Manual (bottom right of the front side) for more information.

7
USING YOUR CAMERA SAFELY
We have paid close attention to the safety of this product. When using this
product, we request your special attention regarding items marked with
the following symbols.
Warning
•Do not attempt to take the camera apart or modify the camera. High
internal voltages are present which can produce electric shock.
•If internal parts of the camera become exposed as a result of the
camera being damaged, do NOT touch the exposed portions, as there
is a danger of receiving an electric shock.
•Keep the provided stylus away from infants and children to prevent
possible injury or death. Poking the eyes with the stylus may cause a
loss of sight.
•To avoid the risk of it being swallowed by mistake, keep the SD Memory
Card out of the reach of small children. Seek medical attention
immediately if a card is accidentally swallowed.
•Keep the provided strap away from infants and children to prevent
possible injury or suffocation.
•Use an AC adapter that is of the power and voltage specified for
exclusive use with this product. The use of an AC adapter other than
that specified exclusively for use with this product may cause fire or
electric shocks.
•If the camera emits smoke or a strange smell, or in the event of any
other irregularity, stop using the camera immediately, remove the
battery and contact your nearest PENTAX Service Center. Continued
use of the camera may result in fire or electric shock.
Warning
This symbol indicates that ignoring this item could
cause serious personal injury.
Caution
This symbol indicates that ignoring this item could
cause minor or medium personal injury, or material
loss.
About the Camera

8
Caution
•Never try to disassemble or short the battery. Also, do not dispose of
the battery in fire, as it may explode.
•Do not charge any batteries other than rechargeable lithium-ion battery
D-LI63. The battery could explode or catch fire.
•Do not place your finger on the flash when it is discharging as there is
a risk of burns.
•Do not discharge the flash while it is touching your clothing as there is
a risk of discoloring.
•If any battery leakage should come in contact with your eyes it may
cause a loss of sight, do not rub your eyes. Flush your eyes with clean
water and get medical attention immediately.
•If any battery leakage should come in contact with skin or clothes it may
cause irritate the skin, wash the affected areas thoroughly with water.
•Remove the battery from the camera immediately if it becomes hot or
begins to smoke. Be careful not to burn yourself during removal.
•Some portions of the camera heat up during use, so please take care,
as there is a risk of low temperature burns if such portions are held for
long periods of time.
•Should the LCD be damaged, be careful of glass fragments. Also, be
careful not to allow the liquid crystal to get on your skin or in your eyes
or in your mouth.
•To avoid scratching the display screen of the LCD monitor, use only
your finger or the provided stylus to make selections. Never use sharp
objects such as pens or pencils as they may cause the camera to
malfunction.

9
Warning
•Do not use the product at a voltage other than the specified voltage.
Use with a power source or voltage other than that designed can cause
a fire or electrical shock. The specified voltage is 100 - 240V AC.
•Do not disassemble or modify the product. This can cause a fire or
electrical shock.
•If the generation of smoke or strange odor from the product or other
abnormality occurs, immediately discontinue using and consult a
PENTAX Service Center. Continuing to use the product can cause a
fire or electrical shock.
•If water should happen to get inside the product, consult a PENTAX
Service Center. Continuing to use the product can cause a fire or
electrical shock.
•If thunderstorm should be present during use of the battery charger or AC
adapter, unplug the power cord and discontinue use. Continuing to use
the product can cause damage to the equipment, fire or electrical shock.
•Wipe off the plug of the power cord if it should become covered with
dust. This can cause a fire.
Caution
•Do not place heavy objects on the AC plug cord, allow heavy objects to
drop onto it or allow the AC plug cord to become damaged due to
excessive bending. If the AC plug cord becomes damaged, consult a
PENTAX Service Center.
•Do not short or touch the output terminals of the product while it is still
plugged in.
•Do not plug in the AC plug cord with wet hands. This can cause an
electrical shock.
•Do not subject the product to strong impacts or allow it to drop onto a
hard surface. This can cause a malfunction.
•To reduce the risk of hazards, use only CSA/UL Certified power supply
cord set, cord is Type SPT-2 or heavier, minimum NO.18 AWG copper,
one end with a molded-on male attachment plug cap (with a specified
NEMA configuration), and the other is provided with a molded-on
female connector body (with a specified IEC nonindustrial type
configuration) or the equivalent.
•Do not use the battery charger to charge batteries other than rechargeable
lithium-ion battery D-LI63. This can cause overheating or malfunctions.
About the Battery Charger and the AC Adapter

11
•The response speed of the liquid crystal display becomes slow at low
temperatures. This is due to the properties of the liquid crystal and is
not a fault.
•Periodic checks are recommended every 1 to 2 years in order to
maintain high performance.
•If the camera is subjected to rapid temperature changes, condensation
may form on the inside and outside of the camera. Therefore put the
camera in a bag or plastic bag, and take the camera out when the
difference in temperature has subsided.
•Avoid contact with garbage, dirt, sand, dust, water, toxic gases, salt,
etc. as this may cause damage to the camera. If rain or drops of water
get onto the camera, please wipe dry.
•Refer to “Precautions When Using an SD Memory Card” (p.19)
regarding the SD Memory Card.
•Please note that formatting an SD memory card or built-in memory will
delete all data, however it may still be possible to recover that data
using off-the-shelf data recovery software. Please manage your
camera’s memory at your own risk.
•Please do not press forcefully on the LCD monitor. This could cause
breakage or malfunction.
•Be careful not to sit down with the camera in your back pocket as this
may damage the exterior of the camera or the LCD monitor.
•When using a tripod with the camera, be careful not to overtighten the
screw in the tripod socket on the camera.
•The AC plug cord supplied with the camera is for exclusive use with the
battery charger D-BC63. Do not use it with any other equipment.
LED Safety Standard
This device is a digital still camera that conforms to the safety standard
(IEC60825-1) for a Class 1 LED product.

12
1
Getting Started
1Getting Started
If anything is missing or damaged, contact your local authorized PENTAX
dealer.
Items marked with an asterisk (*) are also available as optional accessories.
For other optional accessories, refer to “Optional Accessories” (p.169).
Checking the Contents of the Package
Camera
Optio T30
Strap O-ST20 (*) Stylus pen
O-SP63
Software
(CD-ROM) S-SW63
USB cable
I-USB7 (*)
AV cable
I-AVC7 (*)
Rechargeable lithium-ion
battery D-LI63 (*)
Battery charger
D-BC63 (*)
AC plug cord
D-CO24 (*)
Operating Manual
(this manual)
PC Connection Manual Quick Guide
Attaching the Strap
13
1
Getting Started
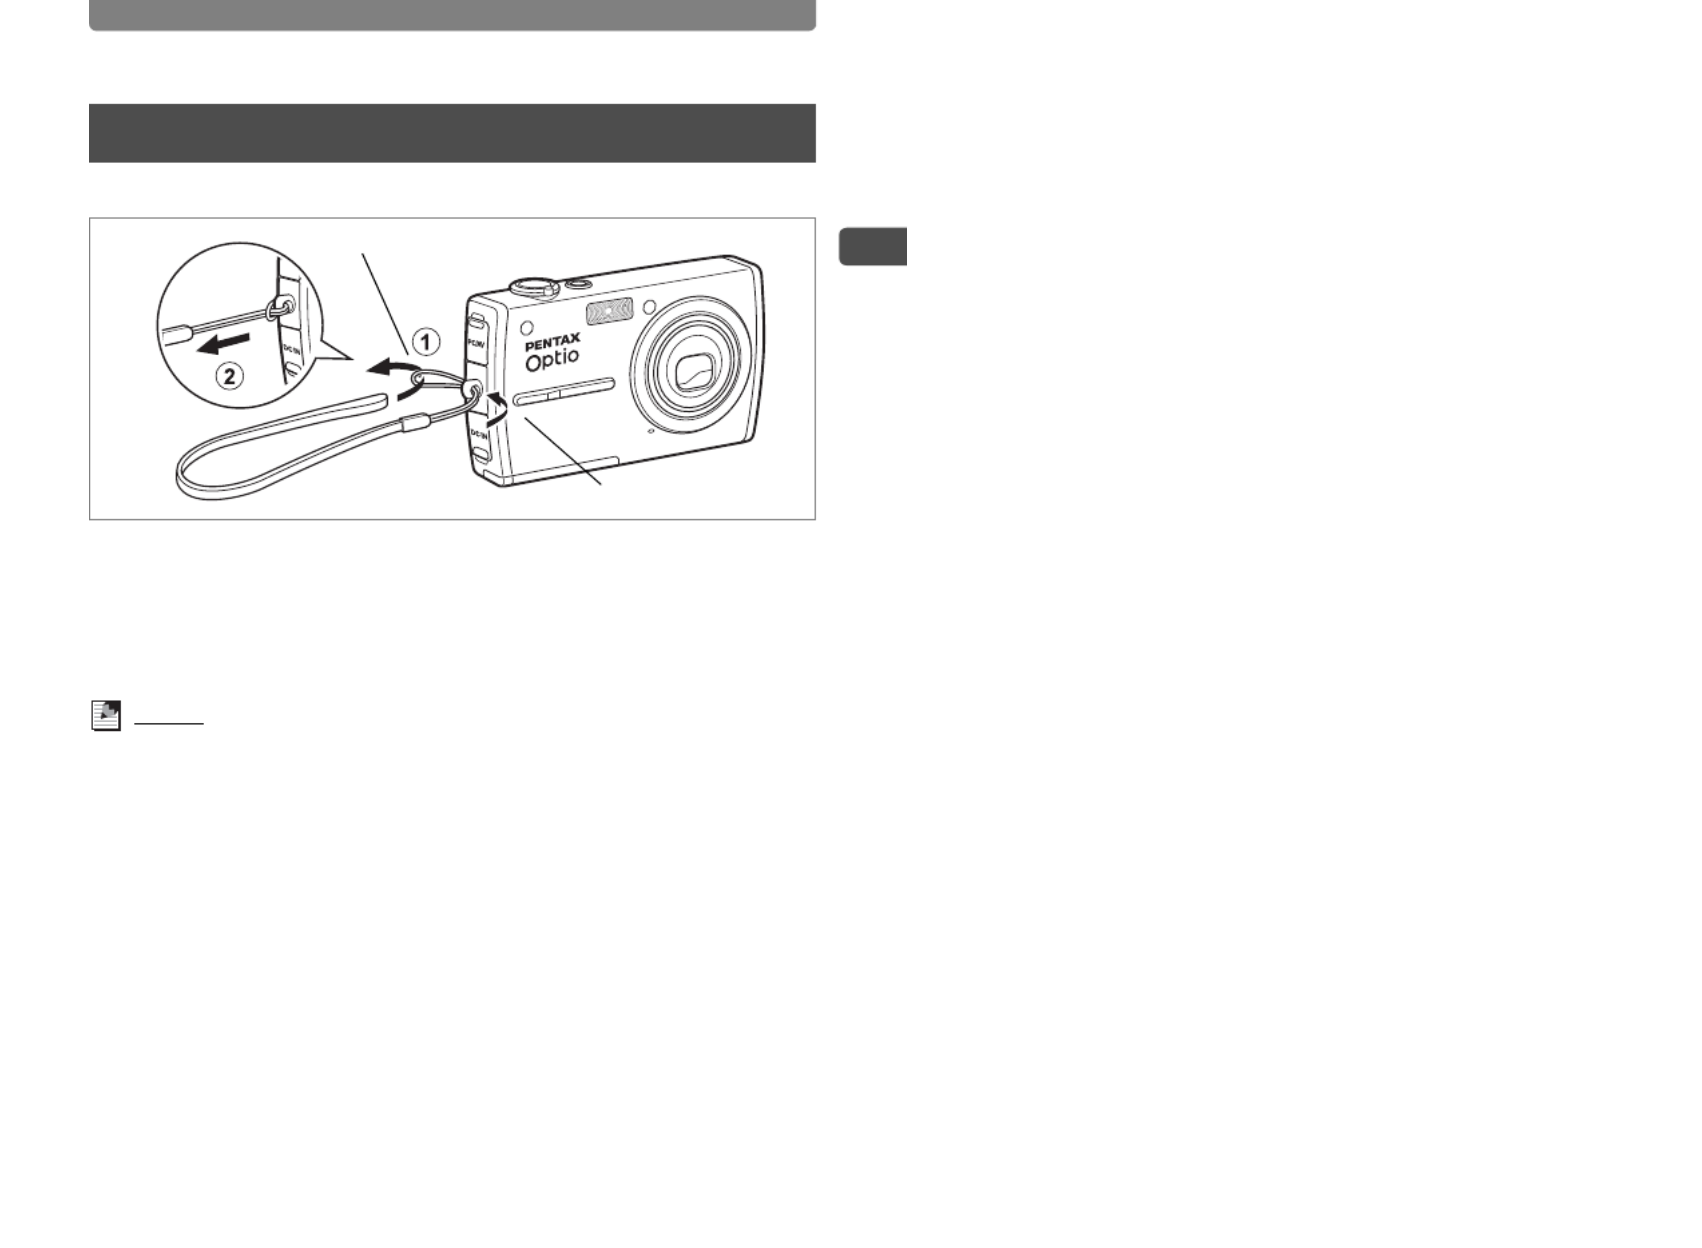
Attach the camera strap as shown below.
1Pass the narrow end of the strap (1) through the strap
lug on the camera.
2Pass the other end of the strap through the loop 1 and
pull tight 2.
Memo
The stylus can be attached to the strap for your convenience, if necessary.
Attaching the Strap
1
2
Installing the Battery
14
1
Getting Started
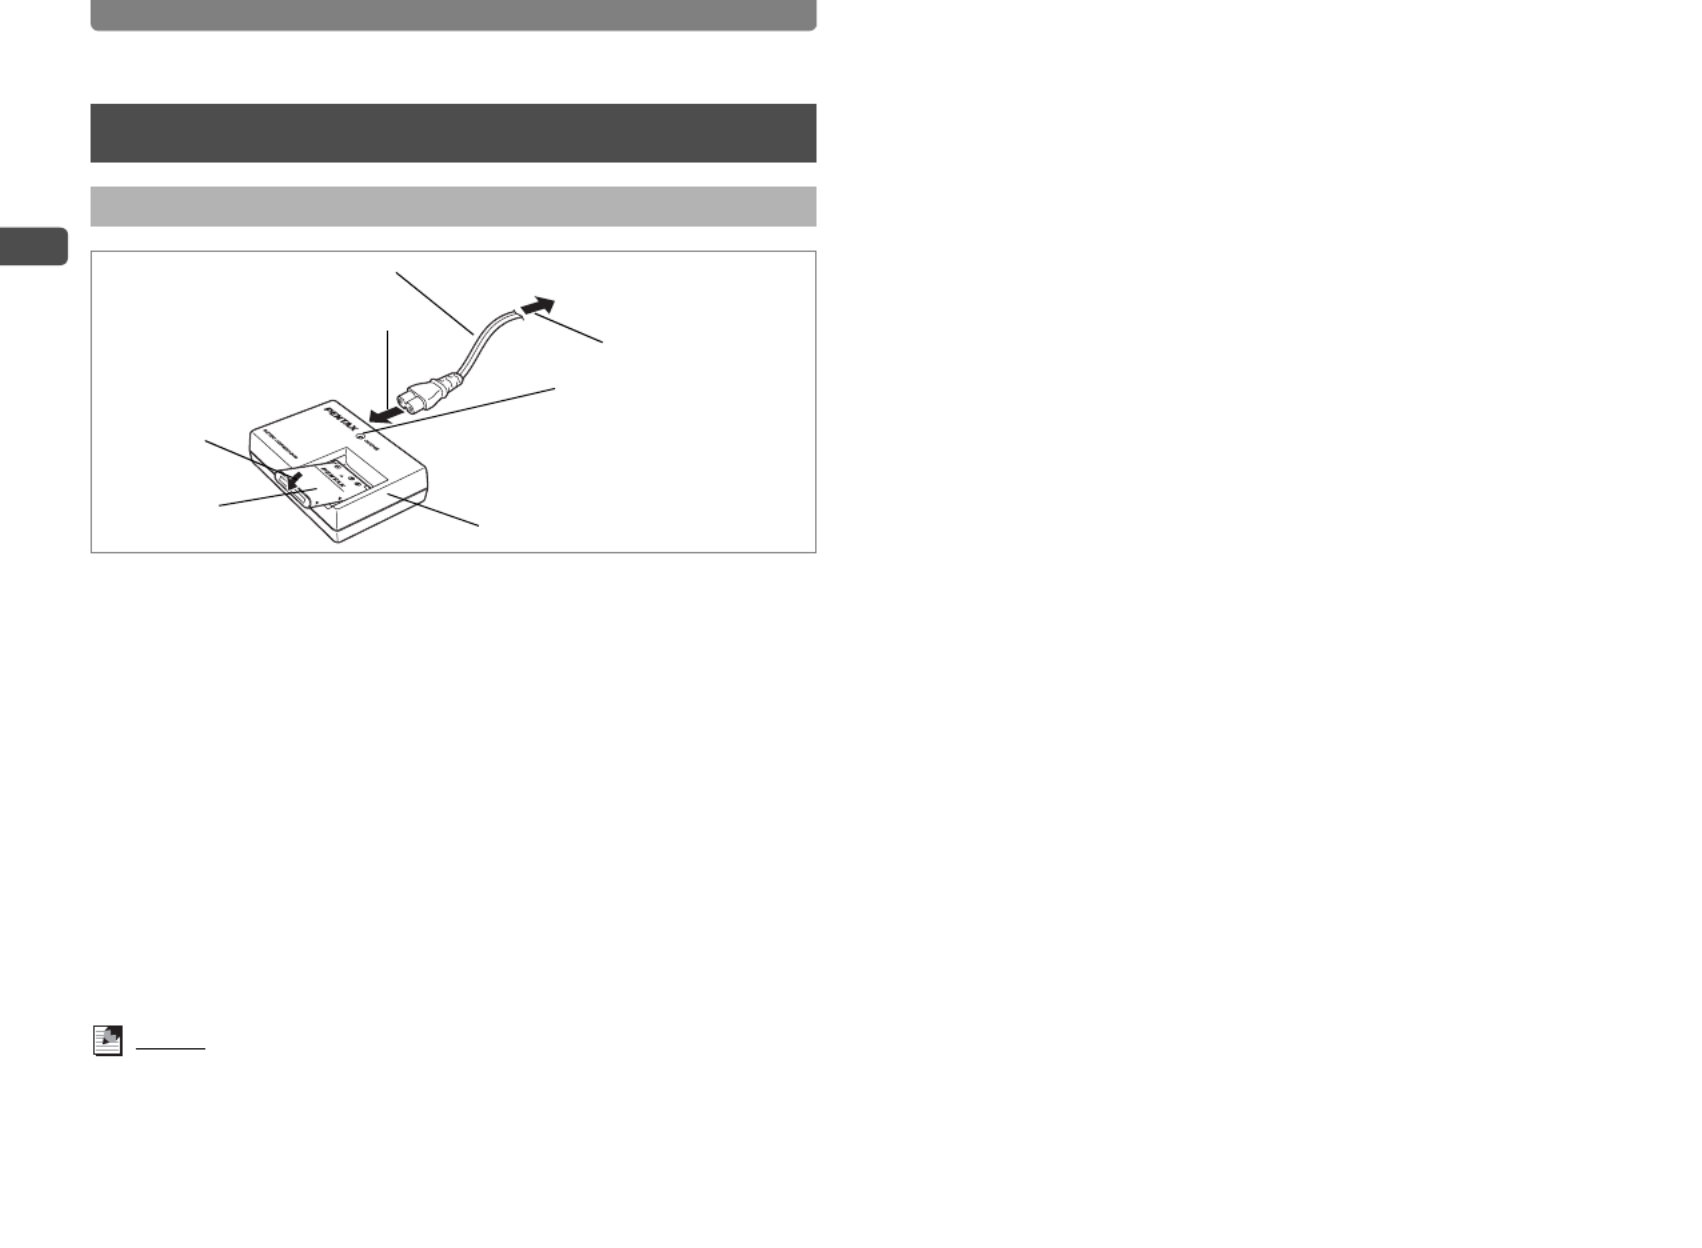
Use the battery charger to charge the battery before using it in the camera
for the first time, after a long period of non-use, or when the [Battery
depleted] message appears.
Note: AC plug cord “Listed, Type SPT-2 or NISPT-2, 18/2 flexible
cord, rated 125 V, 7A, minimum 6ft (1.8m)”
1Connect the AC plug cord to the battery charger.
2Plug the AC plug cord into a power outlet.
3Place the battery in the charger with the PENTAX logo
facing up.
The charging indicator glows red while charging.
It goes out when charging is finished.
4Remove the battery from the battery charger when fully
charged.
Memo
•The time required to fully charge the battery is about 120 minutes (max.).
The appropriate ambient temperature for charging the battery is 0°C to 40°C
(32°F to 104°F). The charging time may vary depending on the ambient
temperature and other conditions.
•The battery has reached the end of its service life when it starts to run down
soon after being charged. Replace with a new battery.
Installing the Battery
Charging the Battery
Battery charger
3
Battery
To power outlet
AC plug
cord
1
2
Charging indicator
While charging:
Glows red
Charging finished:
Goes out

Installing the Battery
15
1
Getting Started
Caution
•Do not use the battery charger to charge batteries other than the
rechargeable lithium-ion battery D-LI63, as the charger may overheat or
become damaged.
•If the battery is inserted correctly but the charging indicator fails to light, the
battery may be faulty or exhausted. Replace with a new battery.
Use only the battery that is provided with the camera. Charge the battery
before using it in the camera for the first time.
1Open the battery/card compartment cover.
Pull out the battery/card compartment cover in the direction as shown by
1. Release it and it opens by itself in the direction shown by 2.
2Use the side of the battery to lift the battery lock lever
upward 3, and insert the battery with the PENTAX logo
as shown.
Push the battery in until it is locked in place.
3Close the battery/card compartment cover.
1Open the battery/card compartment cover.
2Release the battery by using your finger to push the
battery lock lever upward 3.
The battery will be ejected. Pull the battery out of the camera.
Installing the Battery
Removing the Battery
1
2
Battery lock lever

Installing the Battery
16
1
Getting Started
Caution
•This camera uses the rechargeable lithium-ion battery D-LI63. Use of any
other type of battery may damage the camera and cause malfunction.
•If the battery is incorrectly inserted, malfunction may result.
•Do not remove the battery while the camera is turned on.
•If the camera will not be used for a long period of time, remove the battery.
•The date and time may revert to the default setting if the battery is removed
from the camera for an extended period of time.
Image Recording Capacity and Playback Time
(at an ambient temperature of 23°C with the LCD monitor on and the
battery fully charged)
*1: Recording capacity shows the approximate number of shots recorded during
CIPA-compliant testing (with LCD monitor on and flash used for 50% of the
shots at an ambient temperature of 23°C). Actual performance may vary
depending on operating conditions.
*2: According to the results of PENTAX in-house testing.
Memo
•Battery performance may be temporarily reduced at low temperatures.
•Be sure to take a spare battery with you when traveling abroad or to a cold
region, or if you intend to take a lot of pictures.
Battery Level Indicator
The battery level can be checked by observing the * indicator on the
LCD monitor.
Image Recording Capacity *1
(with the flash used for 50% of the shots) Playback Time *2
Approx. 200 pictures Approx. 170 min.
Screen Display Battery Status
*(green) Adequate power remains.
,(green) Battery is running low.
;(yellow) Battery is running very low.
%(red) Battery is almost exhausted.
Battery depleted The camera will turn off after this message appears.

Installing the SD Memory Card
17
1
Getting Started
This camera uses an SD Memory Card. When an SD Memory Card is
installed in the camera, captured images and sound files are saved on the
card. If a card is not installed, they are saved in the built-in memory (p.20).
Caution
•Make sure the camera is turned off before inserting or removing the SD
Memory Card.
•Be sure to format an SD Memory Card that is new or has been used in
another camera. Refer to “Formatting an SD Memory Card and the Built-in
Memory” (p.147) for instructions on formatting.
1Open the battery/card compartment cover.
Pull out the battery/card compartment cover in the direction as shown by
1. Release it and it opens by itself in the direction shown by 2.
2Insert the SD Memory Card into the SD Memory Card slot
so that the front of the card (the side with the label) is
facing up toward the lens.
Push the card in until it clicks. Make sure to insert the card all the way into
the slot or images and sound may not be recorded properly.
3Close the battery/card compartment cover.
Installing the SD Memory Card
SD Memory Card
SD Memory
Card slot
1
2

Installing the SD Memory Card
18
1
Getting Started
Memo
•The number of pictures that can be stored on an SD Memory Card will vary
depending on the capacity of the card and the image resolution and quality
level selected (p.55, p.58).
•The power indicator blinks while the SD Memory Card is being accessed
(data is being recorded or read).
1Open the battery/card compartment cover.
2Push the card into the SD Memory Card slot to eject it.
Pull the card out.
3Close the battery/card compartment cover.
Backing Up Data
The camera may not be able to access data in the built-in memory in
the case of a malfunction. Use a computer or other device to back up
important data in the case of a malfunction.
Removing the SD Memory Card
Installing the SD Memory Card
19
1
Getting Started
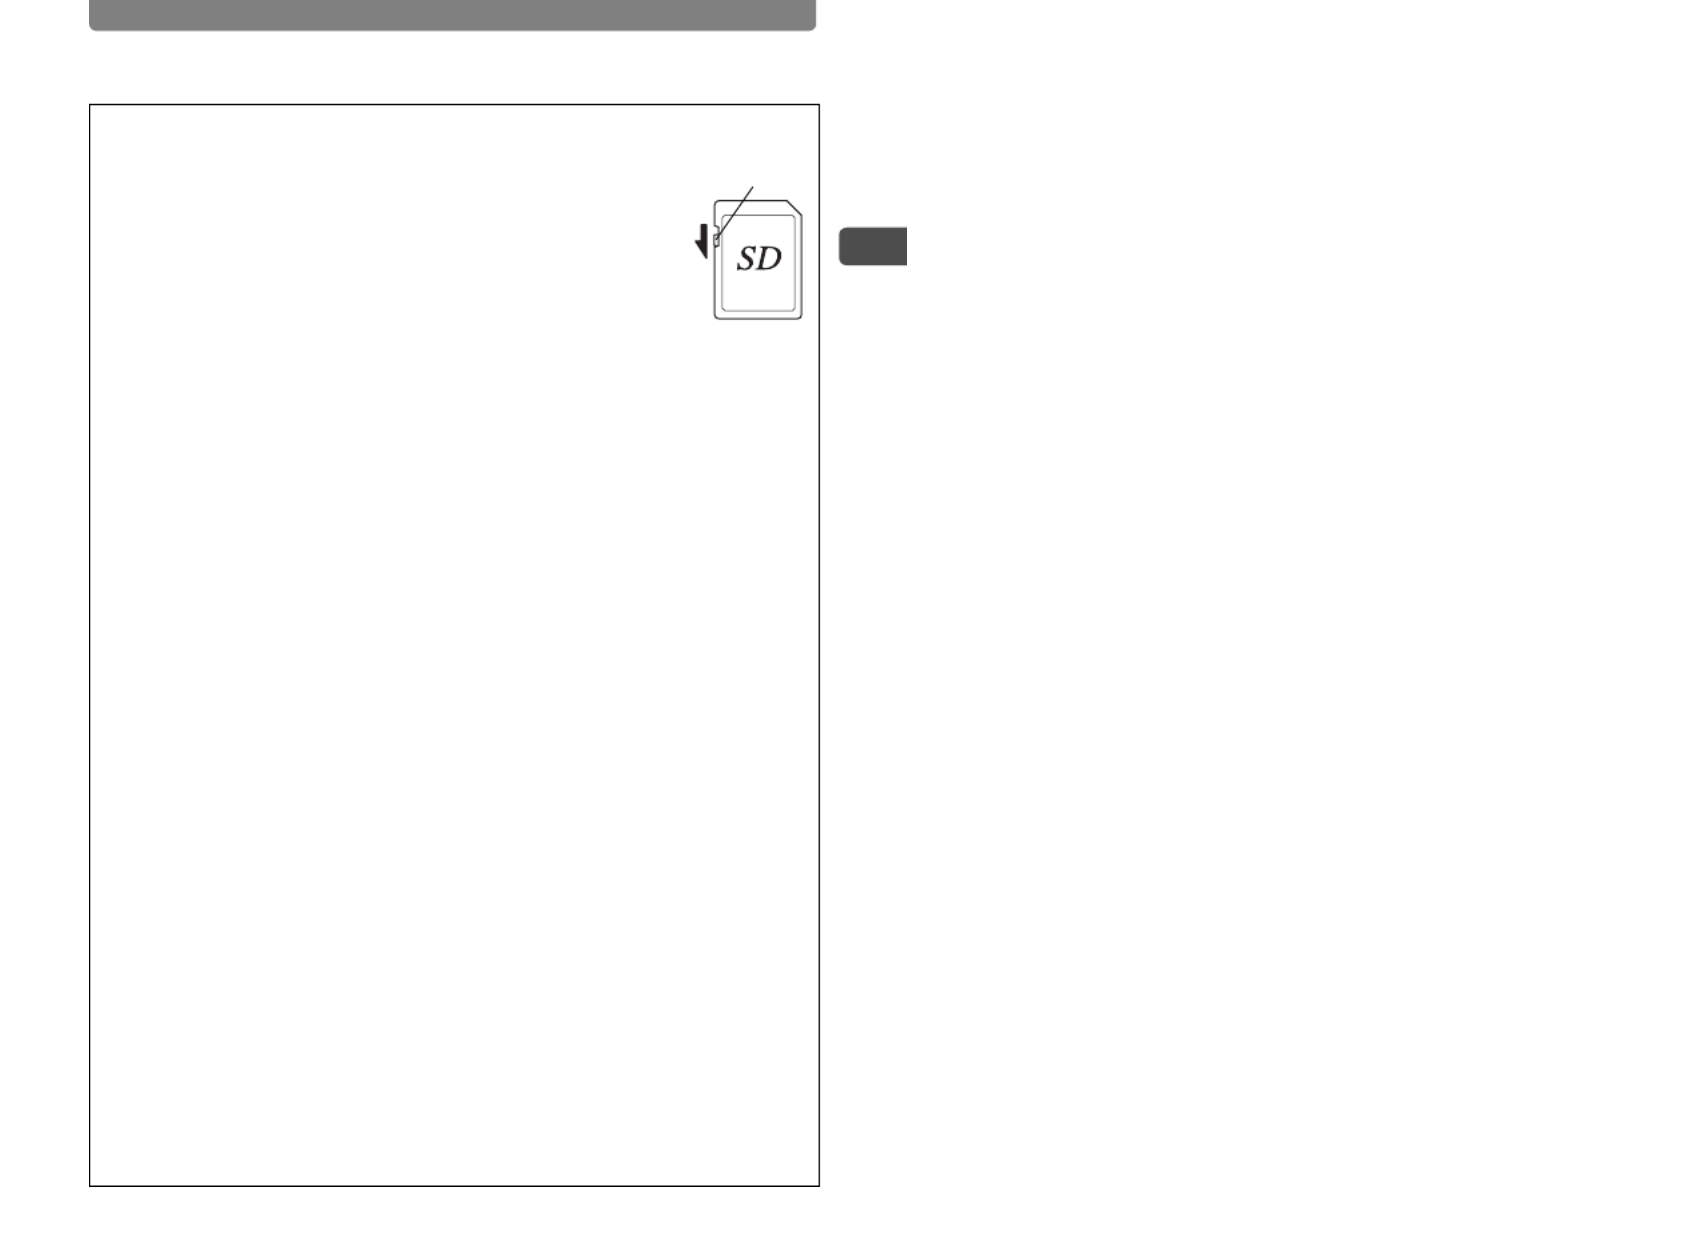
Precautions When Using an SD Memory Card
• Make sure that the camera is turned off before opening the battery/card cover.
• The SD Memory Card is equipped with a write-protect
switch. Setting the switch to [LOCK] protects the existing
data by prohibiting recording of new data, deletion of
existing data or formatting of the card.
• Care should be taken if you remove the SD Memory Card
immediately after using the camera, as the card may be
hot.
• Do not remove the SD Memory Card or turn the camera
off while data is being recorded on the card, images or
sound are being played back, or the camera is connected to a PC with the USB
cable as this may cause the data to be lost or the card to be damaged.
• Do not bend the SD Memory Card or subject it to violent impact. Keep it away
from water and store away from high temperature.
• Be sure to format unused cards or cards that have been used in another
camera. Refer to “Formatting an SD Memory Card and the Built-in Memory”
(p.147) for instructions on formatting.
• Do not remove the SD Memory Card during formatting as this may damage the
card and render it unusable.
• The data on the SD Memory Card may be deleted in the following
circumstances. PENTAX does not accept any liability for data that is deleted
(1) when the SD Memory Card is mishandled by the user.
(2) when the SD Memory Card is exposed to static electricity or electrical
interference.
(3) when the card has not been used for a long time.
(4) when the card is ejected, the AC adapter is disconnected or the battery is
removed while the data on the card is being recorded or accessed.
• The SD Memory Card has a limited service life. If it is not used for a long time,
the data on the card may become unreadable. Be sure to regularly make a
backup of important data on a PC.
• Avoid using or storing the card where it may be exposed to static electricity or
electrical interference.
• Avoid using or storing the card in direct sunlight or where it may be exposed to
rapid changes in temperature or to condensation.
• When using an SD Memory Card with a slow recording speed, recording may
stop while you are taking movies even when there is adequate space in the
memory, or shooting and playback may take a long time.
• Before purchasing a SD Memory Card please check the Pentax website to
ensure that it is compatible with your camera. You can also contact the nearest
Pentax service center for this information.
• If you are going to discard, give away or sell your SD Memory Card, you should
ensure that the data on the card is completely deleted or the card itself is
destroyed if it contains any personal or sensitive information. Please note that
formatting the SD Memory Card will not necessarily delete the data so that it
cannot be recovered using off-the-shelf data recovery software. There are off-
the-shelf secure data deletion software programs available that will completely
delete the data. In any case, the data on your SD Memory Card should be
managed at your own risk.
Write-protect switch

Turning the Camera On and Off
20
1
Getting Started
1Press the power switch.
The camera turns on and is ready to take pictures (Capture mode).
If the Language/ screen appears when you turn the camera on,
follow the procedure on p.21 to make the initial settings.
2Press the power switch again.
The camera turns off and the power indicator light goes off.
The memory card is checked automatically
when the camera turns on, and an icon for the
built-in memory or SD Memory Card appears
on the LCD monitor. a appears on the LCD
monitor when an SD Memory Card is inserted,
and + appears when there is no SD Memory
Card inserted. When + appears on the LCD
monitor, images and sound files will be saved
in the built-in memory.
Y appears instead of a when the write-protect switch on the SD Memory
Card is in the locked position. Images and sound cannot be recorded
when the write-protect switch is locked.
Turning the Camera On and Off
Checking the Memory Card
Power switch
01/26/2007
0
0
0
01
1
1
1/
/
/
/2
2
2
26
6
6
6/
/
/
/2
2
2
20
0
0
00
0
0
07
7
7
7
14:25
1
1
1
14
4
4
4:
:
:
:2
2
2
25
5
5
5
38
3
3
3
38
8
8
8
14:25
38
AUT O
P I C T
01/26/2007
Memory status
Initial Settings
21
1
Getting Started
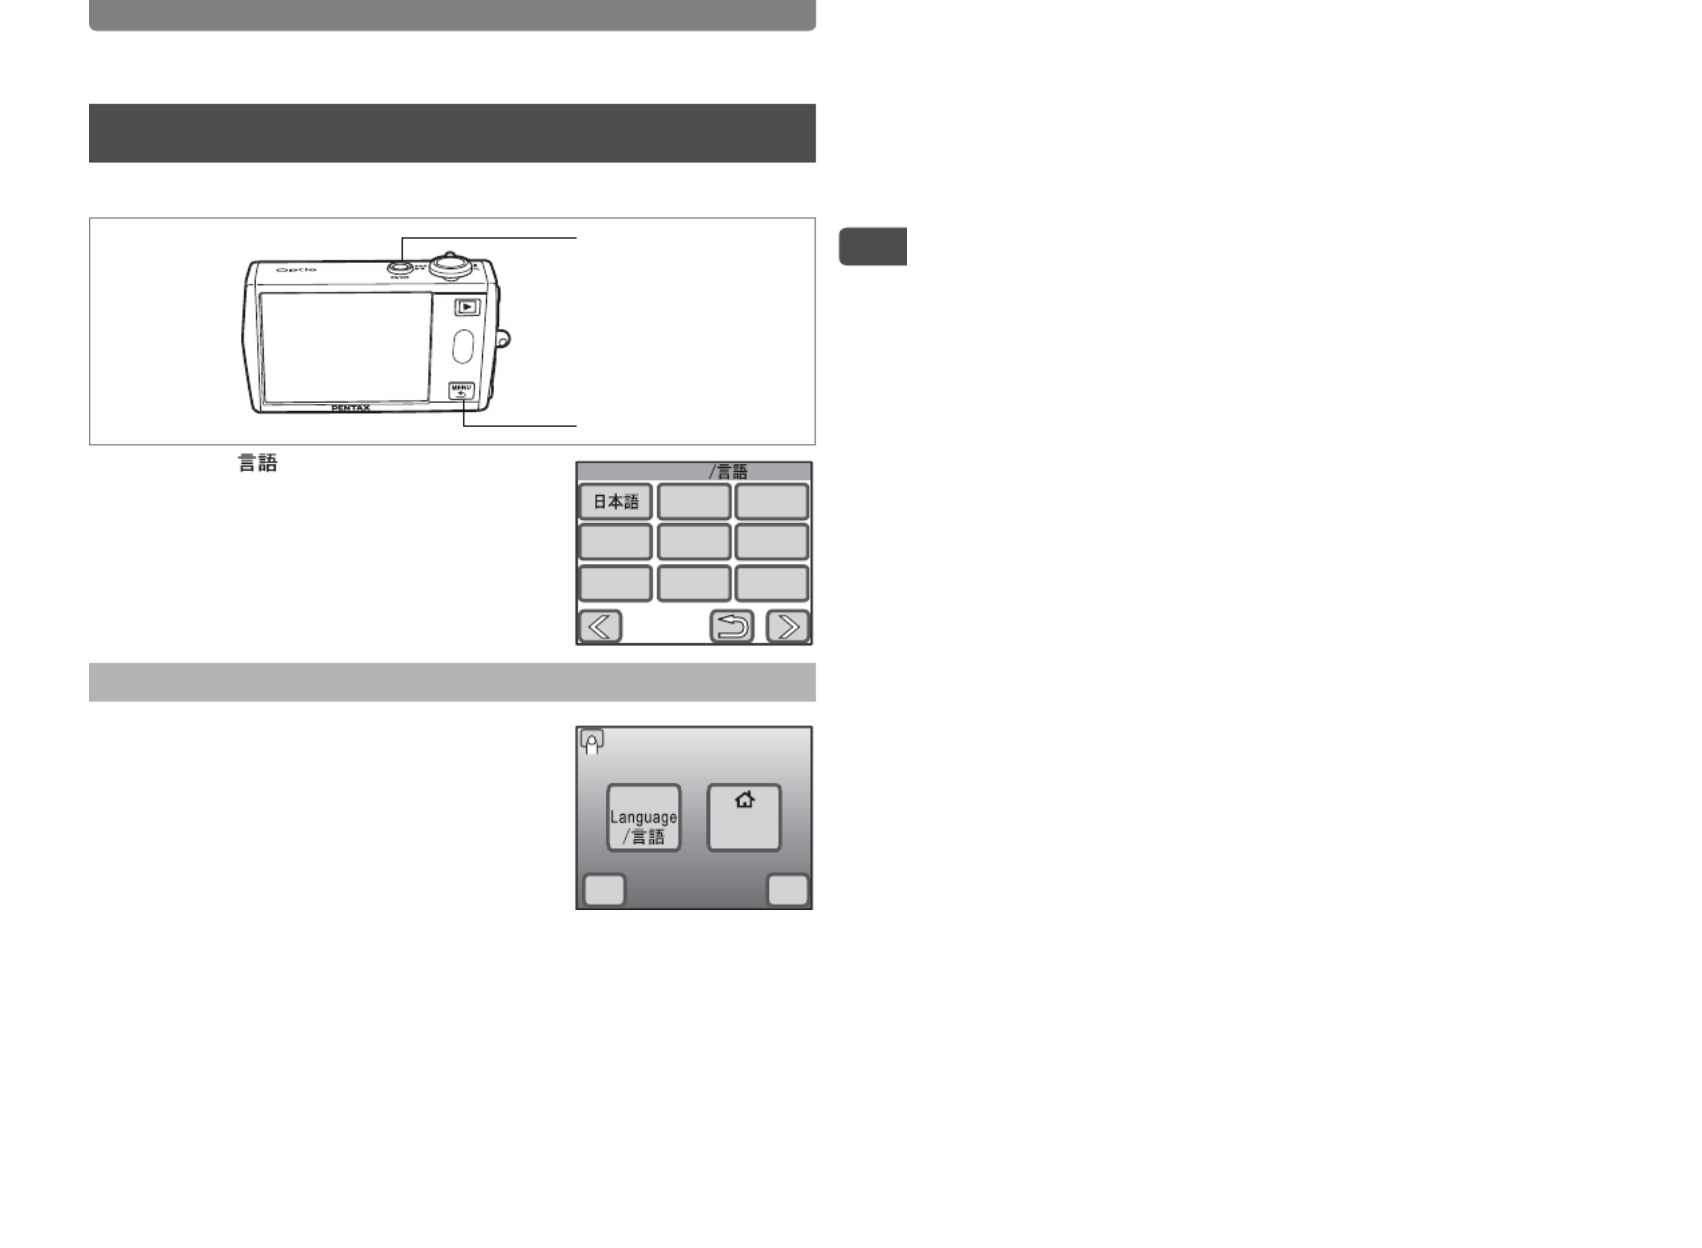
Set the language, time, and date before using the camera for the first time.
The Language/ screen appears when the
camera is turned on for the first time. Perform
the operations below to set the language and
the current date and time.
1Choose a language from the screen
display.
If the desired language does not appear,
touch the arrow icons to advance the screen
and select the language.
The Initial Setting screen appears in the
selected language.
[Hometown] and [Video Out] will appear in the selected language. If
[Hometown] or [Video Out] is not correctly displayed, touch the flashing
icon on the LCD monitor and change the setting.
Initial Settings
Setting the Language and the Date and Time
Power switch
3 button
Language 1/3
English
Deutsch Español Português
Italiano
Nederlands
Dansk
Français
Initial Setting
Hometown
OKCancel
English

Initial Settings
22
1
Getting Started
2Touch [OK].
The Date Adjust screen appears.
Caution
If the 3 button is pressed without touching [OK] on the Initial Setting
screen, the language will not be set and the Date Adjust screen appears. In
this case, the Language/ screen will appear next time you turn the
camera on.
3Touch [Date Style].
The Date Style screen appears.
4Touch the arrow icons (qr) to
choose the display style of the
year, month, and day.
Select [mm/dd/yy], [dd/mm/yy] or [yy/mm/dd].
5Touch the arrow icons (qr) to choose the time display
style.
Select [24h] (24-hour display) or [12h] (12-hour display).
6Touch [OK].
The setting is saved and the screen returns to the Date Adjust screen.
[Hometown] and [Date Style] are automatically set according to the
language selected on the Initial Setting screen. To change these
settings, refer to the pages below.
• [Hometown] : “Setting the Destination” (p.153)
• [Date Style] : “Changing the Date and Time” (p.149)
Date Adjust
Date
Style Date Time
OKCancel
Date Style
mm/dd/yy
24h
OKCancel

Initial Settings
23
1
Getting Started
7Touch [Date].
The Date screen appears.
8Touch the arrow icons (su) to
set the current date.
9Touch [OK].
The setting is saved and the screen returns to
the Date Adjust screen.
10 Touch [Time].
The Time screen appears.
11 Touch the arrow icons (su) to
set the time.
12 Touch [OK].
The setting is saved and the screen returns to
the Date Adjust screen.
13 Touch [OK].
The camera returns to Capture mode.
Caution
If the shutter release button is pressed without touching [OK] on the Date
Adjust screen, the camera will return to Capture Mode without setting the time.
The set language, date, and time can be changed. Refer to the pages
below for instructions.
• To change the language: “Changing the Display Language” (p.157)
• To change the date and time: “Changing the Date and Time” (p.149)
Date
0101 2007
OKCancel
Time
0000
OKCancel
Enjoy Taking Pictures
25
2
Camera Features
4
Take the Picture
5
Play Back the Images
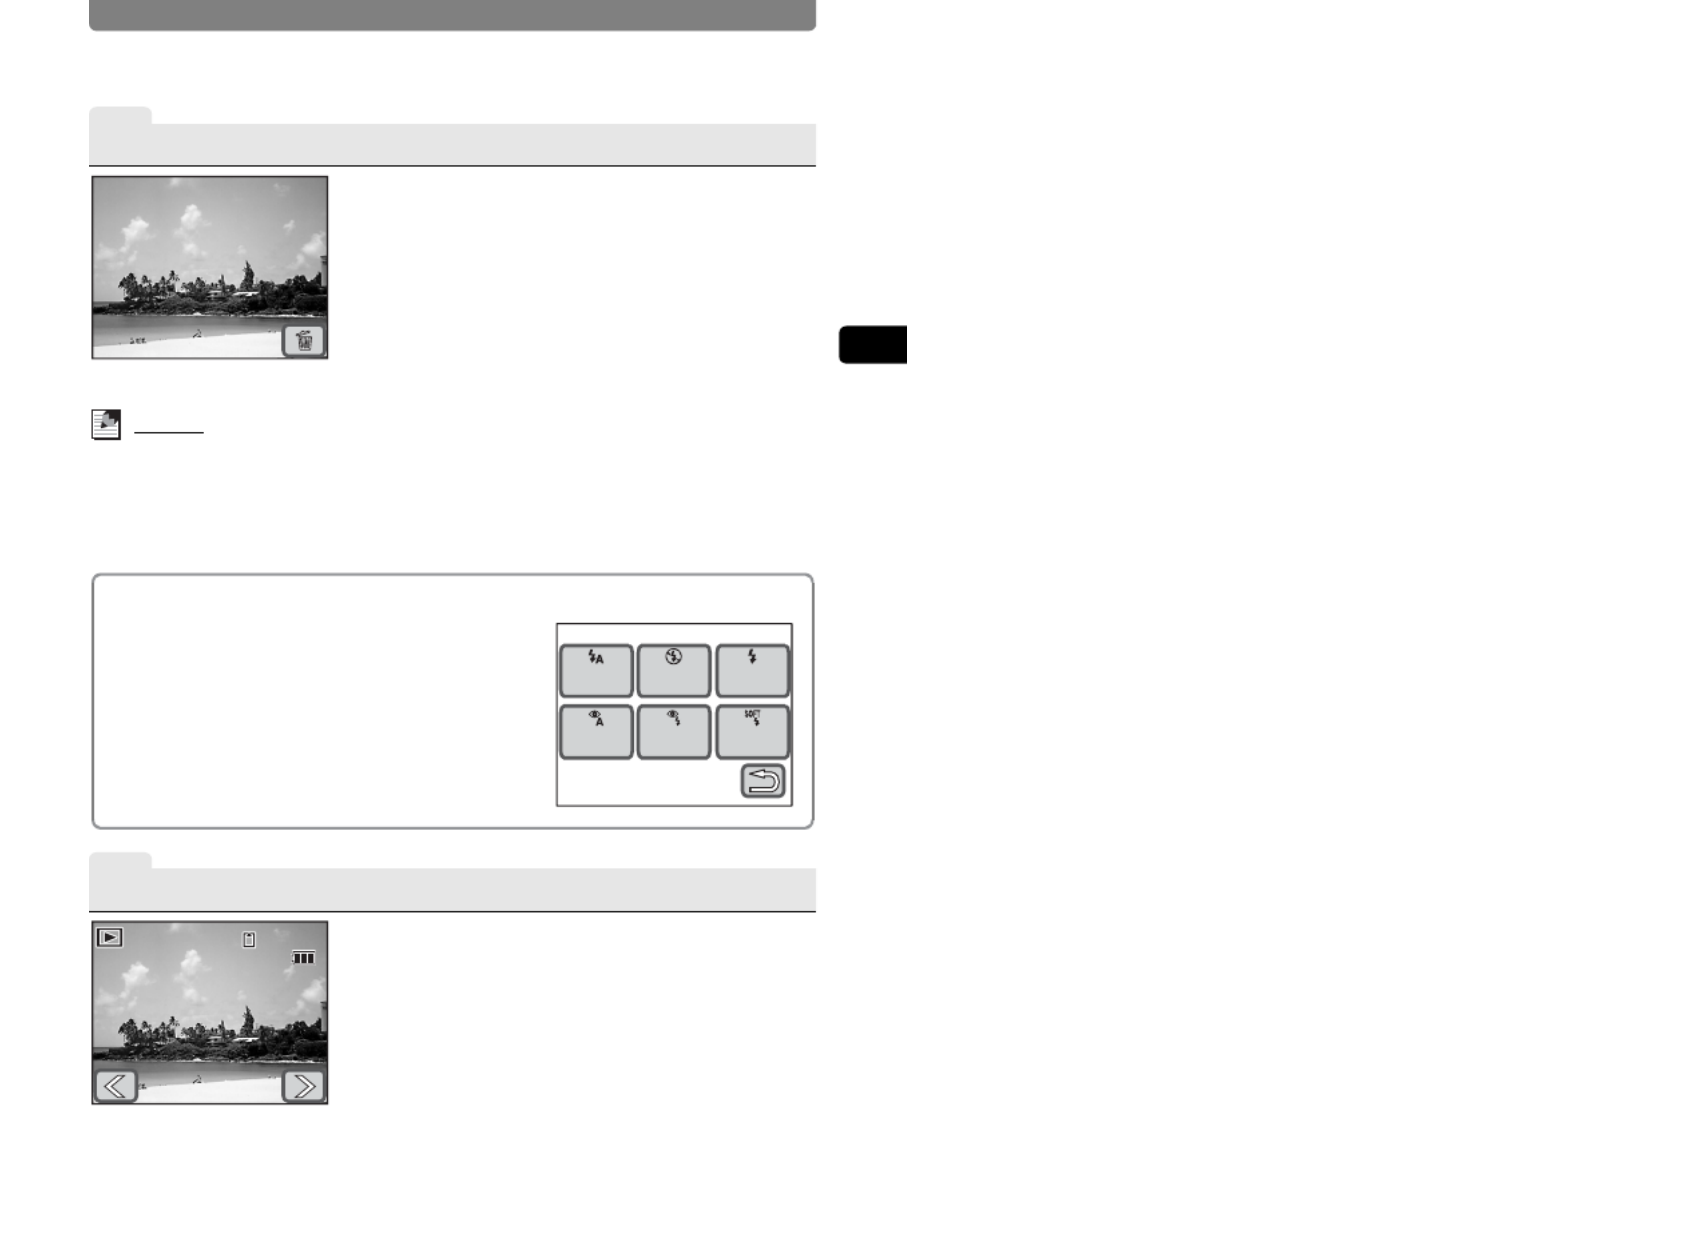
After the shutter release button is pressed
halfway (which locks in the focusing point and
exposure values), press it all the way down to
take a picture.
The captured image appears on the LCD monitor
for one second (Instant Review) and is saved.
• The Instant Review time can be adjusted (p.83). To
delete the image without saving it, touch the i icon
during Instant Review.
Memo
• Pressing the shutter release button all the way down is referred to as
pressing it “fully”.
•
Pressing the shutter release button also allows you to take pictures continuously
(p.82). In addition, self-timer (p.79) and remote control (p.80) enable you to take
pictures hands-free.
Using the Flash
By default, the flash is set to automatically fire
when taking pictures in low light conditions.
You can change the flash mode setting (p.62) to
turn off the flash, reduce the brightness of the
picture, prevent the subject from appearing with
red eyes, and perform other functions.
Setting the flash mode
X
Touch the LCD monitor
J
[Capture Toolbar]
J
,
.
After taking a picture, press the
Q
button to switch
to Playback mode. The captured image appears on
the LCD monitor (p.85). Touch the arrow icons
(
qr
) to play back the images in order.
In Playback mode, you can magnify (p.92),
delete (p.102), or rotate the images (p.90).
Additionally, you can view the images in a nine-
image display (p.93) or as a slideshow (p.98).
Selecting the function for the displayed image
X JIn Playback mode, touch the LCD monitor
[Playback Toolbar] J select the function.
Flash Mode
Auto
Flash On
+Red-eye Soft
Flash
Flash
Off
Flash On
Auto +
Red-eye
14:25
1
1
1
14
4
4
4:
:
:
:2
2
2
25
5
5
5
100-0038
1
1
1
10
0
0
00
0
0
0-
-
-
-0
0
0
00
0
0
03
3
3
38
8
8
8
14:25
100-0038
01/26/2007
0
0
0
01
1
1
1/
/
/
/2
2
2
26
6
6
6/
/
/
/2
2
2
20
0
0
00
0
0
07
7
7
7
01/26/2007

Enjoy Taking Pictures
26
2
Camera Features
6
Edit an Image
Viewing Images on a TV
The pictures that you take can also be viewed on
a TV or other AV equipment so that everyone can
enjoy them (p.100).
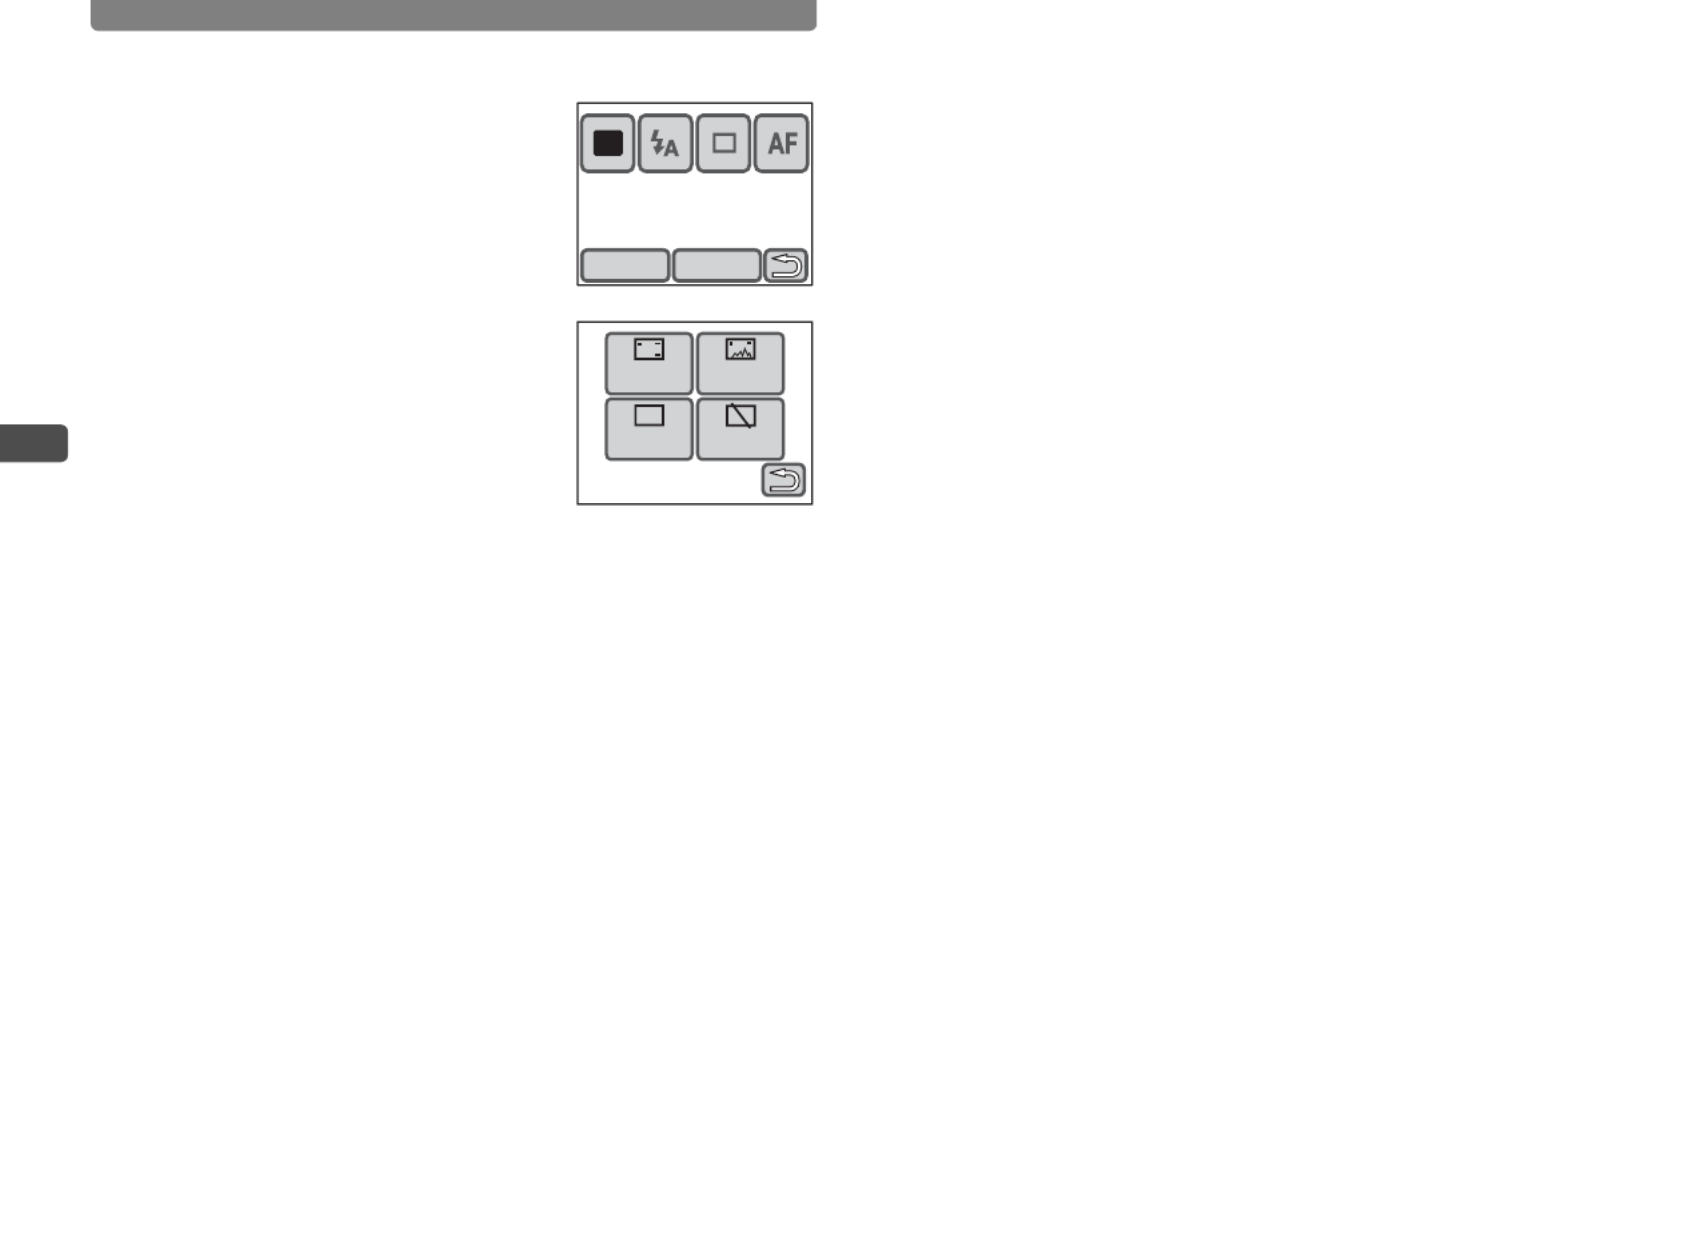
You can edit captured images (p.108).
You can change the size and quality level
(p.108), crop an image (p.109), draw a picture
(p.111), add stamps (p.111), add a frame
(p.119), change the brightness (p.126), add
sound (p.130), correct images where the flash
has caused the subject to appear with red eyes
(p.128), and more.
Selecting the editing method
X JIn Playback mode, touch the LCD monitor
[Playback Toolbar] J .n
Various Editing Functions
Digital Filters
Use these to soften an image, give
the image the look of an illustration,
change the width of the subject to
appear broader or more slender
(p.127).
My Drawing
Use the supplied stylus to draw
pictures on an image, add stamps,
create a stamp from part of the
image, and more (p.111).
Selecting the editing method
X JOn the [Playback Palette], double-touch h .i or j
1/2
1
1
1
1/
/
/
/2
2
2
2
1/2
Playback Palette
Playback Palette
Playback Palette
Playback Palette
Playback Palette
Playback Palette
Guide
Guide
Guide
Guide
Guide
Guide
OKCancel
My
1.0
Cancel
Ca
Ca
Ca
Canc
nc
nc
nce
e
e
el
l
l
l
OK
OK
OK
OK
OK
Cancel OK
Enjoy Recording Movies
29
2
Camera Features
3
Play Back the Movie
4
Edit a Movie
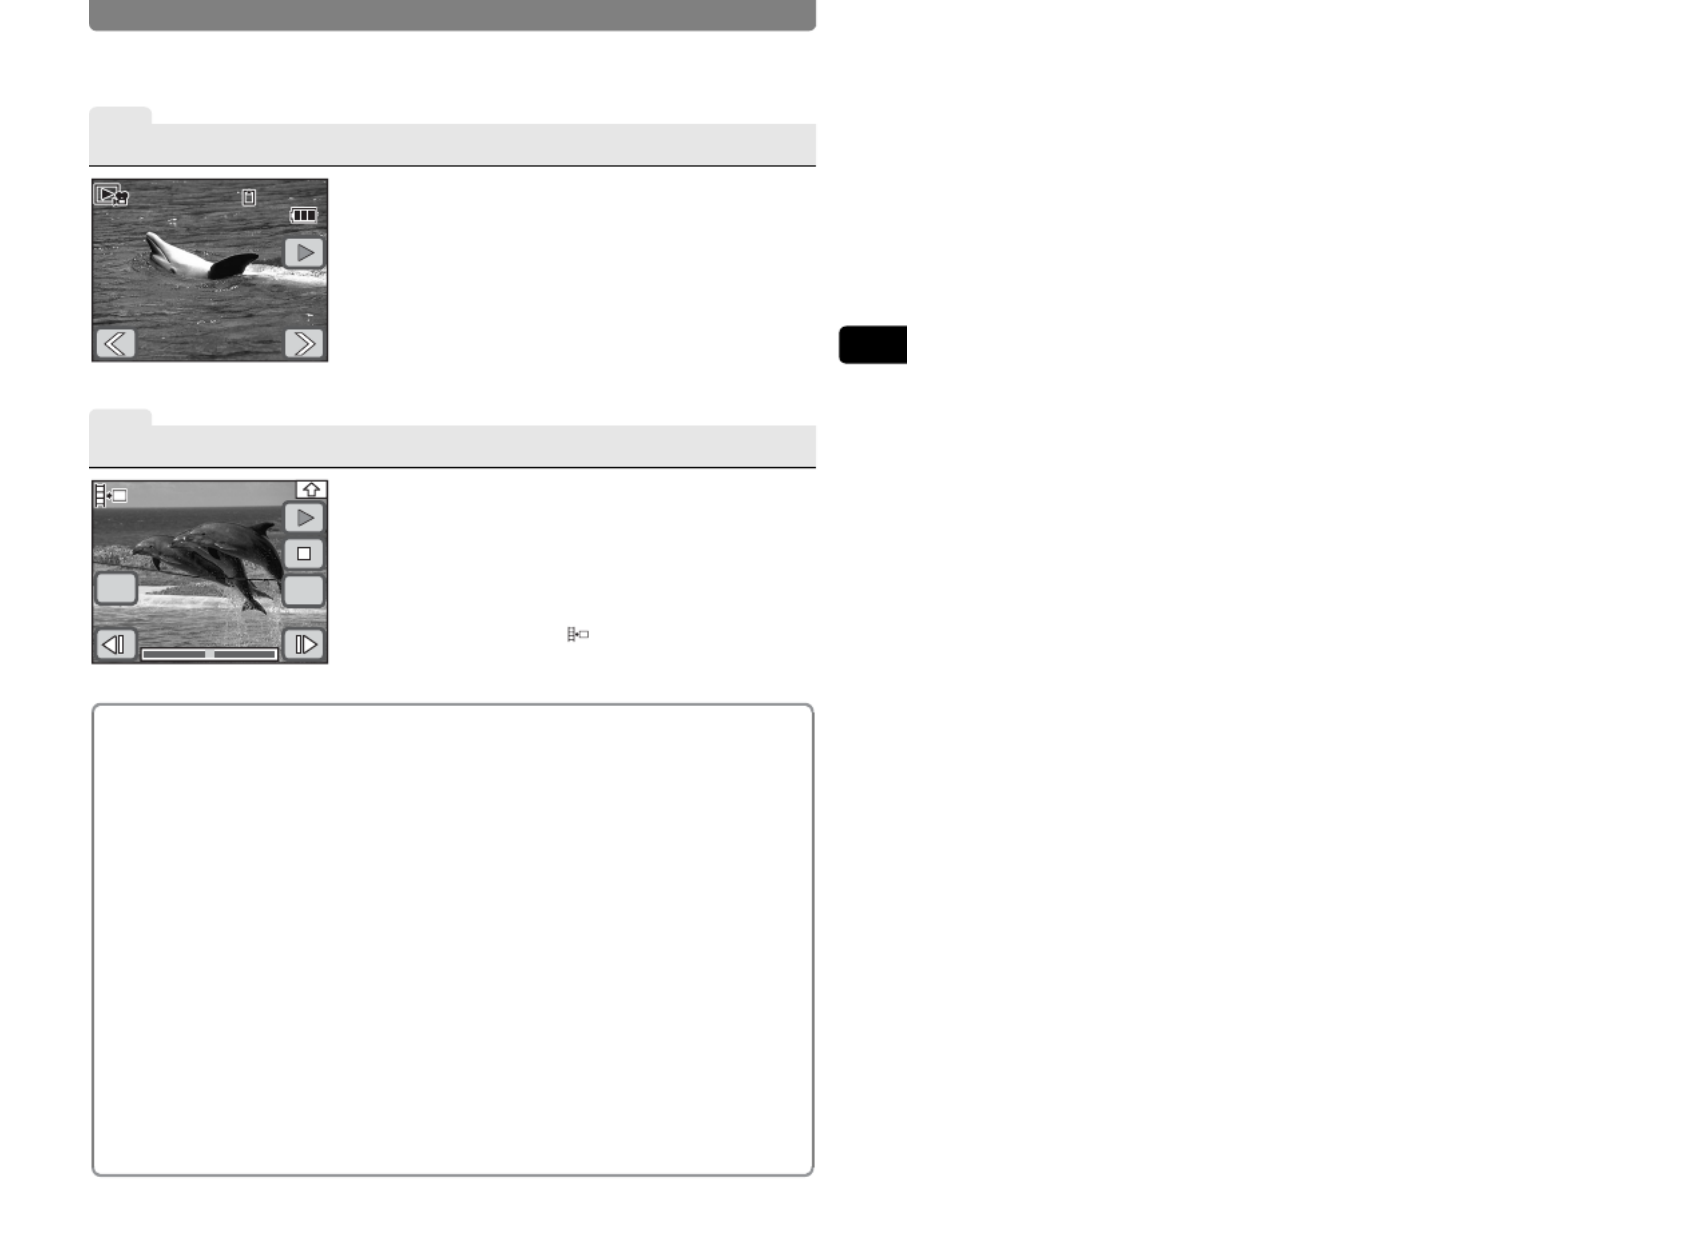
After recording a movie, press the Q button to
switch to Playback mode. The recorded movie
appears on the LCD monitor.
In Playback mode, you can reverse playback,
pause playback, adjust the volume, and
reverse or forward playback frame by frame
(p.96).
You can save one frame from a movie (p.132)
divide a movie (p.133) or stitch two movies
together (p.134).
Selecting the movie editing method
X Touch the LCD monitor J [Playback Toolbar] J n
J J double-touch [ .
About Movie Recording:
Yes
• You can use both the optical and
digital zoom when composing your
shot, but only the digital zoom is
available when recording (p.50).
•
You can record movies by pressing
and holding the shutter release
button for more than one second.
• You can adjust the recorded
pixels, frame rate, quality level and
color mode (p.56).
• You can set the white balance,
sharpness, saturation, and
contrast (p.64, p.66).
• You can correct the exposure
before recording (p.59).
No
• Flash mode, continuous shooting
mode and auto bracket mode are
not available.
• You cannot change the following
shooting conditions:
[Aux.AF Light]: Off (p.75)
[AE Metering]: Multi-segment
metering (p.61)
[Sensitivity]: Auto (p.76)
14:25
1
1
1
14
4
4
4:
:
:
:2
2
2
25
5
5
5
100-0017
1
1
1
10
0
0
00
0
0
0-
-
-
-0
0
0
00
0
0
01
1
1
17
7
7
7
30
3
3
3
30
0
0
0
14:25
100-001730
01/26/2007
0
0
0
01
1
1
1/
/
/
/2
2
2
26
6
6
6/
/
/
/2
2
2
20
0
0
00
0
0
07
7
7
7
01/26/2007
112
1
1
1
11
1
1
12
2
2
2
112
OK
Cancel

Enjoy Recording Sounds
30
2
Camera Features
You can record sounds up to a maximum of 24 hours (as a single
recording) with the camera. You can add an index during recording to help
you quickly find the section of sound you want to listen to. You can also
add voice memos to pictures you have taken.
1
Switch to Voice Recording Mode
2
Record Sounds
Enjoy Recording Sounds
To record sounds, use the [Capture Palette] to
switch to Voice Recording mode.
Switching to Voice Recording mode
X JIn Capture mode, touch the LCD monitor
[Capture Toolbar] J J b double-touch O.
Press the shutter release button fully to start
voice recording. The self-timer lamp blinks
during recording.
Press the shutter release button fully again to
stop voice recording.
If you press and hold the shutter button for
more than one second, recording is done until
you stop pressing it.
The following information appears on the LCD
monitor during recording.
1 Recording time
2 Remaining recordable time
Microphone
SHUTTER RECMENU
Index Stop
01:30:22
2201 :00 :
1 2

Enjoy Recording Sounds
31
2
Camera Features
3
Play Back the Sound
Using the Index Function for Quicker and Easier Playback
Press the 3 button during recording to add an index to the current sound
file. By adding an index to a point in the sound file, you can quickly jump to that
position during playback at any time.
•Indexes cannot be added during playback.
After recording, press the Q button to switch
to Playback mode.
In Playback mode, you can fast forward, fast
rewind, and adjust the volume. When indexes
are added during recording, you can fast
forward or fast rewind to each index (p.97).
Adding a Voice Memo to a Picture
You can add a voice memo of up to 60 seconds to a picture
you have already taken to describe the picture or how it
was shot (p.130).
01/26/2007 14:25
100-002500:01:30

Enjoy Printing Images
32
2
Camera Features
After taking pictures and editing them, you can print them easily by using
DPOF (Digital Print Order Format) settings. You can even print them
directly from the camera without a PC when using a PictBridge-
compatible printer. You can then share prints with friends and family or
keep them in a photo album. Pictures can be output on a DPOF-
compatible printer or printed by a local photo processing lab using DPOF
settings that indicate the number of photos and date imprinting options for
your “print order”.
1
Make the DPOF Print Settings
2
Set the USB Connection Mode
Enjoy Printing Images
Choose the number of copies and if the date is
to be superimposed on the pictures you want to
print (DPOF settings) (p.137).
The pictures can then be printed using a DPOF-
compatible printer or photo processing lab.
•To use a photo processing lab, take the SD
Memory Card containing the pictures with the print
order data and ask to have them printed.
How to configure the DPOF settings
X JIn Playback mode, touch the LCD monitor
[Playback Toolbar] J J n double-touch r.
By connecting the camera to a PictBridge-
compatible printer with the provided USB cable,
you can print images directly from the camera
without a PC.
To print pictures, you need to set the [USB
Connection] mode on the camera to
[PictBridge] in advance (p.160).
Setting the [USB Connection] mode
X3 button J touch [Setting] J [USB
Connection].
Print
One
Print
All
DPOF
USB Connection

Enjoy Printing Images
33
2
Camera Features
3
Connect the Camera to a Printer
4
Print the Images
Connect the camera to a printer that supports
PictBridge using the provided USB cable. The
settings for the number of copies and whether
to superimpose the date can also be made on
the camera when printing even if no DPOF print
settings are made (p.140).
If the DPOF settings have already been made,
simply touch [DPOF Setting] and then [Print] to
print the pictures (p.143). You can also print
individual images (p.141) or print all the images
on an SD Memory Card or those stored in the
built-in memory (p.143).
When printing is completed, turn off the
camera, and disconnect the USB cable from
the camera and printer.
Inserting the Date on Prints
By inserting the date on your prints, you can easily
determine when the picture was taken. The setting
for inserting the date can be made when making
the DPOF settings or when printing (p.137, p.141,
p.143).
•Not all printers are capable of date imprinting.
Print
All
Print
One
DPOF
Setting
Select printing mode
Total
Date Copies
10
1
Print with DPOF setting
PrintCancel
2007.01.26
2007.01.26
2007.01.26
2007.01.26
2007.01.26
2007.01.26
2007.01.26
2007.01.26
2007.01.26
2007.01.26
2007.01.26
2007.01.26

34
3
Taking Pictures
3Taking Pictures
In Capture mode, press the 3 button or touch the LCD monitor to
display the shooting settings.
• On the [Capture Palette], touch an icon with the guide checkbox checked to
display the guide display. To skip the guide display, double-touch the icon.
• If you press the shutter release button or no operation is performed for a certain
period of time, the camera returns to Capture mode.
• Press the Q button to switch to Playback mode.
• Touch to return to the previous screen.
Setting the Shooting Functions
Memo PadDISPLAY
AUTO
P I C T
Guide
Guide
Guide
Guide
Guide
1/2
1
1
1
1/
/
/
/2
2
2
2
1/2
Capture Palette
Capture Palette
Capture Palette
Capture Palette
Capture Palette
Capture Palette
AUTO
P I C T
Guide
Menu
Rec.
Mode 1 Rec.
Mode 2 Movie
SettingSoundCommon
Rec. Mode 1
Recorded
Pixels Quality
Level White
Balance
AUTO
400
Sensi-
tivity
AE
Metering
7
AF
Setting
AF
Recorded Pixels
3 2 640
57 4
Touch the LCD
monitor.
Continue with operations while following the on-screen guidance.
Touch the
desired icon.
Touch the desired icon.
These four icons
provide shooting-
related functions.
Press the
3 button.
Touch the
desired icon.
Touch the
desired icon.
Touch the
desired icon.
[Menu]
[Capture Toolbar]

Setting the Shooting Functions
35
3
Taking Pictures
Functions set with the [Capture Toolbar]
Functions set with the [Menu]
Item Description Default Setting Page
Shooting
Mode
Sets the shooting mode according to the
shooting condition or your subject.
b
(Auto Picture) p.43
Flash Mode Sets the flash mode according to the
shooting condition. , (Auto) p.62
Drive Mode Sets the self-timer, continuous shooting
mode, Auto Bracket and remote control. 9 (Standard) p.79, p.80,
p.67, p.82
Focus Mode Sets the focus mode. = (Standard) p.72
Information
Display
Sets the type of information displayed on
the LCD monitor. Standard p.41
Item Description Default Setting Page
Recorded
Pixels
Sets the number of recorded pixels of
pictures. a (3072×2304) p.54
Quality Level Sets the quality level of pictures. D (Better) p.54
White Balance Adjusts the color balance according to
the light conditions. F (Auto) p.64
Focusing
Area Chooses the focusing area. J (Multiple) p.74
Focus
Limiter Limits the focus range. Off p.75
Aux.AF
Light
For choosing whether to use the
auxiliary AF light when shooting in
dimly lit locations.
On p.75
AE Metering For choosing which area of the image to
measure for determining the exposure.
L
(Multi-segment
metering)
p.61
Sensitivity Sets the ISO sensitivity. AUTO400 p.76
EV
Compensation
Adjusts the overall brightness of the
picture. ±0.0 p.59
Auto Bracket Selects and sets Auto Bracket. l (Exposure) p.67
Instant Review
Sets the amount of time an image is
displayed on the LCD monitor after a
picture is taken.
1 sec. p.83
Sharpness For choosing sharp or soft outlines. G (Normal) p.66
Saturation Adjusts the color saturation. D (Normal) p.66
Contrast Adjusts the image contrast level. J (Normal) p.66
V Rec. Mode 1
AF Setting
W Rec. Mode 2

Setting the Shooting Functions
36
3
Taking Pictures
Item Description Default Setting Page
Recorded
Pixels
Sets the number of recorded pixels for
movies. m (640×480) p.56
Quality Level Sets the quality level of movies. C (Best) p.56
Frame Rate Sets the frame rate (number of frames
per second). 30fps p.56
Color Mode Selects the color of movies. Full color p.58
Movie SR Sets whether or not to compensate
camera shake in movies. On p.58
Digital Zoom Activates the digital zoom function. On p.51
Memory
Retains your shooting settings or
returns to the default values when the
camera is turned off.
On (only for Flash
mode, Digital
Zoom, and File No.)
p.39
Fn Setting
For quickly calling up frequently used
functions.
l (Off) p.37
C Movie O Common

Setting the Shooting Functions
37
3
Taking Pictures
Up to four frequently used functions can be
assigned to the [Capture Toolbar] for easy
access when taking pictures or recording
movies.
Functions that can be called up when taking pictures and recording movies
Calling Up Frequently Used Functions
Item When Taking Pictures When Recording Movies
Recorded Pixels c c
Quality Level c c
Frame Rate ¯ c
Movie SR ¯ c
White Balance c c
Color Mode ¯ c
Focusing Area c c
Focus Limiter c ¯
AE Metering c ¯
Sensitivity c ¯
EV Compensation c c
Sharpness c c
Saturation c c
Contrast c c
7
±0.0
AUTO
400
Memo PadDISPLAY
AUTO
P I C T
Assigned functions
V
Rec. Mode 1/
C
Movie
W
Rec. Mode 2

Setting the Shooting Functions
38
3
Taking Pictures
Assigning a Function to the Capture Toolbar
1Press the 3 button.
The [Menu] appears.
2Touch [Common].
The Common screen appears.
3Touch [Fn Setting].
The Fn Setting screen appears.
4Touch the l icon you want to
assign a function to in the [Capture
Toolbar].
To assign a function to call up when taking
pictures, touch the l icon under A.
To assign a function to call up when recording movies, touch the l icon
under C.
5Touch the icon of the function you
want to assign to the [Capture
Toolbar].
•The setting is saved and the screen returns
to the previous screen.
•If the function you want to assign does not
appear, touch [qr] to advance the
screen.
6Repeat Steps 4 to 5 to assign the necessary functions.
7Touch three times.
•The camera returns to Capture mode.
•Press the Q button to return to Playback mode.
Memo
To cancel a function assigned to the [Capture Toolbar], touch the l (Off)
icon in Step 5.
Fn Setting
OFF OFF OFF OFF
OFF OFF OFF OFF
Fn Setting1
1/2
Focusing
Area
White
Balance Focus
Limiter
Recorded
Pixels Quality
Level
Off
7
A
OFF
FL

Setting the Shooting Functions
40
3
Taking Pictures
1Press the 3 button.
The [Menu] appears.
2Touch [Common].
The Common screen appears.
3Touch [Memory].
The Memory screen appears.
4Touch the setting you want to
change.
•The setting changes to O P (On) or (Off).
•If the function you want to change does not
appear, touch [qr] to advance the
screen.
5Touch [OK].
6Touch twice.
•The camera returns to Capture mode.
•Press the Q button to return to Playback mode.
Memory
1/2
Flash
Mode
MF
Position White
Balance
Drive
Mode Focus
Mode
Zoom
Position
OKCancel
Setting the Shooting Functions
42
3
Taking Pictures
1In Capture mode, touch the LCD
monitor.
The [Capture Toolbar] appears.
2Touch [DISPLAY].
The DISPLAY Selection screen appears.
3Touch the desired setting.
The setting is saved and the camera returns
to Capture mode.
Memo PadDISPLAY
AUTO
P I C T
Standard Standard+
Histogram
No Info.
Display LCD Off

Selecting a Shooting Mode
43
3
Taking Pictures
By selecting the shooting mode according to the shooting situation, you
can easily take pictures with the appropriate settings. The shooting
modes for taking pictures are as shown below.
Selecting a Shooting Mode
Selecting the Shooting Mode in the Capture Palette
Icon Shooting
Mode Description Functions Not
Available
bAuto
Picture
The camera automatically selects the
appropriate Capture Mode for taking pictures.
Cont. Shooting,
Auto Bracket,
White Balance,
AE Metering, EV
Compensation,
Focusing Area
A Program
The camera automatically adjusts the shutter
speed and aperture for taking still pictures. You
can set other shooting functions such as the
flash mode or continuous shooting mode.
None
ANight
Scene
The camera decreases the shutter speed for
beautiful pictures of night views. To prevent
camera shake, use a tripod or rest the camera on
a flat surface when taking pictures with this
mode. Use the flash if people are included (p.48).
Flash Mode:
Auto, Auto +
Red-eye
Drive Mode:
Cont. Shooting
I Portrait Gives your subject a bright, natural look.
Cont. Shooting,
Auto Bracket +
other functions
not available in
Picture Modes
qLand-
scape
The camera sets the focus to keep both near
and far objects as sharp as possible.
White Balance,
Sharpness,
Saturation,
Contrast, AE
Metering
< Flower Flowers are captured with soft outlines.
CKids For taking pictures of children who move
around a lot.
iSurf &
Snow
For taking pictures under extremely bright
conditions such as beach and snow scenes.
\ Sport
Suitable for photographing fast moving
subjects. The focus stays on the moving subject
until the shutter opens.
E Pet The camera takes into account the color of the
pet’s fur for proper exposure (p.49).
Picture Mode

Selecting a Shooting Mode
46
3
Taking Pictures
2Touch the Shooting Mode (e.g. b).
• The icon of the currently selected Capture Mode appears on the
[Capture Toolbar].
• The [Capture Palette] appears.
• If the desired icon does not appear, touch the arrow icons (qr) to
advance the screen.
3Double-touch the or I C icon.
• The camera returns to Capture Mode.
• In I (Portrait) mode, when the camera recognizes the face of the
subject in the LCD monitor, a yellow focus frame appears at the position
of the face. From here on, the position and size of the focus frame
change in keeping with how the subject moves.
• Touch an icon with the guide checkbox checked to display the guide
display.
4Press the shutter release button halfway.
The focus frame on the LCD monitor turns green if the subject is in focus.
5Press the shutter release button fully.
The picture is taken.
Memo
• If the subject's face cannot be recognized, the camera focuses in the
focusing area (multiple).
• Only the mode icon and focus frame are displayed on the LCD monitor.
Other photographic information is not displayed.
• When part of the subject's face is obscured by sunglasses, for example, or
the subject's face is not directly facing the camera, the face recognition AF
and face recognition AE functions might not be activated.
• In the Kids mode, AE metering is fixed to multi-segment metering.
• The face recognition AF and face recognition AE functions also are
activated when the Auto Picture Mode is selected and the mode is the
Portrait Mode.
• In the Kids mode, auto-tracking AF is activated. The focus continuously
tracks the movement of the subject even after the shutter release button is
pressed halfway.
• Continuous shooting is not possible while face recognition functions are
activated.
• Digital zoom is not possible while face recognition functions are activated.
• Auto Bracket is not possible while face recognition functions are activated.

Selecting a Shooting Mode
47
3
Taking Pictures
Letting the Camera Decide the Optimum Mode
In the b (Auto Picture) mode, the camera can judge the optimum mode
and take pictures in that mode simply by pressing the shutter release
button.
The camera selects - (Standard) mode, I (Portrait) mode, q
(Landscape) mode or A (Night Scene) as the optimum mode.
1In Capture Mode, touch the LCD monitor.
The [Capture Toolbar] appears.
2Touch the Shooting Mode (e.g. b).
• The icon of the currently selected Capture Mode appears on the
[Capture Toolbar].
• The [Capture Palette] appears.
• If the desired icon does not appear, touch the arrow icons (qr) to
advance the screen.
3Double-touch the b icon.
• The camera returns to Capture Mode.
• Touch an icon with the guide checkbox checked to display the guide
display.
4Press the shutter release button halfway.
• The optimum mode for the subject is selected. The selected mode
appears at the top left of the LCD monitor.
• The focus frame on the LCD monitor turns green if the subject is in
focus.
5Press the shutter release button fully.
The picture is taken.

Selecting a Shooting Mode
48
3
Taking Pictures
Memo
• In the Auto Picture Mode, EV compensation is fixed to ±0.0.
• The face recognition AF and face recognition AE functions also are
activated when the Auto Picture Mode is selected and the mode is the
Portrait Mode. The position of the face is recognized automatically
simply by pointing the camera at the subject from the front, and the
focus is adjusted and exposure adjusted to take the picture.
• Cont. Shooting and Auto Bracket cannot be selected.
• When the optimum mode is judged to be Night Scene while the Flash
Mode is set to Auto and Auto+Red-eye, firing of the flash is disabled.
Taking Pictures in Dimly Lit Locations
When taking pictures under low light conditions, such as during twilight or
at night, the camera shutter must be opened longer to allow more light in.
This camera comes with a special mode A (Night Scene) for taking
pictures when light levels are low. In Night Scene mode, the camera
decreases the shutter speed for optimal exposure to capture beautiful
pictures at night. You can also use this mode to take portraits with night
scenes in the background as the camera will automatically select a long
shutter speed even when using the flash.
Memo
• When pictures are taken in dimly lit locations, the shutter must stay open
longer which contributes to camera shake. When using a shutter speed at
which camera shake is likely to occur, f (camera shake warning) appears
on the LCD monitor. To prevent camera shake, use a tripod and the self-
timer or remote control function.
• You can also increase the ISO sensitivity setting to take pictures in dimly lit
locations without using the flash. When the ISO sensitivity is increased, the
shutter speed also increases, making it easier to prevent camera shake and
blurring of the subject. However, noise, which appears as a grainy pattern,
may appear in the picture (p.76).

Selecting a Shooting Mode
49
3
Taking Pictures
Taking Pictures of Your Pet
In Pet mode (E), choose the appropriate icon
depending on whether your pet is dark, light, or
in between. The exposure will automatically be
adjusted to produce the best picture. Choosing
either the cat or dog icon does not affect the
resulting picture. Choose whichever you prefer.
Taking Pictures of Text
In the B (Text) mode, sharp photos of text can be taken. This mode is
handy for saving important documents as images or for when text is too
small for reading. You can also select from color, color reversed, black
and white, or black and white reversed to match the display or state of the
text.
Reducing the Influence of Camera Shake or Blurring
of Subjects
In the c (Digital SR) Mode, photos can be taken at a higher ISO
sensitivity which results in reduced blurring. In this mode, the shutter
speed and aperture are automatically set to the appropriate values. Use
this mode in photographic scenes where camera shake or blurring of the
subject may occur due to low light levels.
The ISO sensitivity is fixed to AUTO3200 in the Digital SR mode.

Composing Your Shot
50
3
Taking Pictures
When the zoom is set to a wide angle, more of the scene is included.
When the zoom is set to telephoto, distant objects appear closer. Wide
angle settings make near-to-far objects look further apart than they really
are while telephoto settings make them look closer together.
1In Capture mode, turn the zoom
lever toward x or w.
x Tele : Brings the subject closer with a
narrow angle of view.
w Wide : Makes the subject smaller with a
wider angle of view.
You can take pictures at up to three times
magnification using the optical zoom. When the
digital zoom is on, you can combine it with the
optical zoom to enlarge the subject to a
maximum magnification equivalent to 12 times.
Caution
You cannot use the optical zoom when the focus mode is set to q (Macro).
Only the digital zoom is available.
Memo
• Camera shake is likely to occur when taking pictures at telephoto settings.
To prevent camera shake, use a tripod and the self-timer or remote control
function.
• Using the digital zoom produces a slightly grainy image. For the best image
quality, use optical zoom.
Composing Your Shot
Using the Zoom
38
3
3
3
38
8
8
8
38
AUTO
P I C T
Zoom bar
Turn the zoom
lever toward x.
38
3
3
3
38
8
8
8
38
AUTO
P I C T
Optical zoom
range
Digital zoom
range

Adjusting the Size, Quality Level, Brightness, and Color Tone
53
3
Taking Pictures
The camera will automatically adjust settings such as brightness and
color tone to capture pictures and movies as optimally as possible. If,
however, you want to use creative effects, you will need to customize the
shooting functions. This section explains the various built-in functions that
can help you to capture better pictures and movies.
Size and Quality Level
Set the size and quality level according to how you intend to use the
pictures or movies (p.54).
Brightness
The brightness (exposure) of a picture is determined by the amount of light
entering the camera lens (aperture) and the length of time the light is allowed
to enter (shutter speed). If the brightness of a picture is not at the desired level,
one solution is to adjust the setting using the EV compensation function (p.59).
The AE metering function is also helpful in allowing you to select the
metering method to measure proper brightness under different shooting
situations (p.61).
When you take a picture in a dimly lit location, using the flash to illuminate
the subject is a basic technique (p.62). But if you want a more natural
feeling and do not want to use the flash, adjusting the ISO sensitivity
(p.76) can help produce a properly exposed image.
Color Balance (White Balance)
Use the white balance setting if the color balance of the image is not
pleasing, or if you want to give the picture a bluish or reddish look (p.64).
Sharpness, Saturation, and Contrast
Sharpness, saturation and contrast settings are available in three levels
(p.66) for sharpening or softening the outlines of an image, enhancing its
vividness, and adjusting the image contrast.
Automatically Changing the Shooting Settings When Taking
Pictures (Auto Bracket)
Use the Auto Bracket setting to take three continuous pictures with the
shooting settings (exposure, white balance, sharpness, saturation, and
contrast) automatically changed when the shutter release button is
pressed. (p.67)
Adjusting the Size, Quality Level, Brightness,
and Color Tone
Produkt Specifikationer
| Mærke: | Pentax |
| Kategori: | Kamera |
| Model: | Optio T30 |
Har du brug for hjælp?
Hvis du har brug for hjælp til Pentax Optio T30 stil et spørgsmål nedenfor, og andre brugere vil svare dig
Kamera Pentax Manualer

11 Januar 2025
11 Januar 2025
25 August 2024
25 August 2024
25 August 2024
25 August 2024
25 August 2024
25 August 2024
25 August 2024
25 August 2024
Kamera Manualer
- Kamera Bosch
- Kamera SilverCrest
- Kamera Acer
- Kamera Ozito
- Kamera Denver
- Kamera Sony
- Kamera Canon
- Kamera Samsung
- Kamera GE
- Kamera Panasonic
- Kamera TP-Link
- Kamera Philips
- Kamera Lenco
- Kamera Gigaset
- Kamera Braun
- Kamera Logitech
- Kamera Epson
- Kamera Daewoo
- Kamera Technaxx
- Kamera HP
- Kamera Sanyo
- Kamera Easypix
- Kamera Grundig
- Kamera D-Link
- Kamera Arlo
- Kamera Bushnell
- Kamera Pyle
- Kamera Fujifilm
- Kamera Nikon
- Kamera Kodak
- Kamera Lenovo
- Kamera Olympus
- Kamera Nedis
- Kamera Zorki
- Kamera Optoma
- Kamera Creative
- Kamera Azden
- Kamera Casio
- Kamera Trevi
- Kamera Trust
- Kamera Laserliner
- Kamera Blaupunkt
- Kamera JVC
- Kamera Leica
- Kamera Hitachi
- Kamera Medion
- Kamera Exakta
- Kamera EZVIZ
- Kamera König
- Kamera Gembird
- Kamera Powerfix
- Kamera Alpine
- Kamera Netgear
- Kamera Maginon
- Kamera Avaya
- Kamera Nest
- Kamera Vtech
- Kamera BenQ
- Kamera Bresser
- Kamera Anker
- Kamera Sigma
- Kamera Rollei
- Kamera Xiaomi
- Kamera Moultrie
- Kamera Viewsonic
- Kamera Imou
- Kamera Polaroid
- Kamera Ricoh
- Kamera Aida
- Kamera Konica-Minolta
- Kamera Foscam
- Kamera Kyocera
- Kamera GoPro
- Kamera Lorex
- Kamera Cobra
- Kamera Velleman
- Kamera FLIR
- Kamera Swann
- Kamera Eufy
- Kamera Celestron
- Kamera Ring
- Kamera Fluke
- Kamera Hikvision
- Kamera AVerMedia
- Kamera Reolink
- Kamera EVE
- Kamera Prixton
- Kamera Marshall Electronics
- Kamera General Electric
- Kamera SPC
- Kamera Hanwha
- Kamera ARRI
- Kamera BirdDog
- Kamera Bauhn
- Kamera MuxLab
- Kamera Spypoint
- Kamera Vivitar
- Kamera Ansco
- Kamera Vimar
- Kamera Oregon Scientific
- Kamera Dahua Technology
- Kamera SereneLife
- Kamera Lexibook
- Kamera Intel
- Kamera SJCAM
- Kamera Scosche
- Kamera Speco Technologies
- Kamera Joy-It
- Kamera Kogan
- Kamera Levenhuk
- Kamera Emerson
- Kamera Minox
- Kamera Burris
- Kamera Silvergear
- Kamera Elmo
- Kamera AViPAS
- Kamera UniView
- Kamera AquaTech
- Kamera Alfatron
- Kamera BZBGear
- Kamera PTZ Optics
- Kamera Daitsu
- Kamera Agfa
- Kamera AgfaPhoto
- Kamera Argus
- Kamera Lumens
- Kamera Yashica
- Kamera Sygonix
- Kamera Mamiya
- Kamera Zenit
- Kamera Fuji
- Kamera Minolta
- Kamera EverFocus
- Kamera RunCam
- Kamera SeaLife
- Kamera Aplic
- Kamera FIMI
- Kamera Meade
- Kamera Contax
- Kamera Sinji
- Kamera Traveler
- Kamera Digital Watchdog
- Kamera Getac
- Kamera Ikegami
- Kamera Pelco
- Kamera ZeissIkon
- Kamera Dorr
- Kamera HOLGA
- Kamera Praktica
- Kamera Hasselblad
- Kamera Moto Mods (Motorola)
- Kamera Fantasea Line
- Kamera Brinno
- Kamera Z CAM
- Kamera General
- Kamera Ergoguys
- Kamera Strex
- Kamera Berger & Schröter
- Kamera Leitz Focomat IIc
- Kamera Cosina
- Kamera Videology
- Kamera InfiRay
- Kamera Videotec
- Kamera GoXtreme
- Kamera IOptron
- Kamera Cambo
- Kamera Kobian
- Kamera Kyocera Yashica
- Kamera Red Digital Cinema
- Kamera Konica
- Kamera Akaso
- Kamera Seek Thermal
- Kamera Ikelite
- Kamera Adeunis
- Kamera Hoppstar
- Kamera PatrolEyes
- Kamera Camouflage
- Kamera HuddleCamHD
- Kamera Linhof
- Kamera Aquapix
- Kamera KanDao
Nyeste Kamera Manualer
29 Marts 2025
29 Marts 2025
27 Marts 2025
12 Marts 2025
12 Marts 2025

14 Januar 2025

13 Januar 2025
12 Januar 2025
11 Januar 2025
8 Januar 2025