Praktica LRF-7 Manual
Læs gratis den danske manual til Praktica LRF-7 (3 sider) i kategorien Afstandsmåler. Denne vejledning er vurderet som hjælpsom af 43 personer og har en gennemsnitlig bedømmelse på 4.8 stjerner ud af 22 anmeldelser.
Har du et spørgsmål om Praktica LRF-7, eller vil du spørge andre brugere om produktet?
Produkt Specifikationer
| Mærke: | Praktica |
| Kategori: | Afstandsmåler |
| Model: | LRF-7 |
| Bredde: | 43 mm |
| Dybde: | 75 mm |
| Højde: | 105 mm |
| Vægt: | 190 g |
| Produktfarve: | Grøn |
| Driftstemperatur (T-T): | -10 - 40 °C |
| Batterier inkluderet: | Ja |
| Batteritype: | CR2-3V |
| Bæretaske: | Ja |
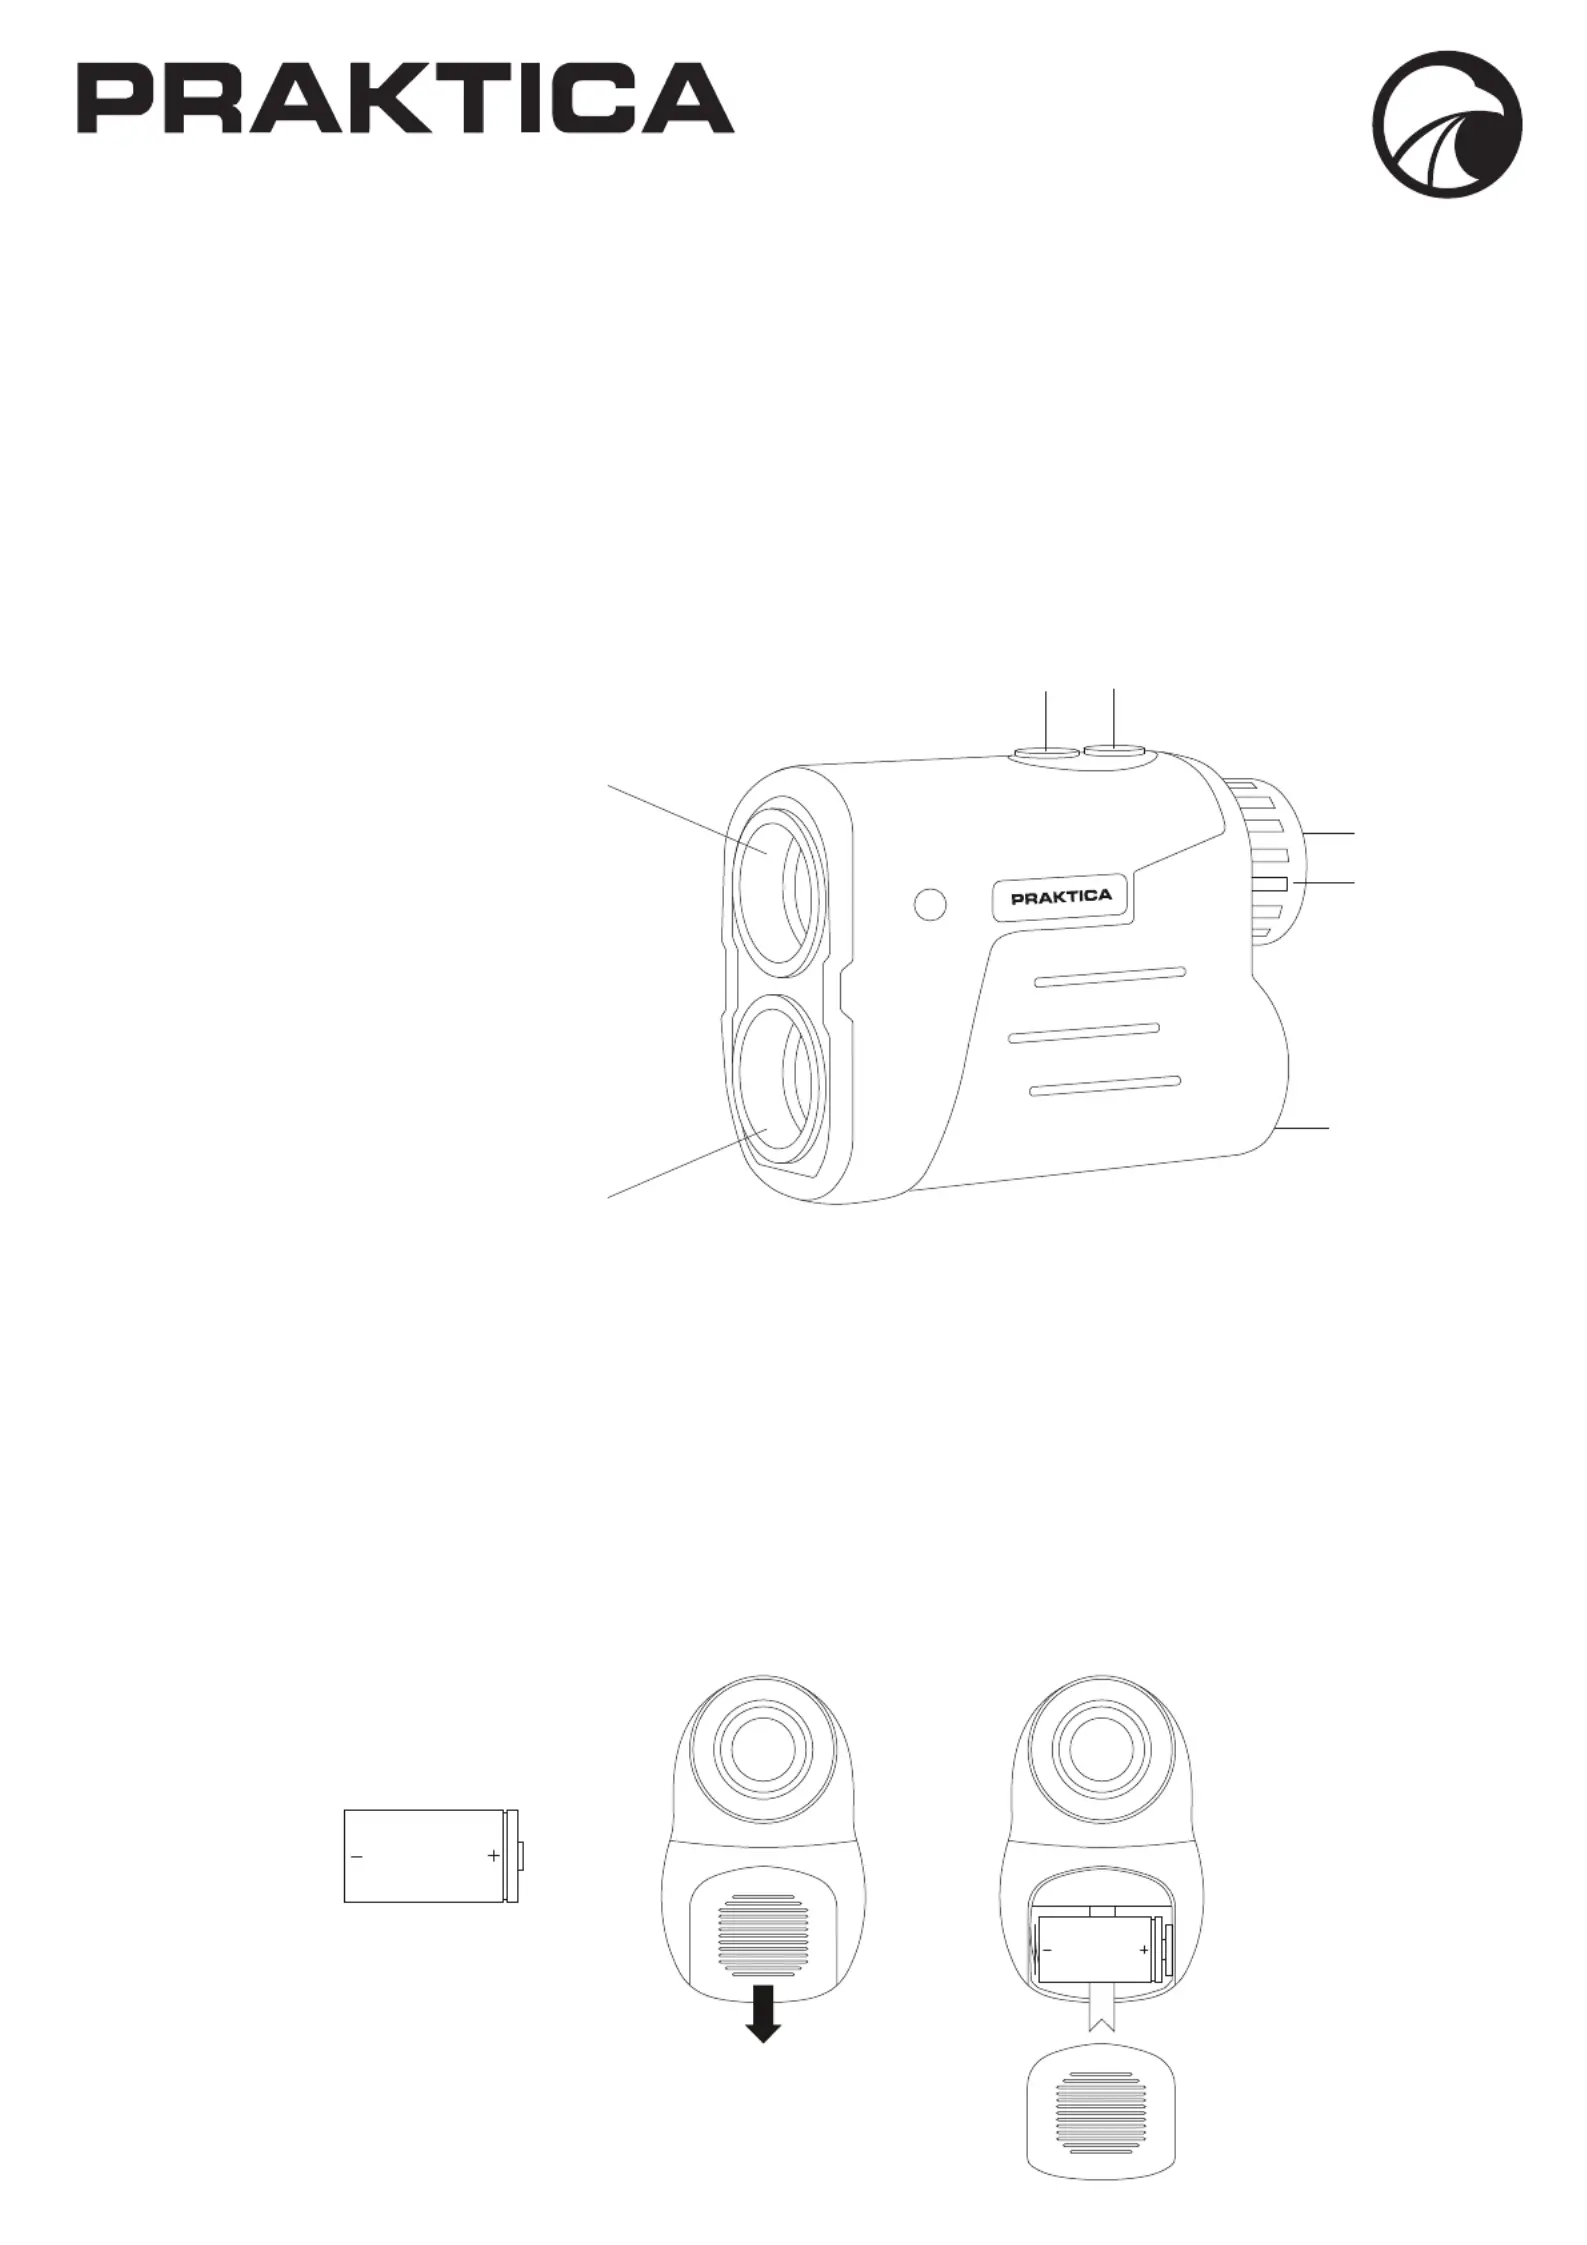
| Forstørrelse: | 7 x |
| Øjenlindring: | 12 mm |
| Objektiv diameter: | 25 mm |
| Udgangspupil: | 3.5 mm |
| Synsfelt (ved 1000 m): | 126 m |
| Linse overflade: | Fully Multi Coated (FMC) |
| Målt afstand: | 6 - 600 m |
Har du brug for hjælp?
Hvis du har brug for hjælp til Praktica LRF-7 stil et spørgsmål nedenfor, og andre brugere vil svare dig
Afstandsmåler Praktica Manualer

Afstandsmåler Manualer
- Powerfix
- Westfalia
- Makita
- Techweise
- Hilti
- Stanley
- Fluke
- Milwaukee
- Draper
- Kreator
- ADA
- Workzone
- Bosch
- Kress
- KS Tools
Nyeste Afstandsmåler Manualer


