Samsung Sam4S ER-600 Manual
Samsung Sam4S
Kasseapparat
ER-600
Læs nedenfor 📖 manual på dansk for Samsung Sam4S ER-600 (264 sider) i kategorien Kasseapparat. Denne guide var nyttig for 23 personer og blev bedømt med 4.5 stjerner i gennemsnit af 2 brugere
Side 1/264

ER-600
Programming &
Operation Manual
2003.05.22 Ver. 1
2003.05.31 Ver. 2
All specifications are subject to change without notice
ATTENTION
The product that you have purchased contains a rechargeable Ni-MH battery. This battery is recyclable. At the end of its useful life,
under various state and local laws, it may be illegal to dispose of the battery into the municipal waste system.
Check with your local solid waste officials for details concerning recycling options or proper disposal.
WARNING
This is a Class A product. In a domestic environment this product may cause radio interference in which case the user may be
required to take adequate measures.

ER-600 Contents • i
Contents
Programming
Introduction 1
About the ER-600 ......................................................................................................................1
Using this Manual......................................................................................................................1
Unpacking..................................................................................................................................2
Basic Features and Functions ....................................................................................................3
Standard Hardware......................................................................................................3
Optional Hardware ......................................................................................................3
Software Features........................................................................................................3
Default Keyboard ........................................................................................................5
Programmable Function Keys .....................................................................................6
Control Lock .............................................................................................................10
Front Display.............................................................................................................11
Initial Clear ..............................................................................................................................15
Memory Clear..........................................................................................................................16
Memory All Clear .....................................................................................................16
Service Mode Programming 17
Overview .................................................................................................................................17
Hardware Test..........................................................................................................................18
Hardware Test Table .................................................................................................19
Clear All Totals .......................................................................................................................20
Clear Grand Total ....................................................................................................................20
Clear PLU File.........................................................................................................................21
EPROM Information ...............................................................................................................21
Memory Allocation..................................................................................................................22
Function Key Assignment .......................................................................................................24
Function Key Codes ..................................................................................................26
IRC Options.............................................................................................................................27
RS232C Port 1/2/3/4 Options..................................................................................................28
RS232C Settings Screen Program Notes...................................................................31
Program Mode Programming 32
Descriptor Programming Methods...........................................................................................32
Program Overlay Method..........................................................................................32
Descriptor Code Method ...........................................................................................33
Program Mode Menu...............................................................................................................34

ii • Contents ER-600
PLU Programming...................................................................................................................36
Add/Modify PLU.......................................................................................................36
PLU Options - Reference Information ......................................................................39
Delete PLU ................................................................................................................41
Group Programming ................................................................................................................44
Sales Tax Programming...........................................................................................................47
Programming an Add-On Tax Rate Percentage ........................................................48
Programming a Tax Table .........................................................................................49
Programming a VAT (Value Added Tax) .................................................................53
Programming a Canadian GST..................................................................................54
System Option Programming...................................................................................................55
System Options - Reference Information ..................................................................59
Print Option Programming.......................................................................................................63
Print Options - Reference Information ......................................................................67
Clerk Programming..................................................................................................................71
Clerk Programming - Reference Information............................................................72
Function Key Programming.....................................................................................................73
#/NS...........................................................................................................................74
%1 -%5 ......................................................................................................................76
ADD CHECK............................................................................................................79
CANCEL ...................................................................................................................81
CASH ........................................................................................................................82
CHARGE 1-8 ............................................................................................................84
CHECK CASHING...................................................................................................86
CHECK ENDORSEMENT.......................................................................................87
CHECK .....................................................................................................................88
CHECK # ..................................................................................................................90
CURRENCY CONVERSION 1-4 ............................................................................92
EAT-IN TAKE OUT DRIVE THRU.......................................................................93
ERROR CORRECT ..................................................................................................94
F/S TEND..................................................................................................................95
FUNCTION LOOK UP(FLU) #1-2 ..........................................................................97
GUEST ......................................................................................................................99
MDSE RETURN .....................................................................................................100
MODIFIER 1-5 .......................................................................................................101
PBAL.......................................................................................................................103
PAID OUT 1-3 ........................................................................................................104
PRINT CHECK.......................................................................................................105
PROMO...................................................................................................................106
RECD ON ACCT 1-3..............................................................................................107
SCALE ....................................................................................................................108
SERVICE ................................................................................................................110
TABLE ....................................................................................................................112
TARE.......................................................................................................................113
TAX EXEMPT........................................................................................................114
TIME IN/OUT.........................................................................................................115
TIP...........................................................................................................................116
VALIDATE.............................................................................................................117
VOID ITEM ............................................................................................................118
WASTE ...................................................................................................................119
PAYMENT..............................................................................................................120
FINALIZE ...............................................................................................................121
Logo Descriptor.....................................................................................................................122
Preamble..................................................................................................................123
Postamble ................................................................................................................124

ER-600 Contents • iii
Endorsement Message.............................................................................................125
Financial Report ......................................................................................................126
Clerk Report ............................................................................................................127
Macro Name............................................................................................................128
Mix & Match Name ................................................................................................129
NLU Code Number ...............................................................................................................130
Download Programs ..............................................................................................................131
Clerk In/Out...........................................................................................................................133
PLU Stock .............................................................................................................................134
Drawer Limit .........................................................................................................................136
Check Change Limit..............................................................................................................137
Time & Date ..........................................................................................................................138
Tare Weight ...........................................................................................................................139
Macro.....................................................................................................................................140
Programming a New Macro ....................................................................................141
Editing an Existing Macro.......................................................................................142
Machine No. ..........................................................................................................................143
Training Mode Password.......................................................................................................144
Program Scans .......................................................................................................................145
Operating Instructions 147
Operator Display Screen........................................................................................................147
Operator Display Example ......................................................................................148
Clerk Operations....................................................................................................................149
Clerk Sign On Instructions......................................................................................150
Clerk Sign Off Instructions .....................................................................................150
Clerk Time Keeping ................................................................................................151
Item Registrations..................................................................................................................153
Open Keyboard PLU Entry .....................................................................................154
Preset Price Keyboard PLU.....................................................................................154
Keyboard PLU Repeat Entry...................................................................................155
Keyboard PLU Multiplication.................................................................................156
Keyboard PLU Multiplication with Decimal Point.................................................157
Split Pricing (Keyboard PLU).................................................................................158
Single Item Keyboard PLU .....................................................................................159
Open Code Entry PLU ............................................................................................160
Preset Price Code Entry PLU ..................................................................................160
Code Entry PLU Multiplication ..............................................................................161
Code Entry PLU Multiplication with Decimal Point ..............................................162
Split Pricing Code Entry PLU .................................................................................162
PLU Price Inquiry ...................................................................................................163
Modifier Key...........................................................................................................164
Price Level Key.......................................................................................................165
Promo ......................................................................................................................166
Waste.......................................................................................................................167
Shifting or Exempting Tax ....................................................................................................168
Shifting Tax.............................................................................................................168
Shifting Tax (VAT : FOR GERMANY ONLY).....................................................169
Exempting Tax ........................................................................................................170
Percent Key Operations .........................................................................................................172
Preset Percent Discount on an Item.........................................................................172
Enter a Percent Discount on an Item .......................................................................173
Percent on Sale Total...............................................................................................174
Coupon on Sale (Vendor Coupon) .......................................................................... 175

iv • Contents ER-600
Coupon on Item (Store Coupon) .............................................................................176
Return Merchandise Registrations.........................................................................................177
Voids and Corrections ...........................................................................................................178
Error Correction (Void Last Item)...........................................................................178
Void Previous Item..................................................................................................178
Cancel......................................................................................................................179
Void Position Operations ........................................................................................179
No Sale Operations................................................................................................................180
Open Drawer ...........................................................................................................180
Non Add Number ....................................................................................................180
Received On Account Operations..........................................................................................181
Paid Out Operations...............................................................................................................182
Subtotaling a Sale ..................................................................................................................183
Eat In/Take Out/Drive Thru Sales .........................................................................................183
Totaling and Tendering..........................................................................................................184
Totaling a Cash Sale................................................................................................184
Totaling a Check Sale..............................................................................................184
Tendering a Cash Sale .............................................................................................185
Tendering a Check Sale...........................................................................................185
Totaling a Charge Sale ............................................................................................186
Tendering a Charge Sale .........................................................................................187
Check Cashing.........................................................................................................188
Split Tender .............................................................................................................189
Post Tender..............................................................................................................190
Food Stamp Sales ....................................................................................................191
Currency Conversion...............................................................................................193
Receipt On/Off and Receipt on Request..................................................................194
Check Tracking Operations ...................................................................................................195
Overview .................................................................................................................195
Posting Balances Manually .....................................................................................197
Soft Check ...............................................................................................................199
Hard Check..............................................................................................................202
Fast Food Drive Thru ..............................................................................................205
Scale Operations ....................................................................................................................207
Direct Scale Entry....................................................................................................208
Automatic Scale Entry.............................................................................................209
Tare Weight Entry ...................................................................................................210
Manual Tare Weight Entry......................................................................................211
Manual Weight Entry ..............................................................................................212
X Mode 213
Manager Mode.......................................................................................................................213
Manager Operation ................................................................................................................214
X Reports...............................................................................................................................215
Declaration.............................................................................................................................217
Register Print Format.............................................................................................................218
Stop Register Printing............................................................................................................219
Training Mode .......................................................................................................................220
E.J. 0peration .........................................................................................................................221
NOT FOUND PLU................................................................................................................222
Z Mode 225
Reset Report Mode ................................................................................................................225

ER-600 Contents • v
Z Reports ...............................................................................................................................226
Reset Electronic Journal ........................................................................................................228
PC Communication................................................................................................................228
PLU Lookup Program ...........................................................................................................229
Age Verification ....................................................................................................................231
KP Starting No.......................................................................................................................232
MIX & MATCH PGM ..........................................................................................................233
MIX & MATCH SCAN ........................................................................................................234
RESET N.F. PGM .................................................................................................................234
Sample Reports 237
Financial ................................................................................................................................237
Time.......................................................................................................................................241
PLU........................................................................................................................................242
Clerk ......................................................................................................................................243
Individual Clerk.....................................................................................................................244
Groups ...................................................................................................................................245
Stock ......................................................................................................................................246
Clerk Time Report .................................................................................................................247
Check File..............................................................................................................................248
Special character 249
Program .................................................................................................................................249
Glossary of Terms 251

ER-600 Introduction • 1
Introduction
About the ER-600
Congratulations! You have selected a very flexible electronic cash register designed for years
of reliable service. ER-600 will fit many shops and restaurants, providing fast transaction
processing, security, and detailed sales information.
The ER-600 features a unique operator screen that allows you to view itemized transaction
information, as well as providing on screen programming that is simple and easy to use. The
keyboard has 98 individual key locations. All locations are programmable so that your dealer
can customize the keyboard to fit your needs exactly.
Using this Manual
This manual provides the sequences and reference information required to set up and program
your ER-600.
In this Manual you will find:
• "Introduction" - Before you begin programming, please review this chapter carefully to
understand the basic features and capabilities of your ER-600.
• "Service Mode Programming" - In the service mode, you can perform hardware tests,
then complete one-time set up procedures that will ready your ER-600 for use.
• "Program Mode Programming" - All routine programming procedures, including PLU,
function key, system options and sales tax programming are performed in Program Mode.
• "X-Mode" - Manager procedures, including X reports are detailed here.
• "Z-Mode" - Z (reset) reports are detailed.
• "Sample Reports" - A sample of each report is provided.

2 • Introduction ER-600
Unpacking
1. Unpack and Unwrap the cash register.
2. Located in the packing are the following items:
• 2 sets of control keys
• Operator's Manual
• 1 ferrite core for use with optional IRC cable. (See instructions included
with IRC cable.)
3. Remove the cardboard protectors from the cash drawer.
4. Plug the register into a grounded outlet (three prong), insert a control key and turn the
key to the REG control lock position.

ER-600 Introduction • 3
Basic Features and Functions
Standard Hardware
• Adjustable 8 line, 20 character liquid crystal display.
• 98-position Keyboard
• 7-position control lock.
• LCD display.
• Communications ports: 4 RS232C & IRC.
Optional Hardware
• Load cell scale.
• Kitchen printer or video requisition system.
• Bar code scanner.
• Coin changer.
• Pole Display.
• EFT.
Software Features
• 63 standard/80 maximum Keyboard NLU keys.
• Up to 5 price levels for each PLU.
• Up to 5 PLU modifier keys (i.e. small, medium, and large).
• Up to about 10,000 Price Look Ups (PLUs). (The total number of PLUs available varies
by memory allocation.
• 12 character programmable descriptors for PLUs and functions.
• Up to 99 PLU Group totals.
• Operation for up to 99 clerks with separate report totals.
• Employee time keeping functions for each clerk.
• Four tax rates with value added tax (VAT) capability. Each tax rate is programmable for
tax table look-ups and/or straight percentage tax programming. Tax rate 4 can be
programmed to accommodate Canadian goods and services tax (GST).
• Programmable functionality for each key location.
• 24-hour real-time clock with automatic day and date change.
• Check, Cash, and up to 8 charge tender functions.

ER-600 Introduction • 5
Default Keyboard
1
3
2
4
5
LEVEL
2 8
9
3
FUNCTION
LOOK-UP 1
#/NS
7
9
14
2
ADD
CHECK
PAGE
DOWN
PLU
7
13
6
4
ERROR
CORR
TAX 1
SHIFT
10
16
5
LEVEL
1
11
17
.
6
CLEAR
ESC
00
0
12
18
CLERK
#
PAGE
UP
PAPER
FEED
VOID
ITEM
20
26
32
19
24
31
21
27
33
23
28
34
23
30
35
38
44 37
42
39
45
40
46
41
47
48
49
CASH
ENTER
SBTL
CHECK
FUNCTION
LOOK-UP 2
YES/NO
@/FOR
PRT SCR
% 1
52
58 51
56
53
59
54
60
55
61
62
63
1. CANCEL
2. MDSE RETURN
3. RA1
4. PO1
5. TIP
6. TAXEXMT
7. CONV1
8. TIME IN/OUT
FUNCTION LOOK-UP 1 MENU
1. CHARGE 1
2. CHARGE 2
3. CHARGE 3
4. CHARGE 4
5. CHARGE 5
6. CHARGE 6
7. CHARGE 7
8. CHARGE 8
FUNCTION LOOK-UP 2 MENU
8
1 15 22 29 43 36 50
% 2
% 3
57
Program Overlay
1
3
2
4
i
5
)
8
9
Q
7
@
=
!
PAGE
DOWN
/
PLU
:
DOUBLE
6
A
W
#
Z
S
E
.
CAPS
CLEAR
ESC
00
0
X
D
PAGE
UP
PAPER
FEED
BACK
SPACE
"
SPACE
V
G
C
F
T
;
SPACE
B
$
'
SPACE
R
%
?
Y
& ^
<
H
U
N
J
SPACE
M
SPACE
>
CASH
ENTER
SBTL
YES/NO
@/FOR
PRT SCR
P
I
( *
-
K
O
,
L
CAPS
.
CAPS
+

6 • Introduction ER-600
Programmable Function Keys
Functions can be assigned as necessary from the list that follows into any keyboard location.
Key Descriptions
KEY Description
NUMERIC
KEYPAD: 0-9, 00,
AND DECIMAL
Use the numeric keypad to enter amounts and other numeric values.
The decimal key is used for decimal multiplication, when setting or
entering fractional percentage discounts, or when programming fractional
tax rates. Do not use the decimal key when making amount entries into
PLUs.
NLU 1 - NLU 80 Use any of the 80 NLU keys to categorize merchandise (as you would with
traditional department keys.) NLUs can be programmed to access any PLU
number in the register.
#/NS Press to open the cash drawer when you have not already started a
transaction. Also, can be used to print any non-adding number (up to 9
digits) on the printer paper.
%1 -%5 Up to five % keys may be placed on the keyboard. Each % key is set with a
specific function, such as item discount or surcharge, or sale discount or
surcharge. The percent rate may be entered or preprogrammed, or the percent
keys can be programmed with a negative open or preset price, thus acting as
coupon keys.
@/FOR
(PRT SCREEN)
Enter a quantity, then press the @/FOR key to enter multiple items. Also
use to enter “split pricing” items, such as 1 item at 3 for $.89.
When pressed directly, the @/FOR key will cause the information
displayed on the screen to be printed. (The print screen function is allowed
or disallowed by a system option.)
ADD CHECK Use to combine individual trays (in a cafeteria situation) that will be paid
together. Each tray subtotal will advance the consecutive number.
CANCEL Press CANCEL to void (or erase) all items entered thus far in any
transaction.
CASH
(ENTER)
Press to total a transaction paid by cash. Also, if the cash amount tendered
is over the amount purchased, enter the amount of the tender, then press the
CASH key. The drawer will open and the cash change will be computed.
The CASH key doubles as an ENTER key. When you are performing
manager functions, or programming, use the ENTER key to advance to the
next item or screen.
CHARGE 1-8 Use to finalize charge sales. Calculates the sale total including tax, finalizes
the sale, and opens the cash drawer. Change computation may be allowed
by entering an amount before pressing the CHARGE key. The cash
drawer will open only if the amount tendered is equal to or greater than the
total amount of the sale. Change issued will be subtracted from the cash-in-
drawer total.
CHECK CASHING Use to exchange a check for cash. Cash-in-drawer and check-in-drawer totals
are adjusted.
CHECK
ENDORSEMENT
Use to print a check endorsement message on an optional slip printer.

8 • Introduction ER-600
KEY Description
MDSE RETURN Used to return or refund merchandise. Returning an item will also return
any tax which may have been applied.
MODIFIER 1-5 The MODIFIER key alters the next PLU registered, either by changing the
code number of the PLU so that a different item is registered, or by adding
the modifier descriptor (and not changing the code of the subsequent PLU.)
PBAL Use to enter the amount of an outstanding balance. The PBAL key will take
the recall function if the drive thru feature is enabled in CHECK # key
programming.
PAGE DOWN When transactions contain more items than can be displayed on the screen
at one time, press the PAGE DOWN key to view items at the end of the
transactions.
PAGE UP When transactions contain more items than can be displayed on the screen
at one time, press the PAGE UP key to view items at the beginning of the
transactions.
PAID OUT 1-3 Use to record money taken from the register to pay invoices, etc. The paid out
amount subtracts from the cash-in-drawer total. Paid outs are allowed outside
of a sale only
PAPER FEED Press to advance the printer paper.
PLU Use to register a Price Look Up (PLU) that is not located on the keyboard.
PLU LOOK UP
1-15
Use PLU LOOK UP keys to view a list of up to 8 PLUs on the display. With
the PLU list in view, a PLU can be registered by pressing the digit representing
the PLU. Up to fifteen PLU LOOK UP keys can be placed on the keyboard.
PRICE INQUIRY Use to display the price of a PLU without registering the price.
PRICE LEVEL
(1- 5)
Price Level keys shift the price PLU that is being registered . Levels can be
stay down ; pop-up after each item to register, for example large, medium or
small soft drink; pop-up after each transaction to register, for example,
toppings of various pizza sizes.
PRINT CHECK Use to print a guest check. The check can be printed on an optional (RS-232C)
printer, or can be printed on the receipt printer. The PRINT CHECK key can
be set to automatically service the check.
PROMO The PROMO key allows you to account for promotional items, as in "buy two,
get one free". Pressing this key will remove an item's cost from the sale, but
will include the sale of the item in the item's sales counter.
RECD ON ACCT
1-3
The RECD ON ACCT (received on account) key is used to record media
loaned to the cash drawer, or payments received outside of a sale. The cash
drawer will open. The amount received adds to the cash-in-drawer total.
SBTL(SUBTOTAL) Press once to display the sale subtotal.
SCALE Use to make weight entries. When a scale is attached, press the scale key to
show the weight in the display, then press (or enter) a PLU to multiply the
weight times the price. When a scale is not attached, you can enter the weight
(using the decimal key for fractions). PLUs may be programmed to require an
entry through the scale key.
SERVICE Use to temporarily finalize Previous Balance or check tracking transactions.

ER-600 Introduction • 9
KEY Description
TABLE You can enforce the entry of a table number for guest check transactions, or for
all transactions. If you are tracking guest check balances, the balance can be
recalled either by entering the check number or the table number.
TARE Tares are container weights. If you are using the scale function, you can preset
up to 5 different tare weights. The tare can be subtracted automatically when a
specific PLU is registered, or the tare can be subtracted by manually inputting
the tare number and pressing the TARE key.
TAX EXEMPT Press the TAX EXEMPT key to exempt tax 1, tax 2, tax 3, and/or tax 4 from
the entire sale.
TAX SHIFT 1-4 Press to reverse the programmed tax status of a PLU. For example, by
pressing the appropriate TAX SHIFT key prior to registering a taxable
item, the item will be sold without sales tax added.
TIME IN/OUT Use to track hours worked by an employee, as would be done by a time
clock.
TIP The TIP key allows a gratuity to be added to a guest check before payment.
The tip amount is deducted from the Cash-in-Drawer amount for the
Clerk/Cashier closing the guest check.
The TIP key may be programmed as either a percentage or amount. If
programmed as a percentage, tax programming defines whether the
percentage is calculated on the net amount, or the amount after taxes.
VOID ITEM Use to void an item previously entered within a transaction by pressing
VOID, then re-entering the item you wish to remove.
WASTE The WASTE key allows control of inventory by accounting for items which
must be removed from stock due to spoilage, breakage or mistakes. Press the
WASTE key before entering wasted items, then press the WASTE key again
to finalize. The WASTE key may be under manager control, requiring the
control lock to be in the X position. The WASTE key is not allowed within a
sale.
YES/NO Press to toggle from Y (yes) to N (no) when selecting program options.
VALIDATION Press to initiate a single line validation. Note that an optional printer with
validation capability must be attached to the ER-600 and identified.
PAYMENT Press to make a payment, partial payment, or pre-payment while posting to
a check (account). If the payment amount exceeds the check balance, a
credit balance will be maintained. The FINALIZE key option for charge
posting must be set to “Y” in order to use this function.
FINALIZE Pressing before closing a check will close the account and the account
number will no longer be reported. The FINALIZE key option for charge
posting must be set to “Y” in order to use this function

10 • Introduction ER-600
Control Lock
V
OID
PGM
Z
X
REG
OFF
SM
VOID
OFF
REG
X
Z
PGM
SM
Use to void (correct) items outside of a
sale.
The register is inoperable.
Use for normal registrations.
Use to read register reports and perform
other manager functions.
Use to read register reports and reset totals
to zero.
Use to program the register.
Service Mode used for tests and special
settings.
The ER-600 includes two sets of keys that can be used to access the following key lock
positions.
Key Positions Accessible
VD VOID, OFF, REG, X
REG OFF, REG
X OFF, REG, X
Z OFF, REG, X, Z
P VOID, OFF, REG, X, Z, PGM
C ALL POSITIONS
Note: Keys can be removed from the key lock in the OFF or REG positions.

ER-600 Introduction • 11
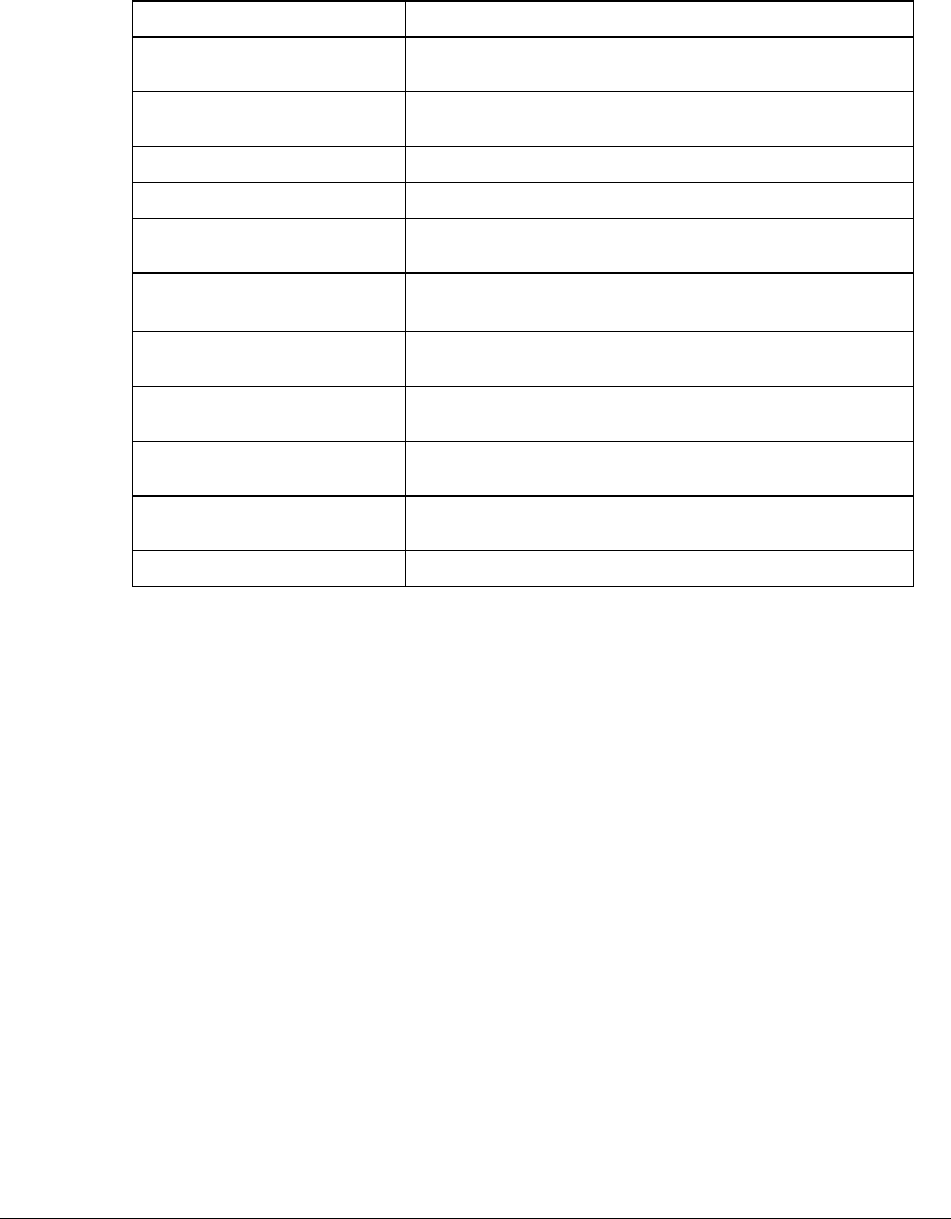
Front Display
The front display is a liquid crystal screen, allowing you to view up to 8 lines of information
with up to 20 characters per line. The display is backlit and adjustable to provide excellent
visibility, regardless of lighting conditions.
When the control lock is in the OFF position, the message OFF MODE is displayed and the
register can not be operated. When the control lock is in the REG or VOID positions the
appropriate message, VOID MODE or REGISTER MODE is displayed with the message
"CLOSED". You must sign on a clerk to remove the "CLOSED message and begin
operation. When the control lock is in the X, Z, PGM or SM positions, the appropriate menu
is displayed.
OFF
OFF MODE
REG
REGISTER MODE
■■■■■■■■■■■
■ CLOSED ■
■■■■■■■■■■■
VOID
VOID MODE
■■■■■■■■■■■
■ CLOSED ■
■■■■■■■■■■■

12 • Introduction ER-600
X
MANAGER MODE
0.MANAGER OPERATION
1.X REPORTS
2.DECLARATION
3.REG. PRINT FORMAT
4.STOP REG PRINTING
5.TRAINING MODE
6.E.J. OPERATION
♦ Press PAGE DOWN to view the remainder of the MANAGER MODE menu:
MANAGER MODE
7.NOT FOUND PLU
Z
RESET REPORT MODE
0.Z REPORTS
1.RESET E.J
2.PC COMMUNICATION
3.PLU LOOKUP PGM
4.AGE VERIFICATION
5.KP STARTING NO.
6.MIX & MATCH PGM
♦ Press PAGE DOWN to view the remainder of the RESET REPORT MODE menu:
RESET REPORT MODE
7.MIX & MATCH SCAN
8.RESET N.F. PLU

ER-600 Introduction • 13
PGM
PROGRAM MODE È
0.PLU
1.GROUP
2.SALES TAX
3.SYSTEM OPTION
4.PRINT OPTION
5.FUNCTION KEYS
6.CLERK
♦ Press PAGE DOWN to view the remainder of the PROGRAM MODE menu:
PROGRAM MODE Ç
7.LOGO DESC.
8.NLU CODE# PGM.
9.DOWNLOAD PROGRAMS
00.MORE
♦ Press 00 to view the MORE PROGRAMS menu:
PROGRAM MODE page2
0.CLERK I/O
1.PLU STOCK
2.DRAWER LIMIT
3.CHECK CHANGE LIMIT
4.TIME & DATE
5.TARE WEIGHT
6.MACRO È
♦ Press PAGE DOWN to view the remainder of the PROGRAM MODE page 2 menu:
PROGRAM MODE page2
7.MACHINE NO. Ç
8.TRAINING MODE P/W
00.SCAN

14 • Introduction ER-600
SM
SERVICE MODE È
0. H/W TEST
1. CLEAR ALL TOTALS
2. CLEAR GRAND TOTAL
3. CLEAR PLU FILE
4. EPROM INFO.
5. MEMORY ALLOCATION
6. KEY ASSIGNMENT
♦ Press PAGE DOWN to view the remainder of the SERVICE MODE menu:
SERVICE MODE Ç
7. IRC OPTIONS
8. RS232C PORT
ER-600 Introduction • 15
Initial Clear
CAUTION: Do not share this information with unauthorized users. Distribute the P-
Mode key only to those you may want to perform this function.
The initial clear function allows you to exit any register activity and return to a beginning or
cleared state. Any transaction that is in progress will be exited and totals for that transaction
will not be updated.
Here are some reasons you may want to perform an initial clear:
• The register is in an unknown state, and you wish to exit the current program
or transaction without following normal procedures.
• You have performed a function that includes a compulsory activity, such as
validating or printing, and you wish to bypass the compulsory activity.
• An initial clear may be necessary as part of servicing, or troubleshooting a
ER-600 register or system.
Perform this procedure only as necessary.
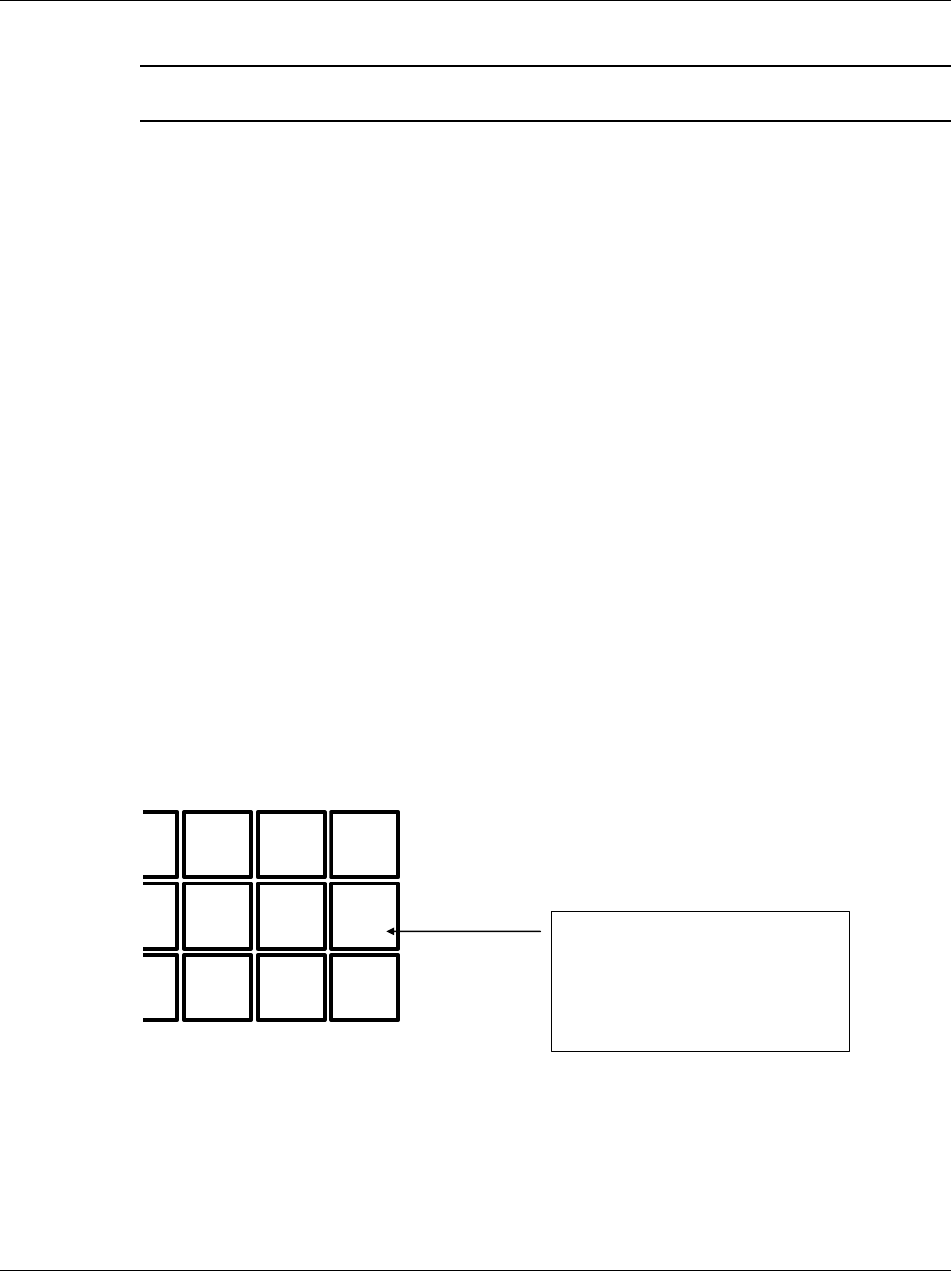
To Perform an Initial Clear:
1. Turn the power switch located on the right side of the register to the OFF position.
2. Turn the control lock to the PGM position.
3. Press and hold the key position where the SBTL key is located on the default keyboard
layout.
4. While continuing to hold the SBTL key, turn the power switch to the ON position.
5. The message "INITIAL CLEAR SERV". will display momentarily when the initial clear
is complete.
1
SBTL
3 2
4
CHECK
6 5
0
CASH
.
00
TO INITIALIZE:
Press and hold the SBTL key
position during power-up in PGM
mode.
16 • Introduction ER-600
Memory Clear
CAUTION: The procedures described in this area are security sensitive. Clearing all
or parts of the ER-600 memory may cause damage or loss to the program. Do not share
this information with unauthorized users and distribute the special SERVICE-Mode
key only to those you may want to perform these functions.
Memory All Clear
See "Clear All Totals" on page 20.
"Clear All Totals" on page 20, or "Clear PLU File" on page 21 if you wish to clear only parts
of ER-600 memory. Complete clearing of all memory areas and installation of the default
program can be done through the following special procedure:
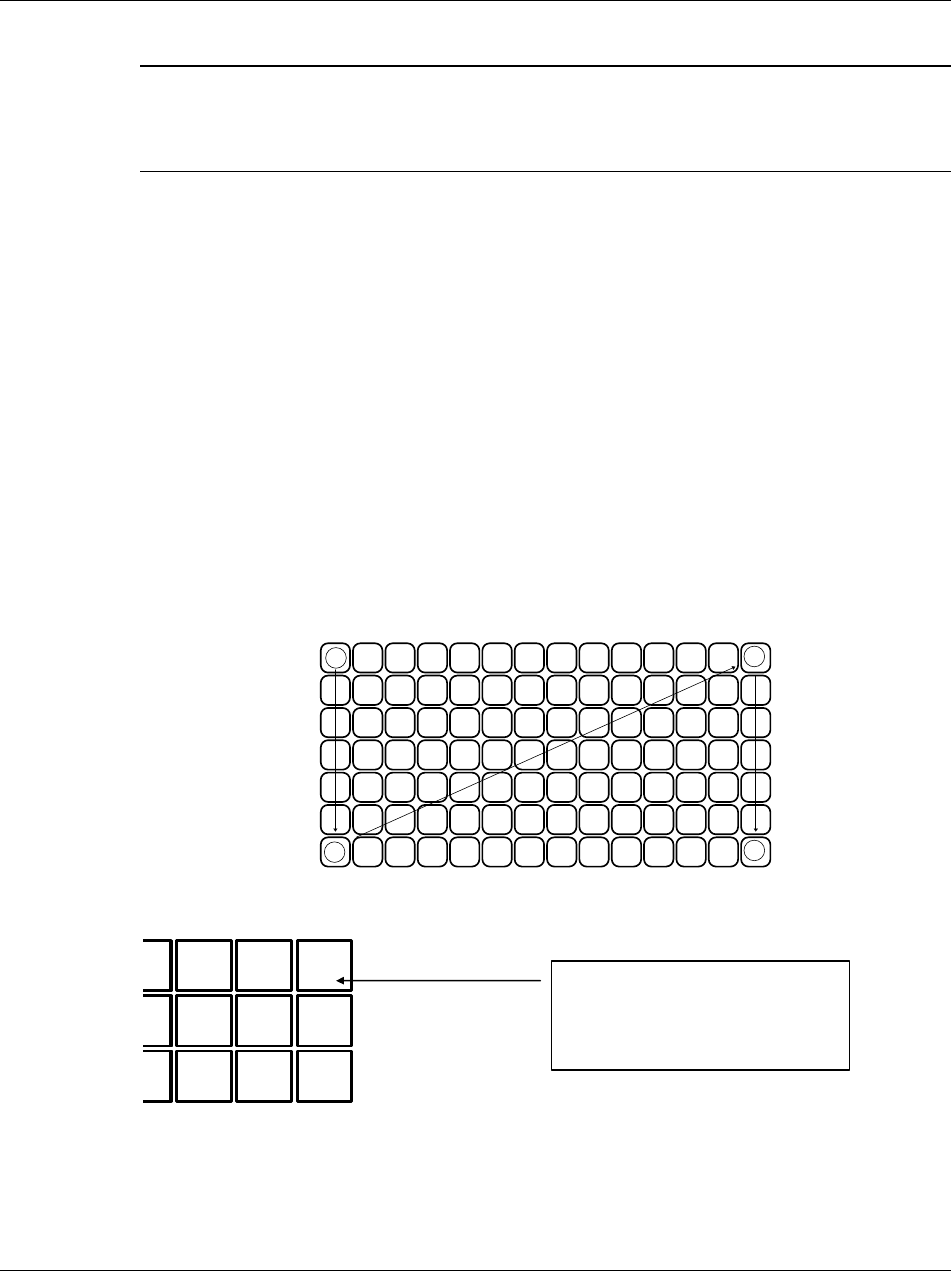
1. Turn the power switch located on the right side of the register to the OFF position.
2. Turn the control lock to the SM position one position clockwise from the PGM position.
3. Press and hold the key position where the CHECK key is located on the default
keyboard layout.
4. While continuing to hold the CHECK key while turning the power switch to the ON
position. The message: "RAM ALL CLEAR SERV." displays on the screen.
5. Press the upper left key of the keyboard, then the lower left key, then the upper right key,
and finally press the lower right key.
3
42
1
6. The display will monitor the memory clear process, which takes about 1 minute. When
complete, the version and check sum will display.
1
SBTL
3 2
4
CHECK
6 5
0
CASH
Enter
. 00
TO MEMORY ALL CLEAR:
Press and hold this key position
during power-up in SERVICE mode.

ER-600 Service Mode Programming • 17
Service Mode Programming
Overview
The following procedures are done from the Service Mode menu:
• Hardware Tests
• Clear all totals
• Clear grand total
• Clear PLU file
• EPROM Information
• Memory Allocation
• Assignment of functions to keyboard locations
• IRC Options
• RS22C Port 1, 2, 3 & 4 Options.

18 • Service Mode Programming ER-600
♦ Turn the key to the SM position (one position clockwise from the PGM position) to
display the SERVICE MODE menu:
SERVICE MODE È
0. H/W TEST
1. CLEAR ALL TOTALS
2. CLEAR GRAND TOTAL
3. CLEAR PLU FILE
4. EPROM INFO.
5. MEMORY ALLOCATION
6. KEY ASSIGNMENT
♦ Press PAGE DOWN to view the remainder of the SERVICE MODE menu:
SERVICE MODE Ç
7. IRC OPTIONS
8. RS232C PORT
Hardware Test
Various components of the ER-600 can be tested by using this program.
1. From SERVICE MODE menu press 0 to display the H/W TEST menu:
H/W TEST
0. TEST PRINTER
1. TEST DISPLAY
2. TEST KEYBOARD
3. TEST MODE & CLERK
4. TEST RS-232
5. PRINTING PATTERN
6. IRC RANGE TEST
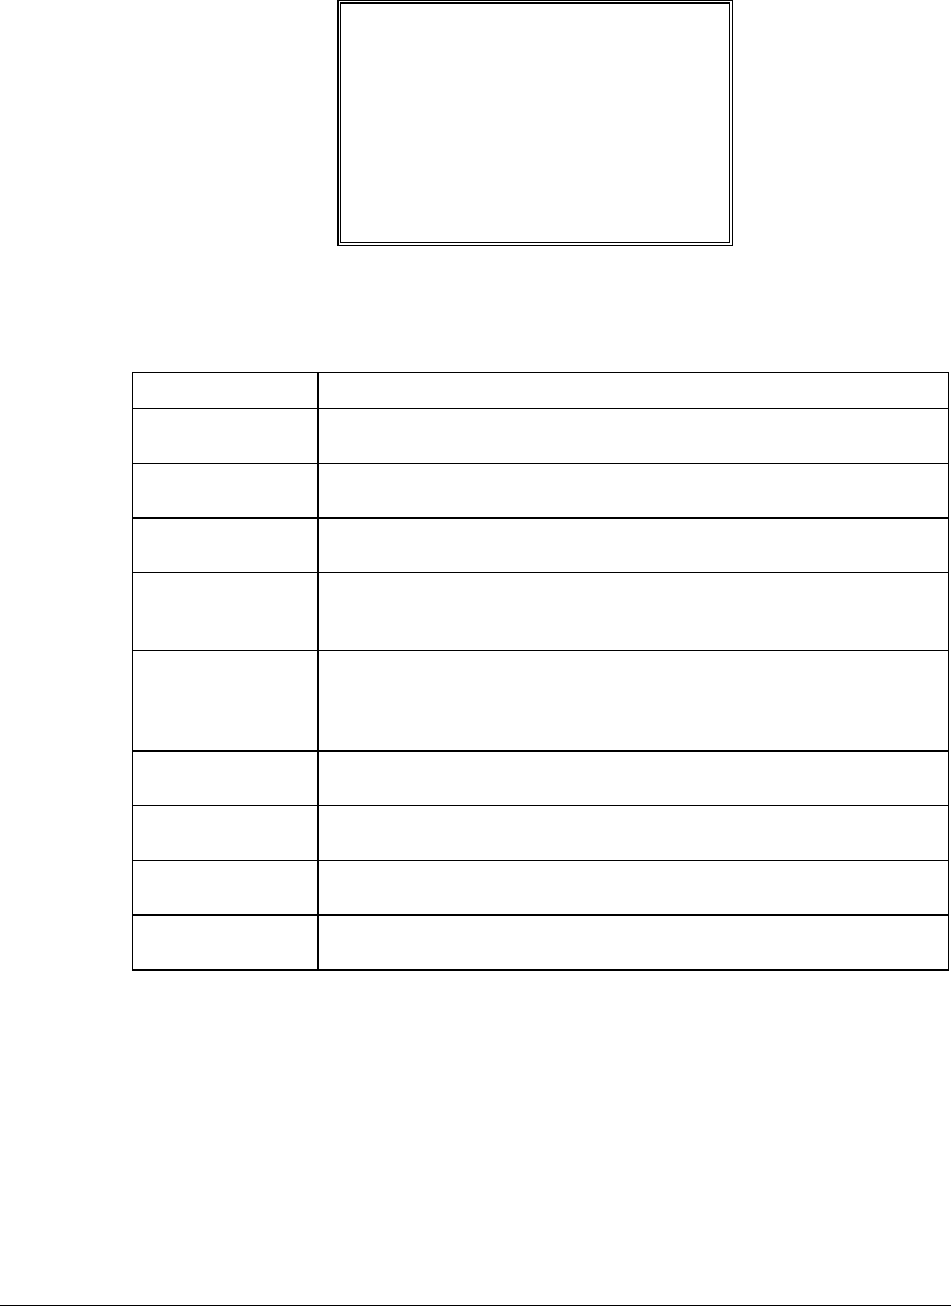
ER-600 Service Mode Programming • 19
H/W TEST
7. TEST MCR
8. TEST RTC
2. Press the digit representing the test you wish to perform. See the table that follows for
notes about each test.
Hardware Test Table
TEST NOTES
PRINTER A printer test pattern is printed. The H/W TEST menu automatically
returns when the test is complete.
DISPLAY A display test is initiated. The H/W TEST menu automatically returns
when the test is complete.
KEYBOARD The display indicates: "KEYBOARD TEST". Press any key location to
display its' position. Turn the key lock to end the test.
MODE Check the mode lock with this test. As you turn the key lock, the display
will show the current position. Return the key to the SERVICE position to
end the test.
RS-232 Select LOOP TEST PORT 1,2,3,4 or LOOP TEST IRC. (to loop test port
1,2,3 or 4 , a loop back connector must be in place; to loop test IRC, the
IRC cable must be connected between all registers.) Then after a moment,
the display indicates NG (not good) or OK.
PRINTING
PATTERN
ENDLESS PRINTING and LIFE TEST PRINT are factory tests. Toggle
the power switch on and off to end the test.
IRC RANGE This test checks communication with each register programmed in IRC
options. Reports pass or fail.
TEST MCR Check the MCR. (MCR must be in placed). Select the this menu and then
swiped the card through the machine.
TEST RTC The display indicates date & time for the RTC chip test. Turn the key lock
to end the test.

20 • Service Mode Programming ER-600
Clear All Totals
This selection clears all totals and counters, including the grand total.
1. From SERVICE MODE menu press 1 to display the CLEAR ALL TOTALS screen:
CLEAR ALL TOTALS
ARE YOU SURE ? NÅ
2. Press the YES/NO key to display Y at the "ARE YOU SURE ?" question. Press
ENTER.
3. The display reads: "PLEASE WAIT". The message "ALL TOTAL CLEAR" is printed
and the screen returns to the SERVICE MODE menu.
Clear Grand Total
This selection clears only the grand total.
1. From SERVICE MODE menu press 2 to display CLEAR GRAND TOTALS screen:
CLEAR GRAND TOTALS
ARE YOU SURE ? NÅ
2. Press the YES/NO key to display Y at the "ARE YOU SURE ?" question. Press
ENTER.
3. The message "GRAND TOTAL CLEAR" is printed and the screen returns to the
SERVICE MODE menu.

ER-600 Service Mode Programming • 21
Clear PLU File
This selection clears the entire PLU file, including totals, counters and programming.
1. From SERVICE MODE menu press 3 to display the CLEAR PLU FILE screen:
CLEAR PLU FILE
ARE YOU SURE ? NÅ
2. Press the YES/NO key to display Y at the "ARE YOU SURE ?" question. Press
ENTER.
3. The message "PLU FILE CLEAR" is printed and the screen returns to the SERVICE
MODE menu.
EPROM Information
This selection displays the version, check sum and date of the EPROM. You may be asked to
check you EPROM version if you contact your dealer for assistance. You should also verify
that all registers in an IRC configuration have the same version EPROM.
1. From SERVICE MODE menu press 4 . The "PLEASE WAIT" message displays
momentarily until the ER-600 EPROM INFO screen displays:
ER-600 INFORM.
VERSION : STD 1.0
CHECKSUM : AF7B
APPCKSUM : 43CC/6BAF
KEYS/RAMS: 98KEYS 1
PLUS USED: 80/2000
APPRIL 14 2003
PRESS CLEAR KEY
2. Press CLEAR to return to the SERVICE MODE menu.

22 • Service Mode Programming ER-600
Memory Allocation
NOTE: You must step through every memory allocation field to implement new memory
allocation. If you press CLEAR, at any field you will abort memory allocation processes
without making changes.
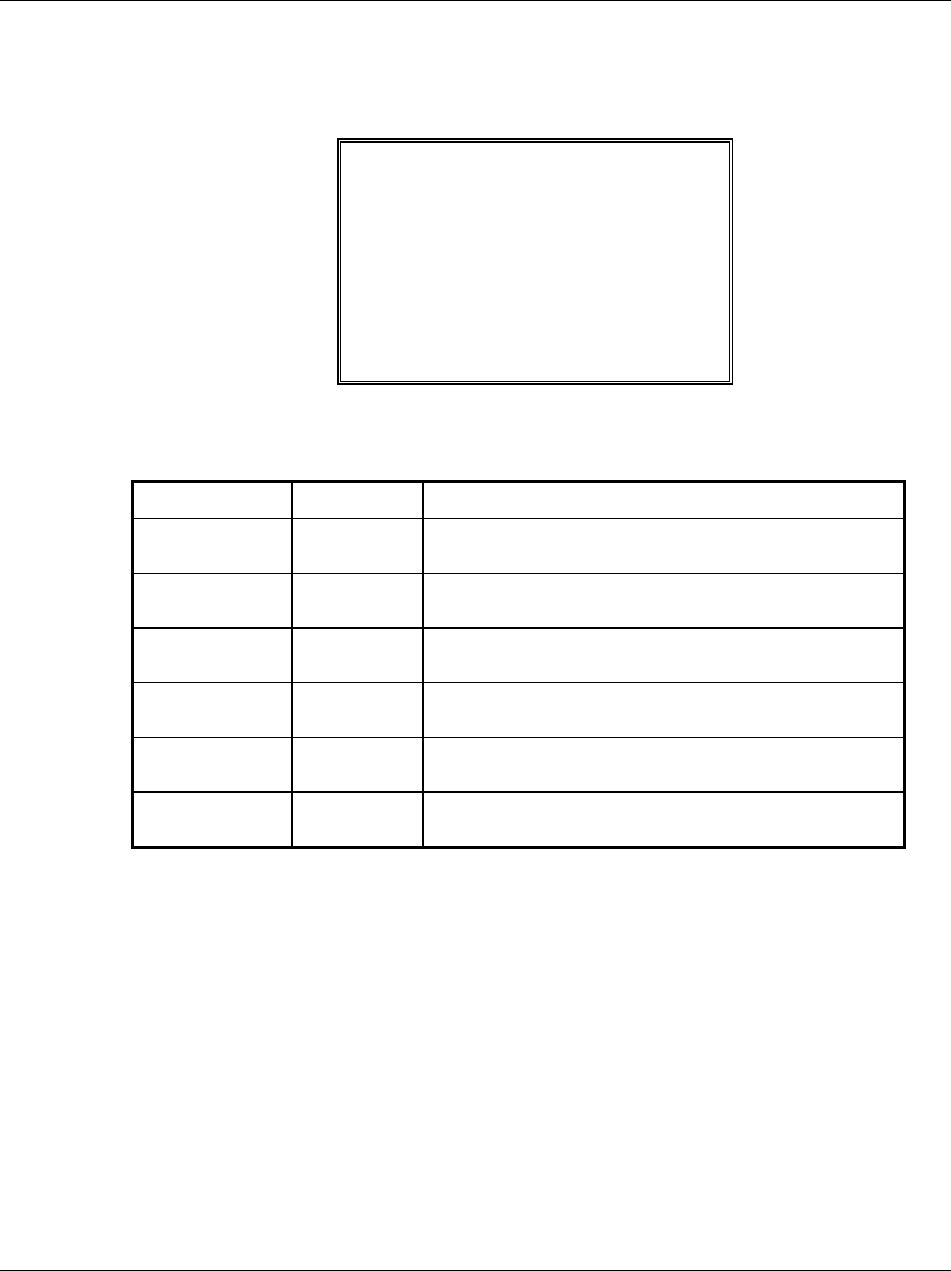
1. At the SM control lock position menu, press 5 for Memory Allocation programming.
The MEMORY ALLOCATION screen displays:
MEMORY ALLOCATION È
TTL AVAIL: ??????
TTL USED: ??????
# PLUS 2000Å
# LEVELS (1-5) 1
# CLERKS 10
# GROUP TOTALS 30
2. The total available memory is displayed on the first line of the screen (TTL AVAIL).
The total memory currently allocated is displayed on the second line of the screen (TTL
USED). The TTL USED field is updated when you complete a change and press
ENTER.
Starting at the PLUs field, enter the quantity of each memory variable. Press ENTER
after each entry, and the cursor will move to the next variable. Page 2 of Memory
Allocation will display after the # OF GROUP TOTALS field is set:
MEMORY ALLOCATION Ç
TTL AVAIL: ??????
TTL USED: ??????
# EJ LINES 0
# CHECKS 000
Y=HARD/N=SOFT CHK N
# LINES/SFT CHK 0

ER-600 Service Mode Programming • 23
3. Continue filling each variable until complete. Press ENTER after setting the last field,
"# LINES/SOFT CH". The screen will display "ARE YOU SURE ?". N (No) will
display as the default answer to the question. If you wish to implement the new
allocation you have entered, press the YES/NO key, then press ENTER.
4. The message "PLEASE WAIT . . . . " display when successful. No display this message if
you attempt to allocate features requiring more memory than is available.
5. The SERVICE MODE menu screen displays when memory allocation programming is
completed.

24 • Service Mode Programming ER-600
Function Key Assignment
Any key location may be reprogrammed with a function from the list of available functions.
The default program installs the functions as they are shown with the standard key legends.
To change the function on a specific key:
1. At the SM control lock position menu, press 6 for Key Assignment programming. The
KEY ASSIGNMENT screen displays:
KEY ASSIGNMENT
PUSH KEY TO BE
PROGRAMMED
0Å
2. Press any key location. The current key assignment is displayed:
KEY ASSIGNMENT
KEY NUMBER : 102
CURRENT ASSIGNMENT
CASH
ENTER NEW CODE,
PRESS ENTER
0Å
3. Enter a new key code from the list of "Function Key Codes" on the following page and
press ENTER, or press PAGE DOWN to display a list of key codes on the screen.
FUNCTION KEYCODE
--------------------
NLU#1 - NLU#80(1-80)
ONE 81
TWO 82
THREE 83
FOUR 84
FIVE 85

ER-600 Service Mode Programming • 25
4. With the key code list displayed, you can press PAGE DOWN repeatedly, or PAGE UP
until you find the key code you wish to use. Type the key code number you wish to
place and the screen returns to the KEY ASSIGNMENT screen shown at step 2 above.
Press ENTER. The KEY ASSIGNMENT screen displays again:
KEY ASSIGNMENT
PUSH KEY TO BE
PROGRAMMED
PRESS ENTER TO EXIT
0Å
5. Continue to program function key locations as necessary. When you have completed
function key programming, press the ENTER key to finalize. The screen displays:
KEY ASSIGNMENT
PRESS ENTER TO
SAVE CHANGES
OR
PRESS ESCAPE TO EXIT
WITHOUT SAVING
6. Press ENTER to save the changes you have made, or press ESC to exit without saving
changes.
Notes:
1. Numeric keys (0-9), CLEAR/ESC, and CASH/ENTER cannot be removed from the
keyboard unless they have been assigned to a new keyboard location. This protects the
programmer from accidentally removing keys that are required for register programming
and operations.
2. If you wish to program the CASH/ENTER key, select it immediately after selecting
KEY ASSIGNMENT from the SERVICE MODE menu. After the initial key is
programmed, the CASH/ENTER key is used to finalize the program.

26 • Service Mode Programming ER-600
Function Key Codes
Code Function Code Function Code Function
1 NLU 1 117 CURRENCY CONV. 1 156 PAID OUT 2
through
118 CURRENCY CONV. 2 157 PAID OUT 3
80 NLU 80 119 CURRENCY CONV. 3 158 PAPER FEED
81 Numeric 1 120 CURRENCY CONV. 4 159 PLU PRICE INQ
82 Numeric 2 121 DRIVE THRU 160 PRINT CHECK
83 Numeric 3 122 EAT-IN
161 PROMO
84 Numeric 4 123 ERROR CORRECT 162 RECD ON ACCT 1
85 Numeric 5 124 F/S SHIFT 163 RECD ON ACCT 2
86 Numeric 6 125 F/S SUB 164 RECD ON ACCT 3
87 Numeric 7 126 F/S TEND 165 SBTL(SUBTOTAL)
88 Numeric 8 127 Function lookup #1 166 SCALE
89 Numeric 9 128 Function lookup #2 167 SERVICE
90 Numeric 0 129 GUEST # 168 TABLE #
91 Numeric 00 130 PLU (CODE ENTRY) 169 TARE
92 Decimal
131 PRICE LEVEL 1 170 TAKE OUT
93 #/NS
132 PRICE LEVEL 2 171 TAX EXEMPT
94 %1 133 PRICE LEVEL 3 172 TAX SHIFT 1
95 %2
134 PRICE LEVEL 4 173 TAX SHIFT 2
96 %3
135 PRICE LEVEL 5 174 TAX SHIFT 3
97 %4
136 MACRO 1 175 TAX SHIFT 4
98 %5
137 MACRO 2 176 TIME IN/OUT
99 @/FOR 138 MACRO 3 177 TIP
100 ADD CHECK 139 MACRO 4 178 VOID ITEM
101 CANCEL
140 MACRO 5 179 WASTE
102 CASH(ENTER)
141 MACRO 6 180 YES/NO
103 CHARGE 1 142 MACRO 7 181 VALIDATION
104 CHARGE 2 143 MACRO 8
105 CHARGE 3 144 MACRO 9
182 -
196
PLU LOOKUP1 -
PLU LOOKUP15
106 CHARGE 4 145 MACRO 10 197 PAYMENT
107 CHARGE 5 146 MDSE RETURN 198 FINALIZE
108 CHARGE 6 147 MODIFIER 1 199 INACTIVE
109 CHARGE 7 148 MODIFIER 2
110 CHARGE 8 149 MODIFIER 3
111 CHECK CASHING 150 MODIFIER 4
112 ENDORSE 151 MODIFIER 5
113 CHECK TEND 152 P/BAL
114 CHECK TRACK # 153 PAGE DOWN
115 CLEAR (ESC) 154 PAGE UP
116 CLERK # 155 PAID OUT 1
ER-600 Service Mode Programming • 27
IRC Options
1. At the SM control lock position menu, press 7 for IRC Option programming. The IRC
OPTIONS screen displays:
IRC OPTIONS
REG# (1-8) 1Å
STORE# 000000
FROM REG# 1
TO REG# 1
IRC RETRIES(0-99) 3
SERVER MODE N
2. Refer to the table below to fill the fields on the IRC OPTIONS screen.
3. Press the CLEAR key to finalize and return to the SERVICE MODE screen.
Option Entry Description
REG# Numeric
1 digit
Enter the IRC number of this register (1-8).
STORE# Numeric
6 digits
Enter the store number.
FROM REG# Numeric
1 digit
Enter the first register number in the IRC system.
TO REG# Numeric
1 digit
Enter the last register number in the IRC system.
IRC RETRIES Numeric
2 digits
Each retry equals approximately 0.5 seconds.
SERVER
MODE
Y or N Set the SERVER register in the IRC system.

28 • Service Mode Programming ER-600
RS232C Port 1/2/3/4 Options
1. At the SM control lock position menu, press 8 and then select menu for RS232C Port
programming. The appropriate PORT PROGRAM screen displays:
PORT 1 PROGRAM pg1
BAUD RATE 0Å
0: 9,600 1:1,200
2: 2,400 3:4,800
4:19,000
PARITY CHECK 0
0:NONE 1:ODD 2:EVEN
DATA BITS(0:8 1:7)0
2. At each field, press ENTER to view the selections. Enter the digit representing your
selection from the pop-up window.
3. Press PAGE DOWN to view the page 2 of the RS232C port program:
PORT 1 PROGRAM pg2
STOP BITS(0:1 1:2)0Å
DEVICE FUNCTION 0
--------------------
0:NONE 1:PC 2:SCL
3:RJ 4:RP 5:KV
6:SCAN 7:COIN 8:EFT
9:POLE
4. Press PAGE DOWN to view the page 3 of the RS232C port program:
PORT 1 PROGRAM pg3
INITIAL FEEDING LINE
ON RP(0-20) 0Å
ENDING FEEDING LINE
ON RP(0-20) 0
INITIAL FEEDING LINE
ON SLIP(0-20) 0

ER-600 Service Mode Programming • 29
5. Press PAGE DOWN to view the page 4 of the RS232C port program:
PORT 1 PROGRAM pg4
PRINT LINE ON GUEST
CHECK(0-50) 0Å
SCALE TYPE
0:NCI 1:CAS 0
PRINTER TYPE 0
0:NONE
1:SAM SRP-100
6. Press PAGE DOWN to view the page 5 of the RS232C port program:
PORT 1 PROGRAM pg5
PRINTER TYPE 0Å
2:SAM SRP-270
3:SAM SRP-300
4:SAM SRP-350
5:CITIZEN 3550/3551
6:CITIZEN 810
7:CITIZEN 230
7. Press PAGE DOWN to view the page 6 of the RS232C port program:
PORT 1 PROGRAM pg6
PRINTER TYPE 0Å
8:EPSON TM-T88-2
9:EPSON U200
10:EPSON U295
11:EPSON U300
12:EPSON U325

30 • Service Mode Programming ER-600
8. Press PAGE DOWN to view the page 7 of the RS232C port program:
PORT 1 PROGRAM pg7
PRINTER TYPE 0Å
13:STAR SP-200
14:STAR SP-298
15:STAR SP-300
16:STAR TSP-200
9. Press PAGE DOWN to view the page 8 of the RS232C port program:
PORT 1 PROGRAM pg8
POLE DISLAY TYPE 0Å
0:EPSON 1:ICD
RS232C RETRY
TIMES(0-99) 1
RECEIPT PRINTER N
10. Refer to "RS232C Settings Screen Program Notes" on the next page to fill the fields for
each port.
11. Press the CLEAR key to finalize and return to the SERVICE MODE screen.
ER-600 Service Mode Programming • 31
RS232C Settings Screen Program Notes
Option Description
BAUD RATE Select 1200, 2400, 4800, 9600, or 19200 from the pop-up
window; 9600 is default.
PARITY Select NONE, EVEN, or ODD from the pop-up window;
NONE is default.
DATA BITS Select 8 or 7 from the pop-up window; 8 is default.
STOP BITS Select 1 or 2 from the pop-up window; 1 is default.
DEVICE FUNCTION Enter the code number for the device you wish to attach to
this port from the code numbers displayed.
PRINT LINE ON GUEST
CHECK (0-50)
Enter the number of lines that represent the maximum that
can be printed on a single guest check.
SCALE TYPE Select the digit that represents the scale type connected to
this port.
PRINTER TYPE Select the digit that represents the printer type connected to
this port.
POLE DISPLAY TYPE Select the digit that represents the pole display type
connected to this port.
RS232C RETRY TIMES Set the number of retries for RS232C communication (about
0.5 seconds each.)
RECEIPT PRINTER Set the Remote Journal Printer to this port.

32 • Program Mode Programming ER-600
Program Mode Programming
Descriptor Programming Methods
Descriptors are programmable for PLUs, function keys, groups, clerks and the logo/messages.
There are two methods available to program descriptors, the Program Overlay Method and
the Descriptor Code Method.
This chapter describes both methods. Refer to each program area for specific steps for
programming PLUs, groups, function keys, etc.
Program Overlay Method
When the descriptor field is selected on the program screen, you can simply type the
descriptor using the overlay below. Press enter to finalize your descriptor.
1 3
2
4
i
5
)
8
9
Q
7
@
=
!
PAGE
DOWN
/
PLU
:
DOUBLE
6
A
W
#
Z
S
E
.
CAPS
CLEAR
ESC
00
0
X
D
PAGE
UP
PAPER
FEED
BACK
SPACE
"
SPACE
V
G
C
F
T
;
SPACE
B
$
'
SPACE
R
%
?
Y
& ^
<
H
U
N
J
SPACE
M
SPACE
>
CASH
ENTER
SBTL
YES/NO
@/FOR
PRT SCR
P
I
( *
-
K
O
,
L
CAPS
.
CAPS
+
The program overlay method is the default method for programming descriptors.

ER-600 Program Mode Programming • 33
Descriptor Code Method
If you customize your keyboard by covering key locations, or by installing double or quad
size keys, you will need to program descriptors using the descriptor code method.
See “System Option Programming” on page 55. You must set the option “PGM DESC BY
CODE” found on page 66 to Y to use the descriptor code method.
Program Sequence
1. With the cursor pointed at a descriptor field, refer to the Descriptor Code Chart
below and type the code for the first character. Press the decimal [.] key.
2. For each additional character, type the code and press the decimal key. Each
character will be displayed as it is entered.
3. Press ENTER when the descriptor is complete.
Program Example
To program the descriptor "APPLE", type:
[65] [ . ] [80] [ . ] [80] [ . ] [76] [ . ] [69] [ . ] [ENTER]
A P P L E
Note:
For lower case enter 98 after the descriptor code. For example:
a = [6598] [ . ] [ENTER]
For DOUBLE (wide) characters enter 99 after the descriptor code. For example:
A
= [6599] [ . ] [ENTER]
Descriptor Code Table
Char. Space ! " # $ % & ' ( )
Code 32 33 34 35 36 37 38 39 40 41
Char. * + , - . / 0 1 2 3
Code 42 43 44 45 46 47 48 49 50 51
Char. 4 5 6 7 8 9 : ; < =
Code 52 53 54 55 56 57 58 59 60 61
Char. > ? @ A B C D E F G
Code 62 63 64 65 66 67 68 69 70 71
Char. H I J K L M N O P Q
Code 72 73 74 75 76 77 78 79 80 81
Char. R S T U V W X Y Z [
Code 82 83 84 85 86 87 88 89 90 91
Char. ] ^ _ Back-
space
CAPS Double 1line Delete
Code 92 93 94 95 96 97 98 99 0

34 • Program Mode Programming ER-600
Program Mode Menu
♦ Turn the control lock to the PGM position. The first page of the PROGRAM MODE
menu displays:
PROGRAM MODE È
0.PLU
1.GROUP
2.SALES TAX
3.SYSTEM OPTION
4.PRINT OPTION
5.FUNCTION KEYS
6.CLERK
♦ Press PAGE DOWN to view the remainder of the PROGRAM MODE menu:
PROGRAM MODE Ç
7.LOGO DESC.
8.NLU CODE# PGM.
9.DOWNLOAD PROGRAMS
00.MORE

ER-600 Program Mode Programming • 35
♦ Press 00 to view the MORE PROGRAMS menu:
PROGRAM MODE page2
0.CLERK I/O
1.PLU STOCK
2.DRAWER LIMIT
3.CHECK CHANGE LIMIT
4.TIME & DATE
5.TARE WEIGHT
6.MACRO È
♦ Press PAGE DOWN to view the remainder of the PROGRAM MODE page 2 menu:
PROGRAM MODE page2
7.MACHINE NO. Ç
8.TRAINING MODE P/W
00.SCAN

36 • Program Mode Programming ER-600
PLU Programming
1. At the PGM control lock position menu, press 0 for PLU Programming. The PLU
PROGRAMMING screen displays:
PLU PROGRAMMING
0.ADD/MODIFY PLU
1.DELETE PLU
Add/Modify PLU
1. Press 0 to add or modify a PLU. The PLU NUMBER screen displays:
PLU NUMBER
∗ ENTER PLU NUMBER
AND PUSH PLU, OR
∗ PRESS A PLU KEY ON
THE KEYBOARD
0Å
2. To view the PLU # PROGRAMMING screen, enter the number of the PLU you wish
to program, or press a PLU key on the keyboard, or press a modifier key followed by a
the PLU key on the keyboard.
3. Refer to "PLU Options - Reference Information" on page 39 to make program entries or
changes, press the CLEAR key to finalize and return to the PROGRAM MODE screen.

ER-600 Program Mode Programming • 37
PLU# 1 P1
DESC: PLU1 Å
PRESET Y
PRICE/HALO1 0.00
PRICE/HALO2 0.00
PRICE/HALO3 0.00
PRICE/HALO4 0.00
PRICE/HALO5 0.00
PLU# 1 P2
PRESET OVERRIDE
TAX able BY: 1 2 3 4
N N N N
FOOD STMP ELIGIBLEN
GROUP #1 (1-20) 1
GROUP #2 (1-20) 0
GROUP #3 (1-20) 0
PLU# 1 P3
HASH
SINGLE ITEM
NON-ADD # COMP.
GALLONAGE ITEM
INVENTORY ITEM
DISABLE
Press
PAGE DOWN
to view the third
PLU
Programming
screen.
D
escriptor
Type the descriptor
u
sing the Progra
m
Overlay. The
overlay is
automatically
activated when the
cursor is pointing at
t
he DESC field.
Press
PAGE DOWN to
view the second
PLU
Programming
screen.
Press PAGE UP
once to return to
the first option on
a screen. Press
PAGE UP again
to return to the
previous screen.
Press ENTER to
advance the
arrow to the next
option.
Press YES/NO
to toggle from
''Y' to 'N' for
yes or no
decisions.
PLU# 1 P4
SCALABLE
AUTO SCALE
AUTO TARE (1-5)
CONDIMENT
COMP. CONDIMENT
PRINT ON RECEIPT
PRINT ON DISPLAY
Press
PAGE DOWN
to view the
fourth PLU
Programming
screen.
NEGATIVE ITEM
Y
N
N
N
N
N
N
N
N
N
0
N
N
Y
Y
Å
Å
Å

38 • Program Mode Programming ER-600
PLU# 1 P5
PRINT ON CHECK YÅ
PRT PRICE ON RCPT Y
PRT PRICE ON CHK Y
DISABLE PROMO N
COUNTER NOT RESET N
PRESET OVERRIDE
IN MGR CONTROL N
Press
PAGE DOWN
to view the 5
th
PLU
Programming
screen.
If you wish the
r
egistration o
f
t
his PLU to
automatically
cause the
r
egistration o
f
another PLU,
E
nter the PLU #
y
ou wish to lin
k
w
ith the 10-key
p
ad. Enter '0'
for no link.
PLU# 1 P6
LINK PLU:
0
Press
PAGE DOWN
to view the 6
th
and last PLU
Programming
screen.
Å
MIX & MATCH (1-99)0

ER-600 Program Mode Programming • 39
PLU Options - Reference Information
Option Entry Description
DESC Alpha numeric
12 character
You can program a descriptor for each PLU. Type the descriptor
using the Program Overlay. The overlay is automatically activated
when the cursor is pointing at the DESC field. The default
descriptors are PLU #1, PLU #2, etc.
PRESET Y or N Choose Y for a preset PLU. Choose N for an open PLU. Open
PLUs accept amount entries. Use open PLUs to enter different
priced items into the same PLU. Preset PLUs automatically
register a preprogrammed price when the PLU is entered. Use
preset PLUs to register an individual item quickly and accurately.
For example, cigarette packs or food items can be assigned to
PLUs.
PRICE/HALO1
PRICE/HALO2
PRICE/HALO3
PRICE/HALO4
PRICE/HALO5
7 digit amount Up to five price levels are available. (Note that price level fields
2-5 will display only if you allocate memory for additional price
levels.) If the PLU is open, the amount entered here is the high
amount lock out (HALO). You can limit errors by setting the
maximum amount that can be entered into a PLU. If the PLU is
preset, the amount entered here is the amount that is registered
automatically when the PLU is entered.
PRESET OVERRIDE Y or N If Y, you can enter a price to override the preset price.
TAXable BY TAX1
TAXable BY TAX2
TAXable BY TAX3
TAXable BY TAX4
Y or N Select N for non taxable items. Select Y to apply the appropriate
tax automatically for this PLU.
FOOD STMP
ELIGIBLE
Y or N Select Y to accumulate a total of food stamp eligible items in the
current sale. The total can be viewed by pressing the F/S SUB key
and food stamps can be tendered with the F/S TEND key.
GROUP #1
GROUP #2
GROUP #3
0-99 For each of three group assignments, enter a group where this
PLU's sales will accumulate. The number of groups available is
determined by memory allocation.
NEGATIVE ITEM Y or N Select Y to register items that subtract, rather than add to the sale
total.
HASH Y or N Items designated with HASH status add to the current sale, but do
not add to the registers grand total. HASH items may or may not
add to the net sales total - see system option programming. Use
hash for lottery sales or bottle deposits.
SINGLE ITEM Y or N Select Y for a single item PLU. Single item PLUs automatically
total as a cash sale immediately after the PLU entry. Single item
PLUs are used to speed up one item sales.
NON-ADD # COMP Y or N Select Y to enforce the entry of a non-add number before a
registration can be made.

40 • Program Mode Programming ER-600
Option Entry Description
GALLONAGE ITEM Y or N Select Y to compute gallons sold. The gallons sold will print
along with the price entry on the receipt. The total gallons sold
will accumulate in the PLU counter. You must program the price
per gallon (in tenths of a cent, i.e. $1.299 for $1.29 and 9/10) in
the PRICE/HALO field.
INVENTORY ITEM Y or N Select Y if you wish to track the number of items remaining in
inventory using the Stock report.
DISABLE Y or N Select Y to disable the PLU. Entries can not be made into disabled
PLUs.
SCALEABLE Y or N If Y, the PLU will work only when you are multiplying a weight
from an optional scale.
AUTO SCALE Y or N Select Y if you wish entries into this PLU to be automatically
multiplied by the weight on the optional scale
AUTO TARE (1-5) 0-5 Enter a value (1-5) to indicate the number of the preprogrammed
tare weight you want to automatically subtract when the PLU is
used for a scale entry (using an optional scale). Enter 0 to disable
automatic tare subtraction.
CONDIMENT Y or N Select Y if you wish the item to act like a condiment on the kitchen
printer.
COMPULSORY
CONDMNT
Y or N Select Y if you wish to force the entry of a condiment after this
item is entered.
PRINT ON RECEIPT
PRINT ON
DISPLAY
PRINT ON CHECK
Y or N Select N if you wish to suppress printing (or display) of the item at
the designated location.
PRT PRICE ON
RCPT
Y or N Select N if you wish to suppress printing of the item's price on the
receipt.
PRT PRICE ON CHK Y or N Select N if you wish to suppress printing of the item's price on the
check.
DISABLE PROMO Y or N Select Y to block the PROMO function on this PLU.
COUNTER NOT
RESET
Y or N Select Y if you do not wish to reset the PLU item counter on the Z
PLU report.
PRESET OVERRIDE
IN MGR CONTROL
Y or N If preset override is Y, then you can force manager control for
preset override by setting this option to Y.
LINK PLU 14 digit
maximum
If you wish the registration of this PLU to automatically cause the
registration of another PLU, enter the PLU # you wish to link with
the 10-key pad. Enter 0 for no link.
MIX&MATCH (1-
99)
1-99 Enter a value (1-99) to indicate the number of the preprogrammed
MIX&MATC TABLE. Enter 0 to disable

ER-600 Program Mode Programming • 41
Delete PLU
1. From the PLU PROGRAMMING screen, press 1 to display the DELETE PLU screen:
DELETE PLU
0.DELETE ONE PLU
1.DELETE PLU RANGE
2. Press 0 to delete an individual PLU. The PLU NUMBER screen displays:
PLU NUMBER
∗ ENTER PLU NUMBER
AND PUSH PLU, OR
∗ PRESS A PLU KEY ON
THE KEYBOARD
0Å
3. Enter the number of the PLU you wish to delete, or press a PLU key on the keyboard, or
press modifier key followed by a the PLU key on the keyboard. The CONFIRM
DELETE screen displays:
CONFIRM DELETE
ARE YOU SURE YOU
WISH TO DELETE PLU#
??????????????
ENTER=DELETE
ESC=ABORT
4. Press ENTER to delete the PLU; press ESC to return to the PLU DELETE screen
without deleting the PLU.
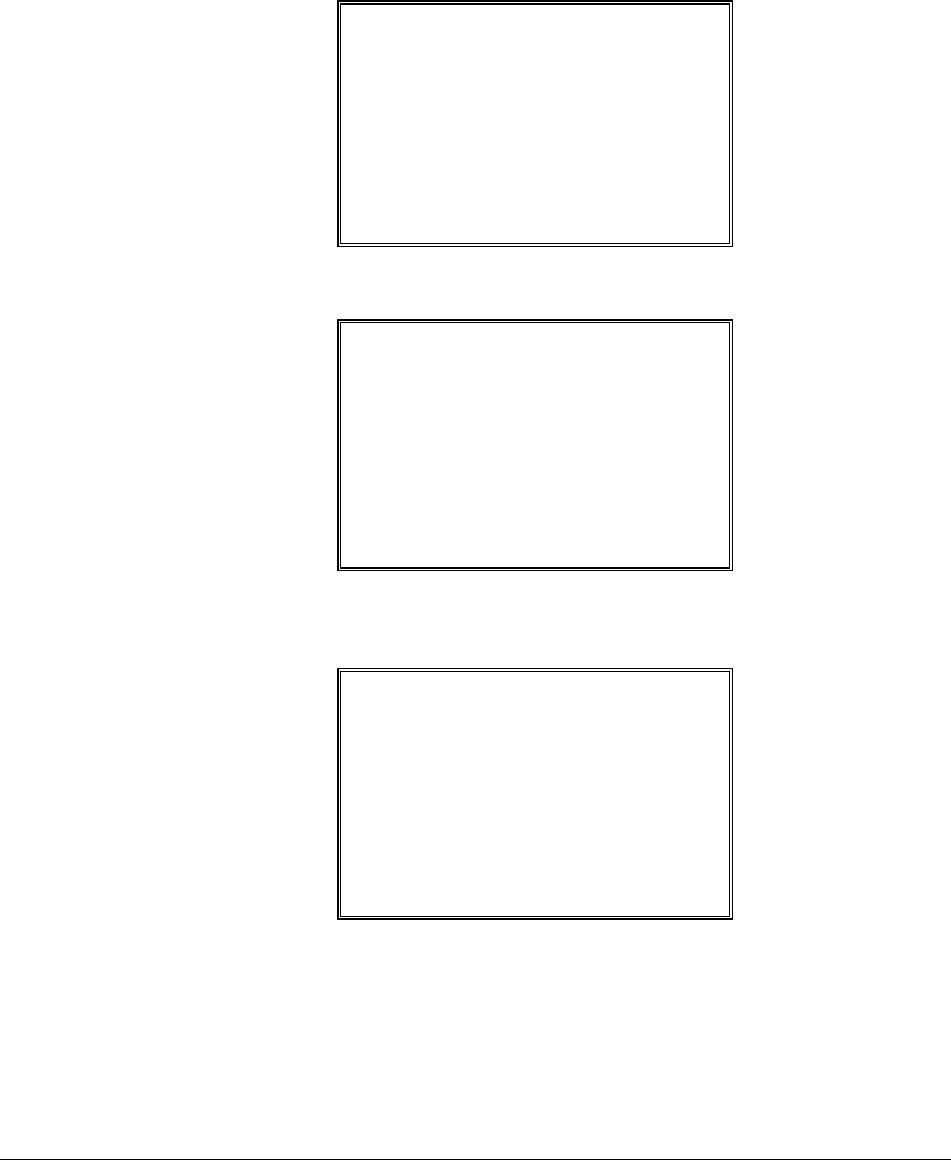
42 • Program Mode Programming ER-600
Delete PLU Range
1. From the PLU PROGRAMMING screen, press 1 for to display the DELETE PLU
screen:
DELETE PLU
0.DELETE ONE PLU
1.DELETE PLU RANGE
2. Press 1 to delete a range of PLUs. The PLU NUMBER screen displays:
PLU NUMBER
∗ ENTER NUMBER OF
THE FIRST PLU IN
THE RANGE AND PUSH
PLU
0Å
3. Enter the number of the first PLU in the range you wish to delete and press PLU. The
screen prompts for the last PLU in the range:
PLU NUMBER
∗ ENTER NUMBER OF
THE LAST PLU IN
THE RANGE AND PUSH
PLU
0Å

ER-600 Program Mode Programming • 43
4. Enter the number of the last PLU in the range you wish to delete and press PLU. The
CONFIRM DELETE screen displays:
CONFIRM DELETE
ARE YOU SURE YOU
WISH TO DELETE PLU#
?????????????? TO
??????????????
ENTER=DELETE
ESC=ABORT
5. Press ENTER to delete the PLU; press ESC to return to the PLU DELETE screen
without deleting the PLU.

44 • Program Mode Programming ER-600
Group Programming
Up to 99 groups (the exact number is determined by memory allocation) are available to
summarize PLU sales. Group totals appear on reports, so that you can track sales of different
types of items.
♦ The group descriptors programmed here will replace the default descriptors GROUP 1
through GROUP 99 that appear on reports.
♦ Each PLU can report totals to one, two or three different groups. If a PLU sends totals to
more than one group, the group total that appears on the Group report will not represent
PLU sales. Therefore, you also have the option of deciding whether each group's total
will add to the group total on the Group report.
1. At the PGM control lock position menu, press 1 for GROUP. The GROUP
PROGRAM. screen displays: (The maximum group number is set by memory
allocation.)
GROUP PROGRAMMING
GROUP NO? (1-30) 0Å
2. Enter the number of the group to be programmed, press ENTER. The GROUP# PROG.
screen displays:
GROUP #1 PROG.
DESC : GROUP 1 Å
ADD TO GROUP TTL Y
SEND TO KP N
KP PORT#: 1 2 3 4
SAT. N N N N
SER. N N N N
PRINT RED ON KP N

ER-600 Program Mode Programming • 45
3. Press PAGE DOWN to view the second page of group programming:
GROUP #1 PROG.
SEND TO KV NÅ
KV GROUP#(0-8) 0
KV COLOR(0-8) 0
AGE VERIF.(0-5) 0
4. Refer to the table below to fill the fields of the GROUP PROGRAMMING screens.
5. Press ENTER to return to the GROUP PROGRAMMING screen. Continue to
program groups as necessary. Press ESC to return to the PROGRAM MODE screen.

46 • Program Mode Programming ER-600
Group Programming - Reference Information
Option Entry Description
DESC Alpha
numeric
12 character
You can program a descriptor for each group. Type the
descriptor using the Program Overlay. The overlay is
automatically activated when the cursor is pointing at the
DESC field. The default descriptors are GROUP 1,
GROUP 2, etc.
ADD TO GROUP TOTAL Y or N Select N if you do not wish this groups total to be added to
the total of all groups on the Group report.
SEND TO KP Y or N Select Y if you wish to send PLUs reporting to this group to
a kitchen printer.
KP PORT # Y or N Select Y or N to direct items to a device attached to port
1,2,3 or port 4. At R, select Y or N to print a kitchen
requisition at the register.
*SAT. : SATELLITE
SER.: SERVER
PRINT RED ON KP Y or N Select Y if you wish items reporting to this group to print in
red on the kitchen printer. (Note, the kitchen printer must
have red/black printing capability, and this option does not
apply to the register receipt printer.)
SEND TO KV Y or N Select Y if you wish items reporting to this group to display
at a kitchen video.
KV GROUP# 0-8 Select the kitchen video group to which PLUs in this group
are to be sent.
KV COLOR 0-8 The color code set here will control the color or screen
format displayed on an optional kitchen video system
requisition screen. Color codes vary by KVS system. Refer
to the documentation for your video system for specific
information.
AGE VERIF. 0-5 When an item in this group is registered (first time in a
transaction only), the register will prompt the operator to
enter the customer’s date of birth. The sale of the item will
be registed only if the customer has reached the appropriate
age.
Set “0”for no age requirement.
Set “1” to “5” to check the date of birth against the age
requirement group set in Z Mode.

ER-600 Program Mode Programming • 47
Sales Tax Programming
The ER-600 allows three calculation options for each of the four possible taxes.
• Add-On - most sales taxes can be programmed by entering an add-on tax
percentage rate.
• Tax Table - if a tax entered as an add-on tax percentage does not follow
exactly the tax chart that apply in your area, tax table programming will
match tax collection exactly to the break points of your tax table. (Tax table
programming allows up to 75 breakpoints.)(FOR USA)
• VAT - if tax is included in the cost of the item, you can use value added tax
(VAT) to calculate the tax share of each sale.
• A fourth tax programming option, for the Canadian Goods and Services tax
(GST) can be set using tax rate 4.
Important Note: After you have entered your tax program, test for accuracy by entering
several transactions of different dollar amounts. Carefully check to make sure the tax
charged by the cash register matches the tax amounts on the printed tax chart for your area.
As a merchant, you are responsible for accurate tax collection. If the cash register is not
calculating tax accurately, or if you cannot program your tax properly from the information in
this manual, contact your Dealer for assistance.

48 • Program Mode Programming ER-600
Programming an Add-On Tax Rate Percentage
When tax requirements can be met using a straight percentage rate, use the following method
to program a tax as a straight percentage.
1. Turn the control lock to the PGM position.
2. From the PROGRAM MODE menu, press 2 to view the TAX PROG. screen:
TAX PROG.
TAX NUMBER (1-4) 1Å
DESC : TAX1
TAX TYPE (0-2) 0
0 : ADD-ON
1 : TAX TABLE
2 : VAT
3. When the arrow is pointed at the TAX NUMBER field, enter the number of the tax you
wish to program. (There are four taxes available, enter 1, 2, 3, or 4.) The arrow will
move to the TAX TYPE field.
4. Enter 0 for an ADD-ON tax with a straight percentage rate. The appropriate TAX #
PROGRAMMING screen displays:
TAX #1 PROGRAMMING
TAX RATE 0.000Å
5. When the arrow is pointed at the TAX RATE field, enter the percentage rate for the sales
tax. For example if the tax is 6 percent, enter 6.000 or 6.0. If the tax is 7.5 percent, enter
7.500 or 7.5 using the decimal key. If the tax is 10 percent, enter 10.000 or 10.0. Press
ENTER (CASH) to set the rate.
6. The TAX PROG. screen will return prompting you to enter the next tax, if necessary.
Continue to program additional taxes or press CLEAR to return to the PROGRAM
MODE screen.

ER-600 Program Mode Programming • 49
Programming a Tax Table
In some cases, a tax that is entered as a percentage does not follow exactly the tax charts that
apply in your area (even if the tax chart is based on a percentage). In these cases, we
recommend that you enter your tax using tax table programming. This method will match tax
collection exactly to the break points of your tax table.
Before programming, obtain a copy of the tax table you wish to program. You will need the
printed tax table if you wish to determine the break point entries yourself. The "Tax Table
Programming Example - Illinois 6% Tax Table" on page 52 is used as an example in the steps
that follow.
Note: You can enter up to 75 break points.
1. Turn the control lock to the PGM position.
2. From the PROGRAM MODE menu, press 2 to view the TAX PROG. screen:
TAX PROG.
TAX NUMBER (1-4) 1Å
DESC : TAX1
TAX TYPE (0-2) 1
0 : ADD-ON
1 : TAX TABLE
2 : VAT
3. When the arrow is pointed at the TAX NUMBER field, enter the number of the tax you
wish to program. (There are four taxes available, enter 1, 2, 3, or 4.) The arrow will
move to the TAX TYPE field.
4. Enter 1 for an TAX TABLE programming. The appropriate TAX # PROGRAMMING
screen displays:
TAX #1 PROGRAMMING
FIRST TAX AMOUNT
0.01Å
NON-TAXable AMOUNT
0.10
# OF NON-REPEAT
BREAK 5
# OF REPEAT BRK 3

50 • Program Mode Programming ER-600
5. Use the table below as a guide in filling the fields on this screen. After completing these
entries, your screen should look like the screen that follows.
Field Description
FIRST TAX AMOUNT Enter the first tax amount that is charged. For
this example the entry is 0.01.
NON-TAXable AMOUNT Enter the highest amount where no tax is
charged. For this example the entry is 0.10.
# OF NON-REPEAT BRK Enter the number of Non-repeat breaks. For
this example the entry is 5.
# OF REPEAT BREAK Enter the number of repeat breaks. For this
example the entry is 3.
6. After entering the # OF REPEAT BRK field, the next TAX TABLE PROG. screen will
display. Using the printed copy of your tax table, enter information in the SALE
AMOUNT RANGE fields. Enter the information as it appears on your tax table. Enter
the high amount of the first range where you are prompted. The low amount of the next
range will be computed automatically. After completing the tax range entries, your
screen should look like the following screen. Note that this screen should look exactly
like the corresponding part of the printed tax table.
TAX TABLE PROG. È
TAX SALE AMT RANGE
0.00 0.00 - 0.10
0.01 0.11 - 0.21
0.02 0.22 - 0.38
0.03 0.39 - 0.56
0.04 0.57 - 0.73
0.05 0.74 - 0.91Å
7. Because this tax table has more than 5 break points (the number of break points that can
be displayed on the first screen), you must continue to enter SALE AMT RANGE
information on the additional screens until information has been entered for each break
point. After completing the tax range entries, your screen should look like the following
screen. Note that this screen should look exactly like the corresponding part of the
printed tax table.
TAX TABLE PROG. Ç
TAX SALE AMT RANGE
0.06 0.92 - 1.08
0.07 1.09 - 1.24
0.08 1.25 - 1.41Å

ER-600 Program Mode Programming • 51
8. After you have completed entering the SALES AMOUNT RANGE information, the
TAX PROG. screen will return, prompting you to enter the next tax, if necessary.
Continue to program additional taxes or press CLEAR to return to the PROGRAM
MODE screen.

52 • Program Mode Programming ER-600
Tax Table Programming Example - Illinois 6% Tax Table(FOR USA)
1. Examine the printed tax table for the tax you are programming.
2. Calculate the break point differences by subtracting the high side of the previous range
from the high side of the sale amount range.
3. Examine the pattern of break point differences to determine when the break points begin
to repeat. Mark the beginning break points that do not fit a pattern as “non-repeat
breaks.” Mark the break points that are repeating in a pattern as “repeat breaks.” Count
the number of repeat and non-repeat breaks.
Tax Charged
Sale Amount
Range
Break point
Differences
$0.00 $0.00 - $0.10
$0.01 $0.11 - $0.21 11
$0.02 $0.22 - $0.38 17
$0.03 $0.39 - $0.56 18 Non-Repeat
$0.04 $0.57 - $0.73 17
$0.05 $0.74 - $0.91 18
$0.06 $0.92 - $1.08 17
$0.07 $1.09 - $1.24 16 Repeat
$0.08 $1.25 - $1.41 17
$0.09 $1.42 - $1.58 17
$0.10 $1.59 - $1.74 16
$0.11 $1.75 - $1.91 17
$0.12 $1.92 - $2.08 17
$0.13 $2.09 - $2.24 16
$0.14 $2.25 - $2.41 17

ER-600 Program Mode Programming • 53
Programming a VAT (Value Added Tax)
When a tax is included in the cost of the item, you can use the value added tax (VAT)
program to calculate the tax share of each sale.
1. Turn the control lock to the PGM position.
2. From the PROGRAM MODE menu, press 2 to view the TAX PROG. screen:
TAX PROG.
TAX NUMBER (1-4) 1Å
DESC : TAX1
TAX TYPE (0-2) 0
0 : ADD-ON
1 : TAX TABLE
2 : VAT
3. When the arrow is pointed at the TAX NUMBER field, enter the number of the tax you
wish to program. (There are four taxes available, enter 1, 2, 3, or 4.) The arrow will
move to the TAX TYPE field.
4. Enter 2 for VAT. The appropriate TAX # PROGRAMMING screen displays:
TAX #1 PROGRAMMING
TAX RATE 0.000Å
5. When the arrow is pointed at the TAX RATE field, enter the VAT rate. For example if
the tax is 6 percent, enter 6.000 or 6.0. If the tax is 7.5 percent, enter 7.500 or 7.5 using
the decimal key. If the tax is 10 percent, enter 10.000 or 10. Press ENTER (CASH) to
set the rate.
6. The TAX PROG. screen will return, prompting you to enter the next tax, if necessary.
Continue to program additional taxes or press CLEAR to return to the PROGRAM
MODE screen.

54 • Program Mode Programming ER-600
Programming a Canadian GST
Tax 4 can be programmed to accommodate the Canadian Goods and Services tax (GST).
1. Turn the control lock to the PGM position.
2. From the PROGRAM MODE menu, press 2 to view the TAX PROG. screen:
TAX PROG.
TAX NUMBER (1-4) 4Å
DESC : TAX1
TAX TYPE (0-2) 0
0 : ADD-ON
1 : TAX TABLE
2 : VAT
3. When the arrow is pointed at the TAX NUMBER field, enter 4, press ENTER (CASH).
The arrow will move to the TAX TYPE field.
4. Press ENTER (CASH). The TAX #4 PROGRAMMING screen displays:
TAX #4 PROGRAMMING
TAX RATE 0.000Å
GST IS TAXABLE BY
RATE 1 N
RATE 2 N
RATE 3 N
5. When the arrow is pointed at the TAX RATE field, enter the GST rate. For example if
the tax is 6 percent, enter 6.000 or 6.0. If the tax is 7.5 percent, enter 7.500 or 7.5 using
the decimal key. If the tax is 10 percent, enter 10.000 or 10.0. Press ENTER (CASH)
to set the rate.
6. At the RATE 1 field, indicate if the GST is taxable by rate 1 (tax on tax) by pressing the
YES/NO key, then pressing the ENTER (CASH) key. The arrow advances to the
RATE 2 field. Enter taxable status for RATE 2 and RATE 3. The PROGRAM
MODE screen returns.

ER-600 Program Mode Programming • 55
System Option Programming
1. At the PGM control lock position menu, press 3 for SYSTEM OPTION
Programming. The SYSTEM OPTION pg 1 screen displays:
2. Refer to "System Options - Reference Information" on page 59 to make program
entries or changes, press the CLEAR key to finalize.
SYSTEM OPTION pg 1
BEEPER ACTIVE? YÅ
REAL CLERK KEY N
CLERK ENTRY 0
0:PUSH 1:CODE
CLERK ASSIGNED WHEN
CLERK # KEY IS
PUSHED (1-10) 1
SYSTEM OPTION pg 2
CLERK IS Y:POP-UP NÅ
N:STAY-DOWN
DRAWER NEEDS TO BE
SHUT TO OPERATE N
ACTIVATE OPEN
DRAWER ALARM N
Press
PAGE DOWN
to view the 2nd
System Option
screen.
Press ENTER
after making a
change, or press
ENTER to
advance the
arrow to the next
option without
making a
change.
Press PAGE UP
to return to the
p
revious screen.
NOTE:
Be sure to press
ENTER after
changing a
selection. If you
do not press
ENTER, the
change will not
be accepted.
Press YES/NO
to toggle from
'Y' to 'N' for yes
or no decisions.
SYSTEM OPTION pg 3
SECONDS TO ALLOW
DRAWER OPEN 30Å
ALLOW POST TENDER N
OPEN DRAWER ON
POST TENDER N
ALLOW MULTIPLE
RECEIPT N
SYSTEM OPTION pg 4
CASH DECLARATION REQ
BEFORE REPORTS NÅ
MGR CONTROL TO TEND.
NEGATIVE BALANCE N
ZERO BALANCE N
RESET TRANSACTION .
NO. ON Z REPORT N
Press
PAGE DOWN
to view the 4th
System Option
screen.
Press
PAGE DOWN
to view the 3rd
System Option
screen.
The 1st System
Option screen.

56 • Program Mode Programming ER-600
SYSTEM OPTION pg 5
RESET GRAND TOTAL
AFTER Z REPORT N Å
OPEN DRAWER WHEN
REPORTS ARE RUN Y
OPEN DRAWER DURING
TRAIN MODE N
DECIMAL PLACE 2
SYSTEM OPTION pg 6
DATE FORMAT IS 0 Å
0:MDY 1:DMY 2:YMD
MODIFIER 0
0:POP UP AFTER ITEM
1:POP UP AFTER SALE
2:STAYDOWN
Press
PAGE DOWN
to view the 6th
System Option
screen.
Press ENTER
after making a
change, or press
ENTER
to
advance the
arrow to the next
option without
making a
change.
Press PAGE UP
to return to the
previous screen.
NOTE
:
Be sure to press
ENTER
after
changing a
selection. If you
do not press
ENTER
, the
change will not
be accepted.
Press YES/NO
to toggle fro
m
'Y' to 'N' for yes
or no decisions.
SYSTEM OPTION pg 7
% AND TAX CAL. 0 Å
SPLIT PRICE CAL. 0
CALCULATION CHART
0:ROUND UP AT 0.50
1:ROUND UP
2:ROUND DOWN
SYSTEM OPTION pg 8
COMPULSORY EAT-IN
T-OUT D-THRU BEFORE
TENDERING N Å
HASH IS 0
Y:NORMAL N:NON-ADD
ALLOW PRINT SCREEN
ON @/FOR KEY Y
Press
PAGE DOWN
to view the 8th
System Option
screen.
Press
PAGE DOWN
to view the 7th
System Option
screen.
Press
PAGE DOWN
to view the 5th
System Option
screen.
SYSTEM OPTION pg 9
RESET Z COUNTER
AFTER Z1 REPORT
FINANCIAL REPORT N Å
TIME REPORT N
PLU REPORT N
CLERK REPORT N
GROUP REPORT N
Press
PAGE DOWN
to view the 9th
System Option
screen.

ER-600 Program Mode Programming • 57
SYSTEM OPTION pg 10
RESET Z COUNTER
AFTER Z2 REPORT
DAILY SALES RPT N Å
DEACTIVATE SPLIT
PRICING N
Press
PAGE DOWN
to view the 10
th
System Option
screen.
SYSTEM OPTION pg 11
ALLOW DIRECT MULT N Å
INVENTORY CNT PGM N
Y:ADD CURR. LEVEL
N:COUNTER REPLACE
CURR. LVL
GLOBAL ENTRY LIMIT
(0-14) 0
SYSTEM OPTION pg 12
DISABLE PRICE LEVEL
KEY
LEVEL 1: N Å
LEVEL 2: N
LEVEL 3: N
LEVEL 4: N
LEVEL 5: N
Press
PAGE DOWN
to view the 12
th
System Option
screen.
Press
PAGE DOWN
to view the 11
th
System Option
screen.
Press ENTER
after making a
change, or press
ENTER to
advance the
arrow to the next
option without
making a
change.
Press PAGE UP
to return to the
previous screen.
NOTE
:
Be sure to press
ENTER after
changing a
selection. If you
do not press
ENTER, the
change will not
be accepted.
SYSTEM OPTION pg 13
PRICE LEVEL IS 0 Å
0:POP UP AFTER ITEM
1:POP UP AFTER SALE
2:STAYDOWN
ELECTRONIC JOURNALN
Press
PAGE DOWN
to view the 13
th
System Option
screen.
SYSTEM OPTION pg 14
PROMPT OPERATOR WHEN
EJ BUFF. IS FULL Y
STOP OPERATIONS WHEN
EJ BUFF. IS FULL N
SEND ONLY NEGATIVE
ENTRIES TO EJ N
Press
PAGE DOWN
to view the 14
th
System Option
screen.
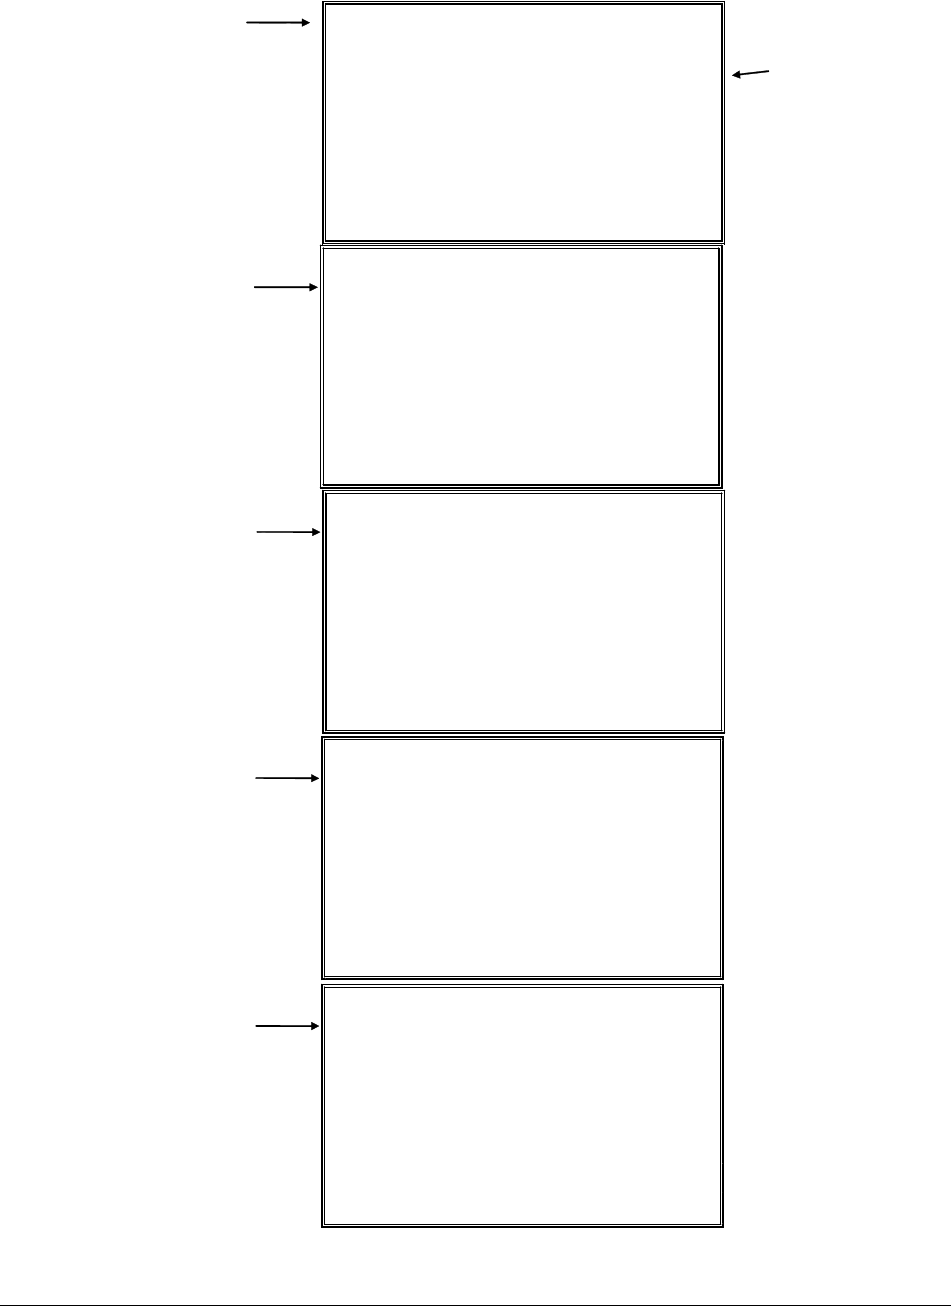
58 • Program Mode Programming ER-600
N
N
N
N
Y
N
N
N
N
N
N
0
SYSTEM OPTION pg 15
SEND RESET REPORT
TO EJ Å
DIRECT MULT MORE
THAN ONE DIGIT
TENDER VALICATION
Y:AMT TENDERED
N:AMT OF SALE
Press
PAGE DOWN
to view the 15th
System Option
screen.
Press ENTER
after making a
change, or press
ENTER to
advance the
arrow to the next
option without
making a
change.
Press PAGE UP
to return to the
previous screen.
NOTE:
Be sure to press
ENTER after
changing a
selection. If
you do not press
ENTER, the
change will not
be accepted.
SYSTEM OPTION pg 16
ALLOW PRICE LEVEL Å
ONLY MGR MODE
EMBEDDED PRICE BAR
CODE TYPE 1/3/4/7
DISPLAY ADD PRICE
OF LINKED ITEMS
Press
PAGE DOWN
to view the 16th
System Option
screen.
SYSTEM OPTION pg 17
ALLOW SALE Å
WITH 0 STOCK
ALLOW CHANGE ROUND
ON SUBT
ON CASH
ALLOW Z STOCK RPT
PRG DESC BY CODE
Press
PAGE DOWN
to view the 17th
System Option
screen.
SYSTEM OPTION pg 18
USE MCR YÅ
USE TRACK 1&2:0 0
TRACK 2&3:1
MCR USE DIGIT 0
(0-9)
CLERK INTERRUPT N
TAX1 SHIFT Y
Press
PAGE DOWN
to view the 18th
System Option
screen.
SYSTEM OPTION pg 19
X REPORT AND
DECLARATION SEND
TO E.J. Å
SCREEN SAVER 0
(RANGE:1-99 MIN)
DISABLE
NOT FOUND PLU N
Press
PAGE DOWN
to view the 19th
System Option
screen.
..

ER-600 Program Mode Programming • 59
System Options - Reference Information
Option Entry Description
BEEPER ACTIVE Y or N Select N for a silent keyboard.
REAL CLERK KEY Y or N Select Y if the optional bayonet clerk lock and key system is
installed.
CLERK ENTRY
0:PUSH 1:CODE
0 or 1 Select PUSH for a push button clerk, select CODE for a
code entry clerk system (number - clerk or clerk - number -
clerk) sequence.
CLERK ASSIGNED WHEN
CLERK KEY IS PUSHED
(1-10)
1-10 If PUSH system is selected, you can select the clerk that is
signed on when the CLERK # key is pressed. Note that the
maximum clerk number you can enter here is determined by
how many clerks are allocated in memory.
CLERK IS Y:POP-UP
N:STAY-DOWN
Y or N Select Y for pop-up clerks, select N for stay down clerks.
With pop-up clerks, you must sign on for each transaction.
With stay down clerks, the same clerk remains signed on
until sign off.
DRAWER NEEDS TO BE
SHUT TO OPERATE
Y or N Select Y to enforce closed drawer for register operations.
ACTIVATE OPEN
DRAWER ALARM
Y or N Select Y if you want the error tone to automatically sound
when the drawer stays open longer than the time set in the
following field.
SECONDS TO ALLOW
DRAWER OPEN
1-99 If you enable the open drawer alarm above, you can set the
length of time (1-99 seconds) before the alarm sounds.
ALLOW POST TENDER Y or N Select Y to allow re-tendering should a second change
calculation be necessary. Re-enter the tendered amount and
press the CASH key to show the new change computation.
OPEN DRAWER ON POST
TENDER
Y or N If you enable post tendering, select N to not open the cash
drawer after the second tender.
ALLOW MULPTIPLE
RECEIPT
Y or N Set to Y if you wish to issue more than one copy of a
transaction receipt.
CASH DECLARATION
REQ BEFORE REPORTS
Y or N Select Y to enforce a cash declaration function before a
financial, clerk, or cash in drawer report can be generated.
MGR CONTROL TO TEND.
NEGATIVE BALANCE
ZERO BALANCE
Y or N Select Y if you wish to control negative transactions (when
cash is removed from the drawer). When selected the
control lock must be in the X position to finalize the
transaction.
RESET TRANSACTION #
ON Z REPORT
Y or N Select Y if you wish to reset the transaction number (often
called the receipt counter) to zero after the financial report is
reset.
RESET GRAND TOTAL
AFTER Z REPORT
Y or N Select Y if you wish to reset the grand total to zero after the
financial report is reset.
OPEN DRAWER WHEN
REPORTS ARE RUN
Y or N Select N to stop the drawer from opening when reports are
run.

60 • Program Mode Programming ER-600
Option Entry Description
OPEN DRAWER DURING
TRAIN MODE
Y or N Select N if you do not want the cash drawer to open during
training mode operations.
DECIMAL PLACE 0, 1, 2, 3, or
4
Enter a digit to place the decimal point the selected number
of positions from the right.
DATE FORMAT IS
0:MDY 1:DMY 2:YMD
0, 1, or 2 Select 0 for MMDDYY, select 1 for DDMMYY, or select 2
for YYMMDD date printing format.
MODIFIER:
0:POP UP AFTER ITEM
1:POP UP AFTER SALE
2:STAYDOWN
0, 1, or 2 A MODIFIER key alters the next PLU registered, either by
changing the code number of the PLU so that a different
item is registered, or by adding the modifier descriptor and
not changing the code of the subsequent PLU. If you press a
modifier key, you have the option of the modifier applying
only to the next item (0), having the same modifier apply to
any subsequent item registered in the same transaction (1),
or having the same modifier apply to any subsequent item on
any subsequent transaction (2).
% AND TAX CAL. 0, 1, or 2 Select the digit that represents the appropriate rounding
method for tax and discount calculations: 0 for round up at
0.5 of a penny (0.005), 1 for always round up or 2 for
always round down.
SPLIT PRICE CAL. 0, 1, or 2 Select the digit that represents the appropriate rounding
method for split pricing (i.e. 2 at 3 for $1.00) calculations: 0
for round up at 0.5 of a penny (0.005), 1 for always round up
or 2 for always round down.
COMPULSORY EAT-IN
T-OUT D-THRU BEFORE
TENDERING
Y or N Choose Y if you wish to enforce use of one of the
destination keys (EAT-IN, TAKE OUT, or DRIVE THRU)
before the sale is finalized.
HASH IS
Y:NORMAL N:NON-ADD
Y or N Y: Hash adds to all totals except the gross and net sales
totals on the financial report.
N: Hash doees not add to any totals, except the HASH total
on the financial report.
ALLOW PRINT SCREEN
ON @/FOR KEY
Y or N Choose N if you wish to disable the print screen function of
the @/FOR key.
RESET Z COUNTER
AFTER Z1 REPORT
FINANCIAL REPORT
TIME REPORT
PLU REPORT
CLERK REPORT
GROUP REPORT
Y or N Choose Y or N to determine if you wish to reset the Z
counter after a Z1 of each report listed.
RESET Z COUNTER
AFTER Z2 REPORT
DAILY SALES RPT
Y or N Choose Y or N to determine if you wish to reset the Z
counter after a Z2 of the daily sales report.
DEACTIVATE SPLIT
PRICING
Y or N If N, both multiplication and split pricing calculations can be
done with the @/FOR key. If Y, only multiplication can be
done with the @/FOR key.
ALLOW DIRECT MULT Y or N If Y, you can multiply preset items by simply entering the
quantity, then pressing the preset PLU key.

ER-600 Program Mode Programming • 61
Option Entry Description
INVENTORY CNT PGM
Y:ADD CURR. LVL
N:COUNTER REPLACE
CURR LEVEL
Y or N Choose Y or N to determine whether the quantity of
inventory you enter in the PLU stock program adds to
existing inventory quantity, or whether it replaces the current
inventory quantity.
GLOBAL ENTRY LIMIT
(0-14)
0-14 Enter a digit to determine the number of numeric digits that
can be entered for any register function. Enter 0 for no limit.
DISABLE PRICE LEVEL
KEY
LEVEL 1:
LEVEL 2:
LEVEL 3:
LEVEL 4:
LEVEL 5:
Y or N You can choose to disable any of the price level keys here.
PRICE LEVEL IS
0:POP UP AFTER ITEM
1:POP UP AFTER SALE
2:STAYDOWN
0, 1, or 2 If you press a price level key, you have the option of the
level key applying only to the next item (0), having the same
level key apply to any subsequent item registered in the
same transaction (1), or having the same level key apply to
any subsequent item on any subsequent transaction(2).
ELEC. JOURNAL Y or N Select Y to enable the electronic journal. The electronic
journal captures in memory what you would print line by
line on a traditional journal. The four options that follow
control the electronic journal feature. The electronic journal
can be read and printed in the X control lock position or
reset and printed in the Z control lock position.
PROMPT OPERATOR
WHEN E.J. IS FULL
Y or N If the electronic journal is enabled above, select Y if you
wish to display a message to notify the operator when the
journal memory is full.
STOP OPERATIONS WHEN
E.J. IS FULL
Y or N If the electronic journal is enabled above, select Y if you
wish to stop operations when the journal memory is full.
SEND ONLY NEGATIVE
ENTRIES TO E.J.
Y or N If the electronic journal is enabled above, select Y if you
wish to capture only transactions with negative entries.
SEND RESET REPORT
TO E.J
Y or N If the electronic journal is enabled above, select Y if you
wish to capture reset reports.
DIRECT MULT MORE
THAN ONE DIGIT
Y or N If you allow direct multiplication of a preset PLU, you can
allow only single digit multiplication or multiplication by
more than one digit.
TENDER VALIDATION
Y:AMT TENDERED
N:AMT OF SALE
Y or N Validation is allowed if an appropriate optional printer is
connected to an RS-232C port. Here you can choose the
content of single line validation
ALLOW PRICE LEVEL
ONLY MGR MODE
Y or N Choose Y to require the X Mode key to operate the Price
Level keys.

62 • Program Mode Programming ER-600
Option Entry Description
EMBEDED PRICE BAR
CODE TYPE 1/3/4/7
1, 3, 4 or 7 Enables price embedded bar codes:
1,4 = Type 1 embedded bar codes with a price check sum.
3 = Type 3 embedded bar codes without a check sum.
7 = Choose 7 if you are embedding a weight, rather than a
price. Use weight when different items are sold in bulk,
such as nut/bolts in a hardware store. When a weight
embedded bar code is scanned the weight is displayed and
must be extended by a price at the cash register.
DISPLAY ADD PRICE OF
LINKED ITEMS
Y or N When Y, the customer display shows a total of the item and
linked item. For example, if PLU is $1.00 and is linked to
PLU2 which is $0.25, the customer display will show $1.25.
ALLOW SALE WITH 0
STOCK
Y or N When N, inventory PLUs cannot be sold when stock reaches
"0".
ALLOW CHANGE ROUND
ON SUBT
ON CASH
Y or N Rounding rounds as below:
.00 - .02 = .00
.03 - .07 = .05
.08 - .09 = .10
ALLOW Z STOCK RPT Y or N When N, the operator is not allowed to clear (Z) stock.
PGM DESC BY CODE Y or N When N, program descriptors by pressing the appropriate
key on the program overlay. When Y, program descriptors
by typing the code for each descriptor character.
USE MCR Y or N Select code entry clerk system by MCR.
USE TRACK 1&2:0
TRACK 2&3:1
0-1 Select the MCR type.
MCR USE DIGIT (0-9) 0-9 Set the limit of use digit.
CLERK INTERRUPT Y or N When Y, if enter the clerk number different while
registration. Sing on and off automatically. At this time
temporarily finalize previous sale data and recall by same
clerk.
TAX 1 SHIFT Y or N When Y, changed function of TAX 1 SHIFT key to
Germany style. This key used in Germany only.
X REPORT AND
DECLARATION SEND
TO E.J.
Y or N If the electronic journal is enabled above, select Y if you
wish to capture X report and declaration.
SCREEN SAVER 0-99 Min Start screen saver mode after entered minute. Enter 0 to
disable this function.
DISABLE NOT FOUND
PLU
Y or N Select Y to disable the NOT FOUND PLU function.
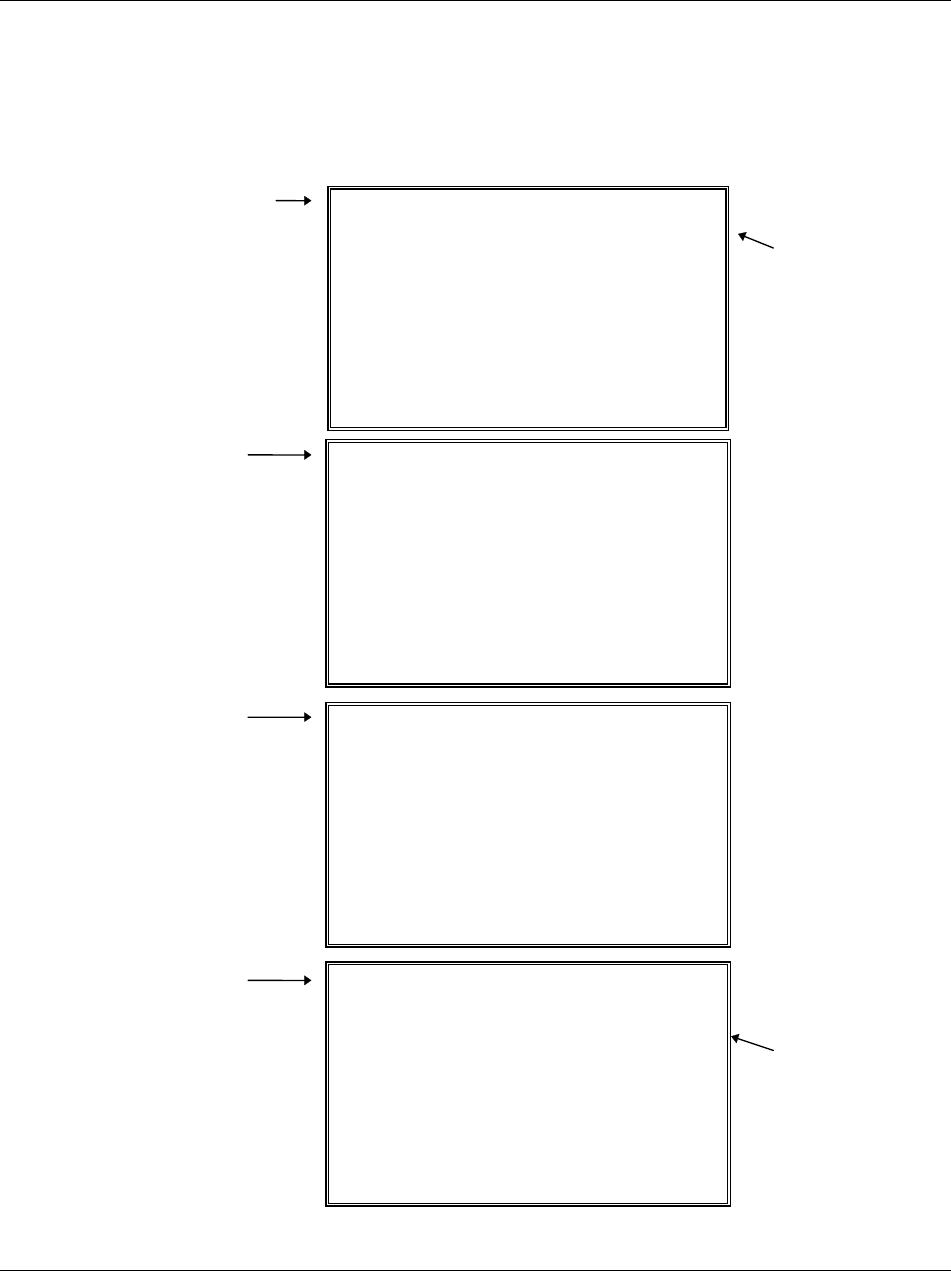
ER-600 Program Mode Programming • 63
Print Option Programming
1. At the PGM control lock position menu, press 4 for PRINT OPTION
Programming. The PRINT OPTION pg 1 displays:
2. Refer to "Print Options - Reference Information" on page 67 to make program
entries or changes, press the CLEAR key to finalize.
PRINT OPTION pg 1
PRINT MEDIA TOTALS
ON CLERK REPORT N Å
PRINT TAX SYMBOL Y
PRINT VD MODE AND
RETURN ON REPORT Y
PRINT AUDACTION
ON REPORT N
PRINT OPTION pg 2
SKIP ZERO TOTALS ON
FINANCIAL REPORT Y Å
SKIP ZERO TOTALS ON
CLERK REPORT Y
PRT CLERK RPT AFT
FINANCIAL RPT N
PRT SALE ITEM NO. N
Press
PAGE DOWN
to view the 2
n
d
Print Option
screen.
Press ENTER
after making a
change, or press
ENTER to
advance the
arrow to the next
option without
making a
change.
Press PAGE UP
to return to the
previous screen.
NOTE :
Be sure to press
ENTER after
changing a
selection. If you
do not press
ENTER, the
change will not
be accepted.
Press YES/NO
to toggle from
'Y' to 'N' for yes
or no decisions.
PRINT OPTION pg 3
PRINT PLU WITH ZERO
TOTALS ON REPORT N Å
PRINT SUBTOTAL WHEN
PRESSED N
PRINT % OF SALES
ON PLU REPORT N
PRINT CONS. NO. Y
PRINT OPTION pg 4
PRINT DATE Y Å
PRINT TIME Y
PRINT MACHINE NO. Y
PRINT CLERK NAME Y
HOME CURRENCY
SYMBOL IS $
PRINT Z COUNTER Y
Press
PAGE DOWN
to view the 4
th
Print Option
screen.
Press
PAGE DOWN
to view the 3
rd
Print Option
screen.
The 1st Print
Option screen.

64 • Program Mode Programming ER-600
PRINT OPTION pg 5
PRINT RECEIPT WHEN
SIGN ON/OFF NÅ
PRINT GRAND TOTAL
ON X REPORT Y
ON Z REPORT Y
PRINT OPTION pg 6
PRINT GROSS TOTAL
ON X REPORT YÅ
ON Z REPORT Y
PRINT SUBTOTAL W/O
TAX N
TAX AMOUNT IS N
Y:COMBINE N:ITEMIZE
Press
PAGE DOWN
to view the 6th
Print Option
screen.
Press ENTER
after making a
change, or press
ENTER to
advance the
arrow to the next
option without
making a
change.
Press PAGE UP
to return to the
p
revious screen.
NOTE:
Be sure to press
ENTER after
changing a
selection. If you
do not press
ENTER, the
change will not
be accepted.
Press YES/NO
to toggle from
'Y' to 'N' for yes
or no decisions.
PRINT OPTION pg 7
PRINT TAX AMOUNT YÅ
PRT TAXABLE TOTAL N
PRINT TAX % RATE N
VAT BREAKDOWN N
PRT TRAIN MODE TITLE
IN TRAINING MODE N
PRINT OPTION pg 8
CURRENCY SYMBOL
CONV#1 .Å
CONV#2 .
CONV#3 .
CONV#4 .
Press
PAGE DOWN
to view the 8th
Print Option
screen.
Press
PAGE DOWN
to view the 7th
Print Option
screen.
Press
PAGE DOWN
to view the 5th
Print Option
screen.

ER-600 Program Mode Programming • 65
PRINT OPTION pg 9
PRT KP ORDER # ON
RECEIPT YÅ
PRINT PRICE ON KP N
SEND TO KP IN
VOID MODE Y
SEND TO KP IN
TRAIN MODE N
Press
PAGE DOWN
to view the 9th
Print Option
screen.
PRINT OPTION pg 10
COMBINE LIKE ITEMS
ON KP NÅ
CONSOLIDATION ON
CHECK TRACK N
VOLUME UNIT 0
0:GAL 1:LTR
Press
PAGE DOWN
to view the 10th
Print Option
screen.
Press ENTER
after making a
change, or press
ENTER to
advance the
arrow to the next
option without
making a
change.
Press PAGE UP
to return to the
previous screen.
PRINT OPTION pg 12
PRINT ON FIN RPT
AVG ITEM/CUST Y
AVG $/CUST Y
BUFFER RECEIPT ISSUE
WHEN REC IS ON N
PRIORITY PRINT BY
GROUP ON KP/KV NÅ
Press
PAGE DOWN
to view the 11th
Print Option
screen.
PRINT OPTION pg 11
PRINT PREAMBLE YÅ
PRINT POSTAMBLE Y
MESG ON RECEIPT
PRINT PREAMBLE N
PRINT POSTAMBLE N
ON THE GUEST CHECK
Press
PAGE DOWN
to view the 12th
Print Option
screen.
PRINT OPTION pg 13
PRINT PLU#
ON RECEIPT Y
REPORT PORT(0-4) 0
PRINT E.J FROM N
Y:OLDEST
N:NEWEST
Press
PAGE DOWN
to view the 13th
Print Option
screen.

66 • Program Mode Programming ER-600
PRINT OPTION pg 14
NOT PRINT WHEN NÅ
POLLING REPORTS
PRINT PLU# N
ON PLU REPORT
GRAND TOTAL IS N
Y:NET N:GROSS
Press
PAGE DOWN
to view the 14th
Print Option
screen.
Press ENTER
after making a
change, or press
ENTER to
advance the
arrow to the next
option without
making a
change.
Press PAGE UP
to return to the
previous screen.
PRINT OPTION pg 16
RECEIPT PRINTER
LEFT SPACE COLUMN
(0-15) 0Å
USE MODE N
PRINT SALE RECEIPT
TO THE SERVER N
Press
PAGE DOWN
to view the 16th
Print Option
screen.
PRINT OPTION pg 17
PRINT TAX CHARGED
FOR LAST SERVICED
ITEMS NÅ
Press
PAGE DOWN
to view the 17th
Print Option
screen.
Press
PAGE DOWN
to view the 15th
Print Option
screen.
PRINT OPTION pg 15
SEND ORDER TO KP
AT SUBTOTAL
PRINT DATE ON N
SERV ON HARD CHECK
RECEIPT PRINTER
COLUMN RANGE
(30-50) 32

ER-600 Program Mode Programming • 67
Print Options - Reference Information
Option Entry Description
PRINT MEDIA TOTALS ON
CLERK REPORT
Y or N Select Y to print media totals for each clerk, thus allowing
clerk cash drawer accountability.
PRINT TAX SYMBOL Y or N Select N to remove the tax symbol (i.e."T1") from the print
and display.
PRINT VD MODE AND
RETURN ON REPORT
Y or N Select N to remove the VOID MODE and RETURN totals
from the financial and clerk reports.
PRINT AUDACTION ON
REPORT
Y or N Select N to remove the AUDACTION total from the
financial and clerk reports.
SKIP ZERO TOTALS ON
FINANCIAL REPORT
Y or N By default, the register prints only totals with information
other than zero. Select N, if you wish to print the contents
of all the financial report totals, even if the total is zero.
SKIP ZERO TOTALS ON
CLERK REPORT
Y or N By default, the register prints only totals with information
other than zero. Select N, if you wish to print the contents
of all the clerk report totals, even if the total is zero.
PRT CLERK REPORT AFT
FINANCIAL RPT
Y or N Select Y if you wish to include the clerk report information
at the end of the financial report.
PRINT PLU WITH ZERO
TOTALS ON REPORT
Y or N By default, the register prints only totals with information
other than zero. Select Y, if you wish to print the contents
of all the PLUs, even if the total is zero.
PRINT SUBTOTAL WHEN
PRESSED
Y or N Select Y if you wish the subtotal to print when the SBTL
key is pressed.
PRINT % OF SALES ON
PLU REPORT
Y or N The register can calculate the percentage of sales represented
by each PLU. Select Y if you wish to print this percentage
on the PLU report. Note: the percentage will print only on
standalone register reports, not IRC report.
PRINT CONS. NO. Y or N The consecutive number (also referred to as the transaction
counter, or receipt counter) normally prints on each receipt.
Select N if you do not wish to print this counter.
PRINT DATE Y or N Select N if you wish to delete the printing of the date.
PRINT TIME Y or N Select N if you wish to delete the printing of the time.
PRINT MACHINE NO.
Y or N If you are using more than one cash register, you can
identify the specific register where a receipt was printed.
Enter Y if you wish to print the register number on the
receipt.
PRINT CLERK NAME Y or N Select N if you wish to delete the printing of the clerk name
on the receipt.
HOME CURRENCY SYM $ Users outside of the USA can designate a different currency
symbol. To select a different symbol, press the symbol you
wish to use on the Alpha Keyboard overlay. When this field
is selected, press 00 to display a list of optional symbols.
PRINT Z COUNTER Y or N Select N if you wish to delete the printing of the reset
counter on Z reports.

68 • Program Mode Programming ER-600
Option Entry Description
PRINT RECEIPT WHEN
SIGN ON/OFF
Y or N Select N if you do not wish to print a receipt when signing
on or off a clerk.
PRINT GRAND TOTAL
ON X REPORT
ON Z REPORT
Y or N Select N if you wish to delete the printing of the grand total
on the financial report reading (X report) or financial report
resetting (Z report).
PRINT GROSS TOTAL
ON X REPORT
ON Z REPORT
Y or N Select N if you wish to delete the printing of the gross sales
total on the financial report reading (X report) or financial
report resetting (Z report).
PRINT SUBTOTAL W/O
TAX
Y or N If you hand write credit card slips, you may find it useful to
print the merchandise subtotal. Select Y if you wish to print
the subtotal without tax on the receipt.
TAX AMOUNT IS
Y:COMBINE N:ITEMIZE
Y or N Select Y if you are calculating and reporting more that one
sales tax rate separately and you wish to print just the total
of multiple taxes rather than itemize each tax on the receipt.
PRINT TAX AMOUNT Y or N Select Y if you wish to delete the printing of the tax amount
on the receipt.
PRINT TAXABLE TOTAL Y or N Select Y if you wish to print the total of merchandise eligible
for each tax on the receipt.
PRINT TAX % RATE Y or N If you are calculating a tax percentage (add-on or VAT),
select Y if you wish to print the tax rate on each receipt.
VAT BREAKDOWN Y or N If Y, a breakdown of the VAT eligible sale will print, the net
amount and the VAT amount.
INCLUDE VAT TAX
IN TAX AMT
Y or N Choose Y to print the VAT tax amount on the receipt, and
include the VAT tax amount with other taxes, if applicable.
PRINT TRAIN MODE
TITLE IN TRAIN MODE
Y or N When in training mode, the message "TRAIN MODE"
normally prints on each receipt. Select N if you wish to
delete this message.
CURRENCY SYMBOL
CONV.#1
CONV.#2
CONV.#3
CONV.#4
Y or N If you are using the currency conversion feature, you can
select the appropriate symbol for each foreign currency you
are accepting. To select a different symbol, press the symbol
you wish to use on the Alpha Keyboard overlay. When one
of these fields are selected, press 00 to display a list of
optional symbols.
PRINT KP ORDER # ON
RECEIPT
Y or N A system wide counter creates an order number for each
kitchen requisition. Choose Y or N to print the order
number on the kitchen printer requisition.
PRINT PRICE ON KP Y or N You can choose to print the item with or without its' price on
the kitchen requisition.
SEND TO KP IN
VOID MODE
Y or N You can choose whether to print or not print registrations in
void mode on kitchen requisitions.
SEND TO KP IN
TRAIN MODE
Y or N You can choose whether to print or not print registrations in
training mode on kitchen requisitions.
COMBINE LIKE ITEMS ON
KP
Y or N If two of the same items are registered in the same
transaction, you can choose the format on the kitchen
requistion. For example, if Y, "2 HAMBURGERS; if N, "1
HAMBURGER" and "1 HAMBURGER".
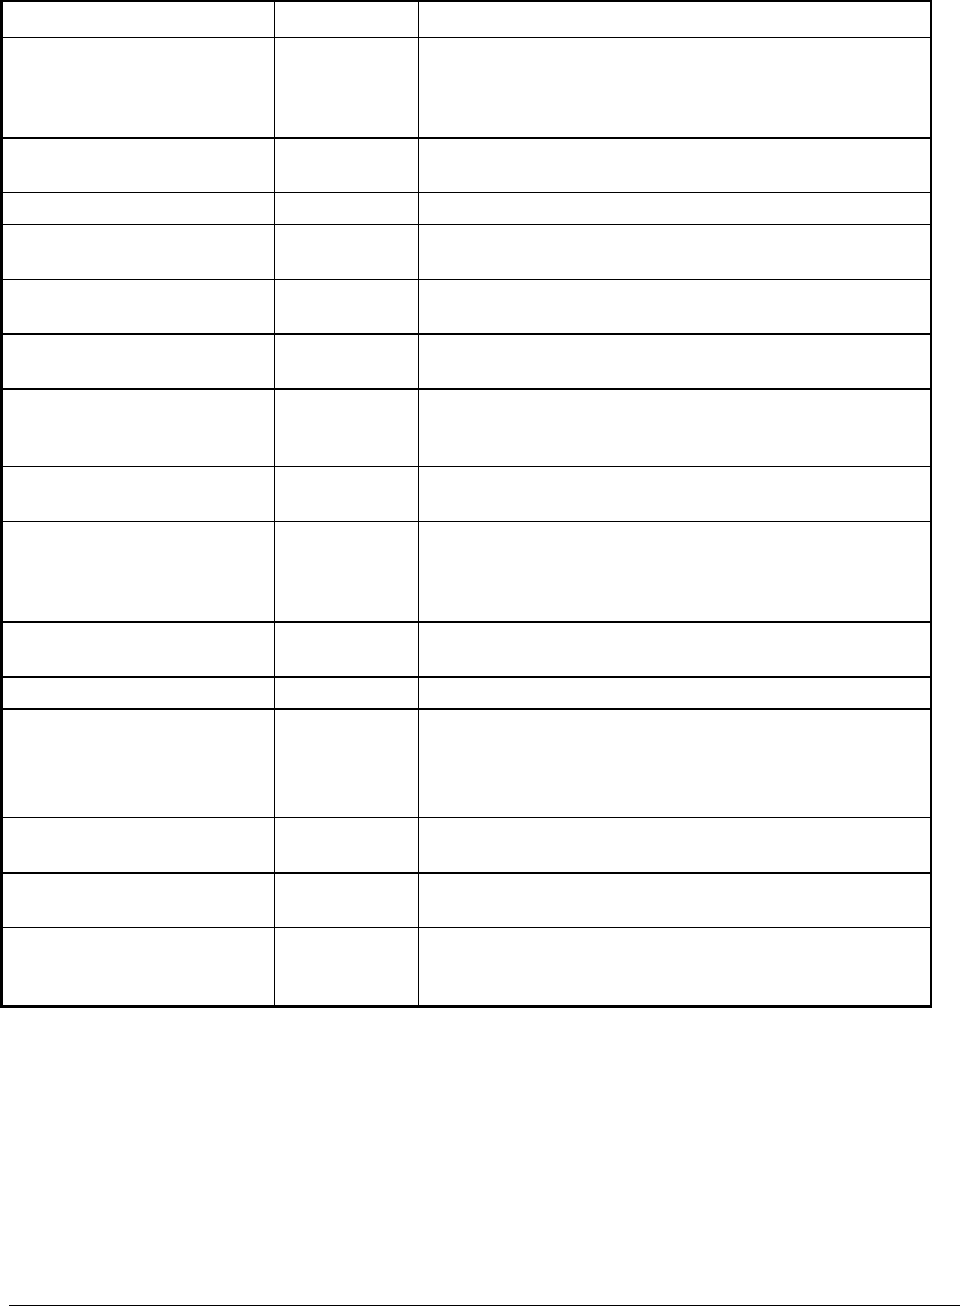
ER-600 Program Mode Programming • 69
Option Entry Description
CONSOLIDATION ON
CHECK TRACK
Y or N Consolidation of like items can be selected for soft guest
check printing. For example, if three rounds of drinks are
served, the check will print "3 TAP BEER" rather than "1
TAP BEER" three times.
VOLUME UNIT
0:GAL 1:LTR
0 or 1 If gallonage is selected in PLU programming, choose gallons
or liters here.
PRINT PREAMBLE Y or N Choose whether to print the PREAMBLE on the receipt.
PRINT POSTAMBLE
MESG ON RECEIPT
Y or N Choose whether to print the POSTAMBLE on the receipt.
PRINT PREAMBLE Y or N Choose whether to print the PREAMBLE on the guest
check.
PRINT POSTAMBLE
ON THE GUEST CHECK
Y or N Choose whether to print the POSTAMBLE on the guest
check.
PRINT ON FIN RPT
AVG ITEM/CUST
AVG $/CUST
Y or N Choose whether to print the average items per customer
(PLU sales counter/Net sales counter) or the average sales
per customer (Net Sales/Net Sales counter).
BUFFER RECEIPT ISSUE
WHEN REC IN ON
Y or N Determine whether you can issue a second receipt for the
same transaction with the CASH key
PRIORITY PRINT BY
GROUP ON KP/KV
Y or N If Y, the order in which items appear on a kitchen requisition
is determined by the group to which the item is assigned, i.e.
items reported to group 1 will print before items reported to
group 2.
PRINT PLU # ON RECEIPT Y or N If Y, the PLU number and descriptor will print. If N, only
the PLU number will print.
REPORT PORT 0 - 4 Choose a port for a remote printer to print reports.
PRINT E.J FROM
Y:OLDEST N:NEWEST
Y or N Y: Prints electronic journal from lowest consecutive number
to highest.
N: Prints electronic journal from highest consecutive
number to lowest.
NOT PRINT WHEN
POLLING REPORTS
Y or N Choose Y if you would like to suppress register printing
when reports are polled.
PRINT PLU #
ON PLU REPORT
Y or N Determines whether PLU# is displayed on the report.
GRAND TOTAL IS
Y:NET N:GROSS
Y or N Choose Y if you wish the grand total to accumulate daily net
sales totals. Choose N if you wish the grand total to
accumulate daily gross sales totals.

70 • Program Mode Programming ER-600
Option Entry Description
SEND ORDER TO KP
AT SUBTOTAL
Y or N Choose Y to print orders on the KP when the SUBTOTAL
key is pressed. Choose N to print orders on the KP when the
order is finalized.
PRINT DATE ON
SERV ON HARD CHECK
Y or N If Y, the posting date will print at every posting on the hard
check.
RECEIPT PRINTER
COLUMN RANGE (30-50)
30-50 Enter a value (30-50) for used column range.
RECEIPT PRINTER LEFT
SPACE COLUMN (0-15)
0-15 Enter a value (0-15) for left space column.
USE MODEM Y or N Choose Y to use modem.
PRINT SALE RECEIPT TO
THE SERVER
Y or N If Y, you can print the check to server register printer.
PRINT TAX CHARGED
FOR LAST SERVICED
ITEMS
Y or N If Y, the tax printed on the check/receipt is only for the items
since the last service. If N, the tax is for all items on check.
Necessary flag for charge posting.
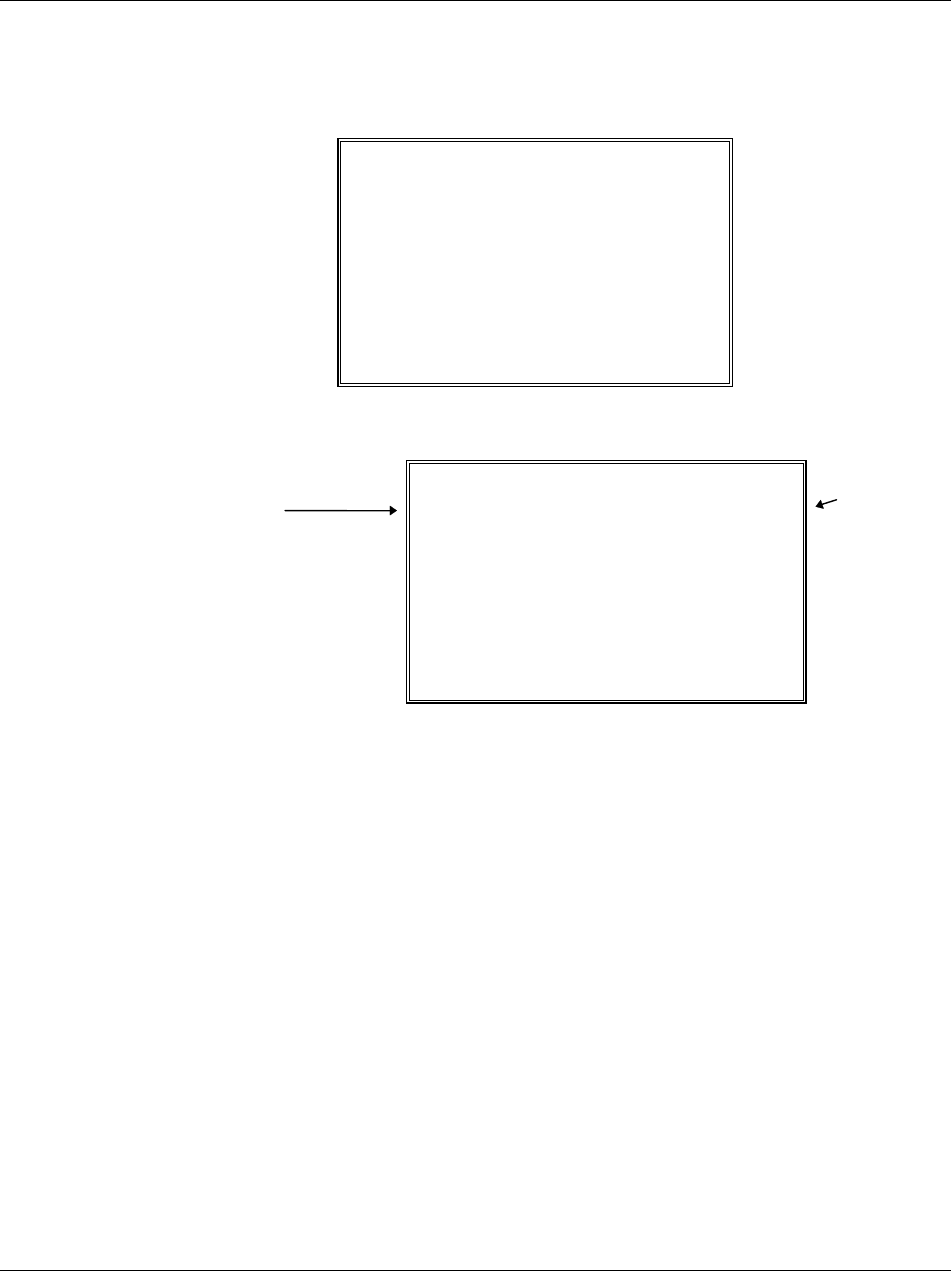
ER-600 Program Mode Programming • 71
Clerk Programming
1. At the PGM control lock position menu, press 6 for CLERK. The CLERK NUMBER
screen displays:
CLERK NUMBER
CLERK NO ? (1-??) 0Å
2. Enter the clerk number 1-99, (the actual number of clerks is set in memory allocation).
Press the ENTER key to display the CLERK # programming screen:
CLERK #1 PROG.
NAME : CLERK 1 Å
PASSWORD 0
DRAWER ASSIGN(0-2)1
Press
ENTER to
advance
the arrow
to the next
option.
D
escripto
r
Type the descriptor using
t
he Program Overlay. The
overlay is automatically
activated when the curso
r
is pointing at the DESC
field.
3. Refer to "Clerk Programming - Reference Information" to make choices or changes on
the screens provided.
4. After making new entries or changes for a function key, press the CLEAR key to finalize
and return to the PROGRAM MODE screen.

72 • Program Mode Programming ER-600
Clerk Programming - Reference Information
Option Entry Description
NAME Alpha numeric
12 character
You can program a descriptor for each clerk. The name you
program will print on the receipt in place of the default CLERK
#1-99. Type the descriptor using the Program Overlay. The
overlay is automatically activated when the cursor is pointing at
the DESC field.
PASSWORD 9 digit number If you are using a direct or code entry clerk system. The number
you set here is the number you must use to sign on or clock in/out.
DRAWER 0-2 Enter 0 to allow check track operations only. (No cash sales.)
Enter 1 or 2 (with the multiple drawer option) to select which
drawer the clerk will open.

ER-600 Program Mode Programming • 73
Function Key Programming
1. From the PGM control lock position menu, press 5 for FUNCTION KEY. The
FUNCTION KEY PROGRAM screen displays:
FUNCTION KEY PROGRAM
PUSH FUNCTION KEY TO
BE PROGRAMMED
2. Press the function key you wish to program.
If the function you wish to program is located on a function look-up key, press the
appropriate function look-up key, then press 1 to select STATUS PROGRAM (meaning you
wish to program the status of the function not the menu assignment of the function look-up
key) then press the digit corresponding to the function you wish to program

74 • Program Mode Programming ER-600
#/NS
1. Press the #/NS key to view the #/NS function key options:
#/NS KEY PROG. È
DESC1: NOSALE Å
DESC2: NON ADD #
KEY DISABLE N
UNDER MGR CONTROL N
INHIBIT NO SALE
AFTER NON-ADD # N
2. Press ENTER from the last field or press PAGE DOWN to view the second page of
#/NS function key options:
#/NS KEY PROG. R
ENFORCE# ENTRY AT
START OF SALE NÅ
PRINT ON N/S Y
NON-ADD# PROHIBIT N
COMP. NON-ADD# MUST
MATCH MAX DIGIT N
MAX DIGIT(0-8) 0
3. Press ENTER from the last field or press PAGE DOWN to view the third page of #/NS
function key options:
#/NS KEY PROG. Ç
PRINT NON-ADD NÅ
ON GUEST CHECK
4. Press ENTER from the last field to return to the FUNCTION KEY PROGRAM screen,
or press ESC at any time to return to the FUNCTION KEY PROGRAM screen without
saving changes.

ER-600 Program Mode Programming • 75
#/NO SALE Function Options
Option Entry Description
DESC1 Alpha numeric
12 character
You can program a descriptor for the no sale function. The default
descriptor is NOSALE.
DESC2 Alpha numeric
12 character
You can program a descriptor for the non add # function. The
default descriptor is NON ADD #.
KEY DISABLE Y or N Select Y to disable this function.
UNDER MGR
CONTROL
Y or N Select Y to allow operation only in manager operation mode.
INHIBIT NO SALE
AFTER NON-ADD #
Y or N Select Y if you want disable the NO SALE function after a non-
add number is entered.
ENFORCE # ENTRY
AT START OF SALE
Y or N Select Y if you wish to enforce the entry of a non-add number at
the beginning of each transaction. (For example, to track the
number of customers in each sale, or to identify a customer
number with each sale.)
PRINT ON N/S Y or N Select N to stop printing when a NO SALE is performed.
NON-ADD #
PROHIBIT
Y or N Select Y to disable the non-add # function.
COMP NON-ADD #
MUST MATCH
MAX DIGIT
Y or N Select Y if you wish all non-add number entries to have the exact
number of digits selected in the MAX DIGIT flag below.
MAX DIGIT (0-8) 0-8 Enter the maximum number of digits for non-add number entry.
Zero (0) means no limit.
PRINT NON-ADD
ON GUEST CHECK
Y or N Select Y if you want print non-add number on the guest check.

76 • Program Mode Programming ER-600
%1 -%5
1. Press the one of the % keys to view the appropriate % function key options:
%1 PROGRAMMING È
DESC : %1 Å
AMOUNT:Y %:N N
RATE 0.000
KEY DISABLE N
UNDER MGR CONTROL N
OPEN:Y PRESET:N N
SALE:Y ITEM:N N
2. Press ENTER from the last field or press PAGE DOWN to view the second page of %
function key options:
%1 PROGRAMMING ↕
OVERRRIDEABLE NÅ
POS.:Y NEG.:N N
TAXable BY TAX1 N
TAXable BY TAX2 N
TAXable BY TAX3 N
TAXable BY TAX4 N
F/S ELIGIBLE N
3. Press ENTER from the last field or press PAGE DOWN to view the next page of %
function key options:
%1 PROGRAMMING ↕
ALLOW ONLY ONE TIME
SUBTOTAL ENTRY NÅ
ALLOW MULTIPLE AMT
DISCOUNT(COUPON)
WITHOUT SUBTOTAL N
PRESET OVERIDE IN
MGR ONLY N

ER-600 Program Mode Programming • 77
4. Press ENTER from the last field or press PAGE DOWN to view the last page of %
function key options:
%1 PROGRAMMING Ç
COMPULSORY VALID NÅ
5. Press ENTER from the last field to return to the FUNCTION KEY PROGRAM screen,
or press ESC at any time to return to the FUNCTION KEY PROGRAM screen without
saving changes.
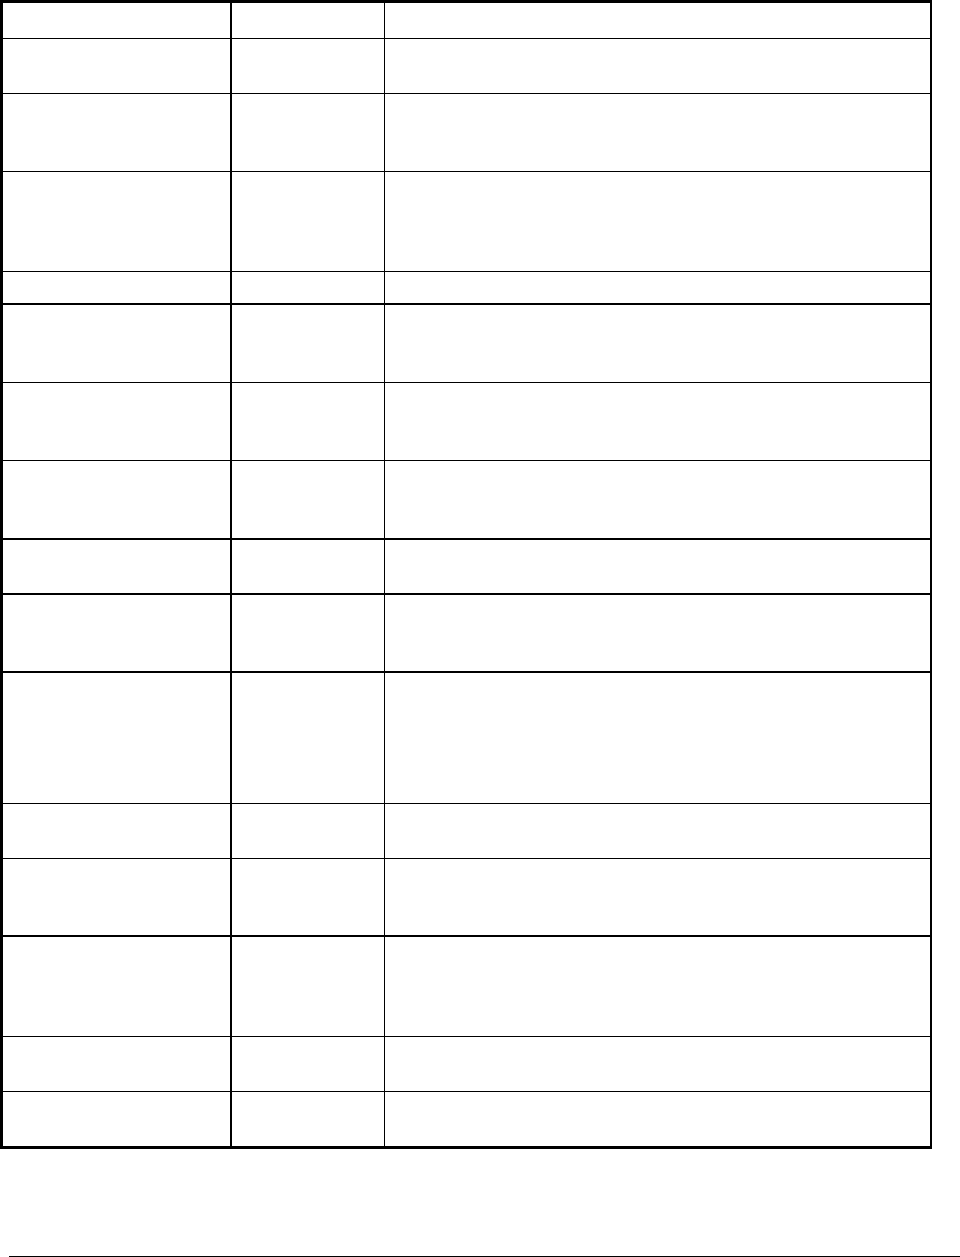
78 • Program Mode Programming ER-600
%1 -%5 Function Options
Option Entry Description
DESC Alpha numeric
12 character
You can program a descriptor. The default descriptors are % 1-
4.
AMOUNT:Y %:N Y or N Select Y if you wish this key to apply an amount (as in a
coupon). Select N if you wish this key to apply a percentage (as
in a discount or surcharge).
RATE 5 digit If the function is an amount, enter an amount from 0 to 999.99.
If not zero, the amount will be the preset coupon amount. If the
function is a percentage, enter a percentage from 0 to 99.999%.
If not zero, the percentage will be the preset percentage
KEY DISABLE Y or N Select Y to disable this function.
UNDER MGR
CONTROL
Y or N Select Y if you do not want the operator use this function in
REGISTER mode. When selected, the function is allowed only
in the X control lock position.
OPEN:Y PRESET:N Y or N Select Y if you with the amount or percentage to be entered by
the operator; select N if you with the amount or percentage to be
preset.
SALE:Y ITEM:N Y or N Select Y if you wish the amount or percentage to apply to the
sale total. Select N if you wish the amount or percentage to
apply to an item.
OVERRIDEABLE Y or N Select Y if you wish to enter a percentage or amount to override
the preset percentage or amount set in the RATE field.
POS.:Y NEG.:N Y or N Select Y if you wish the amount or percentage to add to the sale
total. Select N if you wish the amount or percentage to subtract
from the sale.
TAXable BY TAX1
TAXable BY TAX2
TAXable BY TAX3
TAXable BY TAX4
Y or N Select N to tax any taxable items before the discount or
surcharge is applied (tax the gross amount). Select Y to tax any
taxable items after the discount or surcharge is applied (tax the
net amount).
F/S ELIGIBLE Y or N Select Y to reduce (increase) the food stamp subtotal by the
amount of % entry.
ALLOW ONLY ONE
TIME SUBTOTAL
ENTRY
Y or N If Y, you can enter only a single coupon and you must press the
SBTL key before the coupon entry.
ALLOW MULTIPLE
AMOUNT DISCOUNT
(COUPON) WITHOUT
SUBTOTAL
Y or N If you set a % key to be used for vendor coupons (i.e. amount,
negative and sale status) then choose Y to allow the function to
be operated multiple times, without requiring the SBTL key to
be pressed prior to the coupon entry.
PRESET OVERRIDE
IN MGR ONLY
Y or N Select Y to allow preset override only in manager operation
mode.
COMPULSORY
VALIDATION
Y or N Choose Y to enforce validation if an optional printer with
validation capability is connected to an RS-232C port.

ER-600 Program Mode Programming • 79
ADD CHECK
1. Press the ADD CHECK key to view the add check function key options:
ADD CHECK PROG. È
DESC : ADDCHK Å
KEY DISABLE N
COMPULSORY BEFORE
TENDERING N
CONSECUTIVE NUMBER
ADVANCED Y
RCPT CONDENSED N
2. Press ENTER from the last field or press PAGE DOWN to view the second page of add
check function key options:
ADD CHECK PROG. Ç
EXEMPT TAX 1 NÅ
EXEMPT TAX 2 N
EXEMPT TAX 3 N
EXEMPT TAX 4 N
COMPULSORY VALID N
3. Press ENTER from the last field to return to the FUNCTION KEY PROGRAM screen,
or press ESC at any time to return to the FUNCTION KEY PROGRAM screen without
saving changes.

80 • Program Mode Programming ER-600
ADD CHECK Key Program Notes
Option Entry Description
DESC Alpha
numeric
12 character
You can program a descriptor. The default descriptor is ADD
CHECK.
KEY DISABLE Y or N Select Y to disable this function.
COMPULSORY
BEFORE
TENDERING
Y or N Select Y if you want to force the operator to use the ADD CHECK
function before tendering.
CONSECUTIVE
NUMBER
ADVANCED
Y or N Select Y if you want to advance the consecutive number each time
the ADD CHECK key is used.
RCPT
CONDENCING
Y or N Select Y if you want to print normal keep each time the ADD
CHECK key is used.
EXEMPT TAX 1
EXEMPT TAX 2
EXEMPT TAX 3
EXEMPT TAX 4
Y or N Select Y to exempt the appropriate tax automatically when finalized
with this key.
COMPULSORY
VALIDATION
Y or N Choose Y to enforce validation if an optional printer with validation
capability is connected to an RS-232C port.

ER-600 Program Mode Programming • 81
CANCEL
1. Press the CANCEL key to view the cancel function key options:
CANCEL KEY PROG.
DESC : CANCEL Å
KEY HALO 0.00
(0 : NO LIMIT)
KEY DISABLE N
UNDER MGR CONTROL N
2. Press ENTER from the last field to return to the FUNCTION KEY PROGRAM screen,
or press ESC at any time to return to the FUNCTION KEY PROGRAM screen without
saving changes.
CANCEL Key Program Notes
Option Entry Description
DESC Alpha
numeric
12 character
You can program a descriptor. The default descriptor is CANCEL.
HALO 7 digit amount You can limit errors by setting the maximum amount that can be
used with this function. "0" means that there is no entry limit.
KEY DISABLE Y or N Select Y to disable this function.
UNDER MGR
CONTROL
Y or N Select Y if you do not want the operator use this function in
REGISTER mode. When selected, the function is allowed only in
the X control lock position.

82 • Program Mode Programming ER-600
CASH
1. Press the CASH key to view the cash function key options:
CASH KEY PROG. È
DESC : CASH Å
HALO 0.00
(0 : NO LIMIT)
AMOUNT TEND COMP. N
OVER/UNDER TENDER
IN MGR CONTROL N
DISABLE UNDER TND.N
2. Press ENTER from the last field or press PAGE DOWN to view the second page of
cash function key options:
CASH KEY PROG. Ç
DOES DRAWER OPEN YÅ
EXEMPT TAX 1 N
EXEMPT TAX 2 N
EXEMPT TAX 3 N
EXEMPT TAX 4 N
COMPULSORY VALID N
3. Press ENTER from the last field to return to the FUNCTION KEY PROGRAM screen,
or press ESC at any time to return to the FUNCTION KEY PROGRAM screen without
saving changes.

84 • Program Mode Programming ER-600
CHARGE 1-8
1. Press one of the CHARGE key to view the appropriate charge function key options:
CHARGE 1 PROG. È
DESC : CHARGE1 Å
KEY HALO 0.00
(0 : NO LIMIT)
AMOUNT TEND COMP. N
OVER/UNDER TENDER
IN MGR CONTROL N
DISABLE UNDER TND.N
2. Press ENTER from the last field or press PAGE DOWN to view the second page of
charge function key options:
CHARGE 1 PROG. ↕
DOES DRAWER OPEN YÅ
ALLOW OVER TEND N
NON-ADD # COMP. N
EXEMPT TAX 1 N
EXEMPT TAX 2 N
EXEMPT TAX 3 N
EXEMPT TAX 4 N
3. Press ENTER from the last field or press PAGE DOWN to view the last page of charge
function key options:
CHARGE 1 PROG. Ç
COMPULSORY VALID NÅ
LAN TRAN N
LAN TRAN ACTION 0
CODE (0-8)
4. Press ENTER from the last field to return to the FUNCTION KEY PROGRAM screen,
or press ESC at any time to return to the FUNCTION KEY PROGRAM screen without
saving changes.

ER-600 Program Mode Programming • 85
CHARGE 1-8 Key Program Notes
Option Entry Description
DESC Alpha numeric
12 character
You can program a descriptor. The default descriptors are
CHARGE 1-8.
HALO 7 digit amount You can limit errors by setting the maximum amount that can be
tendered. "0" means that there is no entry limit.
AMOUNT TEND
COMP.
Y or N Select Y if you want to force the operator to enter the tendered
amount and let the register calculate the change.
OVER/UNDER
TENDER IN MGR
CONTROL
Y or N Select Y if you do not want the operator to tender more than the
amount of the sale and issue change. When selected, over
tendering is allowed only in the X control lock position.
DISABLE UNDER
TEND.
Y or N Select Y if you do not want the operator to tender less than the
amount of the sale.
DOES DRAWER
OPEN
Y or N Select N if you do not want the drawer to opened with this key.
ALLOW OVER
TEND.
Y or N Select Y if you wish to allow tender greater than the amount of the
sale.
NON-ADD # COMP. Y or N Select Y if you wish to enforce the entry of a non-add number
prior to tendering.
EXEMPT TAX 1
EXEMPT TAX 2
EXEMPT TAX 3
EXEMPT TAX 4
Y or N Select Y to exempt the appropriate tax automatically when
finalized with this key.
COMPULSORY
VALIDATION
Y or N Choose Y to enforce validation if an optional printer with
validation capability is connected to an RS-232C port.
LAN TRAN Y or N Set to Y if connected to a Lan Tran credit authorization terminal.
LAT TRAN ACTION
CODE
0-8

86 • Program Mode Programming ER-600
CHECK CASHING
1. Press the CHECK CASHING key to view the check cashing function key options:
CHECK CASH PROG.
DESC : CHKCASH Å
KEY HALO 0.00
(0 : NO LIMIT)
KEY DISABLE N
UNDER MGR CONTROL N
COMPULSORY VALID N
2. Press ENTER from the last field to return to the FUNCTION KEY PROGRAM screen,
or press ESC at any time to return to the FUNCTION KEY PROGRAM screen without
saving changes.
CHECK CASHING Key Program Notes
Option Entry Description
DESC Alpha
numeric
12 character
You can program a descriptor. The default descriptor is
CHKCASH.
HALO 7 digit amount You can limit errors by setting the maximum amount that can be
used with this function. "0" means that there is no entry limit.
KEY DISABLE Y or N Select Y to disable this function.
UNDER MGR
CONTROL
Y or N Select Y if you do not want the operator use this function in
REGISTER mode. When selected, the function is allowed only in
the X control lock position.
COMPULSORY
VALIDATION
Y or N Choose Y to enforce validation if an optional printer with validation
capability is connected to an RS-232C port.
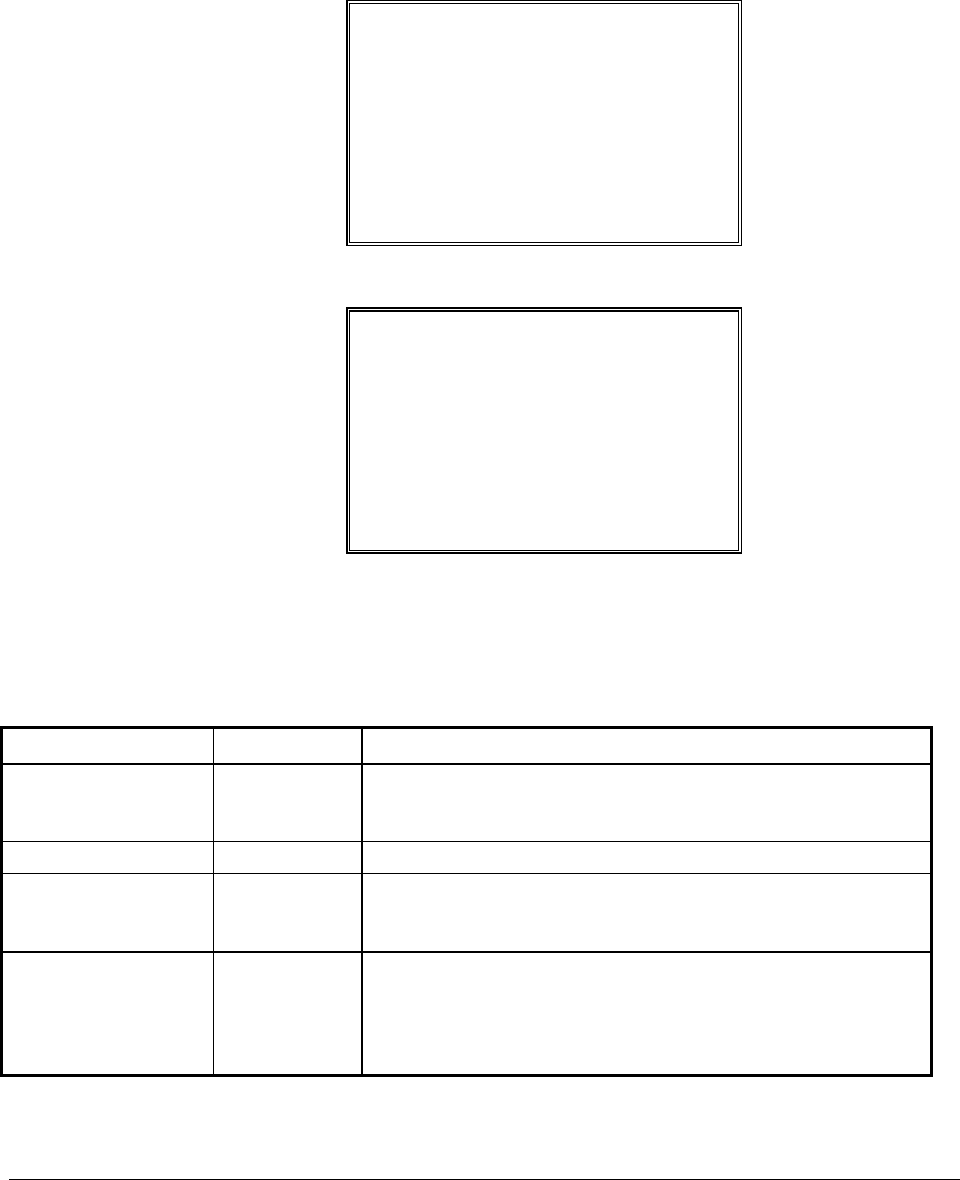
ER-600 Program Mode Programming • 87
CHECK ENDORSEMENT
1. Press the CHECK ENDORSEMENT key to view the check endorsement function key
options:
CHECK ENDORSEMENT È
DESC : CHKENDOR Å
KEY DISABLE N
PRINT CHECK AMT IN
THE ENDORSEMENT N
PRINT OPTION
PRINT DATE N
PRINT TIME N
2. Press ENTER from the last field or press PAGE DOWN to view the second page of
check endorsement function key options:
CHECK ENDORSEMENT Ç
PRINT CLERK NÅ
CONSECUTIVE No. N
3. Press ENTER from the last field to return to the FUNCTION KEY PROGRAM screen,
or press ESC at any time to return to the FUNCTION KEY PROGRAM screen without
saving changes.
CHECK ENDORSEMENT Key Program Notes
Option Entry Description
DESC Alpha
numeric
12 character
You can program a descriptor. The default descriptor is
CHKENDOR.
KEY DISABLE Y or N Select Y to disable this function.
PRINT CHECK AMT
IN THE
ENDORSEMENT
Y or N Choose Y to print the amount of the check as well as the
endorsement message. Choose N to print only the endorsement
message.
PRINT OPTION
PRINT DATE
PRINT TIME
PRINT CLERK
CONSECUTIVE No.
Y or N Choose Y or N to determine whether each option prints on the
check endorsement.

88 • Program Mode Programming ER-600
CHECK
1. Press the CHECK key to view the check function key options:
CHECK KEY PROG. È
DESC : CHECK Å
HALO 0.00
(0 : NO LIMIT)
AMOUNT TEND COMP. N
OVER/UNDER TENDER
IN MGR CONTROL N
DISABLE UNDER TND.N
2. Press ENTER from the last field or press PAGE DOWN to view the second page of
check function key options:
CHECK KEY PROG. ↕
DOES DRAWER OPEN Y
EXEMPT TAX 1 N
EXEMPT TAX 2 N
EXEMPT TAX 3 N
EXEMPT TAX 4 N
COMPULSORY CHECK
ENDORSEMENT N
3. Press ENTER from the last field or press PAGE DOWN to view the third page of check
function key options:
CHECK KEY PROG. Ç
COMPULSORY VALID N
4. Press ENTER from the last field to return to the FUNCTION KEY PROGRAM screen,
or press ESC at any time to return to the FUNCTION KEY PROGRAM screen without
saving changes.

ER-600 Program Mode Programming • 89
CHECK Key Program Notes
Option Entry Description
DESC Alpha numeric
12 character
You can program a descriptor. The default descriptor is CHECK.
HALO 7 digit amount You can limit errors by setting the maximum amount that can be
tendered. "0" means that there is no entry limit.
AMOUNT TEND
COMP.
Y or N Select Y if you want to force the operator to enter the tendered
amount and let the register calculate the change.
OVER/UNDER
TENDER IN MGR
CONTROL
Y or N Select Y if you do not want the operator to tender more than the
amount of the sale and issue change. When selected, over
tendering is allowed only in the X control lock position.
DISABLE UNDER
TEND.
Y or N Select Y if you do not want the operator to tender less than the
amount of the sale.
DOES DRAWER
OPEN
Y or N Select N if you do not want the drawer to open with this key.
EXEMPT TAX 1
EXEMPT TAX 2
EXEMPT TAX 3
EXEMPT TAX 4
Y or N Select Y to exempt the appropriate tax automatically when
finalized with this key.
COMPULSORY
CHECK
ENDORSEMENT
Y or N Choose Y to enforce check endorsement if an optional printer with
endorsement capability is connected to an RS-232C port.
COMPULSORY
VALIDATION
Y or N Choose Y to enforce validation if an optional printer with
validation capability is connected to an RS-232C port.

90 • Program Mode Programming ER-600
CHECK #
1. Press the CHECK TRACK # key to view the check track function key options:
CHECK TRACK PROG.È
DESC : CHECK # Å
KEY DISABLE N
COMPULSORY FOR ALL
SALES N
OPENING CLERK HAS
EXCLUSIVE ACCESS N
PRINT ON RECEIPT Y
2. Press ENTER from the last field or press PAGE DOWN to view the second page of
check track function key options:
CHECK TRACK PROG.↕
PRINT ON REMOTE YÅ
ALLOW ONLY ONE CHK
PER TABLE N
CHECK # ASSIGNED BY
REGISTER N
DRIVE THRU FEATURE
ENABLED N
3. Press ENTER from the last field or press PAGE DOWN to view the second page of
check track function key options:
CHECK TRACK PROG.Ç
LENGTH OF CHECK
(0-9) 0Å
SCAN CHECK # N
SHARE CHECK FILE N
PRINT CHECK TO
THE SERVER N
THE SATELLITE N
4. Press ENTER from the last field to return to the FUNCTION KEY PROGRAM screen,
or press ESC at any time to return to the FUNCTION KEY PROGRAM screen without
saving changes.

ER-600 Program Mode Programming • 91
CHECK # Key Program Notes
Option Entry Description
DESC Alpha
numeric
12 character
You can program a descriptor. The default descriptor is
CHKTRACK.
KEY DISABLE Y or N Select Y to disable this function.
COMPULSORY FOR
ALL SALES
Y or N Select Y you must begin a new, or recall an existing tracking
number before registering items.
OPENING CLERK
HAS EXCLUSIVE
ACCESS
Y or N If Y, the clerk that begins a tracking number is the only clerk who
can recall a check. If N, any clerk can recall any check.
PRINT ON RECEIPT Y or N If N, the check track number and balance will not print on the
receipt.
PRINT ON REMOTE Y or N If N, the check track number and balance will not print on the
remote.
ALLOW ONLY ONE
CHK PER TABLE
Y or N If Y, you can begin only one check with the same table #.
CHECK #
ASSIGNED BY
REGISTER
Y or N If Y, press the CHECK. # key to automatically assign the next
sequential check. Check numbers will begin with #1 and continue
until the open check report is reset, at which point the check number
will be reset and start at #1 again.
DRIVE THRU
FEATURE
ENABLED
Y or N If you wish to implement a drive thru recall key, this setting
changes the function of the PBAL key to that of a recall key. Press
the PBAL key directly to automatically recall the open check with
the lowest tracking number
LENGTH OF
CHECK (0-9)
0-9 Set the length of check in number of digits. For example, if 4, then
checks must be used in the range from 1000, to 9999. This setting
applies only to check numbers input by the operator, not to check
numbers assigned by the register.
SCAN CHECK # Y or N Choose Y to allow the check number to be input by a scanner (must
be nine digits or less).
SHARE CHECK
FILE
Y or N Choose Y to shared check file. You can recall a check on the other
register in the IRC system.
PRINT CHECK TO
THE SERVER
Y or N If Y, you can print the check to server register printer.
PRINT CHECK TO
THE SATELLITE
Y or N If Y, you can print the check to satellite register printer.

92 • Program Mode Programming ER-600
CURRENCY CONVERSION 1-4
1. Press one of the CURRENCY CONVERSION keys to view the appropriate currency
conversion function key options:
CONVERSION #1 PROG.
DESC : CONV1 Å
RATE 0
NUMBER OF DEC. 0
2. Press ENTER from the last field to return to the FUNCTION KEY PROGRAM screen,
or press ESC at any time to return to the FUNCTION KEY PROGRAM screen without
saving changes.
CURRENCY CONVERSION 1-4 Program Notes
DESC Alpha numeric
12 character
You can program a descriptor for each foreign currency. The
default descriptors are CONV 1-4.
RATE 5 digits Enter the exchange rate of up to 5 digits (do not enter the decimal
point). See the examples on the next page.
NUMBER OF DEC. 1 - 6 Enter a number from 0 to 6 to indicate the decimal position of the
exchange rate. Count the decimal position from the right. See the
examples below.
Currency Exchange Rate Programming Examples
Note: Foreign currency exchange rates can be stated as “foreign currency in home currency”,
or “home currency in foreign currency”. Use the rate stated in “home currency in foreign
currency” when you are programming this section.
The home currency is worth 1.92573 EURO (foreign currency).
RATE: 192573
NUMBER OF DEC.: 5
* You can EURO currency exchange rate program on CONV #1 only.
The home currency is worth 64.5863 foreign currency.
RATE: 645863
NUMBER OF DEC.: 4

ER-600 Program Mode Programming • 93
EAT-IN
TAKE OUT
DRIVE THRU
1. Press the EAT-IN, TAKE OUT, or DRIVE THRU key to view the appropriate function
key options:
EAT-IN PROG.
DESC : EATIN Å
EXEMPT TAX 1 N
EXEMPT TAX 2 N
EXEMPT TAX 3 N
EXEMPT TAX 4 N
COMPULSORY VALID N
2. Press ENTER from the last field to return to the FUNCTION KEY PROGRAM screen,
or press ESC at any time to return to the FUNCTION KEY PROGRAM screen without
saving changes.
EAT-IN/TAKE OUT/DRIVE THRU Key Program Notes
Option Entry Description
DESC Alpha
numeric
12 character
You can program a descriptor. The default descriptors are EATIN,
TAKE OUT and DRIVE THRU.
EXEMPT TAX 1
EXEMPT TAX 2
EXEMPT TAX 3
EXEMPT TAX 4
Y or N If you wish to automatically exempt a tax for a particular type of
sale, select Y for the appropriate tax. For example, if items are non-
taxable for take out, but taxable for eat-in, set this program to
exempt tax on take out sales.
COMPULSORY
VALIDATION
Choose Y to enforce validation if an optional printer with validation
capability is connected to an RS-232C port.
94 • Program Mode Programming ER-600
ERROR CORRECT
1. Press the ERROR CORRECT key to view the error correct function key options:
ERR CORRECT PROG.
DESC : ERRCORR Å
KEY HALO 0.00
(0 : NO LIMIT)
KEY DISABLE N
UNDER MGR CONTROL N
2. Press ENTER from the last field to return to the FUNCTION KEY PROGRAM screen,
or press ESC at any time to return to the FUNCTION KEY PROGRAM screen without
saving changes.
ERROR CORRECT Key Program Notes
Option Entry Description
DESC Alpha
numeric
12 character
You can program a descriptor. The default descriptor is
ERRCORR.
HALO 7 digit amount You can limit errors by setting the maximum amount that can be
used with this function. "0" means that there is no entry limit.
KEY DISABLE Y or N Select Y to disable this function.
UNDER MGR
CONTROL
Y or N Select Y if you do not want the operator use this function in
REGISTER mode. When selected, the function is allowed only in
the X control lock position.

ER-600 Program Mode Programming • 103
PBAL
1. Press the PBAL key to view the previous balance function key options:
PREVIOUS BAL. PROG.
DESC : PBAL Å
ENTER ANY TIME N
REQUIRE AT START
OF SALE N
2. Press ENTER from the last field to return to the FUNCTION KEY PROGRAM screen,
or press ESC at any time to return to the FUNCTION KEY PROGRAM screen without
saving changes.
PBAL Key Program Notes
Option Entry Description
DESC Alpha
numeric
12 character
You can program a descriptor. The default descriptor is PBAL.
ENTER ANY TIME Y or N Select Y to allow the PBAL entry at any time. Select N to allow a
PBAL entry only at the start of a sale.
REQUIRE AT
START OF SALE
Y or N Select Y to require an entry into the PBAL key at the start of every
transaction.
ER-600 Program Mode Programming • 105
PRINT CHECK
1. Press the PRINT CHECK key to view the print check function key options:
PRINT CHECK PROG.
DESC : PRINT CHK Å
CHECK PRINT
COM PORT #(0-4) 0
AUTO SERVICE CHK N
PRT CHECK ON RECP N
SKIP PRT OF CONSEC#
ON CHECK N
2. Press ENTER from the last field to return to the FUNCTION KEY PROGRAM screen,
or press ESC at any time to return to the FUNCTION KEY PROGRAM screen without
saving changes.
PRINT CHECK Key Program Notes
Option Entry Description
DESC Alpha
numeric
12 character
You can program a descriptor. The default descriptor is PRINT
CHECK.
CHECK PRINT
COMM PORT # (0-4)
0-4 Select the port (1,2,3 or 4) where the check print printer is attached.
If 0 is selected, the check will print on the receipt printer.
AUTO SERVICE
CHK
Y or N Select Y if you want the Check Print function to automatically
service the check.
PRT CHECK ON
RECP
Y or N Select Y if you want the Check Print function to print on the receipt
printer.
SKIP PRT OF
CONSEC# ON
CHECK
Y or N Select Y if you wish to delete the printing of the consecutive # on
the guest check.
Produkt Specifikationer
| Mærke: | Samsung Sam4S |
| Kategori: | Kasseapparat |
| Model: | ER-600 |
Har du brug for hjælp?
Hvis du har brug for hjælp til Samsung Sam4S ER-600 stil et spørgsmål nedenfor, og andre brugere vil svare dig
Kasseapparat Samsung Sam4S Manualer

22 August 2024
19 August 2024
18 August 2024
17 August 2024
16 August 2024
12 August 2024
11 August 2024
8 August 2024
8 August 2024
5 August 2024
Kasseapparat Manualer
- Kasseapparat Sharp
- Kasseapparat HP
- Kasseapparat Toshiba
- Kasseapparat Casio
- Kasseapparat Olivetti
- Kasseapparat Zebra
- Kasseapparat Olympia
- Kasseapparat Intermec
- Kasseapparat Newland
- Kasseapparat Vectron
- Kasseapparat Sam4S
- Kasseapparat Royal Sovereign
- Kasseapparat Towa
- Kasseapparat Uniwell
- Kasseapparat Advantech
- Kasseapparat VeriFone
- Kasseapparat Approx
- Kasseapparat Settler Unitouch
- Kasseapparat Toshiba TEC
- Kasseapparat Posiflex
- Kasseapparat AOpen
- Kasseapparat Wings
Nyeste Kasseapparat Manualer
20 Februar 2025
20 Februar 2025
21 Januar 2025
21 Januar 2025
21 Januar 2025
1 Januar 2025

12 December 2024
26 November 2024
26 November 2024
26 November 2024