Sharp 65EQ3KA Manual
Sharp
televisión
65EQ3KA
Læs nedenfor 📖 manual på dansk for Sharp 65EQ3KA (80 sider) i kategorien televisión. Denne guide var nyttig for 27 personer og blev bedømt med 4.5 stjerner i gennemsnit af 2 brugere
Side 1/80

Operating Instructions
Android TV Operation Manual
EQ Series
SHA/MAN/0535

2
IMPORTANT GUARANTEE INFORMATION
Thank you for purchasing this television. We hope you have many years of trouble free
enjoyment from your purchase.
Your product is covered under the manufacturers’ guarantee for 12 months from the date
of purchase.
If you experience any diffi culties with your TV, please refer to the ‘Frequently Asked Questions’ section
at the rear of these Operating Instructions.
If you are still unable to remedy the issue, try resetting the TV to factory settings - details can be found in the
‘Settings’ menu section of these Operating Instructions - alternatively, please contact the helpline.
In the event that a fault is diagnosed, the helpline will arrange to collect the TV from your home
or work address, return it to our service centre, repair the item and then return it to you.
If we believe we cannot off er a permanent repair, we will replace the item.
Technical Support Information
Telephone
UK 0330 024 0803 ROI 01443 3323
Web support: www.umc-uk.co.uk
Email: service@umc-uk.co.uk
Calls to 0330 numbers are charged at standard call rates and are included
as part of any bundled minutes with your phone provider.
The telephone opening hours are Monday to Friday 8.30am to 6pm, Saturday 9am – 5pm.
Please note these hours are subject to change periodically.
UK: Calls are charged at your normal telephone call rate.
ROI: Calls are charged at a local rate.
Please retain all packaging materials, in addition to your proof of purchase/receipt,
as you will need these in the event of warranty/service support.
This guarantee is in addition to and does not aff ect your statutory rights.
If you need to call the helpline, you will need the following information.
Model No: (You can fi nd this on the rear of the TV)
Serial Number: (You can fi nd this on the rear of the TV)
Date of purchase: (You can fi nd this on your sales receipt)
EXAMPLE OF LABEL ON REAR OF TV
This TV set is for domestic use only
Manufacturers Guarantee
Model No
Serial No

3
3
3
33
Important Safety Instructions
Please read these instructions. All of the safety and
operating instructions should be read before the
appliance is operated.
Warnings
• Television sets with 40” screens or larger must be lifted and
carried by at least 2 people.
• This television does not contain any parts that are
serviceable by the user. In the event of a fault, contact the
manufacturer or authorised service department.
• Exposing the internal parts of the TV may endanger your
life. The manufacturers guarantee does not extend to faults
caused by repairs carried out by unauthorised third parties.
• Do not use the TV set immediately after unpacking.
Wait until the TV warms up to room temperature before using
it.
• To reduce the risk of fi re, electric shock or damage to the
TV, do not expose it to dust, rain or moisture. Never expose the
TV to dripping or splashing and do not place objects fi lled with
liquids on or near the TV.
• Do not connect any external devices (DVD player, games
console etc.) when the TV is switched on. Disconnect both the
TV and device from the mains before connecting. Only switch
appliances on when the connection process is complete.
• Do not place the television in a confi ned space and do not
obstruct the ventilation openings at the rear of the television.
• When installing on a wall, ensure the TV is at
least 5cm from the wall for ventilation.
• Always ensure that the TV’s ventilation openings
are not covered with items such as newspapers, table-cloths,
curtains, etc.
• Dispose of this television and any components including
batteries in an environmentally friendly manner. If in doubt,
please contact your local authority for details of recycling.
• Ensure this TV is used in moderate climates only.
• In cases of electrostatic discharge (ESD) the TV may operate
incorrectly. If this happens, turn the set off at the mains and
then turn back on again after 30 seconds. The set should now
work normally.
• TV operating Conditions:
- Temperature from +10°C to + 35°C
- Humidity no more than 80% (at a temperature of 25°C)
WARNING: Never place a television set on an unstable
surface. The TV set may fall causing serious personal injury or
death. Many injuries, particularly to children, can be avoided
by taking simple precautions such as:
• Use cabinets or stands recommended by the manufacturer
of the television set.
• Only use furniture that can safely support the television set.
• Ensure the television set is not overhanging the edge of the
supporting furniture.
• Do not place the television set on tall furniture
(for example, cupboards or bookcases) without anchoring both
the furniture and the television
set to a suitable support.
• Do not place the television set on cloth or other materials
that may be located between the television set and supporting
furniture.
• For maximum safety while using your set, it is
recommended to fi t anti-tip straps. These are designed to
be attached between the wall/secure surface and the VESA
mounts on the television. These are available from major
retailers and websites and are an easy and inexpensive way of
ensuring that your set stays safely upright.
• Please educate children about the dangers of climbing on
furniture to reach the television set or its controls.
• If your existing television set is being retained and
relocated, the same considerations as above should be applied.
Safety
• For your safety, this appliance is fi tted with a fused 3 pin
mains plug. Should the fuse need to be replaced, ensure that
any replacement is of the same amperage and approved with
the BSI mark.
• Never try and replace the mains plug unless you have
adequate qualifi cations and are legally authorised to do so. In
the event that a replacement mains cable is required, contact
the manufacturer for a suitable replacement.
• Never use the television if it is damaged in any way.
• Always place the television on a fl at level surface avoiding
anywhere which may be subject to
strong vibration.
• The ideal distance to watch the television is from
approximately 2.5-3 times the length of the diagonal
measurements of the TV screen away.
• Ensure the television is not placed on top of the power
cable as the weight of the television may damage the cable and
cause a safety hazard.
• Never place mobile phones, speakers or any other device
which may cause magnetic or radio interference, near the
television. If interference is apparent, move the device causing
the interference away from the television.
• To disconnect the set from the mains, remove the mains
plug from the socket.
• Ensure that the mains plug is always easily accessible.
• When handling the set do not grip the LCD screen/glass.
• Do not pull the set when mounted on a bracket. If using a
moveable bracket, adjust via the bracket and not the TV set.
• Do not place this set above a heat source.
WARNING: Excessive volume when using earphones
and headphones can cause damage to hearing.
To prevent spread of fi re, keep
candles or other open fl ames away
from this product at all times
~ - Alternating current
- This equipment is a Class II or double
insulated electrical appliance. It has been designed
in such a way that it does not require a safety
connection to electrical earth.

4
Important Safety Instructions
Maintenance
• To clean your TV, wipe with a soft, dry cloth. If the surfaces
are extremely dirty, use a soft cloth dampened with a weak
detergent solution.
• Never use alcohol, paint thinner or benzene to clean this
unit.
• Before using a chemically treated cloth, read the
instructions that came with the cloth carefully.
CAUTION: If water or other liquid enters the
television through the display panel surface,
a malfunction may occur.
Packaging
• The safest way to transport your item is in the original box/
packaging - please save your packaging for this.
• You will need the original box/packaging in the event of
warranty/service repair or support. We are unable to carry
out warranty/service if you are unable to package the item
correctly.
Important information regarding use of video
games, computers, captions or other fi xed image
displays
The extended use of fi xed image program material can cause a
permanent “shadow image” on the LCD/LED panel, also known
as “screen burn”.
This “shadow image” can appear in the background during
normal viewing. This type of irreversible LCD/LED panel
deterioration can be limited by observing the following steps:
1. Reduce the brightness/contrast setting to a minimum
suitable viewing level.
2. Do not display the fi xed image for extended periods
of time.
3. Turn the power off when not in use.
Examples of images that are more likely to cause “screen burn”
are as follows (this is not an exhaustive list):
• TV channel logos: e.g. shopping channel logos and pricing
displays - especially if they are bright and stationary. Moving
or low-contrast graphics are less likely to cause ageing of the
screen.
• Time displays.
• Teletext: Do not view a static page for a long period of time
• TV/DVD menus: e.g. listings of DVD disc content.
• Pause mode: Do not leave the TV in pause mode
for long periods of time, e.g. when watching DVDs
or videos.
Important: Once ‘shadow image/screen burn’
occurs, it will never disappear and is not
repairable under warranty.
How do I dispose of this product?
UK: Waste electrical products should not be disposed of with
household waste. Please dispose of the product at a
designated collection point for recycling
of WEEE. For your nearest facilities, please see www.recycle-
more.co.uk or ask store
for details.
ROI: Waste electrical products should not be
disposed of with household waste. Separate
disposal facilities exist. Check with your local
authority or retailer for recycling advice.
Batteries
• CAUTION: Risk of explosion if the battery
is replaced with an incorrect type.
• Do not expose batteries to high
temperatures, excessive heat, prolonged
sunshine or fi re as this may cause leakage,
explosion or ignition.
• Observe the correct polarity when inserting
batteries.
• Do not use diff erent types of batteries together or
mix old and new batteries.
• Dispose of batteries in an environmentally
friendly way.
• Certain regions may regulate the disposal of batteries.
Please consult your local authority.
CE Statement:
Hereby, Sharp Consumer Electronics Poland sp.
z o.o. declares that this LED TV is in compliance
with the essential requirements and other relevant
provisions of RED Directive 2014/53/EU.
The full text of the EU declaration of conformity is
available by following the link:
www.sharpconsumer.eu
and then entering download section of your model
and choosing’CE Statements’’.
This equipment may be operated in all EU
countries.
The 5 GHzWLAN(Wi-Fi) function of this equipment
may only be operated indoors.
Wi-Fi max transmitter power:
100 mW at 2.412 GHz - 2.472 GHz;
100 mW at 5.150 GHz - 5.350 GHz;
100 mW at 5.470 GHz- 5.725 GHz
Bluetooth max transmitter power: 10 mW at 2.402
GHz - 2.480 GHz
Cd

Microsoft PlayReady™
5
5
5
55
For DTS patents, see http://patents.dts.com. Manu-
factured under license from DTS, Inc. (for companies
headquartered in the U.S./Japan/Taiwan) or under
license from DTS Licensing Limited (for all other
companies). DTS, DTS:X, Virtual:X, and the DTS:X logo
are registered trademarks or trademarks of DTS, Inc.
in the United States and other countries. © 2021 DTS,
Inc. ALL RIGHTS RESERVED.
The DVB logo is the registered trademark of the
Digital Video Broadcasting (DVB) project.
The FREEVIEW text and logos are trademarks of DTV
Services LTD. © DTV Services Ltd
SAORVIEW is a registered trademark owned by RTÉ.
The “CI plus” Logo is a trademark of CI Plus LLP.
YouTube and the YouTube logo are trademarks of
Google Inc.
The Wi-Fi CERTIFIED Logo and Miracast® are
registered trademarks of Wi-Fi Alliance. Wi-Fi
CERTIFIED Miracast™ is a trademark of Wi-Fi Alliance.
The Bluetooth® word mark and logos are registered
trademarks owned by bluetooth SIG,. Inc.
This product contains technology subject to certain
intellectual property rights of Microsoft. Use or
distribution of this technology outside of this product
is prohibited without the appropriate license(s) from
Microsoft.
Content owners use Microsoft PlayReady™ content
access technology to protect their intellectual
property, including copyrighted content. This device
uses PlayReady technology to access PlayReady-
protected content and/or WMDRM-protected
content. If the device fails to properly enforce
restrictions on content usage, content owners may
require Microsoft to revoke the device’s ability to
consume PlayReady-protected content. Revocation
should not aff ect unprotected content or content
protected by other content access technologies.
Content owners may require you to upgrade
PlayReady to access their content. If you decline an
upgrade, you will not be able to access content that
requires the upgrade.
Dolby, Dolby Vision, Dolby Atmos, Dolby Audio,
and the double-D symbol are trademarks of Dolby
Laboratories Licensing Corporation. Manufactured
under license from Dolby Laboratories. Confi dential
unpublished works. Copyright © 1992–2021 Dolby
Laboratories. All rights reserved.
The terms HDMI, HDMI High-Defi nition Multimedia
Interface, and the HDMI Logo are trademarks or
registered trademarks of HDMI Licensing Administra-
tor, Inc.
Google, Google Play, YouTube, Android TV and other
marks are trademarks of Google LLC.
TRADEMARKS

6
CONTENTS
Guarentee Information . . . . . . . . . . . . . . . . . . . . . . . . . . . . . . .3
Safety Instructions . . . . . . . . . . . . . . . . . . . . . . . . . . . . . . . . . .4-5
Trademarks . . . . . . . . . . . . . . . . . . . . . . . . . . . . . . . . . . . . . . . . .6
Securing to a wall . . . . . . . . . . . . . . . . . . . . . . . . . . . . . . . . . .7
GETTING STARTED . . . . . . . . . . . . . . . . . . . . . . . . . . . . . 8-24
Introduction . . . . . . . . . . . . . . . . . . . . . . . . . . . . . . . . . . . . . . .8
Set Functionality . . . . . . . . . . . . . . . . . . . . . . . . . . . . . . . . . .8
Connecting External Device - Wired & non wired . . . . . .9-15
Connecting Headphones - Wired & non wired . . . . . . . . .15
Playing Content stored on a USB Device . . . . . . . . . . . . . .16
Inputting Text . . . . . . . . . . . . . . . . . . . . . . . . . . . . . . . . . . . . .17
Remote Control . . . . . . . . . . . . . . . . . . . . . . . . . . . . . . . . . . . .18
First Time Installation . . . . . . . . . . . . . . . . . . . . . . . . . . . . . . .19-23
ANDROID FUNCTIONALITY . . . . . . . . . . . . . . . . . . . . . . 24-34
Viewing Internet Media . . . . . . . . . . . . . . . . . . . . . . . . . . . . .24
Safe Apps and Video Streaming . . . . . . . . . . . . . . . . . . . . .24
The Google Assistant . . . . . . . . . . . . . . . . . . . . . . . . . . . . . . .25-26
Home Page . . . . . . . . . . . . . . . . . . . . . . . . . . . . . . . . . . . . . . .27-29
Installing Apps . . . . . . . . . . . . . . . . . . . . . . . . . . . . . . . . . . . . .30
Memory Device . . . . . . . . . . . . . . . . . . . . . . . . . . . . . . . . . . . .31
Play Next . . . . . . . . . . . . . . . . . . . . . . . . . . . . . . . . . . . . . . . . .32
Channels . . . . . . . . . . . . . . . . . . . . . . . . . . . . . . . . . . . . . . . . . .33
Discover . . . . . . . . . . . . . . . . . . . . . . . . . . . . . . . . . . . . . . . . . .34
USING THE TV . . . . . . . . . . . . . . . . . . . . . . . . . . . . . . . . . 35-60
Television Menu . . . . . . . . . . . . . . . . . . . . . . . . . . . . . . . . . . .35
Source . . . . . . . . . . . . . . . . . . . . . . . . . . . . . . . . . . . . . . . . . . . .36
Picture Menu . . . . . . . . . . . . . . . . . . . . . . . . . . . . . . . . . . . . . .36-40
Sound Menu . . . . . . . . . . . . . . . . . . . . . . . . . . . . . . . . . . . . . .40-42
Power Menu . . . . . . . . . . . . . . . . . . . . . . . . . . . . . . . . . . . . . . .42
CI Card . . . . . . . . . . . . . . . . . . . . . . . . . . . . . . . . . . . . . . . . . . .43
Advanced Options . . . . . . . . . . . . . . . . . . . . . . . . . . . . . . . . .43
Settings . . . . . . . . . . . . . . . . . . . . . . . . . . . . . . . . . . . . . . . . . . .44-60
Network & Internet . . . . . . . . . . . . . . . . . . . . . . . . . . . . . . .44
Connecting to a Network. . . . . . . . . . . . . . . . . . . . . . . .45
Channel . . . . . . . . . . . . . . . . . . . . . . . . . . . . . . . . . . . . . . . . .46
Tuning in your TV . . . . . . . . . . . . . . . . . . . . . . . . . . . . . .46
Parental Controls . . . . . . . . . . . . . . . . . . . . . . . . . . . . . . .47
Accounts & Sign-in . . . . . . . . . . . . . . . . . . . . . . . . . . . . . . .48
Sign in via Android Phone . . . . . . . . . . . . . . . . . . . . . . .48
Sign in Manually . . . . . . . . . . . . . . . . . . . . . . . . . . . . . . .48
Manage your account. . . . . . . . . . . . . . . . . . . . . . . . . . .48
Apps . . . . . . . . . . . . . . . . . . . . . . . . . . . . . . . . . . . . . . . . . . . . 49
Device Preferences . . . . . . . . . . . . . . . . . . . . . . . . . . . . . . .49-50
About TV . . . . . . . . . . . . . . . . . . . . . . . . . . . . . . . . . . . . . .51
Date & Time . . . . . . . . . . . . . . . . . . . . . . . . . . . . . . . . . . .52
Timer . . . . . . . . . . . . . . . . . . . . . . . . . . . . . . . . . . . . . . . . .52
Language . . . . . . . . . . . . . . . . . . . . . . . . . . . . . . . . . . . . .53
Keyboard . . . . . . . . . . . . . . . . . . . . . . . . . . . . . . . . . . . . . .54
Inputs . . . . . . . . . . . . . . . . . . . . . . . . . . . . . . . . . . . . . . . .54
Power . . . . . . . . . . . . . . . . . . . . . . . . . . . . . . . . . . . . . . . . .55
Storage . . . . . . . . . . . . . . . . . . . . . . . . . . . . . . . . . . . . . . .56
Home Screen . . . . . . . . . . . . . . . . . . . . . . . . . . . . . . . . . .56
Store Mode . . . . . . . . . . . . . . . . . . . . . . . . . . . . . . . . . . . .57
Google Assistant . . . . . . . . . . . . . . . . . . . . . . . . . . . . . . .57
Chromecast Built in . . . . . . . . . . . . . . . . . . . . . . . . . . . . .57
Screensaver . . . . . . . . . . . . . . . . . . . . . . . . . . . . . . . . . . .58
Energy Saver. . . . . . . . . . . . . . . . . . . . . . . . . . . . . . . . . . .58
Location . . . . . . . . . . . . . . . . . . . . . . . . . . . . . . . . . . . . . .58
Usage & Diagnostics . . . . . . . . . . . . . . . . . . . . . . . . . . .58
Accessibility . . . . . . . . . . . . . . . . . . . . . . . . . . . . . . . . . . .59
Reset . . . . . . . . . . . . . . . . . . . . . . . . . . . . . . . . . . . . . . . . .59
Remotes & Accessories . . . . . . . . . . . . . . . . . . . . . . . . . . .60
DIGITAL T V & FREEVIEW PLAY . . . . . . . . . . . . . . . . . . . 61-68
Tuning in Digital Channels . . . . . . . . . . . . . . . . . . . . . . . . . .61
Terrestrial . . . . . . . . . . . . . . . . . . . . . . . . . . . . . . . . . . . . . . .61
Cable . . . . . . . . . . . . . . . . . . . . . . . . . . . . . . . . . . . . . . . . . . .61
Satellite . . . . . . . . . . . . . . . . . . . . . . . . . . . . . . . . . . . . . . . . .61
Using Freeview Play . . . . . . . . . . . . . . . . . . . . . . . . . . . . . . . .62
Channel Guide . . . . . . . . . . . . . . . . . . . . . . . . . . . . . . . . . . .62
Back EPG . . . . . . . . . . . . . . . . . . . . . . . . . . . . . . . . . . . . . . . .63
Quick Buttons. . . . . . . . . . . . . . . . . . . . . . . . . . . . . . . . . . . .63-64
Freeview Play Button . . . . . . . . . . . . . . . . . . . . . . . . . . . . .65
Freeview Play App . . . . . . . . . . . . . . . . . . . . . . . . . . . . . . . .66
Channel List . . . . . . . . . . . . . . . . . . . . . . . . . . . . . . . . . . . . .67
Information Bar . . . . . . . . . . . . . . . . . . . . . . . . . . . . . . . . . .68
UPDATING SOFTWARE . . . . . . . . . . . . . . . . . . . . . . . . . . 68
SPECIFICATIONS . . . . . . . . . . . . . . . . . . . . . . . . . . . . . . . 69-74
Video Formats . . . . . . . . . . . . . . . . . . . . . . . . . . . . . . . . . . . . .69-70
Audio Formats . . . . . . . . . . . . . . . . . . . . . . . . . . . . . . . . . . . . .71-73
Image Formats . . . . . . . . . . . . . . . . . . . . . . . . . . . . . . . . . . . .74
TROUBLESHOOTING GUIDE . . . . . . . . . . . . . . . . . . . . . . 75-79

Viewing Angle Viewing Angle
A B
7
7
7
77
SECURING THE TV TO A WALL
For maximum safety in the home, when using a TV with its stand, anti-tip straps should be fi tted. These are
available from major retailers & websites and are an easy, inexpensive and eff ective way of ensuring your TV
stays safely upright. Straps are designed to be attached to the rear of the TV and then tethered to the wall or
furniture the TV is stood on, these are fi tted as follows.
Using one or both of the top wall-mounting
holes and screws fasten one end of the fastening
cord/s to the TV. (the screws are already supplied in
the wall mounting holes)
Secure the other end of the fastening cord/s to
your wall. (you will need screws/fi xings suitable for
your wall type - available separately from most DIY
stores).
Note: Please ensure that children do not climb on the TV set.
Note: When handling the set do not grip the LCD Panel.
Note: Do not pull the set when mounted on a bracket. If using a moveable bracket, adjust via the
bracket and not the set.
The Royal Society for the Prevention of Accidents is urging people to take care with fl at-screen televisions.
RoSPA stated in 2010 that “Toddlers are particularly at risk of pulling fl at-screen televisions on to themselves.
They are unsteady on their feet and are attracted by colourful television images.”
The risk is increased as televisions become lighter.
IMPORTANT - Before drilling any holes in the wall ensure you are not drilling where there could be any electrical
wires, water or gas pipes.
1. Remove the four screws located at the back of the TV set.
2. The wall mount can now be easily attached to the mounting holes,
located on the back of the TV, using the same four screws removed.
Important: If wall mounting this TV, only use the screws already provided in the wall mounting holes.
Using other screws which are longer could cause irreparable damage to the internal parts. When using a
wall bracket, please ensure the screws in the back of the TV set are not over tightened.
Note: This diagram to the left is an example of screw positions. Due to
model variations, please ensure you check your TV for the exact location of
the wall mounting screw positions.
Securing the TV to a wall with anti-tip straps
Wall mounting & Viewing Angle
Securing to a wall
A
B

8
Getting Started
Your new Android television set is able to run applications, stream video, connect to various sources and allows
you to watch Freeview and benefi t from various catch up services. It features all of the usual applications you are
used to such as Netfl ix, Amazon Prime and YouTube in addition to many more apps available in the Google Play
Store.
When the set is fi rst powered on, you will be presented with the First Time Installation screens. Follow the on
screen instructions for guidance. You can also use the Quick Start Guide supplied for additional guidance. Once
completed the set is ready to be used. It is important that the correct language and country is selected during
this stage of the set-up process as this will determine the basic functionality of the set.
To make full use of your Android set, you will require an aerial and internet connection.
Use these Operating Instructions for guidance on how to use your Sharp Android television.
Unless otherwise stated, the remote control is used to operate the set, i.e., it will be noted when to use the
buttons or control stick on the set itself.
Your set can be used in several ways. If you wish to use the Android functionality, this can be done via the Home
Page. Should you want to watch television, or access the various source inputs, then use the television mode.
SET FUNCTIONALITY
Note: The functionality and appearance of the screens and advice shown in the following pages may vary
depending upon the version of software installed in your set. It is recommended that your set is kept up
to date with the latest version of software applicable to your set to ensure smooth running and continued
enjoyment of your Android based product.
When navigating though the menus, selection will be accompanied by a soft tone coming though the sets
speakers, or headphones/sound device if connected.
INTRODUCTION

HDMIHDMI
B
A
A
B
9
9
9
99
Getting Started
Before turning your set on, it is recommended that your external devices are connected before continuing with
the fi rst-time installation process. Depending on the source connectivity on your television, follow the guidance
below when connecting external devices.
For optimum picture quality, we recommend connecting your device to the television using an HDMI cable.
*Be sure to use an authorised HIGH-SPEED HDMI cable bearing the HDMI logo.
If an HDMI CEC-compatible device (e.g., Blu-ray player, AV receiver) is connected with an HDMI cable, you can
operate the device with the televisions remote control. We recommend using the HDMI (ARC) connection when
used with an AV receiver – please refer to the ARC section of this Operation Manual.
1. Turn on the connected device.
2. To enable HDMI control, press the button, then select Settings Device Preferences [HOME] > >
Inputs.
3. Activate HDMI control on the connected device.
HDMI control Allow the TV to control HDMI devices.
Device auto power off If disabled, the connected device does not turn off automatically when
the television is turned off .
Television auto power
on
If disabled, the television does not turn on automatically when the
connected device is turned on.
CEC Device list Displays the HDMI CEC device list.
Available options
External Device
HDMI cable (not supplied)*
HDMI Connection
HDMI CEC-Compatible Devices
Adjusting HDMI CEC Settings
CONNECTING EXTERNAL DEVICES - WIRED

10
Features Available to Compatible CEC Devices
• Automatically turns the television on and switches the input to the connected Blu-ray/DVD player when
the Blu-ray/DVD player starts to play.
• Automatically turns the connected Blu-ray/DVD player off when you turn the television off .
• Controls menu operation [ARROW] buttons, playback and track selection of the connected Blu-ray/DVD
player through the TV’s remote control.
• Automatically turns the connected AV receiver on and switches the sound output from the TV speaker
to the audio system when you turn the TV on. This function is only available if you have previously used
the AV receiver to output the TV’s sound.
• Automatically switches the sound output to the AV receiver by turning the AV receiver on when the
TV is turned on.
• Automatically turns the connected AV receiver off when you turn the TV off .
• Adjust the volume and mute functions via the [ ] and [ ] buttons on your television remote VOL+/– MUTE
control.
• Automatically turns the TV on and switches the input to the connected video camera when the camera
is turned on.
• Automatically turns the connected video camera off when you turn the TV off .
• Controls menu operation [ARROW] PLAY buttons, playback, e.g. [ ] button of the connected video
camera through the TV’s remote control.
Note: Not all devices with HDMI input/output are HDMI CEC compatible. For information about CEC
compatibility, refer to the instruction manual of the device.
Refer to “HDMI connection (ARC supported)” section of this manual for information relating to connecting
an HDMI (ARC) enabled device.
Blu-ray/DVD player
AV Receiver
Video Camera
Getting Started

AV in
A
BC
C
A
B
11
11
11
1111
Component video Connection
If your external device has component video jacks/sockets, connect them to the television using a mini
component video cable and an audio cable.
Mini AV Source
External Device
Composite video/audio adapter cable (not supplied)
Composite video/audio cable (not supplied)
R
L
Video CVBS
You can connect wired USB devices such a mouse and keyboard via the USB sockets on the rear of the set.
Getting Started
Note: We are unable to guarantee connection of a wired USB device. Use of USB hubs is not
recommended.
USB Devices (wired)

A
B
A
B
12
Connecting an External Audio Device
You can connect audio systems such as AV receivers or sound bars to the television. Select a connection method
below according to the specifi cations of the audio system you want to connect.
• Connecting with an HDMI cable. for Details, carefully read
HDMI Connection (ARC supported)
.
• Connecting with a digital optical cable.
• Connecting with an audio cable.
HDMI Connection (ARC Supported)
Connecting the television and audio system with an HDMI cable. This is the recommended method of
connecting an external audio device.
Connect to the television’s HDMI input terminal bearing the text “ARC”.
HDMI (ARC) HDMI (ARC)
AV Receiver or Soundbar
HDMI cable (not supplied)*
Ensure that the connected audio device is HDMI ARC compatible.
The ARC output on your television may vary depending on the model.
HDMI CEC must be enabled on your set for this connection to work. To do this press the button, then [HOME]
select Settings Device Preferences Inputs and then enable the HDMI control option.> >
Control of volume can be achieved via the television remote control (CEC must be turned on).
When ARC is working, the sound from the television speakers will be muted.
You need to confi gure the Digital Output settings according to your audio system. Press the [HOME] button,
then select Settings Device Preferences Sound Digital Output.> > >
If the audio system is not compatible with Dolby Digital or DTS, set Settings Device Preferences Sound > > >
Digital Output to PCM.
Note: We recommend authorised Premium High-Speed HDMI Cable(s) bearing the HDMI logo.
Getting Started
Note: Refer to the instruction manual of the device to be connected.

A
B
A
A
B
A
B
B
13
13
13
1313
Digital Audio (Optical)
Connecting your television and audio system with a digital optical cable.
Connect to the audio system digital optical input terminal.
Digital Audio Out
Optical
Digital Audio In
Optical
AV Receiver or Soundbar
Audio Optical cable (not supplied)
If there is no output on the digital optical output, ensure that the digital output is set to PCM.
To set, go to: Settings Device Preferences Sound Digital Output to PCM.> > >
The digital optical output is always present whatever source is selected.
RCA Analogue Audio Cable
Connect to the audio system’s audio input terminal.
Audio L/R
Earphone
AV Receiver or Soundbar
Audio cable (not supplied)*
Note: The output audio level is dependent upon the headphone level. The volume level on the connected audio
system must be turned up.
Getting Started
L
R
14
It is possible to connect external non-wired devices such as Bluetooth headphones, keyboard, mouse, etc.
CONNECTING EXTERNAL DEVICES -
NON WIRED
Chromecast built-in
Chromecast built-in allows you to wirelessly cast content from your favourite websites and apps to your
television, directly from your computer or mobile device.
1. Connect a mobile device such as a smartphone or table to the same home network that the television is
connected to
2. Launch a Chromecast supoorted app on the mobile device.
3. Select the (cast) icon in the app
The screen of the mobile device is displayed on the television.
Bluetooth Devices
The Bluetooth function can be used to pair the television with various devices. You can pair audio output devices
such as Bluetooth soundbars, speakers or headphones. Supported input devices are Bluetooth remote controls,
gamepads, computer mouse etc.
To pair the television with a Bluetooth device, follow the instructions below:
1. Turn the Bluetooth device on and put it in pairing mode.
2. To put your Bluetooth device in pairing mode, refer to the instruction manual of the device.
3. [HOME] > >Press the button, then select Settings Remotes & Accessories Add Accessory to put the
television in pairing mode
4. A list of available Bluetooth devices will be displayed.
5. Select the desired device from the list, then follow the on-screen instructions.
6. If you are prompted to enter a passcode, refer to the instruction manual of the device.
7. After pairing is completed, your device will be connected to the television.
Note: An Internet connection is required to use Chromecast built-in. Both your television and device
need to be connected to the same network for the casting function to operate.
There are many Chromecast apps available for mobile and other devices.
Getting Started
15
15
15
1515
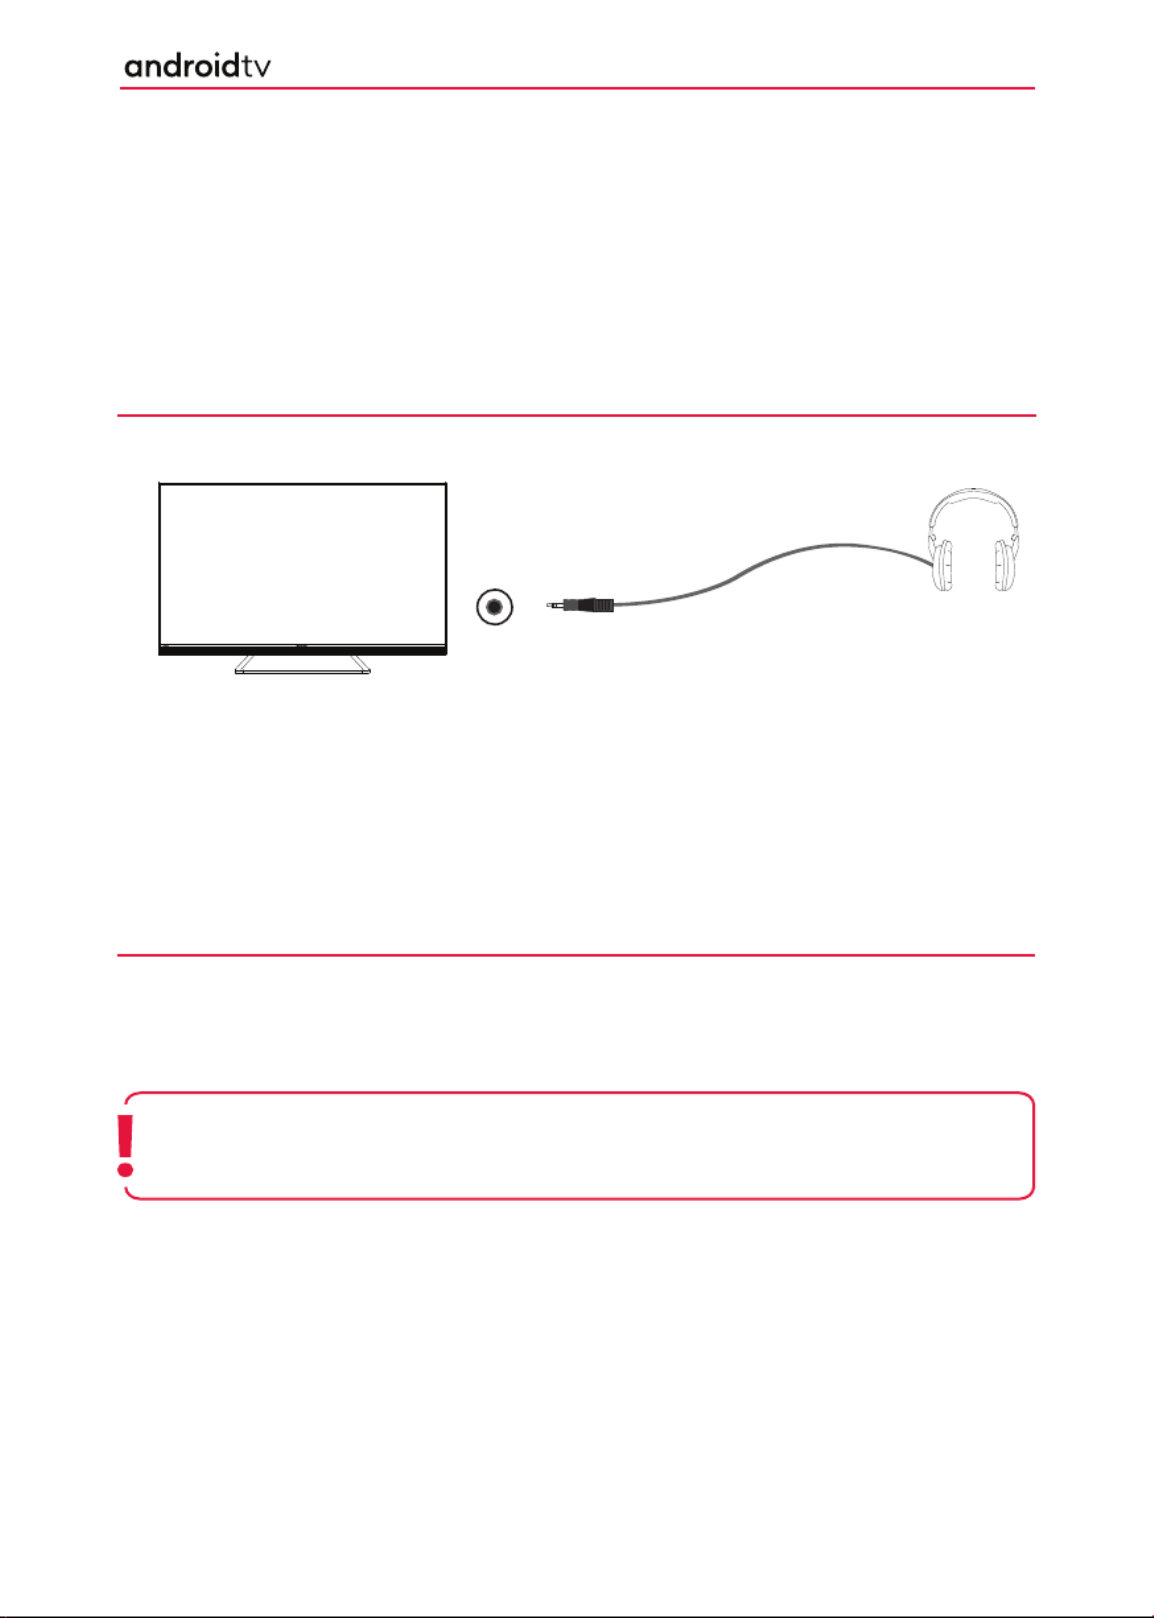
Connecting Headphones
You can connect wired or Bluetooth headphones to this set.
Earphone
When
wired headphones
are connected to the 3.5mm jack socket on the rear of the set, the internal speakers
will cut out. The volume of the sound which comes from the headphones is controlled via the remote control
using the [ ] and [ ] buttons.VOL+ VOL-
When a
Bluetooth device
is paired with the set, the internal speakers will cut out. The volume of the sound that
which comes from the Bluetooth device is adjusted via the remote control using the [ ] and [ ] buttons. VOL+ VOL-
If headphones are connected to the 3.5mm jack on the rear of the set, the Bluetooth device takes over the sound
output, i.e. if both wired and Bluetooth headphones are connected, there will only be sound from the Bluetooth
headphones.
Volume bar display
When the volume is changed on your television set, the volume bar will come up at the bottom of the screen. If
Bluetooth is being used, the bluetooth icon will be displayed.
When the audio is muted, the volume bar will display the last set volume and also the mute icon.
Note: When using headphones, a warning will appear advising not to use excessive volume for long
periods of time as this may damage your hearing.
Turning up the headphone volume too high may result in distortion.
To unpair your remote control, follow the instructions below:
1. >Go to Settings Remotes & Accessories.
2. [OK]Select the remote control to be unpaired and press .
3. [OK]Now select “Unpair” and press .
4. [OK]Select “OK” and press on the remote control.
5. Your remote control will now unpair from the set.
Getting Started

16
PLAYING CONTENT STORED ON A USB
DEVICE
USB
Connect a USB storage device to the USB port of the television to enjoy photo, music, and video fi les stored on
the device.
Connect the USB device to your television and turn it on.
1. [HOME]Press the button, select “Apps” from the Home Page, and select the DigitalMediaPlayer from the
app list.
2. [APPS]If the supplied remote control has an button, you can press the APPS button to display the app list.
3. Browse the list of folders and fi les and select the desired fi le.
4. [OK]Press and playback will start.
Note: Depending on the image dimension, fi le size, and number of fi les in a folder, some photo images
or folders take time to display.
Displaying the contents of the USB device may take some time depending on the content.
While accessing the USB device, do not disconnect power from the television or USB device as the data
may be corrupted.
Depending on the fi le, playback may not be possible, refer to
USB Specifi cations.
Some photos and movies may be magnifi ed, resulting in low picture quality. Depending on the size and
aspect ratio, images may not be displayed in full screen.
It may take a long time to display a photo, depending on the fi le or settings.
If DigitalMediaPlayer cannot be found in the favourite’s apps, you can add it from the apps listing.
The USB ports on the television support FAT32 and NTFS fi le systems.
If your digital still camera does not work with your television, try the following:
• Set the USB connection settings on your camera to Mass Storage.
• Copy the fi les from the camera to a USB fl ash drive, then connect the drive to the television.
Getting Started

17
17
17
1717
INPUTTING TEXT
On -Screen Keyboard
There is a preinstalled on-screen keyboard app in your set which will appear whenever text is expected to be
entered by the user, e.g. Wi-Fi password or website address in the web browser. To navigate the on-screen
keyboard, use the [ARROW] [OK] buttons on the remote control, enter the character selected by pressing . The
character you select will be highlighted like the “Q” in the image below.
If you press and hold the button for 2 seconds while on a selected symbol, this will display the associated [OK]
national character(s) with accents or diacritical marks.
Using the Remote Control
You can operate many of the televisions features by using the , , , and buttons [UP] [DOWN] [LEFT] [RIGHT] [OK]
on the remote control.
The following remote control buttons are used to navigate the menus:
• [EXIT]: Exits from the menu and returns to the source or Home Page.
• [BACK]: Takes you one step back in the menu.
• [ARROW BUTTONS]: Navigate around the options on the screen.
• [OK]: Selects the option highlighted or selected.
Your set can also be voice controlled using the Google Assistant.
Note: When entering the Wi-Fi password this keyboard is extended to show all characters at once.
Getting Started

18
2
3
45
7
9
11
12
13 14
15 16
17 18
19 22
20 21
23 26
24 25
27
9
15 16
17 18
13 14
6
28
2
14
10
11
12
6 8
10
1
1. STANDBY - Switch on the TV when in standby or vice versa.
2. SOURCE - To display the input/source menu.
3. NUMBER BUTTONS - 0-9 to select a TV channel directly.
4. MUTE - Mute the sound or vice versa.
5. GUIDE - Opens the 7 day TV guide (Digital TV mode).
6. MENU - Displays LIVE TV menu.
7. APPS - Opens the menu with installed apps.
8. INFO - Press once for programme information.
Press again to view detailed information
9. - Allows you to navigate the on-screen menus
and adjust settings to your preference.
10. BACK - Step back in the menu.
11. HOME - Displays the TVs Home Menu.
12. EXIT - Exits all menus.
13. VOL (+/-) - Tilt to increase/decrease the sound level.
14. CH (+/-) - Tilt to switch to the next/previous channel in the
sequence.
15. NETFLIX - Access the YouTube App.
16. PRIME VIDEO - Access the Prime Video App.
17. YOUTUBE - Access the YouTube App.
18. FREEVIEW PLAY - Access the Freeview Play service. Only
availble in the UK.
19. AUDIO - Opens the audio track menu.
20. SUB - Turns on/off subtitles at the bottom of the screen.
21. TEXT - turns teletext on/off.
22. TV - Switches the TV to the last watched input.
23. - Play/Pause media.
24. - Play in fast rewind mode.
25. - Play in fast forward mode.
26. - Stop playback.
27. COLOUR BUTTONS - Execute corresponding function at
that time.
28. Google Assistant - Use your voice to access entertain-
ment, control smart devices, obtain answers on screen,
and more.
Getting Started
REMOTE CONTROL

19
19
19
1919
FIRST TIME INSTALLATION
When the set starts up for the fi rst time, it will do so in the fi rst-time installation mode. This enables you to set
up various Android functions, log into your Google account (you will be able to set up a Google account if you
do not have one) and for the set to be tuned into digital television if required.
To navigate through the options when in the fi rst-time installation mode, use the buttons on your remote
control as shown here:
Using the Remote Control
During the set-up process you will be prompted to sign into your Google account via the pre-installed Google
app. This set up process will depend upon the model of television being confi gured. Please ensure that you have
your account details to hand. If not, you will be prompted to set up an account. If you do not wish to set up an
account, this can be done later.
Note: The basic installation steps may vary slightly depending on your model and/or country of use.
Due to Android software updates, the look and feel of the television start up procedure and
subsequent menus may be subject to change.
TV Control Stick
The TV control stick is located on the back of the TV, on the left hand side when looking at the TV. The control
stick can be used to control a variety of TV functions. The shape of the TV’s control stick may vary by model.
While the TV is in standby mode:
1. Pressing the centre of the control stick once powers on the TV set.
While watching TV:
1. RIGHT/LEFT – volume up/volume down.
2. UP/DOWN – changes channel up/down.
3. Press the centre of the control stick once – displays the menu.
4. Press and hold the centre of the control stick – Standby/Power Off .
While in menu:
1. RIGHT/LEFT/UP/DOWN – navigation of cursor in on-screen menus.
2. Press the centre of the control stick once – OK/Confi rm selected item.
3. Press and hold the centre of the control stick – back to previous menu.
TV Control Stick
Getting Started
Press to navigate up
Press to confi rm a selection
Press to navigate right
Press to navigate left
Press to navigate down

20
Full First Time Installation
When the set is turned on for the rst time it will enter the installation mode as shown here. It is recommended
that all steps are completed as shown in the process to ensure correct operation. Use the back button on your
remote control to return to the previous screen.
1. When the set rst turns on, you will be
requested to select your preferred on-
screen display language. This will set the
language in which the menus and associated
information is displayed in. Should you wish
to do so, this can be changed later in the
Device Preferences menu.
2. Next you will be requested to set up your set
with an Android phone. If you do not have
an Android phone, proceed to the next step.
If chosen, the set will request you to log into
your Android phone and connect the set to
your network automatically.
3. If your set is not connected via an Ethernet
cable, it will request that a Wi-Fi network
is selected and logged into. Choose your
network and then follow the on-screen
display to enter your password. When
correctly entered, the set will log into your
network and connect to the internet if this is
available.
4. Now you can sign in using your Google
account. If you do not have a Google
account, this can be set up at this stage if
required. Should you not want to sign in or
create a Google account, then this stage can
be skipped.
5. If signing in, there are two options. You can
either sign in using a device by choosing “Use
your phone or computer”, this will bring up
further options to follow. If using the remote
control to sign in, you will be asked for your
Google account name and password; follow
the prompts to sign in.
Getting Started

21
21
21
2121
6. Once logged into your Google account
you will be asked to con rm that the
Terms of Service are accepted. Then asked
to accept the following:
7. Help Improve Android - When enabled,
the set will automatically send diagnostic
information to Google.
Location: Let Google use your device
location to improve your Android device.
Some apps may require this to be turned
on to perform correctly. This setting can be
turned on or off at any time in the Settings
menu.
Get Personal Results: Turn this on so that
you can use your voice to get your email,
calendar, help with payments and more on
this device. This can be turned on or off in
Assistants settings.
8. After setting up your Google functionality,
some of the bene ts and advantages of the
set are displayed.
9. Enter the country of use for the set. This will
determin the functionality of the television,
for example Freeview Play in the UK or
Saorview in ROI.
10. [OK]When this prompt appears, press the
button on the remote control to enter a
four digit PIN code. You will be asked to
con rm the PIN before progressing to the
next step. This PIN is used when accessing
various functions on the set and during the
lock or parental control usage.
Note: When setting the password, you can only set four numbers. The letters on the displayed
keyboard are not active.
Getting Started

22
11. Set up your television to be in Home or
Store mode. Home mode is the default
setting for normal use. This can be changed
later in the Settings menu if necessary.
12. To enable your set to receive television
channels, it needs to be tuned into your
local transmitter. There are three tuning
modes available, for Freeview Play
functionality choose Antenna and then the
Scan option. While your set is tuning in, the
display will advise progress and the number
of digital channels received.
13. Tuning of the set is now complete.
14. Agree to the Freeview Play Terms and
Conditions if the set is located in the UK and
tuned in
Note: If the store mode is turned on, the set
will go into the demonstration mode after a few
minutes and display banners advising of the
sets speci cation on the screen.
Getting Started
Note: After the TV is tuned in, you may be
prompted to con rm which region your set is
in. This can occur if more than one transmission
signal is detected. If you receive this prompt,
please press the [RIGHT ARROW] on the
remote control and con rm the transmission
signal you would like the TV to use.

23
23
23
2323
15. Connect your remote control using
Bluetooth:
• Press and hold the [LEFT ARROW] and
[HOME] buttons on the remote control at
the same time.
• The LED indicator on the remote control
will start to ash.
• Select your remote control from the list
shown on the television screen and press
[OK] on the remote control.
• Once paired, the pairing screen will
disappear.
16. You will be greeted by a Freeview Play
con rmation screen, when this closes, you
are ready to use your Android set. Your set
will start at the Android Home Page.
Getting Started
Note: A more detailed instruction for remote
pairing can be found on Page 60.

24
Note: Other separate restrictions may be available depending on the app. For details, refer to the
app’s help pages. It is possible to download a large number of applications to the set and as these are not
part of the software installed on the television, instructions on their usage will have to be provided by the
app producer in most cases.
Note: An Internet connection is required to watch content. Some streaming services may require an
account or subscription.
ANDROID FUNCTIONALITY
Your Android set is able to provide many functions and the usage of some of these are shown below.
Viewing internet Media
You can use video streaming services such as YouTube and Net ix to watch content via your internet service. The
services available will vary depending on your country and region. You can launch these services by selecting
their titles on the Home Page.
Enjoying Safe Apps and Video Streaming Services (Security & Restrictions)
You can ensure safe use of the television by setting installation restrictions on apps that are downloaded from
unknown sources, or age restrictions on programmes and videos. You can access parental controls by pressing
the button, then select Settings Apps Security & restrictions or Settings Channel Parental [HOME] > > > >
Controls.
If you change the Security & Restrictions settings, your device and personal data are more vulnerable to attack
by unknown apps from sources other than Play Store. Any third party apps are downloaded at the risk of the
user, any damage to your device or loss of data that may result from using these apps is not covered by the
manufacturer.
Android Functionality
25
25
25
2525
Using the Google Assistant with Voice
The Google Assistant allows voice commands to quickly fi nd and play your favourite shows, obtain answers and
control your home via connected devices. If you experience issues with third party devices, it is suggested that
you contact the provider of the device for support.
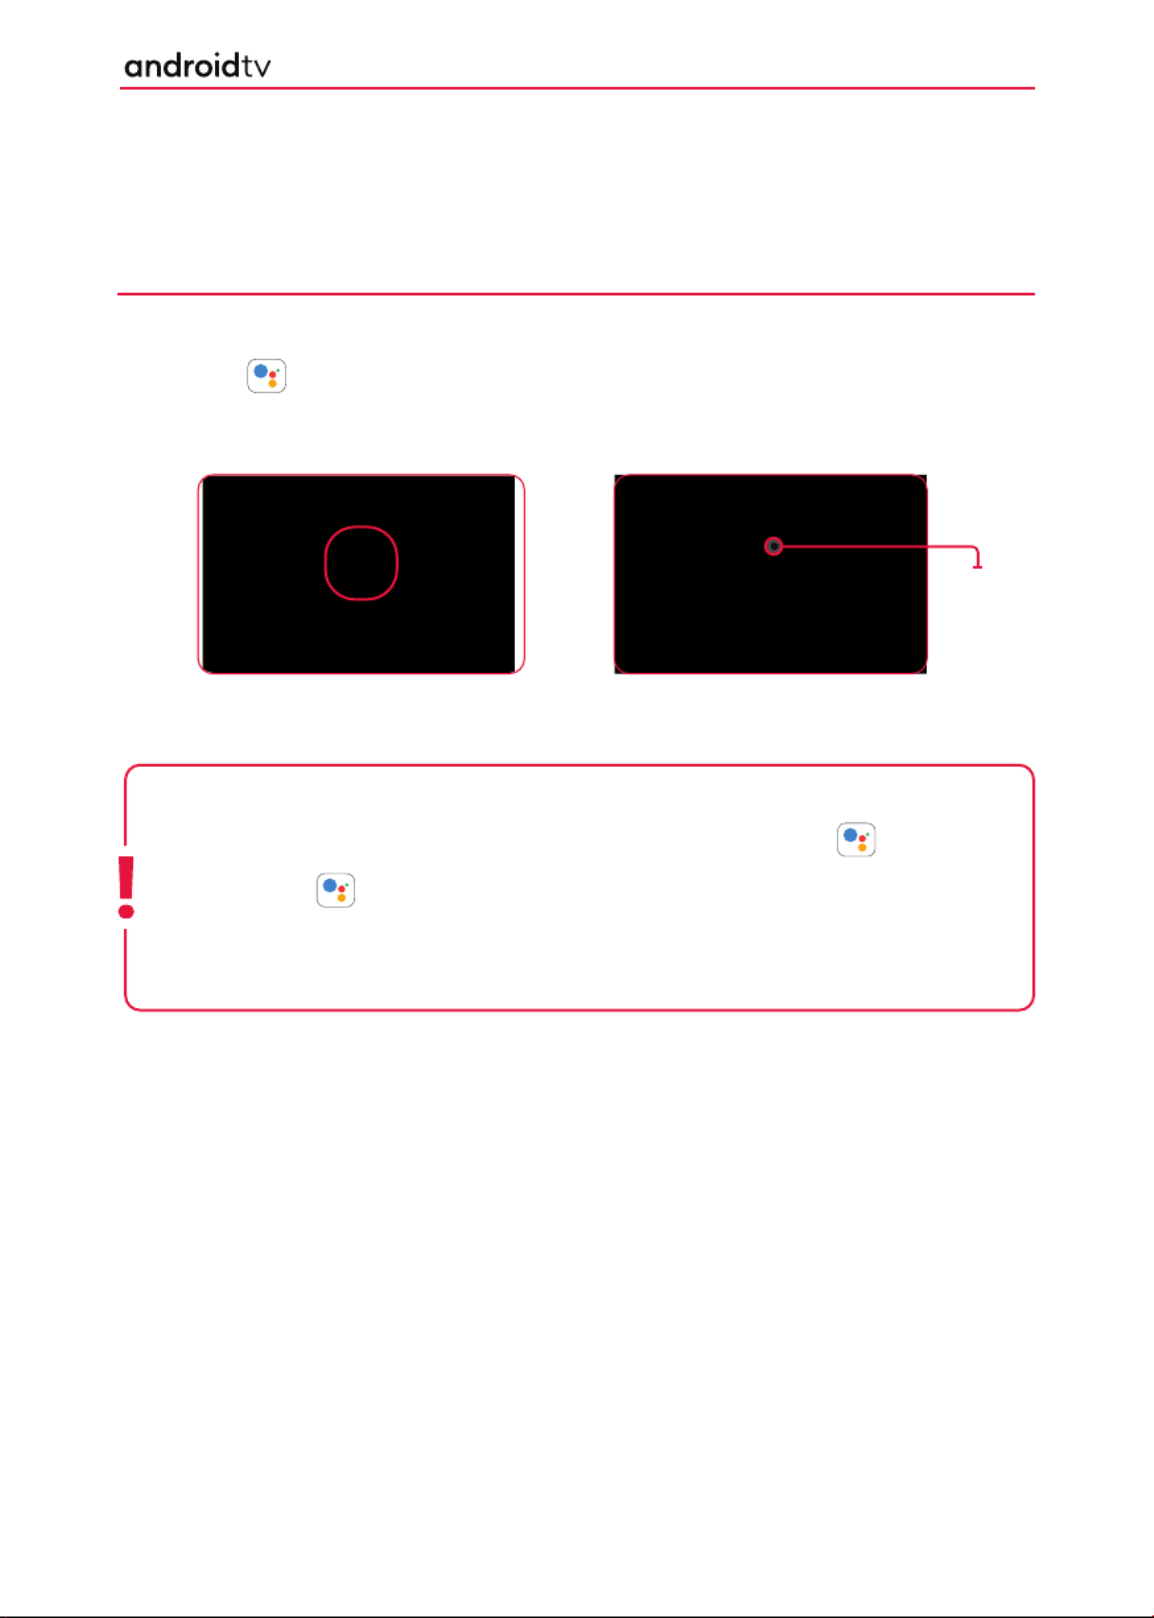
THE GOOGLE ASSISTANT
Remote controls with Google Assistant functionality have a Google Assistant button and a built-in microphone
to allow voice communication with the set. To enable Google Assistant, follow the instructions below:
1. Press the button on your remote control.
2. The light on the remote control will illuminate.
3. Wait for the on-screen message from the Google Assistant, then speak into the microphone.
By speaking into the microphone, you can search for various content or control your connected smart home
devices.
Android Functionality
Note: Helpful phrases may be displayed on the television screen depending on your model. If you are
unable to access the Google Assistant, ensure that the remote control which has the button is paired
to the television.
To do this, press the button on the remote and follow the on screen instructions.
Ensure that when speaking into the microphone that the microphone is positioned about 15 to 30cm away
from your mouth. Do not speak too loudly or softly. Ensure words are spoken clearly.
Microphone
+ LED

26
Note: If the button is pressed on the remote control and it is not paired, the pairing screen will
appear.
Using the Google Assistant with the On-Screen Keyboard
Press the button, then select the icon from the Home Page and press [HOME] [OK]. The on-screen
keyboard will be displayed, you can now enter your question or command by typing this in.
Using the Google Assistant with the On-Screen Keyboard
If during the rst-time installation process the remote was not paired or skipped, then follow the process below
to pair your remote with the television:
1. Turn the set on.
2. >Go to Settings Remotes and Accessories.
3. Now press and hold the [LEFT ARROW] and
[ ] buttons on the remote control at the HOME
same time.
4. The LED indicator on the remote control will
start to ash
5. Select your remote control from the list shown
on the television screen and press on the [OK]
remote control.
6. Once paired, the pairing screen will disappear.
Android Functionality
Note: The Google Assistant requires an internet connection.
The Google Assistant is not available in certain languages and countries.
The type of remote control supplied with the television, and the availability of a remote
control with a built-in microphone varies depending on your model/region/country. An optional remote
control is available.

27
27
27
2727
HOME PAGE
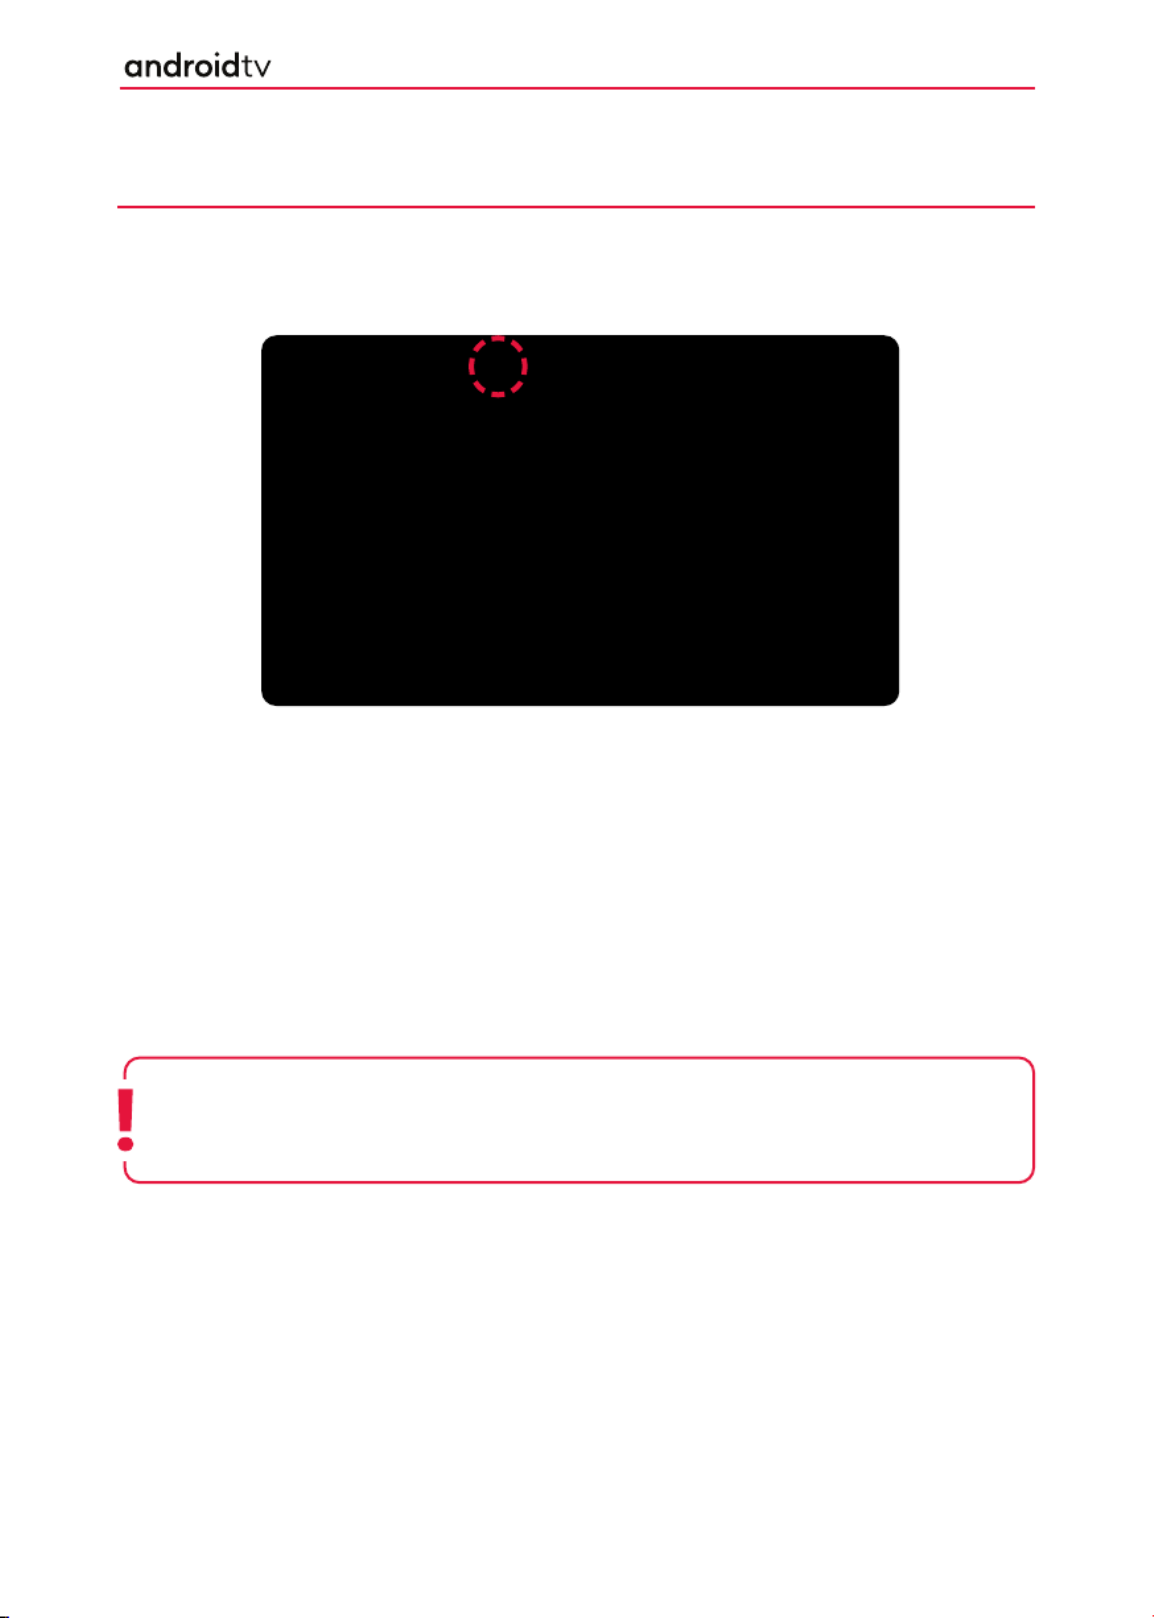
To enter the Home Page screen, press the [HOME] button on your remote control. From the Home Page, you
can search for content and select recommendations, apps, and go into settings.
The Home Page is the default viewing screen for your television and it will appear after the fi rst-time installation
process has been completed.
Inputs, Google Assistant, Network, Notifi cations and Settings
The picture below shows a typical Home Page, here we look at section A as shown inside the dotted line.
A
The Google Assistant
- Use the button on on the remote control or the on-screen keyboard
displayed on the television to input keywords and search for various content.
Notifi cations
- Displayed when there are notifi cations such as when there is a connection issue or
software update. The number within the circle indicates the number of notifi cations.
Network
- Confi gure network and internet. This symbol changes depending on the connection type
– Wi-Fi or Ethernet.
Settings
- Confi gure various television related settings.
Note: The Google Assistant requires an internet connection.
The Google Assistant is not available in certain languages and countries.
The type of remote control supplied with the television, and the availability of a remote control with a built-
in microphone varies depending on your model/region/country. An optional remote control is available.
Android Functionality

28
Apps and Favourite Apps
Apps are programs and functions which expand the functionality and usage of your television. These can include
video stream viewers, on demand players, games, health monitors and many more types. These can be added to
the set via stores such as the Google Play Store. Apps are shown in section B of the Home Page.
B
Moving or Removing an App on the Favourite Bar
Follow the instructions below:
1. Select the app you would like to move or remove from the favourites section.
2. [OK]Press the button on the remote control for more than two seconds.
3. The menu shown on the right will be displayed.
4. [UP/DOWN] [OK]Select the desired function by using the buttons on the remote control, then press .
5. If moving the icon, select [LEFT/RIGHT] on the remote control until the app icon is in the desired position.
Adding More Apps to the Favourites Bar
To add more apps, use the remote control [ARROW] [OK] buttons to select the icon and then press . This
will show apps which are available and have been previously downloaded to the set.
You can now select the app which you would like to add to the favourites bar from the ones which now appear
on the screen.
Note: Some apps cannot be removed from the favourites bar as they are fundamental to the operation of
the set.
Android Functionality
29
29
29
2929
Note: If an app has been un-installed, you will have to download it again. Some Apps which are
fundamental to the operation of the set cannot be un-installed.
Adding More Apps to the Favourites Bar
To enter the App Management screen, select “Apps” from the tabs in the top left of the Home
Screen (circled in the image below) and press on the remote control. You will then see a [OK]
screen similar to the second image.
It is also possible to move, open and uninstall an app from this menu. Follow the instructions below to carry out
these functions:
It is possible to open, move, add to favourites, fi nd info and uninstall an app from this menu. Follow the
instructions below to carry out these functions:
Select the app you would like to open, move, add to favourites, or uninstall from this section.
Press the button on the remote control for more than two seconds.[OK]
A menu shall appear, with the following: Open, Move, Remove from favorites, Info and Uninstall.
Select the desired function by using the buttons on the remote control, then press .[UP/DOWN] [OK]
Android Functionality

30
You can install apps from the Google Play Store to your television, just like you do
with smartphones and tablets. You can only install apps that are compatible with
this television. They may diff er from the apps shown on smartphones/tablets.
An Internet connection and Google account are required to install apps from the Google Play Store. If you
do not have a Google account or wish to create a shared account, this can be achieved during the fi rst time
installation or by accessing the following website on any device:
https://accounts.google.com/signup
The website above may vary depending on your region/country. It is also subject to change without notice. For
details, refer to the Google homepage.
To install an app on your set, press the button and select Google Play Store from the apps list. If the [HOME]
supplied remote control has an [ ] button, you can press the this to display the apps list. Select an app to APPS
install. After downloading, the app is automatically installed and added. Its icon appears in the list of installed
apps, allowing you to launch it.
To add an app from the Play Store, select and enter the Play Store from the apps section of the Home Page.
When the Play Store opens, you can then select an app to load onto the set from the ones which appear, or
search for a desired app.
Installing apps from the Google Play Store
You can move downloaded apps to a USB memory device or SD card to increase the space available in the
television.
Note: There are free apps and paid apps in the Google Play Store. To purchase a paid app, a prepaid
Google Play gift card code or credit card information is required. You can purchase a Google Play gift card
from various retailers.
Free space on internal storage of the television is limited. When storage is full, it will not be possible to
install more apps. To check how much free space is available go to:
Settings Device Preferences Storage.> >
If internal storage is full and you wish to install additional apps, you will have to delete some currently
installed apps or move apps to USB memory device or SD card. Please refer to the chapter
Moving apps to
a USB memory device or SD card.
Note: When you format a USB memory device/SD card, all data saved in the device will be deleted.
Back up your important data before formatting. Performing this procedure formats the USB memory
device/SD card for exclusive use with the television. Therefore, you may be unable to use the USB memory
device/SD card with a computer, etc.
Some apps cannot be moved to a USB memory device/SD card.
Some apps cannot be moved to a USB memory device as they are fundamental to the operation of the set.
Android Functionality
Installing apps from the Google Play Store

31
31
31
3131
Formatting Memory Device
Insert SD card or USB memory device to the television, then press the button, select :[HOME]
Settings Device Preferences Storage the desired USB memory device or SD card. Format the selected > > >
memory device as an internal storage device.
Moving an App to Your Memory Device
Press the button, then select Settings Apps, then select the app that you want to move to the USB [HOME] >
memory device or SD card. Now choose the USB memory device/SD card from the used storage. The app is
moved to the USB memory device/SD card.
Hint: Repeat steps above to move additional apps to the USB memory device.
Removing a USB Memory Device
Press the button, select Settings Device Preferences Storage the desired USB memory device, [HOME] > > >
then select the option to remove it.
Note: Your Android TV formats the USB memory desivce/SD card into a proprietary format. When inserting
the USB memory device/SD card into a personal computer after adding apps to it, you will not be able to
view the contents of the USB memory device/SD card.
To use the USB memory device/SD card on a personal computer, you will need to reformat the devices
which will erase any data stored on the USB memory device/SD card.
Android Functionality
Note: The USB memory device is used only for saving apps. To use the USB memory device for other
purposes, you must format it again.
If you delete an app in the USB memory device using a computer, you will be unable to launch it from the
television.
If you remove a USB memory device from the television, you will be unable to use the apps that were
moved to the USB memory device.
You cannot specify a USB memory device as the installation location of an app. First install the app on the
television as normal, and then move it to the USB memory device.
Depending on the television model, your set will be equipped with either an SD card slot or a Micro SD
card slot. Please ensure you use the correct type of SD card, corresponding to the available slot.

32
Play Next
Play Next functionality is Play Next. This option is only displayed when the Play Next option is active and there is
content in the Play Next list.
Play Next option can be selected when in a streaming app such as You Tube. To do this:
1. Select the item in the Channels list on the Home Page to be added to the Play Next list.
2. [OK]Press and hold the button on the remote control for more than two seconds.
3. The Play Next option appears.
4. Select “Add to Play Next”.
5. Stream will now appear in the Play Next list.
The Play Next option can be turned on and off in the Customize
channels option on the Home Page. In addition, the services which can
be used on Play Next can also be turned on and off . In the case of the
Freeview on demand players it is also possible to restrict channels and
genre.
Note: Once a stream has been played back, it will disappear from the Play Next list.
If there are no streams in the Play Next list, the list will not be seen on the Home Page.
Android Functionality
34
Discover
Channels are services which have been added to your Home Page which enable you to view streaming services
and content within them. You can add, remove and modify channels via the “Customise channels” option. This is
found when you scroll to the bottom of the Home Page.
The layout of the Discover tab is similar to the main home page but the overall content is cutomised to your
previous viewing habits. You will see “channels” but these are not as editable as those on the home screen.
They are normally sorted by genre, but as each persons viewing habits can diff er dramatically, what you will see
on this screen will vary between users.
Android Functionality
Note: You are able to sign into multiple Google accounts, enabling individuals to access their personalised
recommendations on one TV. Please refer to Page 50 on how to do this.

35
35
35
3535
You can access the settings menu below whilst watching the set in Television mode. To do so, ensure you are on
the Live Television source and press the button on the remote control.[MENU]
Options are:
Source Change the picture (input) on your television.
Picture Change the picture mode.
Sound Control the speaker output when used with audio devices.
Power Control the power settings on your television.
CI Card Activate and set up a connected Conditional Access Module (not supplied).
Advanced Options Set up various live TV options.
Settings Control other televisions settings.
Note: For a more detailed explanation of these options, refer to the sections in the next pages.
When on one of the menu options and the arrow button is pressed on the remote control, a further menu [UP]
option appears as below.
Add to My Add current channel to favourites.
Favourites
Program Guide Shortcut to the program guide.
New Channels This will appear if new channels are available.
Available
TELEVISION MENU
Using The TV
Note: The Programme Guide will only appear if the set is tuned into a digital television signal which
supports a program guide function.

36
Source
You can select your desired source from this menu. It is also possible to do this by pressing the [ ] button SOURCE
on the remote control. The number and type of inputs will depend upon the model and specifi cations of your
set. Scroll to the source you desire and press on the Remote Control.[OK]
Picture
To enter the Picture Menu, press the button and select TV. Then press the button and select [MENU] [MENU]
Picture using the [LEFT/RIGHT ARROW] buttons and pressing when selected.[OK]
The menu items are summarised below. Detailed descriptions in the next section, “Picture, explained” explain
options for menu items with the *.
Note: You can go directly to the DTV source (if tuned in), by
pressing the numbered buttons on the remote control,
i.e. pressing the number [ ] will switch the set to channel 1. 1
Alternatively, you can press the button.[TV]
Picture Mode*
Dolby Vision
Notifi cation
Auto
Brightness
Backlight
Brightness
Contrast
Saturation
Hue
Sharpness
Gamma*
This menu provides options to modify picture quality.
Shows a notifi cation if Dolby Vision content is detected.
The TV measures ambient lighting in the room to
automatically adjust the screen brightness.
Controls the strength of the LED Backlight.
Changes the brightness of the picture.
Changes the range between the brightest and darkest parts
of the picture.
Controls the amount of colour in the picture.
Varies the tint of the picture.
Allows for the sharpness of the picture to be adjusted.
Changes the gamma response of the picture.
Using The TV

37
37
37
3737
Picture mode.
Options are:
User For you to set your own preferences.
Standard For standard use.
Vivid Enhances the contrast and brightness.
Sport Suitable for viewing sports events.
Movie Set for watching movies.
Game For gamers.
Energy Best energy performance (on by default).
Saving
Note: Depending on television model, some picture mode options may not be available.
Some settings will only be stored in the when the Picture Mode is set to User.
Colour
Temperature*
Advanced
Video*
Colour Tuner*
11 Point White
Balance
Correction*
Reset to
Default
Changes the colour temperature of the picture.
Options to enhance the viewing experience.
Fine-tune the colour settings (Advanced users).
Adjusts the white balance by adjusting the contrast of the
three primary colours.
Allows you to reset the picture conditions back to their
default levels (factory shipping).
Picture, explained
Gamma
Options are:
Dark Enhances colours in dark areas.
Middle Improves mid-range colours.
Bright Increases brightness of colours.
Colour Temperature
Options are:
Colour Temperature. Adjusts the color temperature.
options: User / Cool / Standard / Warm.
Gain:
Red Controls red content.
Green Controls green content.
Blue Controls blue content.
Using The TV

38
Advanced Video.
Options are:
DNR: Digital Noise Reduction.
Reduces the noise found in some content by using
algorithms to average out pixel data.
Options: Off / Low / Medium / Strong / Auto
MPEG NR: MPEG Noise Reduction.
A feature which improves the quality of pictures by
reducing the block noise and mosquito noise without
compromising the picture resolution.
Options: Off / Low / Medium / Strong
Adaptive Luma Control.
Automatically adjusts the brightness and contrast after
analyzing the input signal.
Options: Off / Low / Medium / Strong
Local Contrast Control:
Local contrast divides your TV screen into diff erent “zones”
so it can dim the dark parts of the screen without aff ecting
the bright areas.
Options: Off / Low / Medium / High
Blue Stretch:
When activated, the brightest part of the screen will be
leveled down to reduce the saturation.
Options: On / Off
Game Mode:
Turns off certain functions such as motion processing to
reduce latency.
Options: On / Off
ALLM: Auto low latency mode.
Automatically turns on Game Mode upon detection of
gameplay specifi c signal input.
Options: On / Off
PC Mode:
Disables certain post processing to attempt a smoother
viewing experience fo reading text and tracking mouse
movements.
Options: On / Off
10-Bit Colour Reproduction:
Attempts to enhance 8-bit colour information to 10-bit.
Options: Off / Low / High
Motion Enhancement:
Simulates frames from the input content to smooth motion
between frames. Useful for sports content.
Options: Off / Low / Middle / High
Using The TV

39
39
39
3939
HDMI RGB Range:
Colour range settings for HDMI input.
Options: Auto: The TV sets the best option based on
the EDID information of connected
device.
Full: The RGB signal will be displayed in
the range of 0-255. This range is
typically used by computers and game
consoles.
Limited: The RGB signal will be displayed in the
range of 16-235.
This setting is required to display
movies properly.
Low Blue Light:
Reduces the blue light emitted from the TV display.
Options: Off / Low / Middle / High
Colour Tuner
Options are:
Enable
Turns the tuner on or off
When turned to “On”, the options available are:
Hue
Saturation
Brightness
Off set
Gain
Adjustment settings for Hue, Saturation & Brightness:
Adjustment settings for Off set & Gain:
Using The TV

40
11 Point White Balance Correction
Options are:
Enable: Turns the corrector On or Off .
When turned to “On”, the options available are:
Gain: 0% to 100%
Red:
Green:
Blue:
Sound
To enter the Sound Menu, press the button and select TV. Then press the button and select [MENU] [MENU]
Sound using the [LEFT/RIGHT ARROW] buttons and pressing when selected.[OK]
The menu items are summarised below. Detailed descriptions in the next section, “Sound, explained” explain
options for menu items with the *.
System
Sounds
Sound Style*
Balance
Equalizer
Detail*
Speaker
Delay
eARC
Digital
Output*
Digital
Output
Delay
Auto
Volume
Control
Downmix
mode
Dolby
Audio
Processing*
Dialogue
Enhancer
Turns the menu navigation sounds On or Off .
Sets the sound mode.
Controls the Left and Right balance of the audio.
Fine control of the frequency response.
Adds delay to the audio output of the speakers.
Turns the HDMI Audio Return Channel between
Off and Auto.
Settings for the digital audio output.
Allows the user to adjust the audio setting to synchronise
the picture and sound for external speakers connected via a
digital audio output.
When “on” is selected, the volume remains at a constant
level regardless of the input/source.
Selects the number of audio output channels between
“Stereo” and “Surround”.
Activates Dolby Audio Processing options.
Adjusts the frequency band of the center channel to
improve the audibility of dialogues.
Using The TV

41
41
41
4141
DTS Virtual:X
Reset to
Defaults
Sound, explained
Sound Style
The sound style confi ugures the equalizer detail based on pre-defi ned
settings.
Options are:
User For you to set your own preferences.
Standard Standard, default settings.
Sports ideal for sports events.
Movie Enhanced for movie experience.
Music Best used when listening to radio channels.
News Tailored for speech.
Equalizer Detail
Fine control of the frequency response. Bands you can adjust are:
120Hz
500Hz
1.5KHz
5.0KHz
10.0KHz
Digital Output
This adjusts the type of encoding for the output of the optical digital
output.
Options are:
Auto
Automatically selects from the input source
Bypass
Audio directly comes from the connected device
PCM
PCM encoded stream only
Dolby Audio© - Dolby Digital Plus
Dolby Digital Plus signals only
Dolby Audio© - Dolby Digital
Dolby Digital signals only
Turns Virtual: X and TrueBass on or off .
Restores the default audio settings.
Using The TV

42
Power
To enter the Power Menu, press the button and select TV. Then press the button and select [MENU] [MENU]
Sound using the [LEFT/RIGHT ARROW] buttons and pressing when selected.[OK]
The menu items are summarised below.
Sleep Timer
Picture Off
Switch Off
Timer
No Signal
Auto Power
Off
Auto Sleep
Lets you set the sleep timer so the television automatically
switches off after a set amount of time.
Off / 10 / 20 / 30 / 40 / 50 / 60 / 90 / 120 minutes can be
selected.
Allows you to turn off the display so that there is no
picture,sound still comes from the speakers. To turn display
back on, press the [STANDBY] button on the remote
control.
Controls the amount of time the set will continue without
any buttons being pressed on the set or remote control
before going into standby.
Off / 30 / 60 / 90 / 120 / 150 / 180 / 210 / 240 minutes can
be selected. Default is Off .
Controls the amount of time the set will stay powered on
without a signal being received.
Off / 5 / 10 / 15 / 30 / 60 minutes can be selected. 15
minutes is default.
Controls the amount of time the set will stay powered on
without an input signal (remote, button presses) being
received.
Duration options are:
Never / 4 Hours (default) / 6 hours / 8 Hours
Dolby Audio© Processing
Dolby Audio Processing enables specially formulated sound profi les to be
enabled, bringing enhanced depth and dynamics to the overall sound of the
television.
Options are:
Dolby Audio Processing
Turns processing On or Off
Sound Style
Enables Dolby engineered sound profi les. Options are:
User / Standard / Sports / Movie / Music / News
Surround Virtualizer
Turns on or off the Dolby surround sound virtualizer
Dolby Atmos
Turns on or off the Dolby Atmos Sound engine
Using The TV
Produkt Specifikationer
| Mærke: | Sharp |
| Kategori: | televisión |
| Model: | 65EQ3KA |
Har du brug for hjælp?
Hvis du har brug for hjælp til Sharp 65EQ3KA stil et spørgsmål nedenfor, og andre brugere vil svare dig
televisión Sharp Manualer

13 Januar 2025
13 Januar 2025
13 Januar 2025
12 Januar 2025
12 Januar 2025
11 Januar 2025
11 Januar 2025
29 December 2024
15 Oktober 2024
13 Oktober 2024
televisión Manualer
- televisión SilverCrest
- televisión Acer
- televisión Denver
- televisión Sencor
- televisión TCL
- televisión Sony
- televisión Siemens
- televisión Samsung
- televisión Panasonic
- televisión VOX
- televisión Philips
- televisión Lenco
- televisión OK
- televisión LG
- televisión AEG
- televisión Pioneer
- televisión Mitsubishi
- televisión Daewoo
- televisión Arçelik
- televisión AOC
- televisión Sanyo
- televisión Grundig
- televisión Nikkei
- televisión Toshiba
- televisión Pyle
- televisión Furrion
- televisión Lenovo
- televisión Infiniton
- televisión Nedis
- televisión Logik
- televisión Abus
- televisión Optoma
- televisión Westinghouse
- televisión Element
- televisión Thomson
- televisión Hyundai
- televisión Aiwa
- televisión Nokia
- televisión Casio
- televisión AKAI
- televisión Hisense
- televisión Strong
- televisión Brandt
- televisión Hannspree
- televisión Trevi
- televisión Blaupunkt
- televisión JVC
- televisión BEKO
- televisión Uniden
- televisión Clatronic
- televisión Hitachi
- televisión Medion
- televisión Sweex
- televisión Citizen
- televisión Megasat
- televisión Haier
- televisión TechniSat
- televisión Innoliving
- televisión NewStar
- televisión Bang And Olufsen
- televisión Luxor
- televisión Vivax
- televisión Loewe
- televisión Walker
- televisión Sunny
- televisión Finlux
- televisión Telefunken
- televisión Kernau
- televisión BenQ
- televisión Packard Bell
- televisión Xiaomi
- televisión Peerless-AV
- televisión Krüger&Matz
- televisión Viewsonic
- televisión Schneider
- televisión Fujitsu
- televisión Oppo
- televisión Zalman
- televisión Tesla
- televisión Polaroid
- televisión NEC
- televisión TERRIS
- televisión OKI
- televisión MT Logic
- televisión Yasin
- televisión Bush
- televisión Dual
- televisión Aspes
- televisión Salora
- televisión Sagem
- televisión Nevir
- televisión Teac
- televisión Nextbase
- televisión Techwood
- televisión Vivo
- televisión Albrecht
- televisión SVAN
- televisión Sogo
- televisión Alba
- televisión RCA
- televisión ECG
- televisión AudioSonic
- televisión Manhattan
- televisión Proline
- televisión JGC
- televisión Orion
- televisión ITT
- televisión ILive
- televisión Intenso
- televisión Fantec
- televisión Cecotec
- televisión Roadstar
- televisión VIZIO
- televisión XD Enjoy
- televisión Wharfedale
- televisión Technika
- televisión Seiki
- televisión TechLine
- televisión Monster
- televisión Bauhn
- televisión V7
- televisión Airis
- televisión Majestic
- televisión Star-Light
- televisión Vestel
- televisión Continental Edison
- televisión Iiyama
- televisión RevolutionHD
- televisión GPX
- televisión CHiQ
- televisión MBM
- televisión Orima
- televisión SereneLife
- televisión Lexibook
- televisión AG Neovo
- televisión Philco
- televisión Kunft
- televisión GoGen
- televisión Kogan
- televisión Graetz
- televisión Emerson
- televisión Kemo
- televisión Insignia
- televisión Xoro
- televisión Manta
- televisión SunBriteTV
- televisión JTC
- televisión Reflexion
- televisión Planar
- televisión QBell Technology
- televisión SYLVOX
- televisión Dyon
- televisión Schaub Lorenz
- televisión Daitsu
- televisión Xiron
- televisión Alden
- televisión Alphatronics
- televisión Aldi
- televisión Allview
- televisión AYA
- televisión Aristona
- televisión Apex
- televisión Ziggo
- televisión Icy Box
- televisión Palsonic
- televisión Funai
- televisión Saba
- televisión Antarion
- televisión Tevion
- televisión Proscan
- televisión Tucson
- televisión Sunstech
- televisión Nabo
- televisión Sylvania
- televisión Marquant
- televisión Nordmende
- televisión AudioAffairs
- televisión Magnum
- televisión Kubo
- televisión Coby
- televisión Seg
- televisión Metz
- televisión Qilive
- televisión Changhong
- televisión Naxa
- televisión Mpman
- televisión Cello
- televisión Mx Onda
- televisión Peaq
- televisión Humax
- televisión Superior
- televisión Difrnce
- televisión Grunkel
- televisión Avtex
- televisión Odys
- televisión NPG
- televisión Bluesky
- televisión Videocon
- televisión Durabase
- televisión HKC
- televisión Edenwood
- televisión Woxter
- televisión Premier
- televisión Teleco
- televisión Opera
- televisión LTC
- televisión Horizon
- televisión Elements
- televisión Viewpia
- televisión CGV
- televisión Online
- televisión Doffler
- televisión DirecTV
- televisión Tele 2
- televisión Mystery
- televisión Telesystem
- televisión Jay-tech
- televisión EKO
- televisión E-motion
- televisión Mitsai
- televisión Selfsat
- televisión High One
- televisión Tve
- televisión ISymphony
- televisión Pantel
- televisión Magnavox
- televisión ATYME
- televisión HCI
- televisión Inno-Hit
- televisión Lin
- televisión Engel
- televisión Digihome
- televisión Englaon
- televisión Reflex
- televisión Astar
- televisión Visco
- televisión Tivax
- televisión H&B
- televisión Norcent
- televisión TELE System
- televisión TIM
- televisión Oyster
- televisión Belson
- televisión Vision Plus
- televisión Sbr
- televisión Voxx
- televisión Rm 2000
- televisión Hoher
- televisión Felson
- televisión Elbe
- televisión Axing
- televisión FFalcon
- televisión Smart Tech
- televisión Séura
- televisión Mitzu
- televisión Caratec
- televisión JTC24
- televisión Kivi
- televisión Smart Brand
- televisión FOX Electronics
Nyeste televisión Manualer

20 Februar 2025

19 Februar 2025
19 Februar 2025

10 Februar 2025
5 Februar 2025
30 Januar 2025

30 Januar 2025

15 Januar 2025
15 Januar 2025

15 Januar 2025