Artillery Sidewinder X1 Manual
Artillery
3D printer
Sidewinder X1
Læs nedenfor 📖 manual på dansk for Artillery Sidewinder X1 (2 sider) i kategorien 3D printer. Denne guide var nyttig for 26 personer og blev bedømt med 4.5 stjerner i gennemsnit af 2 brugere
Side 1/2
Arllery 3D Printer
Sidewinder X1
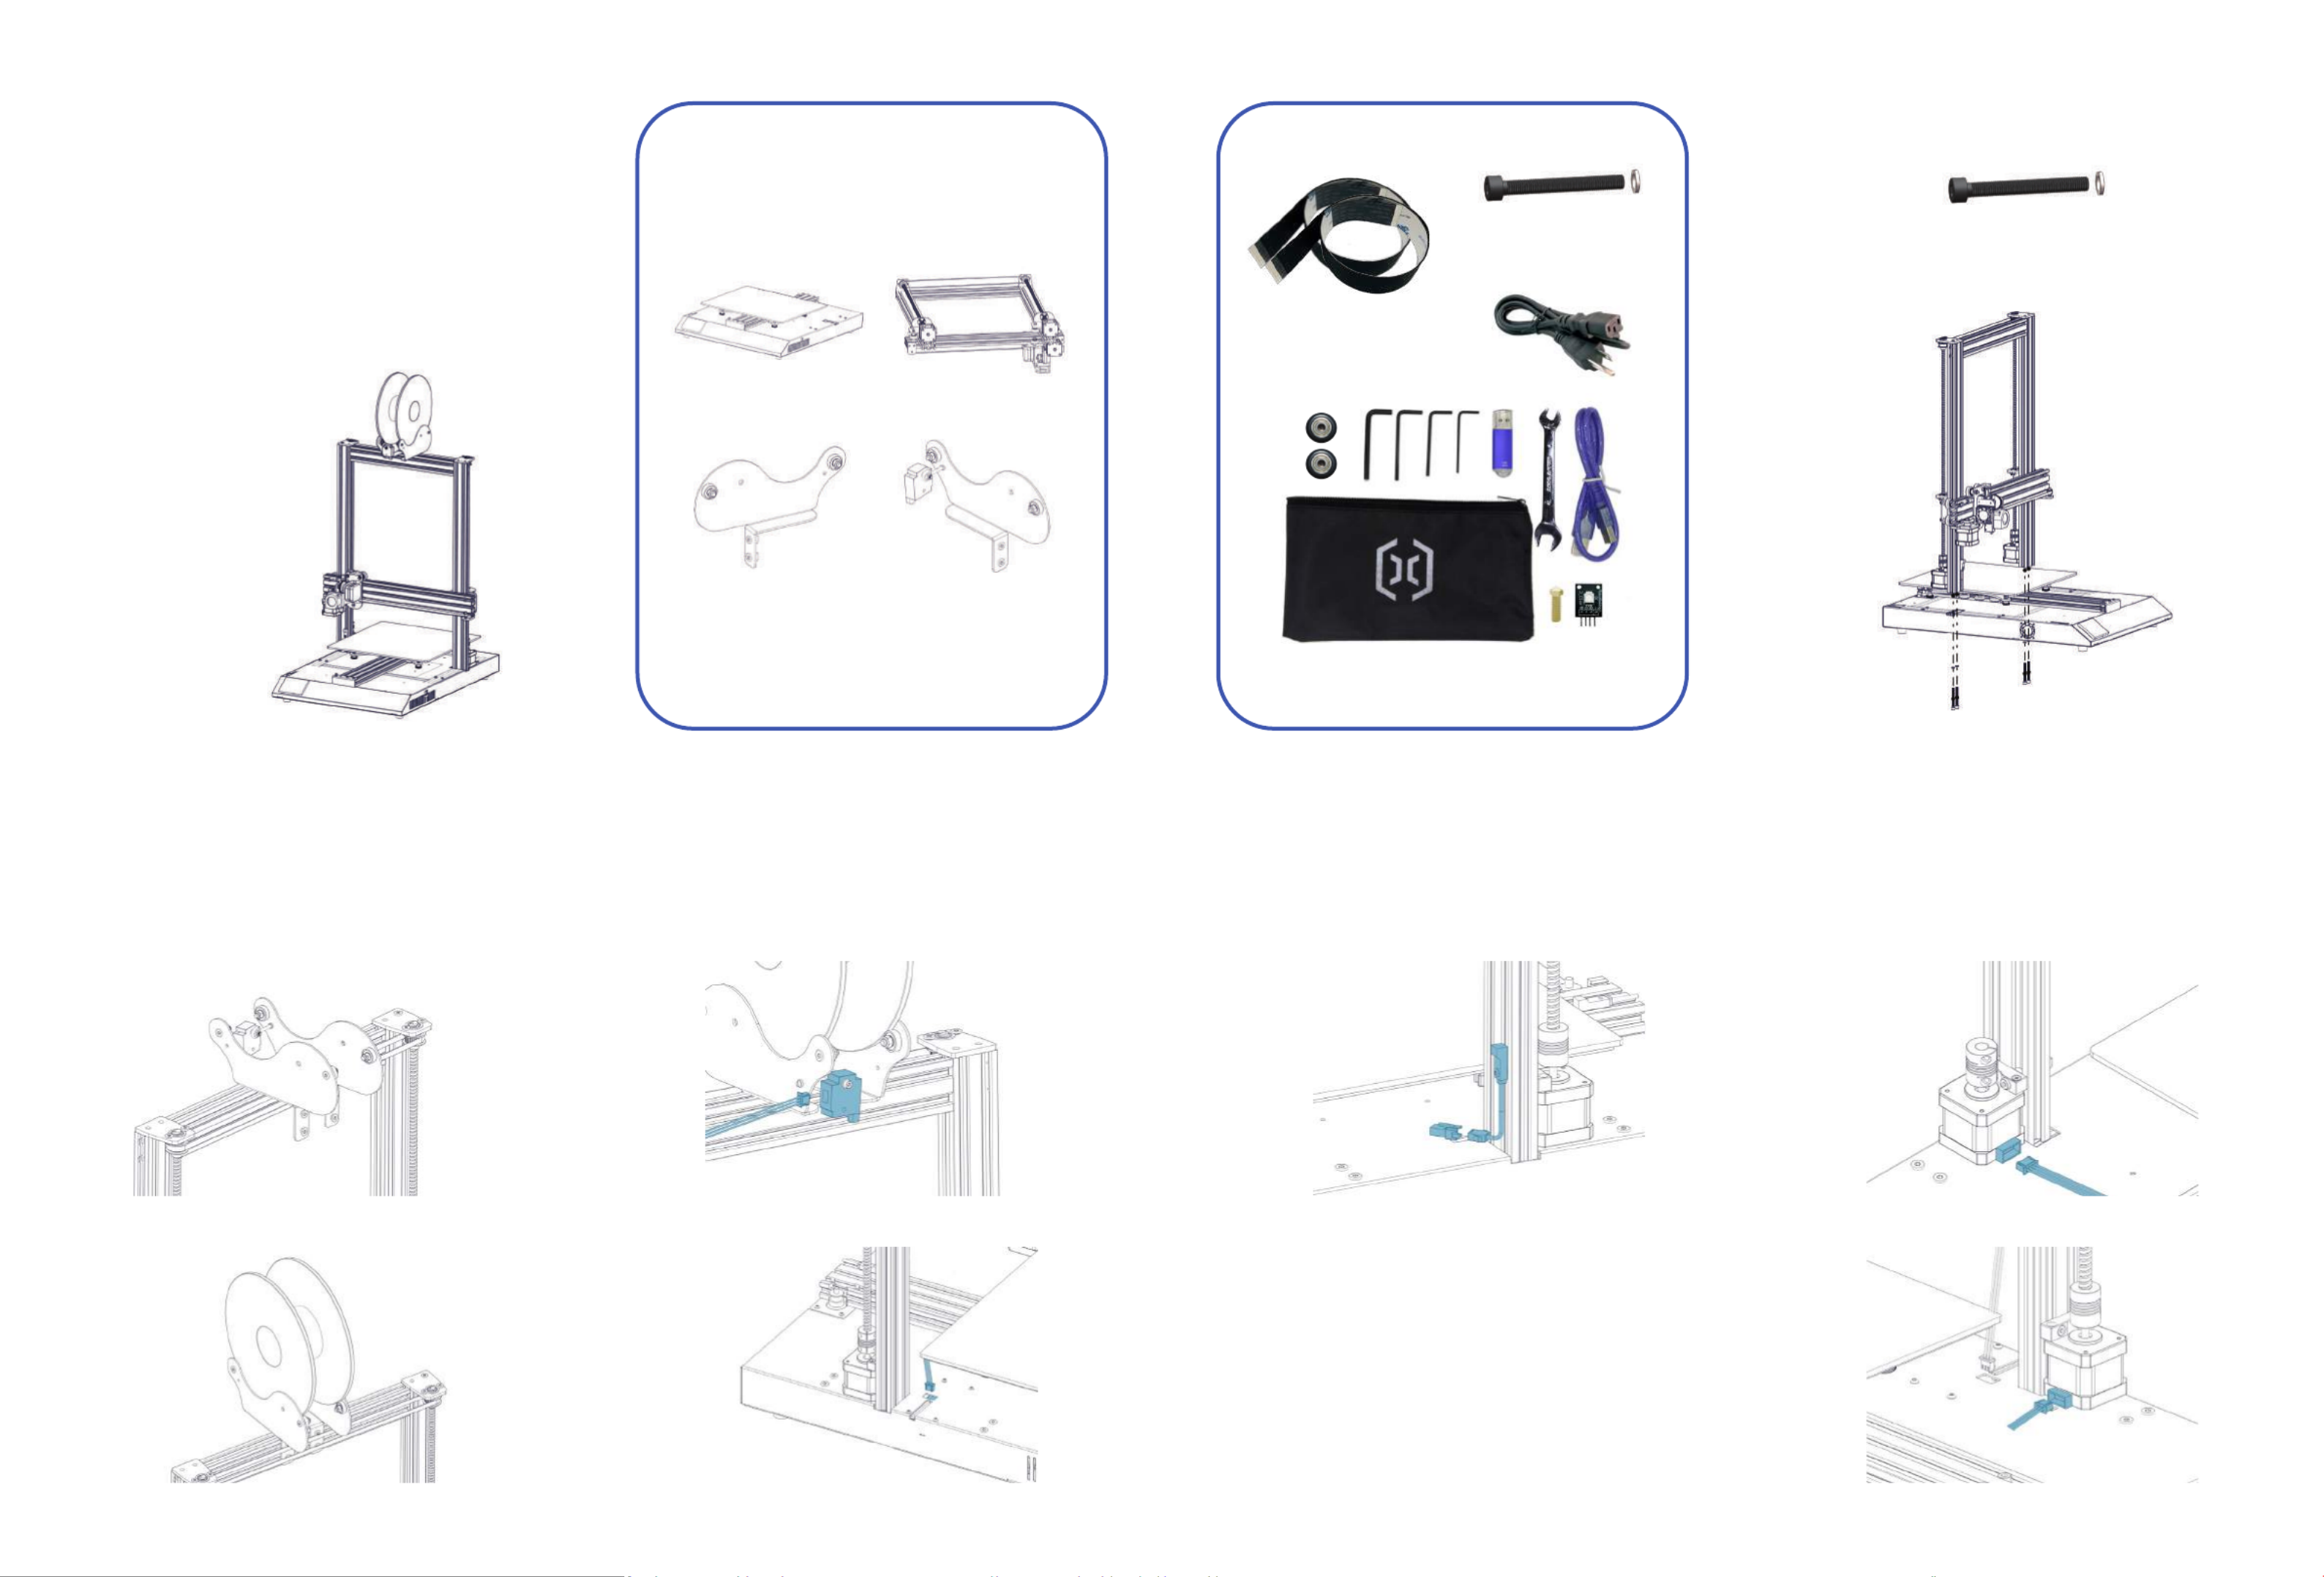
List 1 - Main Modules List 2 - Tools & Spares
M4x45 (5pcs)
Step 1
M4x45 (4pcs)
Fix the XZ gantry to the base with 4pcs of M4x45
screws as shown in the picture below.
Step 2
Fix the spool holder to the top of the printer, adjust
the width to fit the size of your filament spool. Make
sure the filament sensor is facing forward.
Step 3
Connect the filament runout sensor as shown in
pictures below:
Step 4
Connect the Z endstop to the cable.
Step 5
Connect the Z Stepper Motors as shown in the
pictures below:
Front
30pin (1pc)
20pin (1pc)
Produkt Specifikationer
| Mærke: | Artillery |
| Kategori: | 3D printer |
| Model: | Sidewinder X1 |
Har du brug for hjælp?
Hvis du har brug for hjælp til Artillery Sidewinder X1 stil et spørgsmål nedenfor, og andre brugere vil svare dig
3D printer Artillery Manualer

15 August 2024
3D printer Manualer
- 3D printer Kodak
- 3D printer Gembird
- 3D printer Exibel
- 3D printer Anker
- 3D printer Polaroid
- 3D printer Creality3D
- 3D printer Weller
- 3D printer Renkforce
- 3D printer Snapmaker
- 3D printer Bq
- 3D printer Flashforge
- 3D printer Monoprice
- 3D printer XYZprinting
- 3D printer MakerBot
- 3D printer BFB
- 3D printer Weistek
- 3D printer Leap Frog
- 3D printer Wasp
- 3D printer Dimension
- 3D printer Anycubic
- 3D printer German RepRap
- 3D printer Wanhao
- 3D printer GooVer
- 3D printer Easy Threed
- 3D printer Zortrax
- 3D printer LulzBot
- 3D printer SINDOH
- 3D printer PP3DP
- 3D printer 3D Systems
- 3D printer Creality
- 3D printer Raise3D
- 3D printer Craftbot
- 3D printer Orbbec
- 3D printer Sharebot
Nyeste 3D printer Manualer
24 Februar 2025
4 Februar 2025
4 Februar 2025
26 Januar 2025
26 Januar 2025
26 Januar 2025
26 Januar 2025
26 Januar 2025
26 Januar 2025
26 Januar 2025