DXG Riviera -535V Manual
DXG
Videokamera
Riviera -535V
Læs nedenfor 📖 manual på dansk for DXG Riviera -535V (82 sider) i kategorien Videokamera. Denne guide var nyttig for 21 personer og blev bedømt med 4.5 stjerner i gennemsnit af 2 brugere
Side 1/82
DXG-533V and DXG-535V HD
User’s Manual
DXG USA


i
Table of Contents
Preface ..............................................................................v
About this manual.............................................................v
Copyright...........................................................................v
Precautions ......................................................................vi
Before You Start .............................................................viii
1 Introducing the camera ............................. 1
1.1 System requirements...............................................1
1.2 Features..................................................................1
1.3 Unpacking the video camera..................................2
1.4 About the camera ...................................................3
1.4.1 Front view...................................................3
1.4.2 Top view .....................................................3
1.4.3 Bottom view ...............................................4
1.4.4 Right view...................................................4
1.4.5 Left view .....................................................5
1.4.6 Back view....................................................5
1.4.7 Adjusting the LCD display.......................6
1.4.8 About the LEDs........................................10
2 Getting started...........................................11
2.1 Inserting an SD card ............................................11
2.2 Inserting the batteries...........................................13
2.3 Turning on the video camera...............................14
2.4 Changing modes...................................................14

ii
2.5
Before you start ....................................................15
2.5.1 Setting the date and time ........................15
2.5.2 Setting the language................................16
2.5.3 Setting the beep........................................17
2.6 Shoot/Playback video ...........................................18
2.6.1 Shooting a video clip ...............................18
2.6.2 Playing the video clip..............................20
2.7 Taking/viewing pictures........................................21
2.7.1 Taking a still picture................................21
2.7.2 Viewing images........................................22
2.8 Connecting to a computer ....................................23
2.9 Connecting to a standard TV ...............................23
2.10 Connecting to a DVD Player................................24
2.11 Connecting to an HDTV ......................................24
3 Using the camera...................................... 25
3.1 Movie and voice recorder mode ...........................25
3.1.1 Movie and voice recorder mode............25
3.1.2 Using the macro function .......................27
3.1.3 Using the zoom function.........................27
3.1.4 Using the LED light .................................27
3.1.5 Quick access controls ..............................28
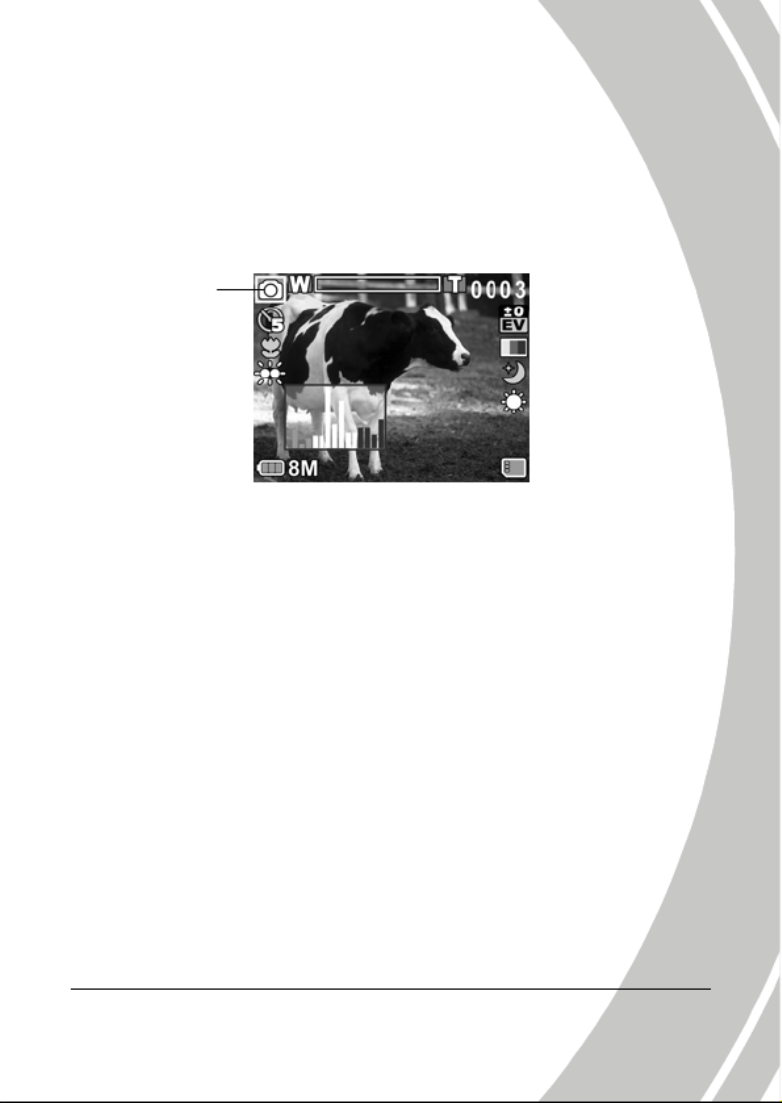
3.2 Photo mode...........................................................29
3.2.1 Photo mode icons.....................................29
3.2.2 Using the macro function .......................30
3.2.3 Using the zoom function.........................30

iii
3.2.4
Using the LED light.................................30
3.2.5 Quick access controls ..............................30
3.3 Movie Playback mode...........................................31
3.3.1 Movie Playback mode icons...................31
3.4 Photo Playback mode ...........................................34
3.4.1 Photo Playback mode icons....................34
3.5 Thumbnail mode ..................................................36
3.6 USB mode.............................................................36
4 Using the menus ....................................... 37
4.1 Movie menu..........................................................37
4.1.1. White balance...........................................37
4.1.2. Video resolution.......................................38
4.1.3. Color effect ...............................................39
4.1.4. Night mode...............................................40
4.1.5. Stabilizer ...................................................41
4.1.6. Capture mode...........................................42
4.2 Movie playback menu...........................................43
4.2.1 Delete.........................................................43
4.2.2 Protect .......................................................45
4.2.3 Autoplay ...................................................46
4.3 Photo menu ..........................................................47
4.3.1 White balance...........................................47
4.3.2 Resolution.................................................48
4.3.3 Color effect ...............................................49
4.3.4 Night mode...............................................50

vi
Precautions
General precautions
• Do not use or store the product in dusty, dirty, or sandy areas,
as its components may be damaged.
• Do not store the product in a hot environment. High
temperatures can shorten the life of electronic devices, damage
batteries and warp or melt certain plastics.
• Do not store the product in cold areas. When the product
warms up to its normal temperature, moisture can form inside,
and may damage the electronic circuits.
• Do not attempt to open the casing or attempt your own repairs.
High-voltage internal components create the risk of electric
shock when exposed.
• Do not drop or knock the product. Rough handling may
damage the internal components.
• Do not use harsh chemicals, cleaning solvents or strong
detergents to clean the product. Wipe the product with a
slightly damp soft cloth.
• Do not fire the flash while it is too close to the subject's eyes.
Intense light from the flash can cause eye damage if it is fired
too close to the eyes. When using the flash, the camera should
be at least one meter from the eyes of the subject.
• Do not open battery cover while an image is being recorded.
Doing so will not only make storage of the current image
impossible, it can also corrupt other image data already stored
in file.
• If the product or any of its accessories are not working
properly, take them to your nearest qualified service center.
The personnel there will assist you and if necessary, arrange
for the product to be repaired.

vii
• Test for proper operation before using the camera.
Notes on the LCD Screen
Caution must be observed when dealing the fluid contained in the
LCD. Ensure that fluid does not leak if the screen becomes cracked
or damaged. If this occurs, follow these steps:
• If the fluids make contact with skin, wipe it with a clean cloth
then rinse with a large amount of water.
• If the fluid makes contact with eyes, wash eyes with clean
water for at least 15 minutes and seek immediate medical
attention.
• If the fluid is swallowed, first rinse mouth with water, then
drink a large amount of water and induce vomiting. Seek
immediately medical attention
Operation conditions
• This camera is designed for use in temperatures ranging from
0°C to 40°C (32°F to 104°F).
• Do not use or keep the camera in the following areas:
- In areas subject to direct sunlight
- In areas subject to high humidity or dust
- Near air conditioners, heaters, or other areas subject to
temperature extremes
- Inside of a closed vehicle, especially one parked in the sun.
- In areas subject to strong vibration
Power supply
• Use only the type of battery that came with your camera.
Using any other type of battery may damage the equipment
and invalidate the warranty.

vii
i
• Ensure the battery is inserted correctly. Inserting the battery
incorrectly can cause damage to the product and possibly start
a fire.
• Remove the battery to avoid the fluid leakage if the camera is
not going to be used for a long time.
• If the battery is crushed or damaged, remove it immediately to
avoid the battery fluid leakage and abnormal expansion.
• The camera can be used with either a Li-ion or four AAA size
batteries. Li-ion battery is recommended to use for longer
operation time.
Before You Start
Take some test shots before performing a formal
recording.
Before taking pictures with this DV camera in any important
occasion (such as a wedding ceremony or an overseas trip), do test
the DV camera beforehand to ensure that it functions properly. Any
additional loss caused by the malfunction of this product (such as
costs of photography or any loss of benefit generated by the
photography) is not the responsibility of the manufacturer and no
compensation will be given for it.
Copyright information
Take care to observe "No Photography" notices in certain locations.
In these cases, you cannot record any live performance,
improvisation or exhibits, even for personal purposes. Any transfer
of pictures or memory card data must be conducted under the
constraints of copyright law.

1.4 About the camera
Refer to the following illustrations to familiarize yourself with the
buttons and controls of this video camera.
1.4.1 Front view
Lens
LED light
Microphone
Self-timer LED
1.4.2 Top view
Shutter button
Zoom / Volume button
3

1.4.3 Bottom view
Battery compartment
Tripod mount
1.4.4 Right view
LCD screen cover
4

1.4.5 Left view
Hand strap
Macro switch
1.4.6 Back view
Mode dial
Pla
y
back button
Scroll wheel
USB / AV Output
REC. / Power LED
REC. / STOP button
HD Output
5

1.4.7 Adjusting the LCD display
Flip and twist the LCD screen as shown while capturing a still
image or recording a video clip.
6

See the table below for a description of each button’s function.
Button Name Function
Power
button Press and hold to turn power on/off.
Menu
button Press to display main OSD* menus.
Mode dial
z Use to toggle Movie, Photo, and
SET modes.
z In Movie mode, press the REC.
button to start and stop recording.
z During Movie Playback mode,
press the REC. to pause/restart
playing.
Scroll
wheel
z In Photo and Movie modes, press
up and down to increase/decrease
the EV settings, and inwards to
adjust the LED light setting.
z In Photo Playback mode:
1. Press up and down to scroll
through stored images.
2. When the image is zoomed in,
you can move the image
up/down or left/right. Then,
press inwards the scroll wheel, to
switch the moving directions
(up/down ↔ left/right).
3. In the thumbnail mode, press the
up and down to select the
7

Display
button
Press once to display all OSD icons.
Press again to turn all OSD icons off.
Zoom
button
z In Photo and Movie modes, press
to zoom in and out.
z In Photo Playback mode:
1. Press the button right to zoom
in your photo.
2. Press the button left to show all
stored files in a 3x2 matrix
thumbnail view.
z In Movie Playback mode:
1. Press the button left to show all
stored video clips in a 3x2
matrix thumbnail view.
2. During video playback, press
the button to increase or
decrease the playback volume.
*OSD: On Screen Display
9

10
1.4.8 About the LEDs
The following table describes the camera LEDs:
LED Color Definition
Green Power-on
Red Blinking Recording
Red Camera busy
Red Blinking Self-timer is activated
Power /
Rec.
Red Blinking
Rapidly
2 seconds self-timer
remaining.
Red Blinking Self-timer is activated.
Self-timer
Red Blinking
Rapidly
2 seconds self-timer
remaining.

2 Getting started
Read this section to learn how to start using the video camera. This
section covers basic functions such as switching on, inserting the
battery and memory cards, and configuring preliminary settings.
See later chapters for advanced functions.
2.1 Inserting an SD card (SD card sold separately)
An SD card can be installed in the video camera to provide
additional storage space for still images, video clips, or other files.
1. Open the LCD screen cover and open the SD card
compartment cover.
2. Insert an SD card, making sure the contacts are facing
downwards.
11

2.2 Inserting the batteries
This video camera is designed to use AAA alkaline batteries or a
rechargeable Li-Ion battery. Only use the batteries supplied or
similar batteries recommended by the manufacturer or your dealer.
• Note: Installing the battery incorrectly could cause damage
to the camera and possibly start a fire.
1. Open the battery compartment cover.
2. Insert the batteries as shown.
3. Close the battery compartment cover.
13

2.3 Turning on the video camera
Press and hold the power button to turn the video camera on/off.
2.4 Changing modes
The video camera can operate in three modes, Movie, Photo, and
SET. Move the mode dial to toggle different modes.
14

4. Press the scroll wheel down to highlight √
√
√
√√ to leave the
date menu.
2.5.2 Setting the language
1. Turn on the video camera, and move the mode dial to
SET. Move the scroll wheel up /down to highlight
Language. Press the scroll wheel inwards to confirm.
2. Use the scroll wheel to select the following languages:
English, Traditional Chinese, Simplified Chinese,
German, Italian, Spanish, French, Turkish, Portuguese,
Dutch, Japanese, Russian, Korean, and Arabic. After the
language is selected, press the scroll wheel inwards to
confirm.
1
6

2.5.3 Setting the beep
1. Turn on the video camera, and move the mode dial to
SET. Move the scroll wheel up/ down to highlight Beep.
Press the scroll wheel inwards to confirm.
2. Use the scroll wheel to select √
√
√
√√ and press the scroll wheel
inwards to confirm.
1
7

3. The LCD preview and the ratio of a still-image
capture can vary depending on the different video
resolution settings. See the following table:
Video resolution
19
Preview Taking pictures
and focusing
720P
WVGA
16:9 ratio 4:3 ratio
4:3 ratio 4:3 ratio
QVGA
4. Before shooting a video clip, you can still take a
photo in Movie mode.

2.6.2 Playing the video clip
1. In Movie mode, press the Playback button and the most
recent file displays on the LCD screen.
Movie playback
mode indicator
2. Move the scroll wheel up and down to scroll through the
video clips. Press the scroll wheel inwards to play back
the video clip.
3. To pause while playing back the video clip, press the
REC. / STOP inwards.
4. When viewing the video clip, press the Zoom button left
or right to adjust the volume.
5. Press the scroll wheel inwards to stop playing.
6. Press the Playback button again to return to Movie
mode.
20
2.7 Taking/viewing pictures
2.7.1 Taking a still picture
1. Turn on the camera and move the mode dial to Photo
mode.
Photo mode
2. Use the LCD screen to frame the picture.
3. Press the Shutter button to capture the image.
4. The picture is automatically saved with a unique file
name.
21

2.7.2 Viewing images
1. In Photo mode, press the Playback button and the most
recent image displays on the LCD screen.
22
Playback mode
2. Press the scroll wheel up and down to scroll through the
images.
3. Press the Zoom button right to zoom in the picture. Then
you can move the image up/down or left/right and press
inwards the scroll wheel, you can switch the moving
directions (up/down ↔ left/right).
4. Press the Zoom button left fully zoomed out to view
thumbnails of all stored files and then press the scroll
wheel up and down to select the thumbnail images.
5. Press the scroll wheel inwards to view the image in full
screen mode.
6. Press the Playback button again to return to Photo mode.
Produkt Specifikationer
| Mærke: | DXG |
| Kategori: | Videokamera |
| Model: | Riviera -535V |
Har du brug for hjælp?
Hvis du har brug for hjælp til DXG Riviera -535V stil et spørgsmål nedenfor, og andre brugere vil svare dig
Videokamera DXG Manualer

15 August 2024
14 August 2024
12 August 2024
8 August 2024
7 August 2024
Videokamera Manualer
- Videokamera Nilox
- Videokamera SilverCrest
- Videokamera Denver
- Videokamera Sencor
- Videokamera Sony
- Videokamera Canon
- Videokamera Samsung
- Videokamera Panasonic
- Videokamera Extech
- Videokamera Philips
- Videokamera Lenco
- Videokamera OK
- Videokamera Braun
- Videokamera Sharp
- Videokamera Logitech
- Videokamera Kenwood
- Videokamera HP
- Videokamera Garmin
- Videokamera Sanyo
- Videokamera Thinkware
- Videokamera Easypix
- Videokamera Nikkei
- Videokamera Bushnell
- Videokamera Toshiba
- Videokamera Pyle
- Videokamera Fujifilm
- Videokamera Nikon
- Videokamera Kodak
- Videokamera Tracer
- Videokamera Olympus
- Videokamera Nedis
- Videokamera Zorki
- Videokamera Hama
- Videokamera Creative
- Videokamera Hyundai
- Videokamera Milwaukee
- Videokamera DataVideo
- Videokamera Trevi
- Videokamera Trust
- Videokamera Laserliner
- Videokamera Mio
- Videokamera Trotec
- Videokamera JVC
- Videokamera Leica
- Videokamera Uniden
- Videokamera Hitachi
- Videokamera T'nB
- Videokamera Medion
- Videokamera Linksys
- Videokamera Cisco
- Videokamera EZVIZ
- Videokamera König
- Videokamera Gembird
- Videokamera EnVivo
- Videokamera Maginon
- Videokamera Vtech
- Videokamera BenQ
- Videokamera Contour
- Videokamera Bresser
- Videokamera National Geographic
- Videokamera Voigtländer
- Videokamera Rollei
- Videokamera Xiaomi
- Videokamera Moultrie
- Videokamera Aiptek
- Videokamera Viewsonic
- Videokamera DJI
- Videokamera Voltcraft
- Videokamera Polaroid
- Videokamera Ricoh
- Videokamera TomTom
- Videokamera Soundmaster
- Videokamera Aida
- Videokamera Konica-Minolta
- Videokamera Kyocera
- Videokamera GoPro
- Videokamera Ikan
- Videokamera Cobra
- Videokamera Xblitz
- Videokamera Velleman
- Videokamera Marshall
- Videokamera FLIR
- Videokamera Energy Sistem
- Videokamera Swann
- Videokamera Zoom
- Videokamera Salora
- Videokamera Lamax
- Videokamera Overmax
- Videokamera SBS
- Videokamera Veho
- Videokamera Midland
- Videokamera Samson
- Videokamera ION
- Videokamera RCA
- Videokamera Prixton
- Videokamera Renkforce
- Videokamera Navitel
- Videokamera Hazet
- Videokamera Transcend
- Videokamera GoClever
- Videokamera Intenso
- Videokamera ARRI
- Videokamera Evolveo
- Videokamera Genius
- Videokamera Zagg
- Videokamera Airis
- Videokamera Steinberg
- Videokamera Spypoint
- Videokamera Vivitar
- Videokamera Contour Design
- Videokamera Dragon Touch
- Videokamera Vimar
- Videokamera Klein Tools
- Videokamera Oregon Scientific
- Videokamera Magellan
- Videokamera Lexibook
- Videokamera SJCAM
- Videokamera Speco Technologies
- Videokamera Prestigio
- Videokamera Blackmagic Design
- Videokamera Kogan
- Videokamera Drift
- Videokamera Insignia
- Videokamera Minox
- Videokamera Elmo
- Videokamera Agfa
- Videokamera AgfaPhoto
- Videokamera Quintezz
- Videokamera AEE
- Videokamera ATN
- Videokamera Activeon
- Videokamera Coby
- Videokamera TacTic
- Videokamera Macally
- Videokamera Naxa
- Videokamera Mamiya
- Videokamera Tronje
- Videokamera Mpman
- Videokamera Ematic
- Videokamera Minolta
- Videokamera Iget
- Videokamera RunCam
- Videokamera SeaLife
- Videokamera Sakar
- Videokamera Jobo
- Videokamera Mediacom
- Videokamera Kreator
- Videokamera Contax
- Videokamera EE
- Videokamera Traveler
- Videokamera Kaiser Baas
- Videokamera Bluetech
- Videokamera Braun Phototechnik
- Videokamera IOPLEE
- Videokamera Vupoint Solutions
- Videokamera Kitvision
- Videokamera Praktica
- Videokamera MMTC
- Videokamera Flip
- Videokamera Jay-tech
- Videokamera Brinno
- Videokamera BlackVue
- Videokamera Storex
- Videokamera Insta360
- Videokamera MD 80
- Videokamera Berger & Schröter
- Videokamera Whistler
- Videokamera Curve
- Videokamera PCE Instruments
- Videokamera DOD
- Videokamera CamOne
- Videokamera Mobius
- Videokamera ISAW
- Videokamera Beaulieu
- Videokamera Revier Manager
- Videokamera Kobian
- Videokamera FHD 1080P
- Videokamera RSC
- Videokamera Stealth Cam
- Videokamera Aqua-Vu
- Videokamera Hamlet
- Videokamera Qoltec
- Videokamera Leotec
- Videokamera Replay
- Videokamera Akaso
- Videokamera Hamilton Buhl
- Videokamera FeiyuTech
- Videokamera Best Buy
- Videokamera Rexing
- Videokamera Bolex
- Videokamera Microtek
- Videokamera Teslong
- Videokamera Izzo
- Videokamera Aquapix
- Videokamera Tactacam
Nyeste Videokamera Manualer

3 April 2025
14 Marts 2025
14 Marts 2025
14 Marts 2025
13 Marts 2025
12 Marts 2025
12 Marts 2025
12 Marts 2025
27 Februar 2025
25 Februar 2025