Guardo Action Cam 4 Manual
Guardo
Digital kamera
Action Cam 4
Læs nedenfor 📖 manual på dansk for Guardo Action Cam 4 (146 sider) i kategorien Digital kamera. Denne guide var nyttig for 17 personer og blev bedømt med 4.5 stjerner i gennemsnit af 2 brugere
Side 1/146
USER’S MANUAL
GB NL D FR

2
DECLARATION OF CONFORMITY
EN55022: 2010
EN55024: 2010
EN62479: 2010
EN60950-1: 2006/A2:2013
------------------------------- Manual/Guardo Action Cam 4/ 10-2016/V1 ----------------------------------
Copyright© GUARDO
TE-GROUP nv
Kapelsestraat 61, 2950 Kapellen - BELGIUM
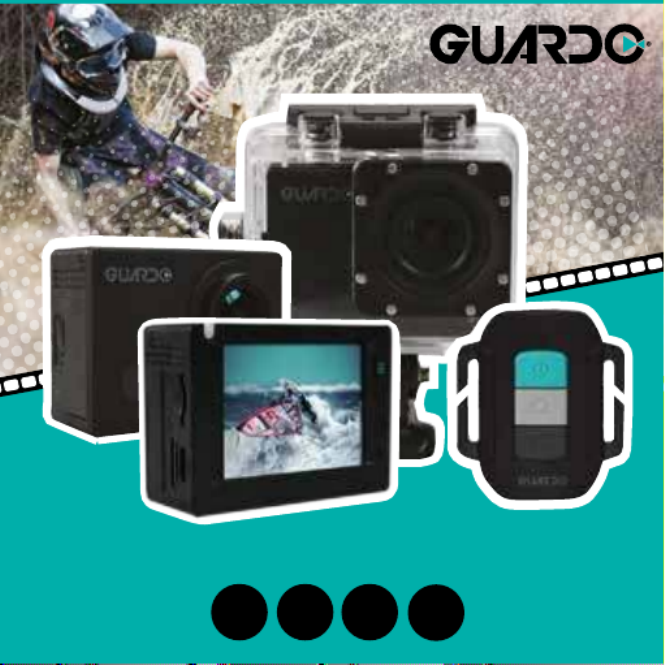
Guardo Action Cam 4
Action Camera WiFi
ETSI EN 300 328 V1.9.1 (2015-02)
ETSI EN 301 489-1 V1.9.2 (2011-09)
ETSI EN 301 489-17 V2.2.1 (2012-09)
Hereby,
Par la présente,
Company/Entreprise:
Address/Adresse:
declare that the following equipment:
déclare que le dispositif suivant :
Product name/ Nom du produit:
Product type/Type de produit:
conforms with the following safety requirements of the directives 2014/30/EU, 2014/35/EU,
2011/65/EU and 1999/5/EC. Conformity is guaranteed by the CE-symbol.
est conforme aux exigences de sécurité suivantes des directives 2014/30/EU, 2014/35/EU,
2011/65/EU et 1999/5/EC. La conformité est garanti par le symbole CE.
Thisproducthasbeentestedagainstfollowingstandardsandspecications,applyingversions
valid in October 2016.
Ceproduitaététestéparrapportauxnormesetspécicationssuivantes,appliquantlesversions
valides en Octobre 2016.
Joseph van Oosterum, CEO TE-Group NV

GB
TABLE OF CONTENTS
ILLUSTRATIONS
PARTS AND FUNCTIONS
CAMERA
LCD SCREEN
INSTALLING THE BATTERY
CHARGING THE BATTERY
USE THE WATERPROOF HOUSING
WATERDROPS & CONDENSATION
MOUNTING THE CAMERA USING THE DELIVERED MOUNTS
MOUNTS WITH ADHESIVE TAPE
A. CURVED SURFACE MOUNT
B. FLAT SURFACE MOUNT
OTHER MOUNTS
A. SEATPOST/HANDLEBAR MEDIUM
B. SAFETY PLUG
GETTING STARTED
1. PLACE MICRO SD CARD
2. TURNING ON/OFF
3. CHANGE MODE
4. DEFAULT SETTINGS
5. CHANGE MENU SETTINGS & SYSTEM SETTINGS
6. SETTING DATE AND TIME
OPERATION
OPERATION FROM REMOTE CONTROL
FULL OPERATION FROM APP
INSTALL THE APP
ENABLE WI-FI ON THE GUARDO ACTION CAM 4
MAKE A WI-FI DIRECT CONNECTION BETWEEN GUARDO ACTION
CAM 4 AND YOUR SMARTPHONE/TABLET
OPERATION
5
6
8
9
10
11
11
12
13
14
21
22
24

34
35
36
36
36
36
37
37
ADJUST GENERAL SETTINGS FOR VIDEO/PHOTO
ADJUST SETTINGS ONLY APPLICABLE IN VIDEO MODE
ADJUST SETTINGS ONLY APPLICABLE IN PHOTO MODE
MAKE VIDEO RECORDINGS
MAKE PHOTOS
VIEW/SELECT/DELETE/… VIDEOS AND PHOTOS
CONNECTING TO A COMPUTER
CONNECTING TO A 4K OR FULL HD TV VIA HDMI CABLE
DASHCAM CAR MODE
RESET
CUSTOMER SUPPORT
SOFTWARE UPDATES
GUARANTEE
LEGAL DISCLAIMER

5
ILLUSTRATIONS
Mo
d
e
2X
2X
16
3
13
11
2
5
4
12
8 7910
25
171615
18
21
22 23
19
14 24 20

6
CAMERA See illustration I
1. Record Button
2. Microphone
3. LCD display
4. Lens
5. MENU / DISPLAY Button
6. Power / Mode Button
7. MENU/WiButtonwithLEDindicator
8. Micro USB port
9. Micro SD card slot (Micro SD card optionally
available on www.guardo.be)
10. Micro HDMI port (HDMI cable optionally
available on www.guardo.be)
11. Recording/Status (LED) Indicator
12. Recording/Battery status (LED) indicator
LCD SCREEN See illustration II
A Photo Mode
1. Photo mode
2. Burst mode
3. Photo Resolution
4. Photo Quality
5. Photo counter: displays
number of photos
left to capture
6. Battery status
13. Battery cover
14. Micro USB charging cable
15. RF Remote Control
16. Waterproof case
17. 2xatsurfacemount+acc.
18. 2xcurvedsurfacemount+acc.
19. Seatpost/Handlebar Medium
20. Pivot/Side mount
21. Elastic strap
22. Skeleton back door
23. Protective cover frame
24. Lens cover
25. 2x Battery
PARTS AND FUNCTIONS
1 2
6
54 3

7
B Video Mode
1. Video mode
2. Video quality
3. Video framerate
4. Video resolution
5. Video timer: displays
hours and minutes
that still can be
used for recording
6. Battery status
C Playback Mode
1. Video folder
2. Photo folder
3. Dashcam (car) folder
1 3
6
52 4
1
3
2

9
To charge the battery:
1. Make sure the Guardo Action Cam 4 is turned off and that the battery is installed.
2. Connect the micro USB cable (14) to the Micro USB Port (8) of the Guardo Action
Cam 4.
3. Connect the other end of the micro USB cable (14) to the USB port of your computer or
the optional Guardo USB home charging device, optionally available on www.guardo.be.
4. During charging, the blue LED indicator (11) at the front of the camera will light
continuously. When charging is completed the blue LED indicator (11) will turn off.
Note:
• The camera can be used while charging.
• When the battery runs out of power, the Guardo Action Cam 4 will turn off but will
save the part that was recorded until the camera turned off.
• When the camera is ON but not in use it will automatically turn off after 5 min. This is
the default setting and can NOT be changed in the camera’s menu.
• WhentheblueLEDindicatorwillashinsteadoflightcontinuously,thismeansthat
there is no battery inside the camera.
• ThedeliveredmicroUSBcable(14)offersfastandefcientchargingbutisalsoused
for synchronizing and data transfer with your PC.
• Extra charging devices/accessories can be ordered from our website: www.guardo.be.
• If the video camera is not used for a long time, remove and store the battery properly
and periodically recharge it to ensure battery performance.
CHARGING THE BATTERY

11
WATERDROPS & CONDENSATION
Regulary check the lens to see if waterdrops or condensation/fog have appeared as these
may be shown on your footage.
To remove/avoid waterdrops and condensation/fog, these tips might help :
• Spit or lick the port or housing lens. The water will sheet off instead of beading up!
• Apply a water repellent and anti-beading/ anti-fog coating or wax (such as ‘RAIN-X)
• Make sure the inside of the housing and camera is as dry as possible (e.g. dry hands, no
sweat) to prevent fog/condensation
• Don’t leave the camera in the direct sun or near heat and don’t leave it ON (generating
heat) when not necessary
• Open the fogged camera housing and carefully wipe off the fog inside, then close it again
• Try to avoid too large temperature differences as these may cause condensation/fog
Anti-Fog inserts are optionally available on www.guardo.be.
Note:‘Mufed’soundisinevitablewhenusingthecamerawiththewaterproofhousing.
MOUNTING THE CAMERA USING THE
DELIVERED MOUNTS
Attaching the camera to any mount, is always done in the same way:
1. Remove the screw from the mount.
2. Place the camera on the mount with the screw.
3. Rotate/Tilt the camera into the desired shooting angle and fasten with the tightening screw.

12
MOUNTS WITH ADHESIVE TAPE
How to apply the adhesive tape (IMPORTANT!)?
• Apply the tape 24 hours before use in a room temperature around 21°C
• Make sure the surface you want to apply the tape on is smooth: the tape will not
adhere properly on an embossed or porous surface.
• Clean and dry the surface before application.Anycleanerthatwillnotleavealmor
oily surface can be used!
• Pressthetapeentirelyandrmlyintoplace!
How to remove the adhesive tape?
The adhesive tape can be removed by using a hairdryer: the heated air will loosen the
adhesive part.
Remove the residue with a cleaner or with alcohol.
A. CURVED SURFACE MOUNT
Stick the 3M VHB tape to the mount and place/stick the mount on a curved surface.
Note: this mount can also be used with the remote control’s strap!

13
B. FLAT SURFACE MOUNT
Placethemountonaatsurface,suchasasnowboard,usingthe3MVHBtape.
OTHER MOUNTS
A. SEATPOST/HANDLEBAR MEDIUM
Turn the tightening screws to enlarge
the opening and to t the seatpost/
handlebar/… in between the openings
of the mount. Turn the screws to secure
the mount.
B. SAFETY PLUG
Somemountsarettedwithasafetyplug,anadditionalsecurityfeature
that helps to prevent the fastener of the mount to come loose! Make sure
this safety plug is securely attached when using it for extreme sports
in which many shocks, sudden (up and down) movements and rotations
occur such as motocross, snowboarding, mountain biking, etc …

16
4. DEFAULT SETTINGS
The Guardo Action Cam 4 can be
set (resolution, video mode, camera
mode, …) according to the purpose
for which it is used and according
to your own preferences! When
the camera is turned on for the 1st
time, the following information will
appear on the LCD display, this is
the default setting:
5. CHANGE MENU SETTINGS
& SYSTEM SETTINGS
The LCD display on the back of the camera makes it able to control the camera and the
settings, live preview and play back videos and photos!
Change menu settings
How? In video/car/photo/playback mode:
• Long press the MENU button (5 or 7) to open the menu.
• UsetheWiButton(7)andMODEButton(6)tonavigatethroughthemenu.
• Press Record Button (1) to open the submenu.
• UsetheWiButton(7)andMODEButton(6)tonavigatethroughthesubmenu.
• Press Record Button (1) to select the desired setting.
• To close the menu, long press the MENU button (5 or 7).
Note: When using the waterproof casing, the menu can only be opened and closed with
the MENU/Wi Button (7).
For example: to set ‘White balance’ to ‘Daylight’ in video mode, please follow these steps:
1. Turn the Guardo Action Cam 4 ON.
2. Long press the MENU button (5 or 7)
3. PresstheWiButton(7)until‘WhiteBalance’
4. Press Record Button (1)
5. PresstheWiButton(7)until‘Daylight’
6. Press Record Button (1) to select ‘Daylight’. White balance is now set to ‘Daylight’.
7. Long press the MENU button (5 or 7) to exit the menu.
1 3
6
52 4
18
Menu Photo Mode:
Resoluon
Photo resoluon Dierent sengs
Quality
Photo Quality Super Fine
Fine
Normal
Metering
The way in which the camera
determines the exposure
Center
Mul
Spot
White Balance
Adjustment of colours
and light
Auto
Daylight
Cloudy
Fluor H
Tungsten
ISO
Light sensivity Dierent sengs
Exposure
Luminance adjustment Dierent sengs
Self-Timer
Delays the shuer release O
2S
10S
Double
Burst Mode
A certain amount of
photos are captured in quick
succession.
O
3 photos
5 photos
10 photos
Connue burst
Contrast
Sharpness & Contrast Hard
Normal
So
Eect
Special eects and lters
Normal
B&W
Sepia
Vivid
Natural
Negave
Warm
Cold
Red
Green
Blue
Low Light Mode
O
On
Stabilizer
O
On
WDR
O
On
Digital Zoom
Zoom in or out O
On

19
Menu Playback mode:
When entering Playback Mode, this window will be shown :
VIDEO = your video recordings
JPG = your photos
CAR = your dashcam recordings
•UsetheWiButton(7)andRecordButton(1)toselectthedesiredfolder
•PresstheWiButton(7)toaccessnextphoto/video.
Playback feature:
• Press the Record button (1) to start/pause/play the video
• Press the MENU button (5) to stop play video
• Press the MENU button (5) to access below settings:
Lock
Single
Lock All
Unlock All
Delete...
Single
All
Slide Show
Start
Interval
Transion
Repeat
Rotate...
Rotate
Save
Back
Resize...
8M
5M
3M
1M
Change system settings:
In video/photo/playback mode:
• Long press MENU button (5 or 7) to open the menu
• Press Mode Button (6) to go to the settings menu
•UsetheWiButton(7)andMODEButton(6)tonavigatethroughthemenu
• Press Record Button (1) to open the submenu
•UsetheWiButton(7)andMODEButton(6)tonavigatethroughthesubmenu
• Press Record Button (1) to select the desired setting

21
6. SETTING DATE AND TIME
To set correct date and time, please follow these steps:
• Long press MENU button (5 or 7) to open the menu
• Press Mode button (6) to switch to the system settings menu
• UsetheWiButton(7)andMODEButton(6)until‘Date&Time’
• Press Record Button (1) to select ‘Date & Time’
• AdjustdateandtimebyusingtheWiButton(7)andMODEButton(6)(changedigits)
and the Mode Button (6) (swap to month, date, hour, …)
Start video recording:
• Make sure the Guardo Action Cam 4 is turned on and in Video Mode.
• Press the Record Button (1) once. The red LED indicator (12) and ‘REC’ will start
ashingslowlyandatimerwillappear=startofrecording.
Note:
• Shooting view angles are slightly different in different working modes of the video
camera.
• Topausethevideorecording,presstheMENU/WiButton(7)1xshortly.
Stop video recording:
• Press the Record Button (1) once again to stop recording. The red LED indicator (12)
and the timer will turn off.
Note:
• When the memory card is full, the Guardo Action Cam 4 will automatically stop
recording. Your recordings will be saved, before the camera turns off! When 0:00
ashesonyourscreen,thisindicatesyourSDcardisfullandrecordingisnolonger
possible. You need to empty or format your SD card (via computer or camera) again.
This of course after having copied/saved your photos/footage from the card to another
device such as your computer’s hard disk. See ‘Format SD Card’.
• When recording continuously over a longer period of time (e.g. 2 hours non-stop), the
footage saved on your Micro SD Card will be split in different sections, 1 section =
max. 4GB/45 min.
OPERATION

22
Make a photo:
• Make sure the Guardo Action Cam 4 is turned on and in Photo Mode.
• Press the Record Button (1) once. You will hear a beep and the red LED indicator (12)
will light up once = taking a photo.
Note:OnlywhenyouhaveheardthebeepandtheredLEDIndicator(12)hasashedthe
photo was really taken.
Picture in Video (PIV)
The Guardo Action Cam 4 allows you to make photos while making a video recording!
• InVideoMode,goto“Video+Picture”andselect“ON”.
• Start recording a video as described above
• ‘Capturedone’willappearonthedisplaytoconrmyourphotoistakeneach5seconds
automatically!
Note:
This feature will not work in 4K and 2.7K settings.
Digital Zoom
The action cam allows you to zoom in and out with the MENU button (5) next to the
display while making a photo or recording a video.
Note:
• During video recording or making a picture, the digital zoom may affect the image quality.
• This feature will not work in 4K and 2.7K settings.
USE REMOTE CONTROL WITH CAMERA
The remote control can be used for
video recording, for taking pictures and
for turning the Guardo Action Cam 4 ON
and OFF.
OPERATION FROM REMOTE CONTROL

25
MAKE A WI-FI DIRECT CONNECTION BETWEEN GUARDO ACTION
CAM 4 AND YOUR SMARTPHONE/TABLET
• Enable Wi-Fi on your smartphone or tablet and let it search for the Wi-Fi Direct
network ‘Guardo Action Cam 4_xxxxxx’.
• SelectthisWi-FiDirectnetwork.Whenyouconnect it thersttime,youneedto
enter the password: “0987654321”. ‘Connected’ will now appear on the display of
your smartphone or tablet.
• Thered LEDindicator oftheWi-FiButton will no longerash butwill stay red
during connection.
• When connection is lost, it will try to auto-reconnect. If not, then manually re-
connect again.
Note:
• When the battery capacity is too low, Wi-Fi cannot work. Please recharge the battery rst!
• During Wi-Fi connection and connection with a smartphone/tablet, the camera will turn
warm. This is normal and not a malfunction!
• A Micro SD Card needs to be inserted before you can make a Wi-Fi connection.
• Wi-Fi will automatically be disabled on your Guardo Action Cam when no device
(smartphone/tablet) is connected within 2 min. to save battery power.
• The password and network name can be changed by the user in the App.
• Date/Time will be set automatically by App and device when replacing the battery.
OPERATION
Before you start using the app make sure a micro SD card is inserted into the camera!
Press the App icon on your Android or Apple iOs device .
Your device will make a connection with the camera and a live video preview will appear!

29
ACTIVATE TIMELA PSE MODE
Press (Apple) or (Android) on your start
screen and select ‘Timelapse mode’.
You can now choose from:
* Video mode: the icon will appear on your
start screen indicating that Timelapse is ON.
* Capture mode: the icon will appear on your
start screen indicating that Timelapse is ON.
SET TIMELA PSE INTER VAL / DUR ATION
Press (Apple) or (Android) on your start
screen and select ‘Timelampse interval’.
You can now choose from verious settings.
If Timelapse Interval is ON, you can also choose
the duration of the interval.
Note: In time-lapse, no sound will be recorded.
SET WHITE BALANCE
Press (Apple) or (Android) on your start
screen and press ‘White Balance’.
You can now choose from:
According to your selected white balance, one of the
following icons will appear on your start screen:
Auto Daylight Cloudy Fluorescent Incandescent

30
SET FREQUENCY (Normal for EU is 50Hz)
Press (Apple) or (Android) on your start
screen and press ‘Frequency.
You can now choose from:
FO RMAT SD CARD ON CAMERA
Press (Apple) or (Android) on your start
screen and press ‘Format Camera’. Press ‘yes’ to
format the Micro SD Card in your camera.
Note:
Timelapse, Upside Down Recording and Slow-Motion (see below) CANNOT be set
simultaneously. As soon as you set one of these, the others will appear in a grey color and can
no longer be selected. In case you do, a pop-up screen will warn you to turn off the other option.
ADJUST SETTINGS ONLY APPLICABLE IN VIDEO MODE
SET SLOW-MOTION FUNCTION
Press (Apple) or (Android) on your start screen and press ‘Slow-Motion Function’
to turn Slow Motion ON/OFF.
The icon will appear on your start screen indicating that Slow Motion is ON.
Note: - For best slow-motion results we suggest to use ‘HD 720p, 120 fps’.
- In slow-motion, no sound will be recorded!
SET UPSIDE DOWN RECORD ING
Press (Apple) or (Android) on your start screen and press ‘Turn upside down
recording’ to turn this function ON/OFF.
The icon will appear on your start screen indicating that upside down recording is ON.
Produkt Specifikationer
| Mærke: | Guardo |
| Kategori: | Digital kamera |
| Model: | Action Cam 4 |
Har du brug for hjælp?
Hvis du har brug for hjælp til Guardo Action Cam 4 stil et spørgsmål nedenfor, og andre brugere vil svare dig
Digital kamera Guardo Manualer

16 August 2024
5 August 2024
2 August 2024
Digital kamera Manualer
- Digital kamera Denver
- Digital kamera Sony
- Digital kamera Canon
- Digital kamera Samsung
- Digital kamera GE
- Digital kamera Panasonic
- Digital kamera Epson
- Digital kamera Technaxx
- Digital kamera HP
- Digital kamera Easypix
- Digital kamera Motorola
- Digital kamera Bushnell
- Digital kamera Toshiba
- Digital kamera Fujifilm
- Digital kamera Nikon
- Digital kamera Kodak
- Digital kamera Olympus
- Digital kamera Casio
- Digital kamera Trust
- Digital kamera JVC
- Digital kamera Geonaute
- Digital kamera Leica
- Digital kamera Medion
- Digital kamera Gembird
- Digital kamera Powerfix
- Digital kamera EnVivo
- Digital kamera Maginon
- Digital kamera Fisher-Price
- Digital kamera Vtech
- Digital kamera BenQ
- Digital kamera Sigma
- Digital kamera Pentax
- Digital kamera Rollei
- Digital kamera Xiaomi
- Digital kamera Aiptek
- Digital kamera Polaroid
- Digital kamera Ricoh
- Digital kamera TomTom
- Digital kamera Kyocera
- Digital kamera GoPro
- Digital kamera FLIR
- Digital kamera Lamax
- Digital kamera Veho
- Digital kamera Renkforce
- Digital kamera General Electric
- Digital kamera HTC
- Digital kamera GoClever
- Digital kamera Genius
- Digital kamera Spypoint
- Digital kamera Vivitar
- Digital kamera Oregon Scientific
- Digital kamera Lexibook
- Digital kamera Pulsar
- Digital kamera Drift
- Digital kamera Minox
- Digital kamera Beha-Amprobe
- Digital kamera Agfa
- Digital kamera AgfaPhoto
- Digital kamera Quintezz
- Digital kamera A-Rival
- Digital kamera AEE
- Digital kamera Apeman
- Digital kamera Argus
- Digital kamera Tevion
- Digital kamera Targa
- Digital kamera Fuji
- Digital kamera Minolta
- Digital kamera Ingo
- Digital kamera Dnt
- Digital kamera Wanscam
- Digital kamera SeaLife
- Digital kamera Sakar
- Digital kamera Jobo
- Digital kamera Odys
- Digital kamera Red
- Digital kamera Digital Blue
- Digital kamera Traveler
- Digital kamera Mustek
- Digital kamera Plawa
- Digital kamera BML
- Digital kamera RadioShack
- Digital kamera Liquid Image
- Digital kamera Praktica
- Digital kamera Somikon
- Digital kamera Brinno
- Digital kamera BlackVue
- Digital kamera Storex
- Digital kamera Insta360
- Digital kamera Bolyguard
- Digital kamera Voigtlaender
- Digital kamera WASPcam
- Digital kamera Revue
- Digital kamera Kompernass - Lidl
- Digital kamera Guide
- Digital kamera Umax
- Digital kamera Magpix
- Digital kamera Konig Electronic
- Digital kamera Sipix
- Digital kamera Nytech
- Digital kamera Yakumo
- Digital kamera Konica
- Digital kamera Duramaxx
Nyeste Digital kamera Manualer

15 Januar 2025
15 Januar 2025

15 Januar 2025
12 Januar 2025
12 Januar 2025
12 Januar 2025

11 Januar 2025

11 Januar 2025
11 Januar 2025
11 Januar 2025