NEC P547UL Manual
Læs nedenfor 📖 manual på dansk for NEC P547UL (174 sider) i kategorien Beamer. Denne guide var nyttig for 38 personer og blev bedømt med 4.5 stjerner i gennemsnit af 2 brugere
Side 1/174

Projector
P627UL/P547UL
User’s Manual
Model No.
NP-P627UL/NP-P547UL

i
Introduction .............................................................................................................................................. iii
Important Information ....................................................................................................................... iv
1. Check the product overview, supplied items and part names .................................... 1
1-1. Introduction to the Projector ............................................................................................................ 1
1-2. What’s in the Box? ................................................................................................................................. 4
1-3. Part Names of the Projector .............................................................................................................. 5
1-4. Part Names of the Remote Control .............................................................................................. 10
2. Projecting an Image (Basic Operation) ................................................................................. 15
2-1. Flow of Projecting an Image .......................................................................................................... 15
2-2. Connecting Your Computer/Connecting the Power Cord .................................................. 16
2-3. Turning on the Projector ................................................................................................................. 18
2-4. Selecting a Source ............................................................................................................................. 20
2-5. Adjusting the Picture Size and Position ..................................................................................... 22
2-6. Correcting Keystone Distortion [KEYSTONE] ........................................................................... 28
2-7. Optimizing Computer Signal Automatically ............................................................................ 32
2-8. Turning Up or Down Volume ......................................................................................................... 32
2-9. Turning o the Projector ................................................................................................................. 33
2-10. When Moving the Projector ......................................................................................................... 34
3. Convenient Features ....................................................................................................................... 35
3-1. Turning o the Image and Sound ................................................................................................ 35
3-2. Freezing a Picture ............................................................................................................................... 35
3-3. Magnifying a Picture ......................................................................................................................... 36
3-4. Changing Eco Mode/Checking Energy-Saving Eect .......................................................... 37
3-5. Correcting distortion of projected image ................................................................................. 39
3-6. Preventing the Unauthorized Use of the Projector [SECURITY] ........................................ 45
4. Using On-Screen Menu ................................................................................................................... 48
4-1. Using the Menus ................................................................................................................................ 48
4-2. List of Menu Items ............................................................................................................................. 50
4-3. Menu Descriptions & Functions [INPUT] ................................................................................... 54
4-4. Menu Descriptions & Functions [ADJUST] ................................................................................ 55
4-5. Menu Descriptions & Functions [SETUP] ................................................................................... 63
4-6. Menu Descriptions & Functions [INFO.] ..................................................................................... 80
4-7. Menu Descriptions & Functions [RESET] ................................................................................... 82
Table of Contents

ii
Table of Contents
5. Making Connections ........................................................................................................................ 83
5-1. Connecting Your Computer ........................................................................................................... 83
5-2. Connecting to a DVD player and other AV devices ............................................................... 86
5-3. Connecting to a Wired LAN ............................................................................................................ 88
5-4. Connecting to a Wireless LAN (Optional: NP05LM series) ................................................... 89
5-5. Connecting to a HDBaseT transmission device (sold commercially) .............................. 92
5-6. Portrait projection (vertical orientation) ................................................................................... 94
6. Using the VIEWER ............................................................................................................................. 97
6-1. Things you can do with the VIEWER ............................................................................................ 97
6-2. Projecting the pictures on a USB memory (basic operation) ............................................. 98
6-3. Slide screen operations .................................................................................................................. 102
6-4. File list screen operations .............................................................................................................. 103
6-5. Option menu ..................................................................................................................................... 105
6-6. Changing the logo data (background image) ....................................................................... 106
7. Connecting to a Network ........................................................................................................... 108
7-1. Things you can do by connecting the projector to a network ........................................ 108
7-2. Connecting to MultiPresenter ..................................................................................................... 109
7-3. NETWORK SETTINGS ....................................................................................................................... 111
7-4. HTTP server function ...................................................................................................................... 119
8. Maintenance .................................................................................................................................... 123
8-1. Cleaning the Lens ............................................................................................................................ 123
8-2. Cleaning the Cabinet ...................................................................................................................... 124
9. Appendix ............................................................................................................................................ 125
9-1. Setting Up the Screen and the Projector ................................................................................. 125
9-2. Compatible Input Signal List ........................................................................................................ 129
9-3. Specications .................................................................................................................................... 131
9-4. Cabinet Dimensions ........................................................................................................................ 134
9-5. Pin assignments and signal names of main terminals ........................................................ 135
9-6. PC Control Codes and Cable Connection ................................................................................ 137
9-7. About the ASCII Control Command .......................................................................................... 139
9-8. Troubleshooting ............................................................................................................................... 141
9-9. Indicator Message ............................................................................................................................ 144
9-10. Setting the date and time in the projector .......................................................................... 148
9-11. Troubleshooting Check List ....................................................................................................... 150
9-12. REGISTER YOUR PROJECTOR! (for residents in the United States, Canada, and
Mexico) ................................................................................................................................................... 152

iii
Thank you for purchasing the NEC projector.
This projector can be connected to computers, video devices, etc. to project images sharply onto
a screen.
Please read this manual carefully before using your projector and keep the manual handy for future
reference.
Read this user’s manual if you have any doubts about operation or if you believe the projector may
be faulty.
Ver. 1 8/22
NOTES
(1) The contents of this user’s manual may not be reprinted in part or whole without permission.
(2) The contents of this user’s manual are subject to change without notice.
(3) Great care has been taken in the preparation of this user’s manual; however, should you notice
any questionable points, errors or omissions, please contact us.
(4) The image shown in this manual is indicative only. If there is inconsistency between the image
and the actual product, the actual product shall govern.
(5) Notwithstanding article (3) and (4), we will not be responsible for any claims on loss of prot or
other matters deemed to result from using this device.
(6) This manual is commonly provided to all regions so they may contain descriptions that are
pertinent for other countries.
Introduction
Important Information
vii
Installing suspended from the ceiling
CAUTION
• Should special works be required, for example to suspend the projector from
the ceiling, consult your dealer.
Never try to install the projector yourself in such cases. The projector could
drop and cause injury.
Suspending the projector from the ceiling requires sucient ceiling strength
to support the projector, and the building standards laws in your particular
country must be followed.
It is also necessary to take measures to prevent the projector from dropping
in anticipation of a malfunction occurring in the projector, ceiling mounting
device and installation location.
• When installed suspended from the ceiling, etc. do not hang from the projec-
tor. The projector could drop and cause injury.
• When installing suspended from the ceiling, use a power outlet that is within
reach so the power cord can be easily plugged and unplugged.
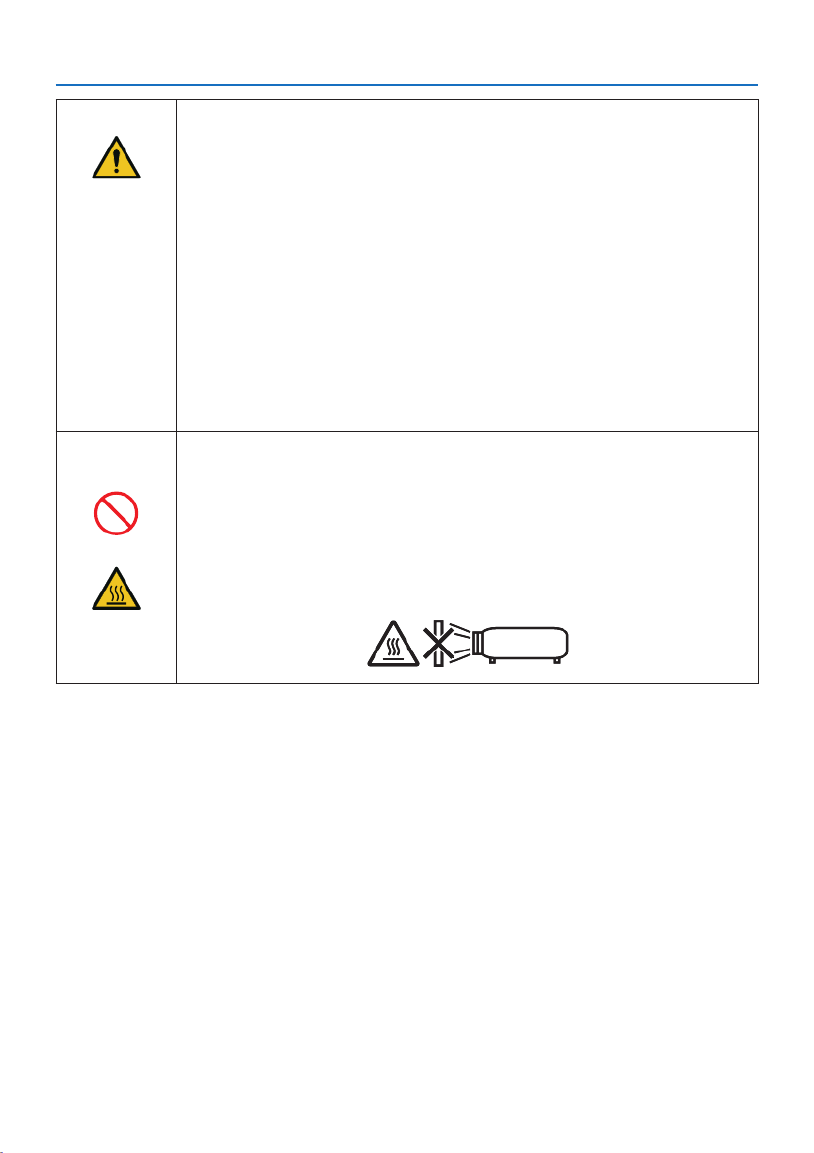
Do not place objects in front of the lens while the projector is
operating.
PROHIBITED
• Do not leave the lens cap on the lens while the projector is operating. The
lens cap could get hot and be warped.
• Do not place objects in front of the lens that obstruct the light while the
projector is operating. The object could get hot and be broken or catch re.
• The below pictogram indicated on the cabinet means the precaution for
avoiding to place objects in front of the projector lens.
CAUTION
FOR HIGH
TEMPERATURE

Important Information
viii
About the projector’s light source
PROHIBITED
• Do not look into the projector’s lens.
Strong light that could damage your eyes is projected when the projector is
operating. Be especially careful when children are around.
• Do not look at the projected light using optical devices (magnifying glasses,
reectors, etc.). Doing so could result in vision impairment.
• Check that there is no one looking at the lens within the projection range
before turning on the projector.
• Do not allow children to operate the projector alone. When a child is operating
the projector an adult should always be present and watch the child carefully.
• The below pictogram, that is indicated near the lens on the cabinet, describes
this projector is categorized in the risk group 2 of IEC/EN 62471-5:2015. As
with any bright light source, do not stare into the beam, RG2 IEC/EN 62471-
5:2015.
When cleaning the projector
PROHIBITED
• Do not use ammable gas sprays to remove dust from the lens, cabinet, etc.
Doing so could lead to re.
Do not use in high security locations.
PROHIBITED
• Usage of the product must not be accompanied by fatal risks or dangers that,
could lead directly to death, personal injury, severe physical damage or other
loss, including nuclear reaction control in nuclear facility, medical life support
system, and missile launch control in a weapon system.
Important Information
x
Handling batteries
PROHIBITED
• Handle batteries with caution. Failure to do so could lead to re, injury or
contamination of the surroundings.
- Do not short-circuit or take apart batteries or dispose of them in ames.
- Do not use batteries other than those specied.
- Do not use new batteries together with old ones.
- When inserting batteries, pay attention to the polarities (+ and − directions),
and be sure to insert them as indicated.
• Contact your dealer or local authorities when disposing of batteries.
About the vents
PROHIBITED
• Do not obstruct the projector’s vents. Also, do not place such soft objects as
paper or cloths underneath the projector. Doing so could lead to re.
Leave sucient space between the place where the projector is installed and
its surroundings (as a general rule, at least 10 cm/4 inches for the intake vent,
20 cm/8 inches for the exhaust vent).
• Do not touch the exhaust vent area while projecting or immediately after
projecting images. The exhaust vent area may be hot at this time and touch-
ing it could cause burns.
CAUTION
FOR HIGH
TEMPERATURE
Moving the projector
PROHIBITED
• When moving the projector, do not hold the lens section. The focus ring
could turn, causing the projector to drop and resulting in injury. Also, if you
put your hand on the gap between the cabinet and the lens, the projector
may be damaged, falling and causing injury.
Inspecting the projector and cleaning the inside
REQUIRED
• Consult with your dealer about once per year for cleaning of the inside of the
projector. Dust could accumulate inside of the projector if it is not cleaned
for extended periods of time, leading to res or malfunction.
Avoid locations with extreme temperatures and humidity
REQUIRED
• Failure to do so could lead to re or electric shock or damage to the projector.
The usage environment for this projector is as follows:
- The operating temperature: 0°C to 40°C / 32°F to 104°F / humidity: 20 to
80% (without condensation)
- The storage temperature: -10°C to 50°C / 14°F to 122°F / humidity: 20 to
80% (without condensation)

Important Information
xiii
Laser light radiation range
The gure below shows the maximum radiation range of the laser light.
Horizontal angle (unit: degree)
Zoom
Lens position
Right most Center (Reference value) Left most
HR HC HL
Wide 33.0 22.3 33.0
Tele 21.8 14.2 21.8
HC
HR
HL
HC
Left
Right
Vertical angle (unit: degree)
Zoom
Lens position
Upper most Center (Reference value)
VU VC
Wide 29.5 14.4
Tele 19.2 9.0
VC
VC
VU
Upper
Important Information
xvi
Disposing of your used product
In the European Union
EU-wide legislation as implemented in each Member State requires that used electrical
and electronic products carrying the mark (left) must be disposed of separately from
normal household waste. This includes the projector or electrical accessory, such as a
power cord. When you dispose of such products, please follow the guidance of your
local authority and/or ask the shop where you purchased the product.
After collecting the used products, they are reused and recycled in a proper way. This
eort will help us reduce the wastes as well as the negative impact to the human health
and the environment at the minimum level.
The mark on the electrical and electronic products only applies to the current European
Union Member States.
Outside the European Union
If you wish to dispose of used electrical and electronic products outside the European
union, please contact your local authority and ask for the correct method of disposal.
For EU: The crossed-out wheeled bin implies that used batteries should not be put to
the general household waste! There is a separate collection system for used batteries,
to allow proper treatment and recycling in accordance with legislation.
According the EU directive 2006/66/EC, the battery can’t be disposed improperly. The battery
shall be separated to collect by local service.
(for Germany only)
Machine Noise Information Regulation - 3. GPSGV,
The highest sound pressure level is less than 70 dB (A) in accordance with EN ISO 7779.
Information of the AUDIO OUT mini jack
The AUDIO OUT mini jack does not support earphone/headphone terminal.
Turkish WEEE information relevant for Turkish market
AEEE Yönetmeliğine Uygundur.

Important Information
xvii
Cautions for ensuring the projector’s performance
• Do not install in places subject to vibrations or shocks.
If installed in places where the vibrations from power sources and the like are conveyed, or in
vehicles or on vessels, etc. the projector could be aected by vibrations or shocks that may dam-
age internal parts and lead to malfunction.
Install in a place not subject to vibrations or shocks.
• Do not install near high voltage power lines or power sources.
The projector may be aected by interference if it is installed near a high voltage power line or
a power source.
• Do not install or store in such places as those described below. Doing so could lead to malfunc-
tion.
- Places where strong magnetic elds are generated
- Places where corrosive gases are generated
• If intense light like laser beams enters from the lens, it could lead to malfunction.
• Consult your dealer before using in places where much cigarette smoke or dust is present.
• When the same still image is projected for a long period of time with a computer, etc. the pattern
of the image may remain on the screen after the projection is stopped, but it will disappear after
a while. This happens due to the properties of liquid crystal panels, and is not a malfunction. We
recommend using a screensaver on the computer side.
• When using the projector at altitudes of about 5500 feet/1600 meters or higher, be sure to set
the [FAN MODE] to [HIGH ALTITUDE]. If not, the inside of the projector may get hot, leading to
malfunction.
• When the projector is used at high altitudes (places where the atmospheric pressure is low), it
may be necessary to replace the optical parts (light source, etc.) sooner than usual.
• About moving the projector
- Be sure to mount the included lens cap to protect the lens from scratches.
- Do not subject the projector to vibrations or strong shocks.
The projector could be damaged otherwise.
• Do not use the tilt feet for purposes other than adjusting the projector’s tilt.
Improper handling, such as carrying the projector by the tilt feet or using it leaned against a wall,
could lead to malfunction.
• Do not touch the surface of the projection lens with bare hands.
Fingerprints or dirt on the surface of the projection lens will be enlarged and projected on the
screen. Do not touch the surface of the projection lens.
• Do not unplug the power cord from the projector or the power outlet while projecting. Doing so
could cause deterioration of the projector’s AC IN terminal or power plug contact. To interrupt
the AC power supply while images are being projected, use a breaker, etc.
• About handling of the remote control
- The remote control will not work if the projector’s remote signal sensor or the remote control’s
signal transmitter is exposed to strong light or if there are obstacles between them that obstruct
the signals.
- Operate the remote control from within 7 meters from the projector, pointing it at the projec-
tor’s remote signal sensor.
- Do not drop the remote control or handle it improperly.
- Do not let water or other liquids get on the remote control. Should the remote control get wet,
wipe it o immediately.
- Avoid using in hot and humid places as far as possible.
- When planning not to use the remote control for long periods of time, remove both batteries.
Produkt Specifikationer
| Mærke: | NEC |
| Kategori: | Beamer |
| Model: | P547UL |
Har du brug for hjælp?
Hvis du har brug for hjælp til NEC P547UL stil et spørgsmål nedenfor, og andre brugere vil svare dig
Beamer NEC Manualer

12 Januar 2025
18 December 2024
10 Oktober 2024
4 Oktober 2024
21 September 2024
14 September 2024
14 September 2024
1 September 2024
26 August 2024
24 August 2024
Beamer Manualer
- Beamer Acer
- Beamer Sony
- Beamer Canon
- Beamer Samsung
- Beamer Panasonic
- Beamer Philips
- Beamer Lenco
- Beamer OK
- Beamer Derksen
- Beamer LG
- Beamer Mitsubishi
- Beamer Sharp
- Beamer Epson
- Beamer Technaxx
- Beamer Smart
- Beamer HP
- Beamer Sanyo
- Beamer D-Link
- Beamer Asus
- Beamer Toshiba
- Beamer Pyle
- Beamer Klarstein
- Beamer Kodak
- Beamer InFocus
- Beamer Lenovo
- Beamer Adj
- Beamer Optoma
- Beamer Da-Lite
- Beamer Hama
- Beamer Auna
- Beamer Casio
- Beamer Hisense
- Beamer Maxell
- Beamer Smartwares
- Beamer Blaupunkt
- Beamer JVC
- Beamer Leica
- Beamer Hitachi
- Beamer Medion
- Beamer 3M
- Beamer BenQ
- Beamer Acco
- Beamer Anker
- Beamer Aiptek
- Beamer Viewsonic
- Beamer Dell
- Beamer Vivitek
- Beamer Polaroid
- Beamer Ricoh
- Beamer Stairville
- Beamer OKI
- Beamer Reflecta
- Beamer Nebula
- Beamer Salora
- Beamer Vogel's
- Beamer Overmax
- Beamer RCA
- Beamer Prixton
- Beamer Renkforce
- Beamer Christie
- Beamer Eurolite
- Beamer Yaber
- Beamer XGIMI
- Beamer GPX
- Beamer Dahua Technology
- Beamer Cameo
- Beamer Kogan
- Beamer Barco
- Beamer Planar
- Beamer Speaka
- Beamer ASK Proxima
- Beamer Eiki
- Beamer Naxa
- Beamer Vankyo
- Beamer Emtec
- Beamer Promethean
- Beamer Odys
- Beamer Laserworld
- Beamer Ibm
- Beamer La Vague
- Beamer Tzumi
- Beamer EKO
- Beamer MicroVision
- Beamer Elite Screens
- Beamer Celexon
- Beamer Fun Generation
- Beamer PLUS
- Beamer Futurelight
- Beamer Varytec
- Beamer Ultimea
- Beamer Dracast
- Beamer Dukane
- Beamer Dream Vision
- Beamer Knoll
- Beamer DTS
- Beamer Touchjet
- Beamer Boxlight
- Beamer AAXA Technologies
- Beamer Miroir
- Beamer Mimio
- Beamer AWOL Vision
- Beamer Smart Tech
- Beamer Atlantis Land
- Beamer KickAss
- Beamer Microtek
- Beamer Panamorph
Nyeste Beamer Manualer

5 Marts 2025
5 Marts 2025

30 Januar 2025
30 Januar 2025
30 Januar 2025
30 Januar 2025
30 Januar 2025
30 Januar 2025

29 Januar 2025
13 Januar 2025