Owon OW16A Manual
Owon
Multimeter
OW16A
Læs nedenfor 📖 manual på dansk for Owon OW16A (51 sider) i kategorien Multimeter. Denne guide var nyttig for 73 personer og blev bedømt med 4.5 stjerner i gennemsnit af 2 brugere
Side 1/51

OW16 Series Digital Multimeter
User Manual
OW16A
OW16B
www.owon.com.cn

Dec. 8 e201 dition V1. 0.2
Copyright © LILLIPUT Company. All rights reserved.
The LILLIPUT's products are under the protection of the patent rights, including ones which have
already obtained the patent rights and those which are applying for. The information in this manual
will replace all materials published.
The information in this manual was correct at the time of printing. However, LILLIPUT will continue to
improve products and reserves the rights to change specification at any time without notice.
is the registered trademark of the LILLIPUT Company.
Fujian LILLIPUT Optoelectronics Technology Co., Ltd.
No. 19, Heming Road
Lantian Industrial Zone, Zhangzhou 363005 P.R. China
Tel: +86- -596 2130430 Fax: +86- - 596 2109272
Web:
www.owon.com.cn
E-m ail: info@owon.com.cn

General Warranty
OWON warrants that the product will be free from defects in materials and workmanship
for a period of from the date of purchase of the product by the original purchaser 1 year
from the OWON Company. This warranty only applies to the original purchaser and is not
transferable to the third party, and does not apply to fuses, disposable batteries or to any
product which has been misused, altered, neglected or damaged by accident or
abnormal conditions of operation or handling.
If the product proves defective during the warranty period, r the OWON either will repai
defective product without charge for parts and labor, or will provide a replacement in
exchange for the defective product. Parts, modules and replacement products used by
OWON for warranty work may be new or reconditioned like new performance. All
replaced parts, modules and products become the property of OWON.
In order to obtain service under this warranty, Customer must notify of the defect OWON
before the expiration of the warranty period. Customer shall be responsible for
packaging and shipping the defective product to the service center designated by OWON,
and with a copy of customer proof of purchase.
This warranty shall not apply to any defect, failure or damage caused by improper use or
improper or inadequate maintenance and care. shall nOWON ot be obligated to furnish
service under this warranty a) to repair damage resulting from attempts by personnel
other than OWON representatives to install, repair or service the product; b) to repair
damage resulting from improper use or connection to incompatible equipment; c) to
repair any damage or malfunction caused by the use of non supplies; or d) to - OWON
service a product that has been modified or integrated with other products when the
effect of such modification or integration increases the time or difficulty of servicing the
product.
Please contact the nearest OWON's Sales and Service Offices for services or a complete
copy of the warranty statement.
For better after-sales service, please visit www.owon.com.cn and register the purchased
product online.
Excepting the after-sales services provided in this summary or the applicable warranty statements,
OWON will not offer any guarantee for maintenance definitely declared or hinted, including but not
limited to the implied guarantee for marketability and special purpose acceptability. - OWON should
not take any responsibilities for any indirect, special or consequent damages.

Table of Contents
1.Safety Information ...................................................................................................... 1
Safety Considerations ............................................................................................................ 1
Measurement Category 3.........................................................................................................
Safety Terms and Symbols ..................................................................................................... 4
2.Quick Start .................................................................................................................. 5
General Inspection ................................................................................................................. 5
Install the Batteries ................................................................................................................ 5
Adjusting the Tilt Stand .......................................................................................................... 6
Power On ............................................................................................................................... 6
Sleep Mode ........................................................................................................................... 6
LCD Backlight Control ............................................................................................................. 6
Selecting the Range ............................................................................................................... 7
Multimeter in Brief ................................................................................................................ 7
Front panel ............................................................................................................................................... 7
Rotary switch ............................................................................................................................................ 8
Keypad ...................................................................................................................................................... 9
Display screen ........................................................................................................................................... 9
Input terminals ....................................................................................................................................... 10
3.Making Measurements .............................................................................................. 12
Measuring AC or DC Voltage ................................................................................................ 12
Measuring Resistance .......................................................................................................... 12
Testing for Continuity .......................................................................................................... 13
Testing Diodes ..................................................................................................................... 13
Measuring Capacitance ........................................................................................................ 13
Measuring Frequency .......................................................................................................... 14
Measuring Temperature ...................................................................................................... 14
Non- Contact Voltage Detect (NCV)....................................................................................... 14
Measuring Transistor Only for specifi— c models ................................................................. 15
Measuring DC or AC Current ................................................................................................ 15
4.Multimeter Features .................................................................................................. 17
Data Hold Mode .................................................................................................................. 17
Making Relative Measurements ........................................................................................... 17
i

Buzzer Feature ..................................................................................................................... 17
5.To Connect with Mobile Device – Only for OW16B .................................................... 18
Android App ........................................................................................................................ 19
How to Connect with Android Device .................................................................................................... 19
User Interface in Android App ................................................................................................................ 20
Operations in Android App ..................................................................................................................... 21
Multimeter Offline Record (Android) ..................................................................................................... 23
iOS App ................................................................................................................................ 24
How to Connect with iOS Device ............................................................................................................ 24
User Interface in iOS App ....................................................................................................................... 26
Operations in iOS App ............................................................................................................................ 28
Multimeter Offline Record (iOS) ............................................................................................................ 30
6.To Connect with Computer Only for OW16B– ............................................................ 32
How to Connect with Computer............................................................................................................. 32
Step 1: Install multimeterBLE software ................................................................................................................ 32
Step 2: Install driver of Bluetooth USB adapter ................................................................................................... 32
Step 3: Connect to multimeterBLE software ........................................................................................................ 38
User Interface in MultimeterBLE Software ............................................................................................ 40
Operations in MultimeterBLE Software ................................................................................................. 41
Multimeter Offline Record (PC Software) .............................................................................................. 41
7.Technical Specifications ............................................................................................ 44
8.Appendix ................................................................................................................... 46
Appendix A: Enclosure ......................................................................................................... 46
Appendix B: General Care and Cleaning ............................................................................... 46
ii

1.Safety Information
1. Safety Information
Safety Considerations
Before any operations, please read the following safety precautions to avoid any
possible bodily injury and prevent this product or any other products damage to
connected. To avoid any contingent danger, this product use only as specified.
EC Declaration of Conformity:
Meets intent of Directive 2004/108/EC for Electromagnetic Compatibility.
Limit operation to the specified measurement category, voltage, or amperage ratings.
Do not use the multimeter if it is damaged. Before you use the multimeter, inspect
the case. Look for cracks or missing plastic. Pay particular attention to the insulation
surrounding the connectors.
Do not use the test leads for other products. provided Use only the certified test
leads specified for this product.
Inspect the test leads for damaged insulation or exposed metal.
Before use, verify the multimeter's operation by measuring a known voltage.
Only the qualified technicians can implement the maintenance.
Always use the specified battery type. The power for the meter is supplied with multi
two standard AA 1.5 V batteries. Observe the correct polarity markings before you
insert the batteries to ensure proper insertion of the batteries in the multimeter.
Check all Terminal Ratings. To avoid fire or shock hazard, check ratings and all
markers of this product. Refer to 'the user s manual for more information about
ratings before connecting to the multimeter.
Do not operate the multimeter with the cover or portions of the cover removed or
loosened.
Use Proper Fuse. Use only the specified type and rating fuse for the multimeter.
Do not operate if in any doubt. If you suspect damage occurs to the multimeter,
have it inspected by qualified service personnel before further operations.
To avoid electric shock, do not operate this product in wet or damp conditions.
Do not operate in an explosive atmosphere.
Keep product surface clean and dry.s
Do not apply more than the rated voltage (as marked on the multimeter) between
terminals, or between terminal and earth ground.
When measuring current, turn off the circuit power before connecting the
multimeter in the circuit. Remember to place the multimeter in series with the
circuit.
1

1.Safety Information
When servicing the multimeter, use only the specified replacement parts.
Use caution when working above 60 V DC, 30 V AC RMS, or 42.4 V peak. Such
voltages pose a shock hazard.
When using the test leads, keep your fingers behind the finger guards on the test
leads.
Remove the test leads from the multimeter before you open the battery cover.
To avoid false readings, which may lead to possible electric shock or personal injury,
replace the battery as soon as the low battery indicator appears and flashes.
Disconnect circuit power and discharge all high-voltage capacitors before testing
resistance, continuity, diodes, or capacitance.
Use the proper terminals, function, and range for your .measurements When the
range of the value to be measured is unknown, the rotary switch position as set the
highest range, or choose the auto ranging mode. To avoid damages to the multimeter,
do not exceed the maximum limits of the input values shown in the technical
specification tables.
Connect the common test lead before you connect the live test lead. When you
disconnect the leads, disconnect the live test lead first.
Before changing functions, disconnect the test leads from the circuit under test.
2

1.Safety Information
Measurement Category
The m 00 V, CAT IIIultimeter ha a safety rating ofs 6 .
Measurement category definition
Measurement CAT I applies to measurements performed on circuits not directly
connected to the AC mains. Examples are measurements on circuits not derived from the
AC mains and specially protected (internal) mains- derived circuits.
Measurement CAT II -consuming applies to protect against transients from energy
equipment supplied from the fixed installation, such as TVs, PCs, portable tools, and
other household circuits.
Measurement CAT III applies to protect against transients in equipment in fixed
equipment installations, such as distribution panels, feeders and short branch circuits,
and lighting systems in large buildings.
Measurement CAT IV - applies to measurements performed at the source of the low
voltage installation. Examples are electricity meters and measurements on primary over
current protection devices and ripple control units.
3

2.Quick Start
2. Quick Start
General Inspection
After you get a new , make a check on the instrument according to the multimeter
following steps:
1. Check whether there is any damage caused by transportation.
If it is found that the packaging carton or the foamed plastic protection cushion has
suffered serious damage, do not throw it away first till the complete device and its
accessories succeed in the electrical and mechanical property tests.
2. Check the Accessories
The supplied accessories have been already described in the Appendix A: Enclosure
of this Manual. You can check whether there is any loss of accessories with reference
to this description. If it is found that there is any accessory lost or damaged, please
get in touch with the distributor of OWON responsible for this service or the
OWON's local offices.
3. Check the Complete Instrument
If it is found that there is damage to the appearance of the instrument, or the
instrument can not work normally, or fails in the performance test, please get in
touch with the s distributor responsible for this business or thOWON' e OWON's local
offices. If there is damage to the instrument caused by the transportation, please
keep the package. With the transportation department or the s distributor OWON'
responsible for this business informed about it, a repairing or replacement of the
instrument will be arranged by the OWON.
Install the Batteries
The two batteries. multimeter is powered by 1.5 V AA alkaline
Warning:
To avoid false readings, which could lead to possible electric shock
or personal injury, replace the battery as soon as the low battery
indicator appears.
Before replacing the battery, turn off the meter,
disconnect test
leads and any connectors from any circuit under test, remove test
leads from the input terminals. Use only the specified battery type.
Use the following procedure to install the batteries.
(1) Ensure that the rotary switch is at the test leads and any position. Remove
connectors from the input terminals.
5
2.Quick Start
(2) Lift the tilt stand and loosen the screws with a suitable Phillips screwdriver and
remove the battery cover.
(3) Observe the battery polarity indicated inside the battery compartment Insert the ,
batter . ies
(4) Place the battery cover back in its original position and tighten the screws.
Caution
: To avoid instruments being damage from battery leakage ways remove , al
the batteries and store them separately if the multimeter is not going to be
used for a long period.
Adjusting the Tilt Stand
Pull the tilt stand outward to its maximum reach (about 85 to the meter body) ° .
Power On
(1) To power ON the multimeter, turn the rotary switch to any other position except
.
(2) To power OFF the multimeter, turn the rotary switch to the position.
Sleep Mode
The multimeter automatically enters the sleep mode if the rotary switch is not moved or
a key is not pressed for When the Bluetooth is activated, this function is 30 minutes. (
disabled.)
Pressing or turn the rotary switch will turn the multimeter back to operation
mode from . the sleep mode
One minute before Auto Power-off, the buzzer will beep five times to warn. Before shutoff,
the buzzer will emit a long beep, and then the multimeter will shut off.
Note: In sleep mode, the multimeter will still a little consume power. If the multimeter is
not going to be used for a long period, the power should be turned off.
LCD Backlight Control
To -view the display in low light conditions, you can activate the LCD backlight ing by press
for more than 2 seconds. The backlight will last for one . minute To turn off
manually, pressing for more than 2 seconds.
6

2.Quick Start
Selecting the Range
Auto ranging is set as default when the meter is powered on, is displayed.
When auto ranging is enabled, press to enter the manual range mode.
In manual range, each additional press of sets the multimeter to the next
higher range, unless it is already in the highest range, at which point the range
switches to the lowest range.
When manual range is enabled, press for more than 2 s second to enter the
auto ranging mode.
Note: Manual range is not available when measuring capacitance.
Multimeter in Brief
Front panel
1
2
3
4
5
6
7
Figure 2-1 Front panel overview
( )OW16B with hFE is shown for example
7
2.Quick Start
No.
Description
Details
①
①
①
①①
Display screen Page 9
②
②
②
②②
Keypad Page 9
③
③
③
③③
Rotary switch Page 8
④
④
④
④④
Input terminals
Page 10
⑤
⑤
⑤
⑤⑤
Transistor test holes ( )only for specific models Page 15
⑥
⑥
⑥
⑥⑥
LED indicator
⑦
⑦
⑦
⑦⑦
Non-contact voltage detector (NCV) Page 14
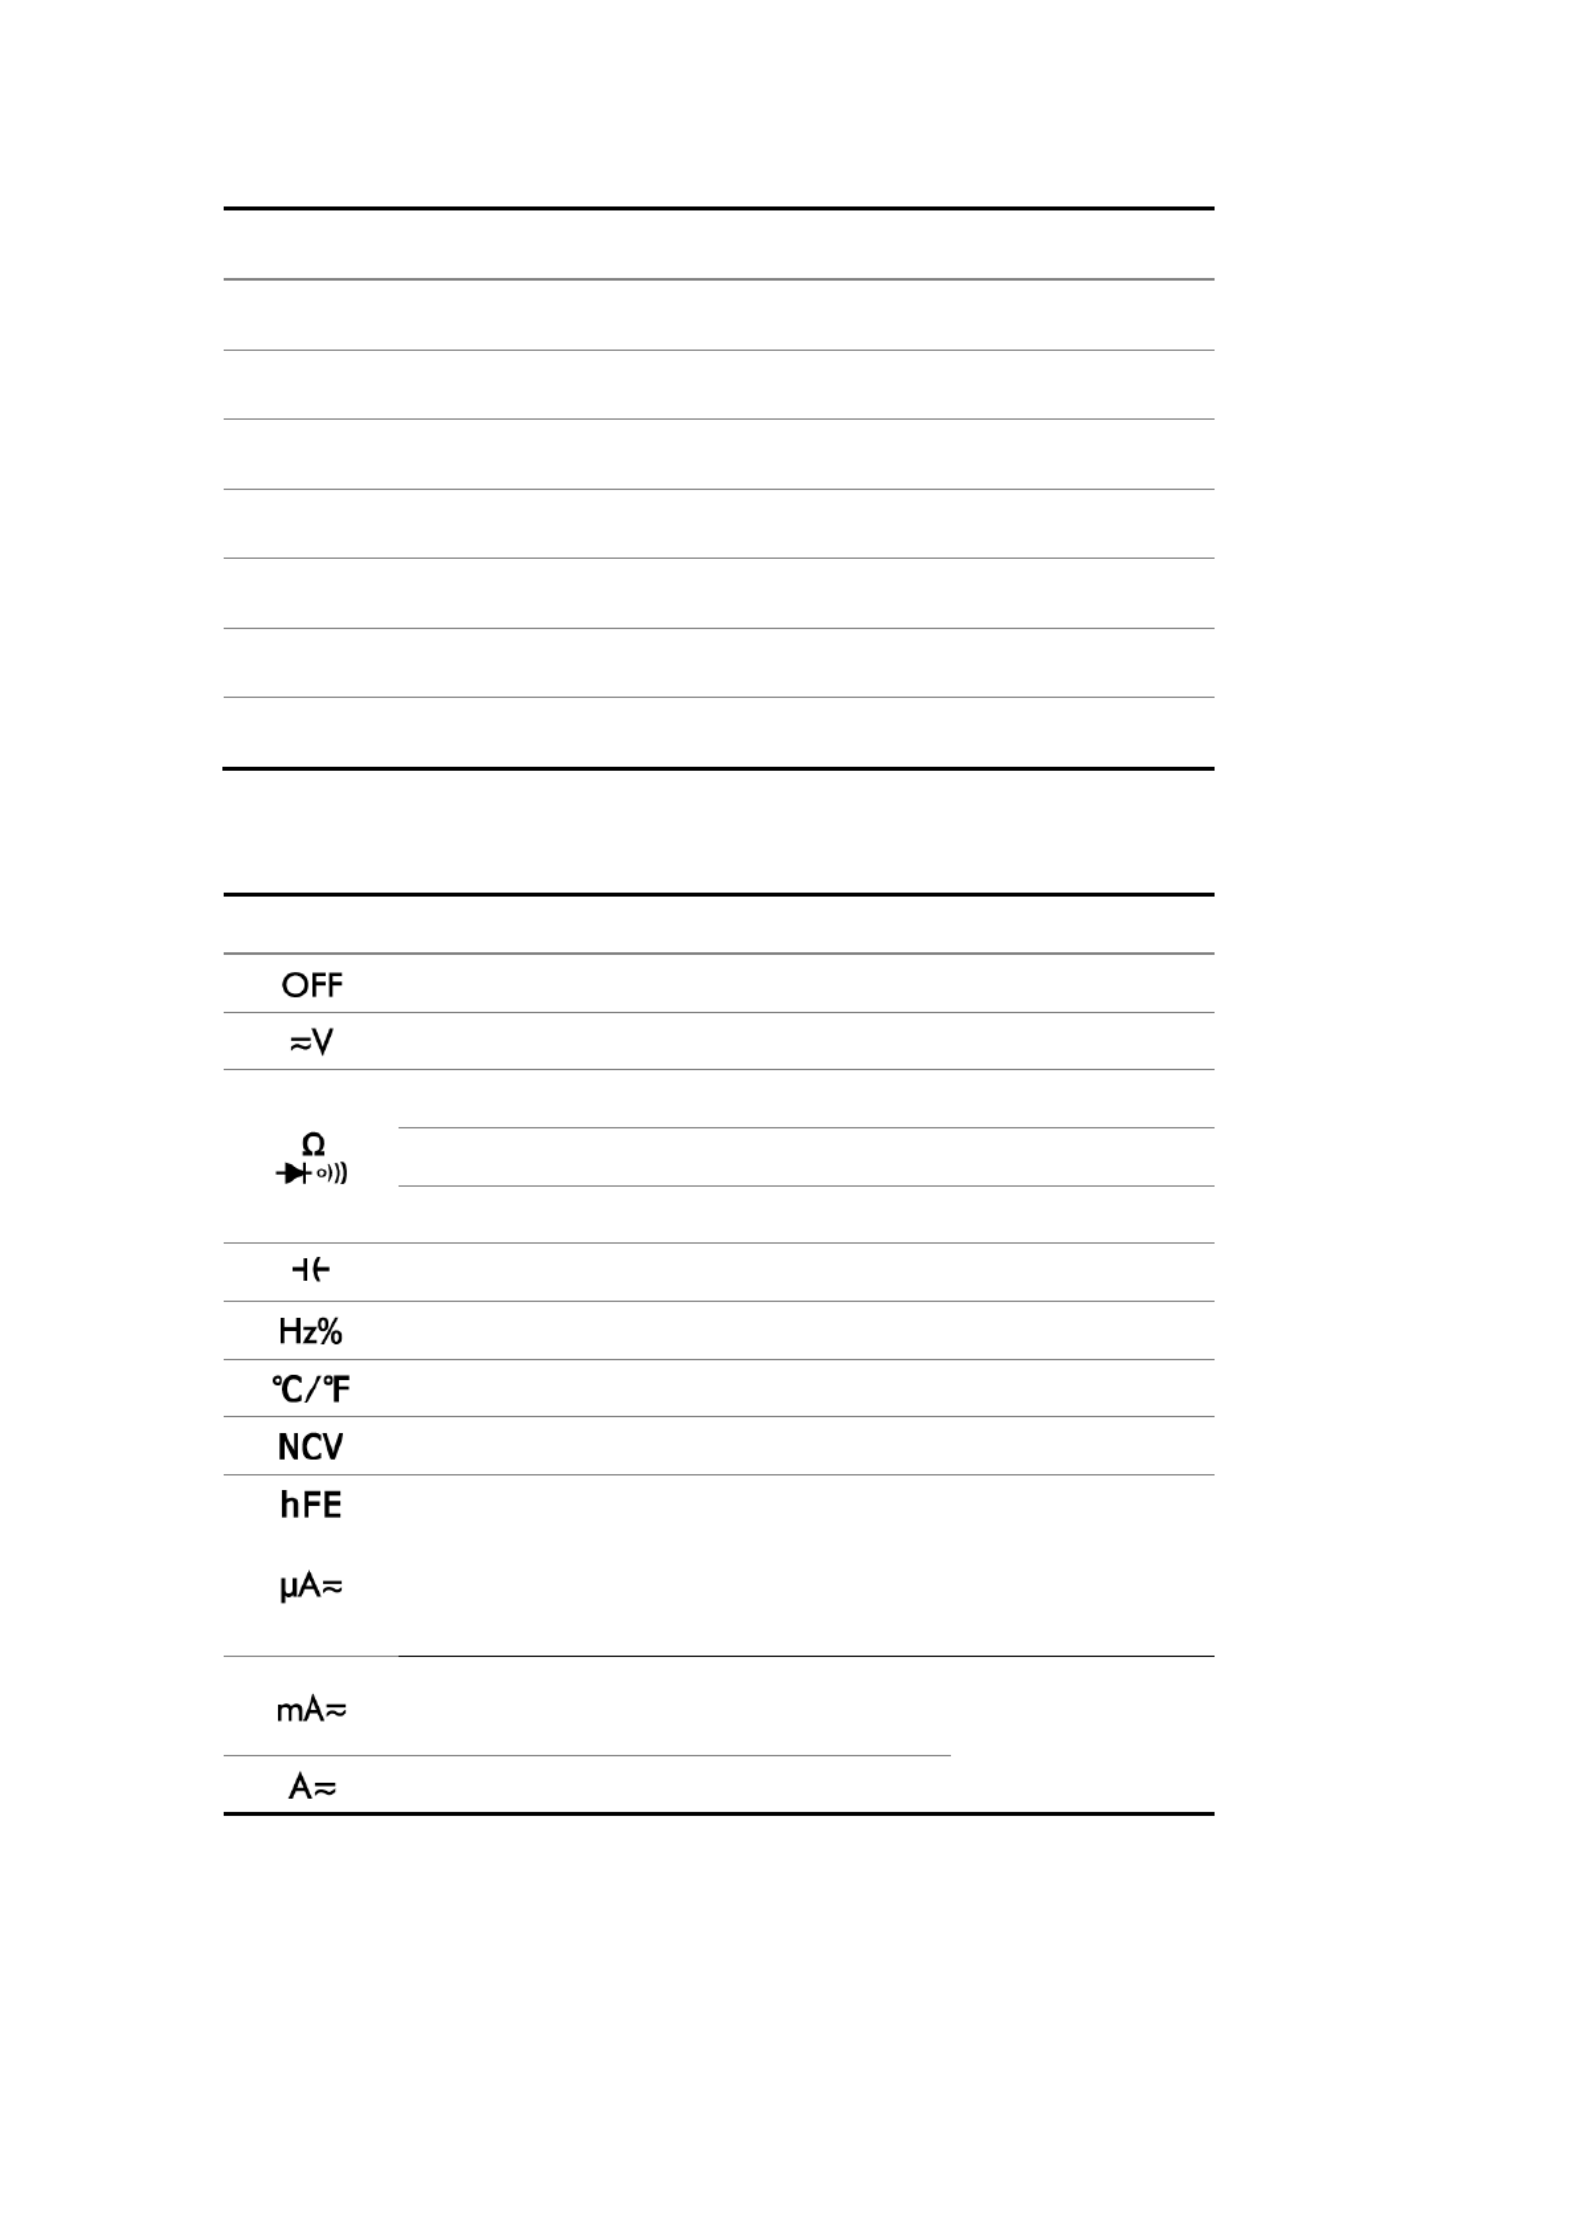
Rotary switch
Position
Description
Details
Power off
Page 6
D AC or C voltage measurement
Page 12
Resistance measurement
Page 12
Continuity test
Page 13
Diode test
Page 13
Capacitance measurement
Page 13
Frequency measurement
Page 14
Temperature measurement
Page 14
Non- contact voltage detect
Page 14
or
Transistor measurement
or
D AC or C current measurement
( 6up to 00 microamperes)
Page 15
or
Page 15
D A current C or C measurement
( 6up to 00 milliamperes)
Page 15
D current C or AC measurement
8

2.Quick Start
Keypad
Key
Description
Details
Select DC or AC
Select Resistance / Continuity / Diode
Auto/Manual range 7 Page
Backlight
Page 6
Data Hold
Page 17
Select frequency/duty cycle
Page 14
Measuring frequency in AC voltage/current mode
Relative Measurements
Page 17
Bluetooth
( 6only for OW1 B)
Page 18
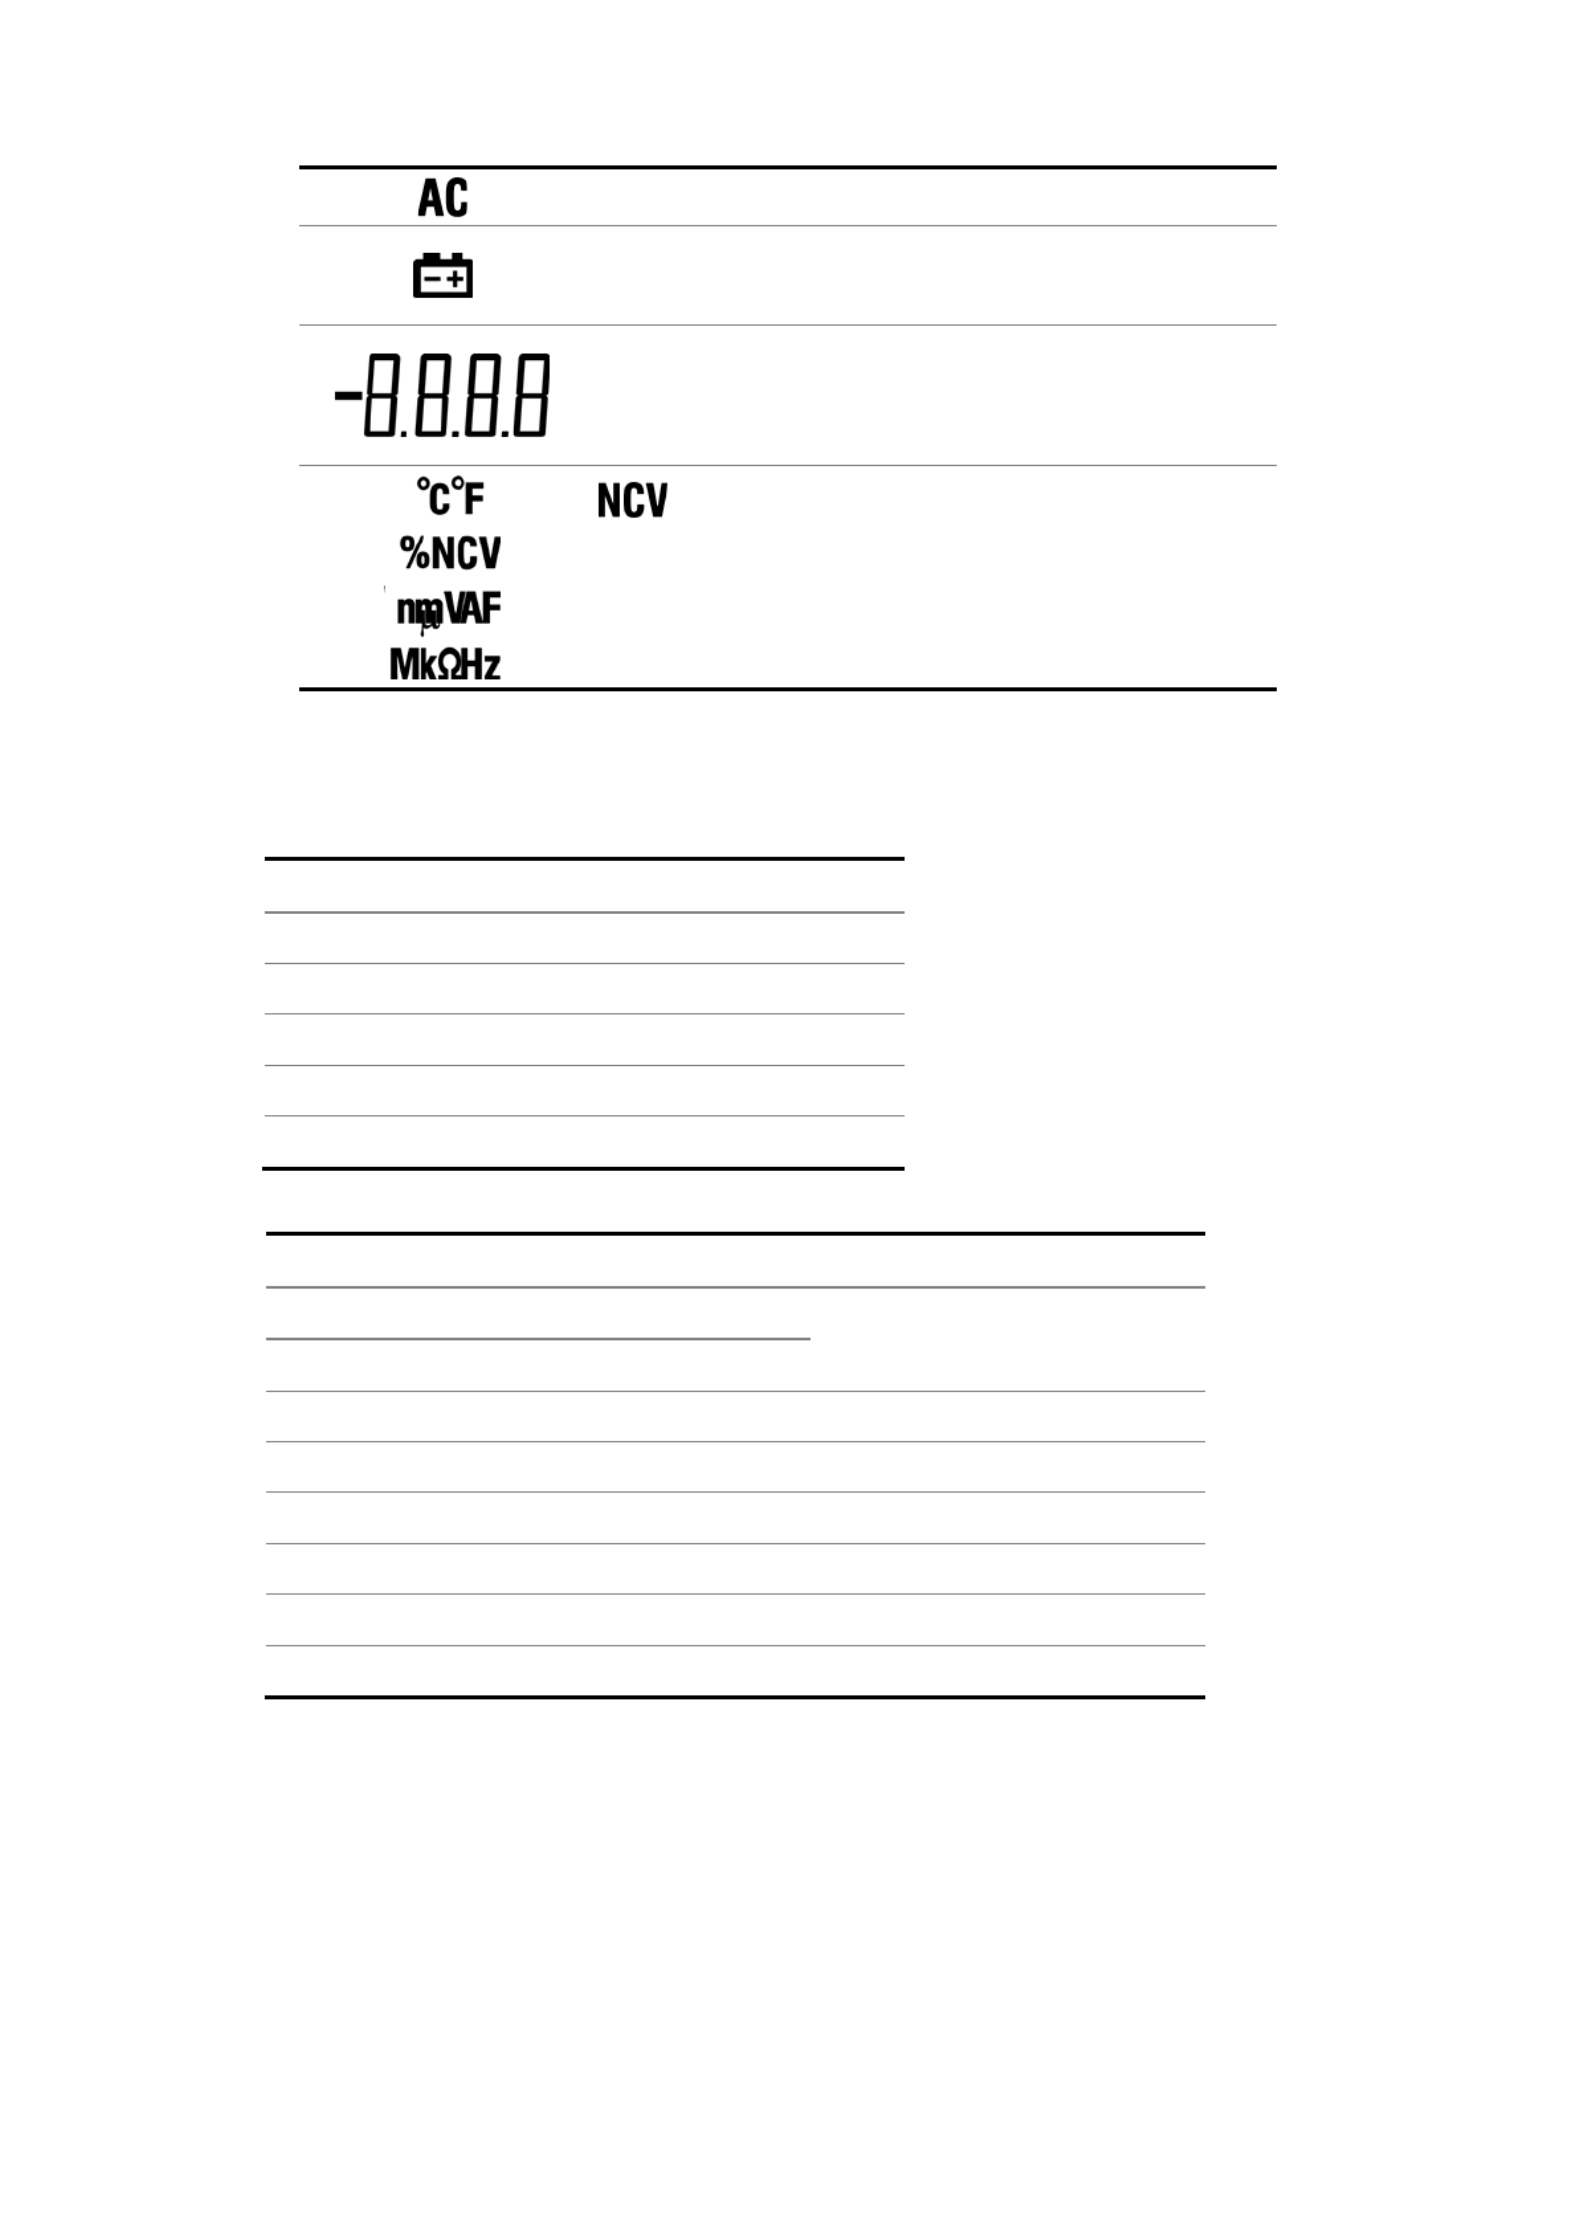
Display screen
Figure 2-2 Display screen
Symbol
Description
Details
Bluetooth enabled Page 18
Auto range
Page 7
Data hold enabled
Page 17
Relative enabled
Page 17
Diode test selected
Page 13
Transistor measurement
Page 15
Continuity test selected
Page 13
DC
Page 12 and
9
2.Quick Start
AC
Page 14
Battery is low 5 Page
Measurement display
("OL" is short for overload, indicates the reading
exceeds the display range)
-is for Non contact Voltage
Detect Page 14
Measuring units Page 10
Measurement units
Sign
Description
M Mega 1E+06 (1000000)
k kilo 1E+03 (1000)
m – milli 1E 03 (0.001)
µ
micro – 1E 06 (0.000001)
n – nano 1E 09 (0.000000001)
Sign
Description
Measurement
type
℃
Degree Celsius Temperature
℉
Degree Fahrenheit
V Voltage Voltage
A Ampere Current
Ω
Ohm Resistance
Hz Hertz Frequency
% Percent, Duty cycle
F Farad Capacitance
Input terminals
The terminal connections for the different measurement functions of the multimeter are
described in the table below.
10

2.Quick Start
Warning:
Before starting any measurement,
observe the rotary switch
position of , and thenthe multimeter connect the test leads to the
correct terminals.
Caution
: To avoid damaging , do not exceed the rated input limit.the rmultimete
Rotary switch
position
Input terminals Overload protection
750 VAC/1000 VDC
2 3 50 VAC/ 00 VDC
10 A/250 V, fast-acting fuse
11

3.Making Measurements
Testing for Continuity
Caution
: To avoid possible damage to your multimeter or to the equipment under
test, disconnect the circuit power and discharge all high-voltage
capacitors before testing for continuity.
(1) Rotate the rotary switch to . Press continuity once to enter testing mode,
will be displayed.
(2) Connect the black test lead to the and the red test lead to the terminal
. terminal
(3) Probe the test points to measure the resistance in the circuit. the w If reading is belo
30 , Ωthe multimeter will beep continuously.
Testing Diodes
Caution
: To avoid possible damage to your multimeter or to the equipment under
test, disconnect the circuit power and discharge all high-voltage
capacitors before testing diodes.
(1) Rotate the rotary switch to . Press ing twice to enter diode test mode,
will be displayed.
(2) Connect the black test lead to the and the red test lead to the terminal
. terminal
(3) Connect the red test lead to the positive terminal (anode) of the diode and the black
test lead to the negative terminal (cathode). The cathode of a diode is indicated with
a band.
(4) Read the diode forward bias If the test lead connection is reversed, the multimeter .
will display " OL".
Measuring Capacitance
Caution
: To avoid possible damage to the multimeter or to the equipment under
test, disconnect circuit power and discharge all high voltage capacitors -
before measuring capacitance. Use the DC voltage function to confirm
that the capacitor is fully discharged.
(1) Rotate the rotary switch to .
(2) Connect the black test lead to the and the red test lead to the terminal
. terminal
13

3.Making Measurements
(3) Probe the test points and read the display.
Measuring Frequency
(1) Rotate the rotary switch to .
(2) Connect the black test lead to the terminal and the red test lead to the
. terminal
(3) Probe the test points and read the display.
(4) Press to switch between the frequency and duty cycle measurements.
Note: When measuring AC voltage or AC current, press to cycle through
frequency measuring, duty cycle measuring, and original measuring.
To measure the frequency of signal with large amplitude, it is recommended to press
to measure the frequency in AC voltage measurement mode.
Measuring Temperature
(1) Rotate the rotary switch to .
(2) Connect the the K- red connection of type thermocouple to the
terminal and the black connection to the terminal.
(3) Probe the test points and read the display.
Non-Contact Voltage Detect (NCV)
To detect the presence of voltage, place the top of theAC meter
close to a voltage source en voltage is detected he LED . Wh , t
above the display will glow, . and the meter will beep
Warning:
n Always test the NCV function on a know live circuit before
use.
Do not attempt to use the meter as an AC Voltage Detector if
the battery is weak or bad.
pEven without indication, voltage may still be resent. Do not
rely on NCV to check the shielded wire. detection Detection
could be impaired by socket design, insulation thickness, or
other factors.
External interference such as static electricity sources could
mistakenly trigger NCV indication.
14

3.Making Measurements
(1) Rotate the rotary switch to .
(2) Test the NCV function on a know live circuit before use.n
(3) Place the top of the meter very close to the voltage source as shown in the figure .
(4) If voltage is ay will detected, the LED above the displ flash, and the meter will beep.
Measuring Transistor — Only for specific models
(1) Rotate the rotary switch to .
(2) Verify the type of the transistor is NPN or PNP, and locate the Emitter, Base and
Collector leads. Insert leads of the transistor into the corresponding test holes on the
panel.
(3) Read the hFE value.
Measuring D A Current C or C
Warning:
-Never attempt an in
circuit current measurement where the
open- circuit potential to earth is greater than 250 V. Doing so will
cause damage to the multime
ter and possible electric shock or
personal injury.
Caution
: To avoid possible damage to the or to the equipment under multimeter
test, check the multimeter’s fuse before measuring current
. Use the
proper terminals, function, and range for your measurement. Never place
the test leads in parallel with a circuit or component when the leads are ny
plugged into the current terminals.
(1) Turn off the power of the measured circuit. Discharge all high- voltage capacitors.
(2) Connect the black test lead to the For currents below . terminal 600 mA,
connect the red test lead to the ; within 6 terminal for currents 00 mA
– 10 A, connect the red test lead to the terminal.
(3) Rotate the rotary switch to the appropriate according toposition the measurement
range, (only for or . specific models), ,
(4) Disconnect the circuit path to be tested. Connect the black test lead to one side of
the circuit (with a lower voltage); connect the red test lead to the (with a other side
higher voltage). Reversing the leads will produce negative reading, but will not a
damage the multimeter.
(5) Select DC or AC measurement mode. Default is DC measurement mode, will be
displayed. Press will be displayed. to switch into AC measurement mode,
(6) Turn on the power of the measured circuit, and read the display. Press to
enable and cycle through the manual ranges. If "OL" is displayed, it indicates the
input exceeds the selected range the rotary switch should be set to the position and
with higher range.
15

3.Making Measurements
(7) Turn off the power of the measured circuit and discharge all high-voltage capacitors.
Remove the test leads and restore the circuit to the original condition.
Note: When measuring AC current, press to cycle through frequency measuring,
duty cycle measuring, and original measuring.
16

4.Multimeter Features
4. Multimeter Features
Data Hold Mode
(1) Press to freeze the display during measurement, will be shown on the
display.
(2) Press again to exit this mode.
Making Relative Measurements
When making relative measurements, reading is the difference between a stored
reference value and the input signal.
(1) Press the rto enter elative mode, will be shown on the display.
The measurement value when pressing is stored as the reference value.
In this mode, = input REL△(current reading) value - reference value.
(2) Press it again to exit the mode.
In relative measurement he manual range mode, t will be
activated automatically. (The
relative measurement should a be carried out under certain isrange, ththat is, function is
only available under the manual range mode.)
Note: This function is not available when measuring AC voltage/current, and frequency.
Buzzer Feature
Press the function key, the buzzer emit a short beep.s
One minute before Auto Power-off, the buzzer will beep five times to warn. Before
shutoff, the buzzer will beep, and then the multimeter shut off.emit a long will
The buzzer beeps continuously to warn once the measured DC voltage exceeds 1000
V, or the measured AC voltage exceeds 750 V.
The buzzer emits a long beep when the short circuit resistance is less than about 5 0Ω
during the continuity test.
When the Bluetooth function is idle for 10 minutes, the Bluetooth will be turned off
automatically. Before turning off, the buzzer will beep twice.
17

5.To Connect with Mobile Device – Only for OW16B
5. To Connect with Mobile Device – Only for OW16B
OW16B supports communications with Android or based smart device through iOS
Bluetooth. You can use the free application software on the smart devices to monitor the
measurements, perform remote control, view trending graphs, etc. The recorded data can
be saved as CSV file. number of record that can be stored depends on the The maximum
free storage space in your smart device. More than one meters can be connected
simultaneously.
Note: Bluetooth connectivity . works over a range of about 7 to 8 meters The work range
is much longer in open non- and sided -occluded environmentwide range , even up to 20
meters.
Install the application softwarefree
System of Requirements Mobile Devices
Bluetooth 4 .0 Android APP
Android s with connectivity. device BLE 4.0
Android versions: 4.3 or above
Bluetooth 4 .0 APPiOS
iPhone 6s/6s Plus iPhone 6/6 Plus iPhone 5c/5s iPhone 5, , ,
(Support iPhone with BLE 4.0 connectivity, iOS7.0 or above; iPhone 4s or the older
devices are not supported.)
F or Android device
If the system and Bluetooth version of your mobile device meet the requirements, scan
the QR Codes below with your mobile device, select the Bluetooth 4.0 Android APP and
install it.
Bluetooth 4.0 Android APP
Note: The help below may be not completely consistent with thecontent application
software, only for reference. Visit www.owon.com.cn to get the latest version of this user
manual.
18

5.To Connect with Mobile Device – Only for OW16B
For iPhone
You OWONcan search " " in the , APP Store select the APP with the icon, and
then install it.
Note: The help nsistent with thecontent below may be not completely co application
software, only for reference. Visit www.owon.com.cn to get the latest version of this user
manual.
Android App
How to Connect with Android Device
(1) Install the free application software for Android on your Android smart device.
(2) Launch the "Multimeter" application.
(3) Turn on the multimeter, press and hold appear on the display. until
(4) Click the icon on the top left of the screen to launch device connection.
(5) If the Bluetooth function is not activated, a dialog box will ask whether to turn on
Bluetooth. Click "Yes".
Click to scan for Bluetooth devices.
19

5.To Connect with Mobile Device – Only for OW16B
(6) Click "BDM" in the device list to pair.
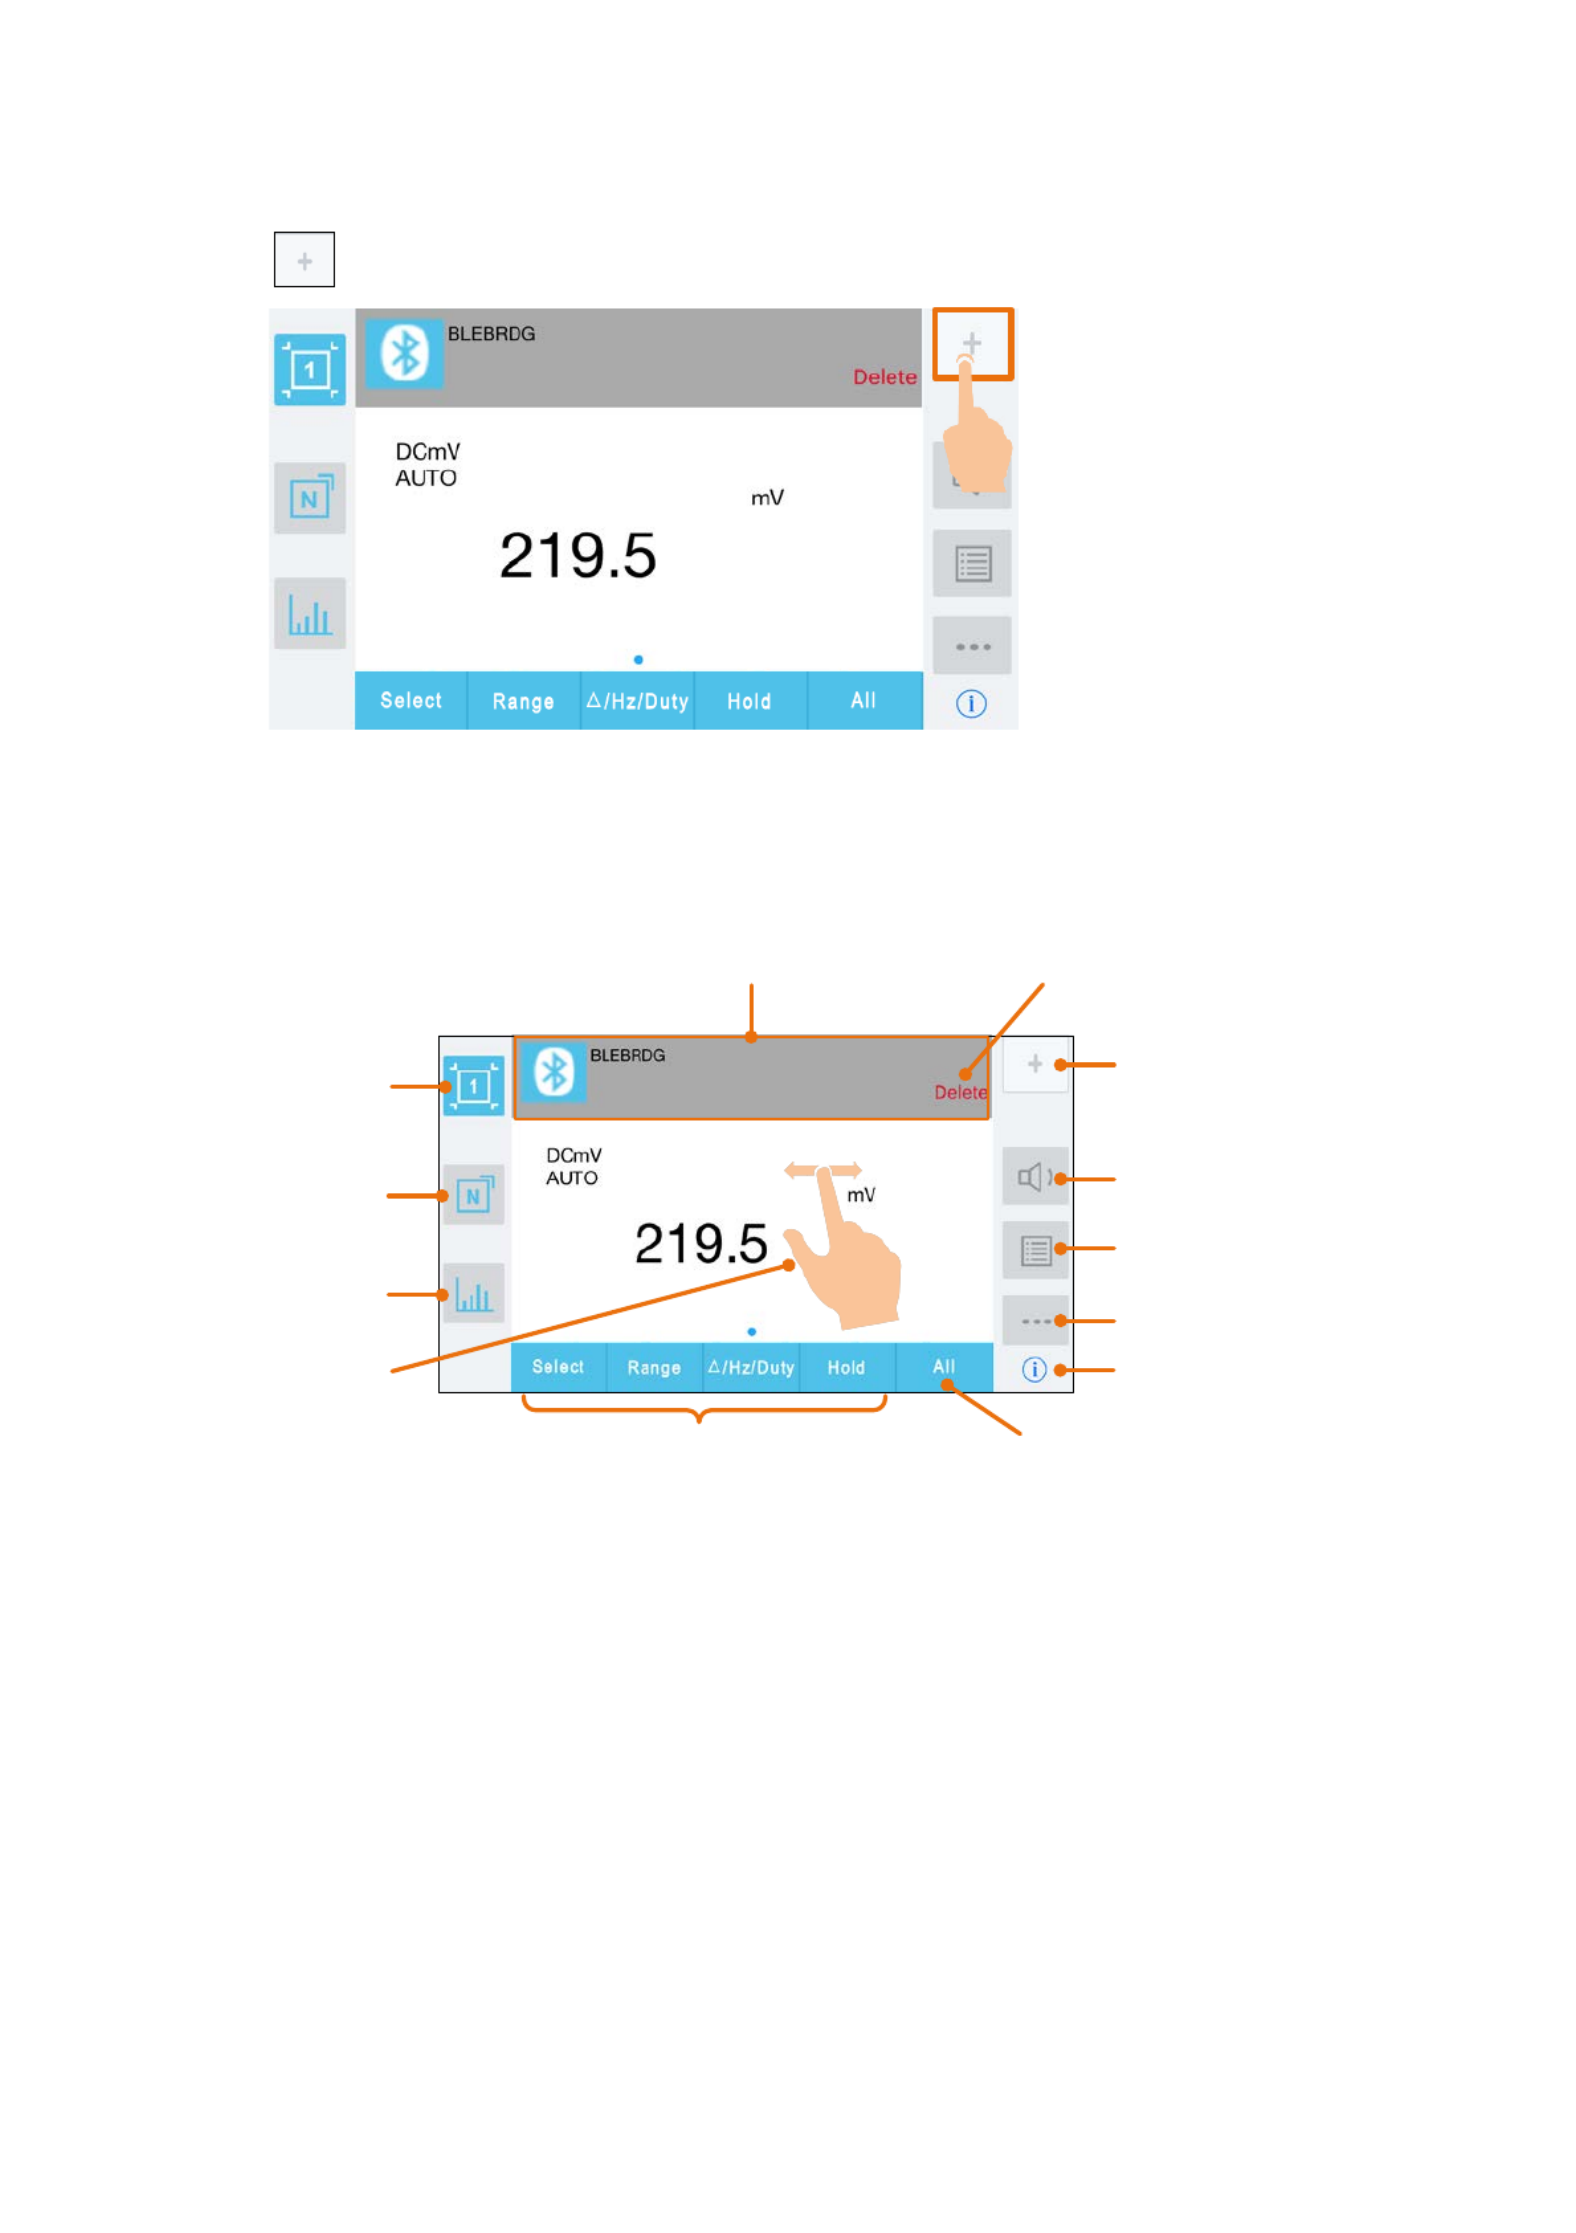
User Interface in Android App
Double View
Double View
Click to disconnect
Press&hold to edit name
Click to enter
Single View
Add Next
page Single
view Graph
&Table Exit/About
20

5.To Connect with Mobile Device – Only for OW16B
Single View
Single View
Range
Data Hold
Function
(Details follow)
Click to disconnect
Press&hold to edit Voice out
Previous
page Next
page Double
view Graph
&Table Exit/About
Same keys of
the multimeter
Oine Record
Function Description Table
Display
Function
Display
Function
DC Direct Current CAP Measuring Capacitance
AC Alternating Current Hz Measuring Frequency
RES Measuring Resistance DUT Measuring Duty Cycle
DIO Testing Diodes TEMP Measuring Temperature
BEEP Testing for Continuity NCV Non-contact Voltage Detect
Operations in Android App
Customize the meter name
The device name of meter can be customized. Press and hold the name on the top
left of the screen, a dialog box below will pop up. You can input the customized name,
this name will be memorized in the device. this meter is connected to the same If
device next time, the customized name will be shown. If this meter is connected to
another device, the name is still the default one or the customized name to the
connected device.
Add meter: In double view, click softkey.
Select meter: In single or double view, click or softkey.
Disconnect meter: In single or double view, click or the meter name.
Remote Control: In single view, the control softkeys (blue background softkeys, as
Hold, Rel, Select, or long to perform control, just as press etc.
) can be short
pressed
21

5.To Connect with Mobile Device – Only for OW16B
the corresponding keys of multimeter.
Voice out function
Provide an audible out of the readings through the text- -to speech (TTS) engine on
your Android device. Click the icon on the top right of the screen to turn on
voice out. Click to turn off. In settings menu on your Android device, you can
set the language-specific voice for the spoken text, or speech rate etc.
You may change to different voices by installing different TTS engines .
TTS engines can be downloaded by scanning QR Codes or visit www.owon.com.cn .
Upgrade Online: Click , and click "About", the following interface is shown.
Click "Upgrade" as below.
Click to upgrade
Data Graph and Table: Click to view data graph and table. Click to
show setting menu.
Trending
graph
Zoom Controls
Data table
Show menu
Data Graph Table&
Data Graph Table&
Setting menu:
Softkey
Description
Open local file Read the saved file (.CSV)
Save data Save the displayed data into .CSV file
22

5.To Connect with Mobile Device – Only for OW16B
Share Share the measurements via the installed sharing apps
Clear data Clear the data that is being displayed
Setting
Record Interval: Set the record interval in the application
software .
Enable Period: Log data within the defined period.
Record Period: Define the period time if the period is enabled.
Fill: Check to fill the area as blue below the data line.
Exit Exit the APP
Note: In trending graph, you can pinch the screen to zoom (value) can be . The Y axis
zoomed by gesturing along the up down direction, and - the X axis (time) can be
zoomed by gesturing along the left-right direction .
Multimeter Offline Record (Android)
When measuring with send a command, OW16B, you can use Android device APP to the
multimeter will start recording the measurements. After receiving the command, the
connection be disconnect will ed automatically. The multimeter will record the measuring
data in its own memory. After completion of the record, use Android APP to reconnect
the multimeter, and then you can read the measuring data into the Android device as a
CSV file. You can use this function to record without staff on dutyfor a long time , while
reducing Bluetooth consumption to conserve the battery power of the multimeter.
Note: When the low battery indicator on the meter screen, the offline appears
record function may not work correctly. Please check the batteri of the meteres to
ensure them in a good state.
(1) Connect the Android device with the multimeter, see "How to Connect with Android
Device" on P19.
(2) In APP single view, tap on the n the top right, select icon o from
the pop- up menu.
(3) Set "Record interval" and "Record count" (maximum s records count is 10,000). Tap
on . The memory in the multimeter can only store the recording data
of one time . When start to record, the earlier offline record stored in the multimeter
will be overwritten. After starting, the APP interface will display
The Android device will disconnect with the multimeter in two seconds. After
23

5.To Connect with Mobile Device – Only for OW16B
disconnecting, the information " " will Bluetooth connection has been disconnected.
be shown on APP. The multimeter will record the current measurements and store in
the memory.
Note: If the multimeter is in the process of recording data and not finished yet,
connect the Android device and the multimeter, a dialog box will pop up:
Select , the recording process will be interrupted. The Android device
will connect with the multimeter to read data.
Select , the multimeter will continue recording, the
connection will be aborted.
(4) After completion of the record, to read the measuring data, reconnect the Android
device and the multimeter.
(5) In APP single view, tap on the icon on the top right, select from
the pop up menu. The file name - start with "Offline", the following part can be
customized.
(6) Tap on read the measuring data and save as , APP will a CSV file into the
Android device. After reading, display as below:
(7) Tap on , the data will be displayed in Data Graph and Table interface.
iOS App
How to Connect with iOS Device
(1) Install the free application software for iOS on your iOS smart device.
(2) Launch the application .If the Bluetooth function is not activated, a dialog
box prompt will you to turn on Bluetooth. Tap on "Settings".
24
5.To Connect with Mobile Device – Only for OW16B
(6) The measurements will be shown if the connection is successful. You can tap on the
softkey on the right to add another multimeter.
User Interface in iOS App
Press&hold
to edit name
Single
device view
Multi-device
view
Graph&Table
view
Add device
Voice out
Oine record
Edit name/setting
About
Same keys of the multimeter
Delete the
device
Combined view
Single Device View
Single Device View
Slide to show
other device
26

5.To Connect with Mobile Device – Only for OW16B
Multi-device View
Range
AUTO/MANUAL
Function
(Details follow)
Slide left to show the
Delete softkey
Slide up/down to
show other device
Function Description Table
Display Function Display Function
DC Direct Current CAP Measuring Capacitance
AC Alternating Current Hz Measuring Frequency
RES Measuring Resistance DUT Measuring Duty Cycle
DIO Testing Diodes TEMP Measuring Temperature
BEEP Testing for Continuity NCV Non-contact Voltage Detect
Graph&Table View
Select device
Record/pause
Zoom the graph using
button or gesture
Show/hide the table
Save the displayed data into .CSV le
Clear the data that is being displayed
Enter the selecting le interface
Enter the setting Interface
27

5.To Connect with Mobile Device – Only for OW16B
Selecting File Interface
Be selected
File operations
Upper/ lower limit Alert on/o Record interval in the
application software
Setting Interface
Operations in iOS App
Customize the meter name
The device name of meter can be customized. Press and hold the the device name (in
single device view), or click softkey (in single or multi-device view) and select
"Change Device Name", a dialog box below will pop up. You can input the customized
name, this name will be memorized in the device. this meter is connected to the If
same device next time, the customized name will be shown. If this meter is
connected to another device, the name is still the default one or the customized
name to the connected device.
28

5.To Connect with Mobile Device – Only for OW16B
Add meter: In single or multi-device view, click softkey.
Select meter: In single device view, slide left or right to switch the meter view. In
multi-device view, click a device item to select it, the background is turned to blue.
Disconnect meter: In single device view, click "Delete". -In multi device view, slide
a device item to the left to show the "Delete" softkey, and click it.
Voice out function : In single or multi-device view, click the icon to turn on
voice out. Click to turn off. In settings interface, you can adjust the reading
speed.
Alert: In setting interface, you can enable the alert notification, and set the
upper/lower limit. APP will alert for any out-of-limit event.
Upgrade Online: In single or multi- device view, click . If "Latest" is shown,
indicates it is the latest version, no need to update . If "Update" is shown, you can
click to update the APP.
Remote Control: In single or multi-device view, the control softkeys below
, can be short or long pressed to
perform control, just as press the corresponding keys of the multimeter.
29

5.To Connect with Mobile Device – Only for OW16B
Multimeter Offline Record (iOS)
When measuring with OW16B, you can use iOS device APP to send a command, the
multimeter will start recording the measurements. After receiving the command, the
connection be disconnect will ed automatically. The multimeter will record the measuring
data in its own memory. After completion of the record, use APP to reconnect the
multimeter, and then you can read the measuring data into the iOS device as a CSV file.
You can use this function to record without staff on dutyfor a long time , while reducing
Bluetooth consumption to conserve the battery power of the multimeter.
Note: When the low battery indicator on the meter screen, the offline appears
record function may not work correctly. Please check the batteries of the meter to
ensure them in a good state.
(1) Connect the device with the multimeter, see "iOS How to Connect with iOS Device"
on P24.
(2) In APP device view, tap on the softkey on the right, select "Record setting"
from the pop up menu.-
(3) Set "Record interval" and "Record " (maximum s scount records count is 10,000). Tap
on " "start offline record . The memory in the multimeter can only store the recording
data of one time. When start to record, the earlier offline record stored in the
multimeter will be overwritten.
Note: If you want to interrupt the recording process of the multimeter, econnect the r
iOS the device and multimeter, select "Stop recording".
(4) After completion of the record, to read the measuring data, econnect tr he iOS device
and the multimeter.
(5) In APP device view, tap on the softkey on the right, select "Record read" from
the pop up menu. The file name - start with "Offline", the following part can be
customized.
30

5.To Connect with Mobile Device – Only for OW16B
(6) Tap on " Read data", APP will read the measuring data and save as a CSV file into the
iOS device.
After reading, display as below:
(7) Tap on "Display data", the data displayed in Data Graph and Tablewill be interface.
31
6.To Connect with Computer – Only for OW16B
6. To Connect Computer with – Only OW16Bfor
To connect the multimeter to a computer, a should be plugged Bluetooth USB adapter
into the USB port of computer.
Use only the Bluetooth USB (optional) supplied with the productadapter .
The computer must be running the operating system Windows (Windows 10,
Windows 8, Windows 7, Windows Vista, Windows XP).
OW16B supports communications with a computer through Bluetooth. You can use the
free multimeterBLE software on computer to monitor the measurements, perform
remote control, view trending graphs, etc. The recorded data can be saved as CSV file.
The maximum number of record that can be stored depends on the free storage space in
your smart device. Up to three multimeters can be connected simultaneously.
How to Connect with Computer
Step 1: Install multimeterBLE software
Install the multimeterBLE software on your computer.
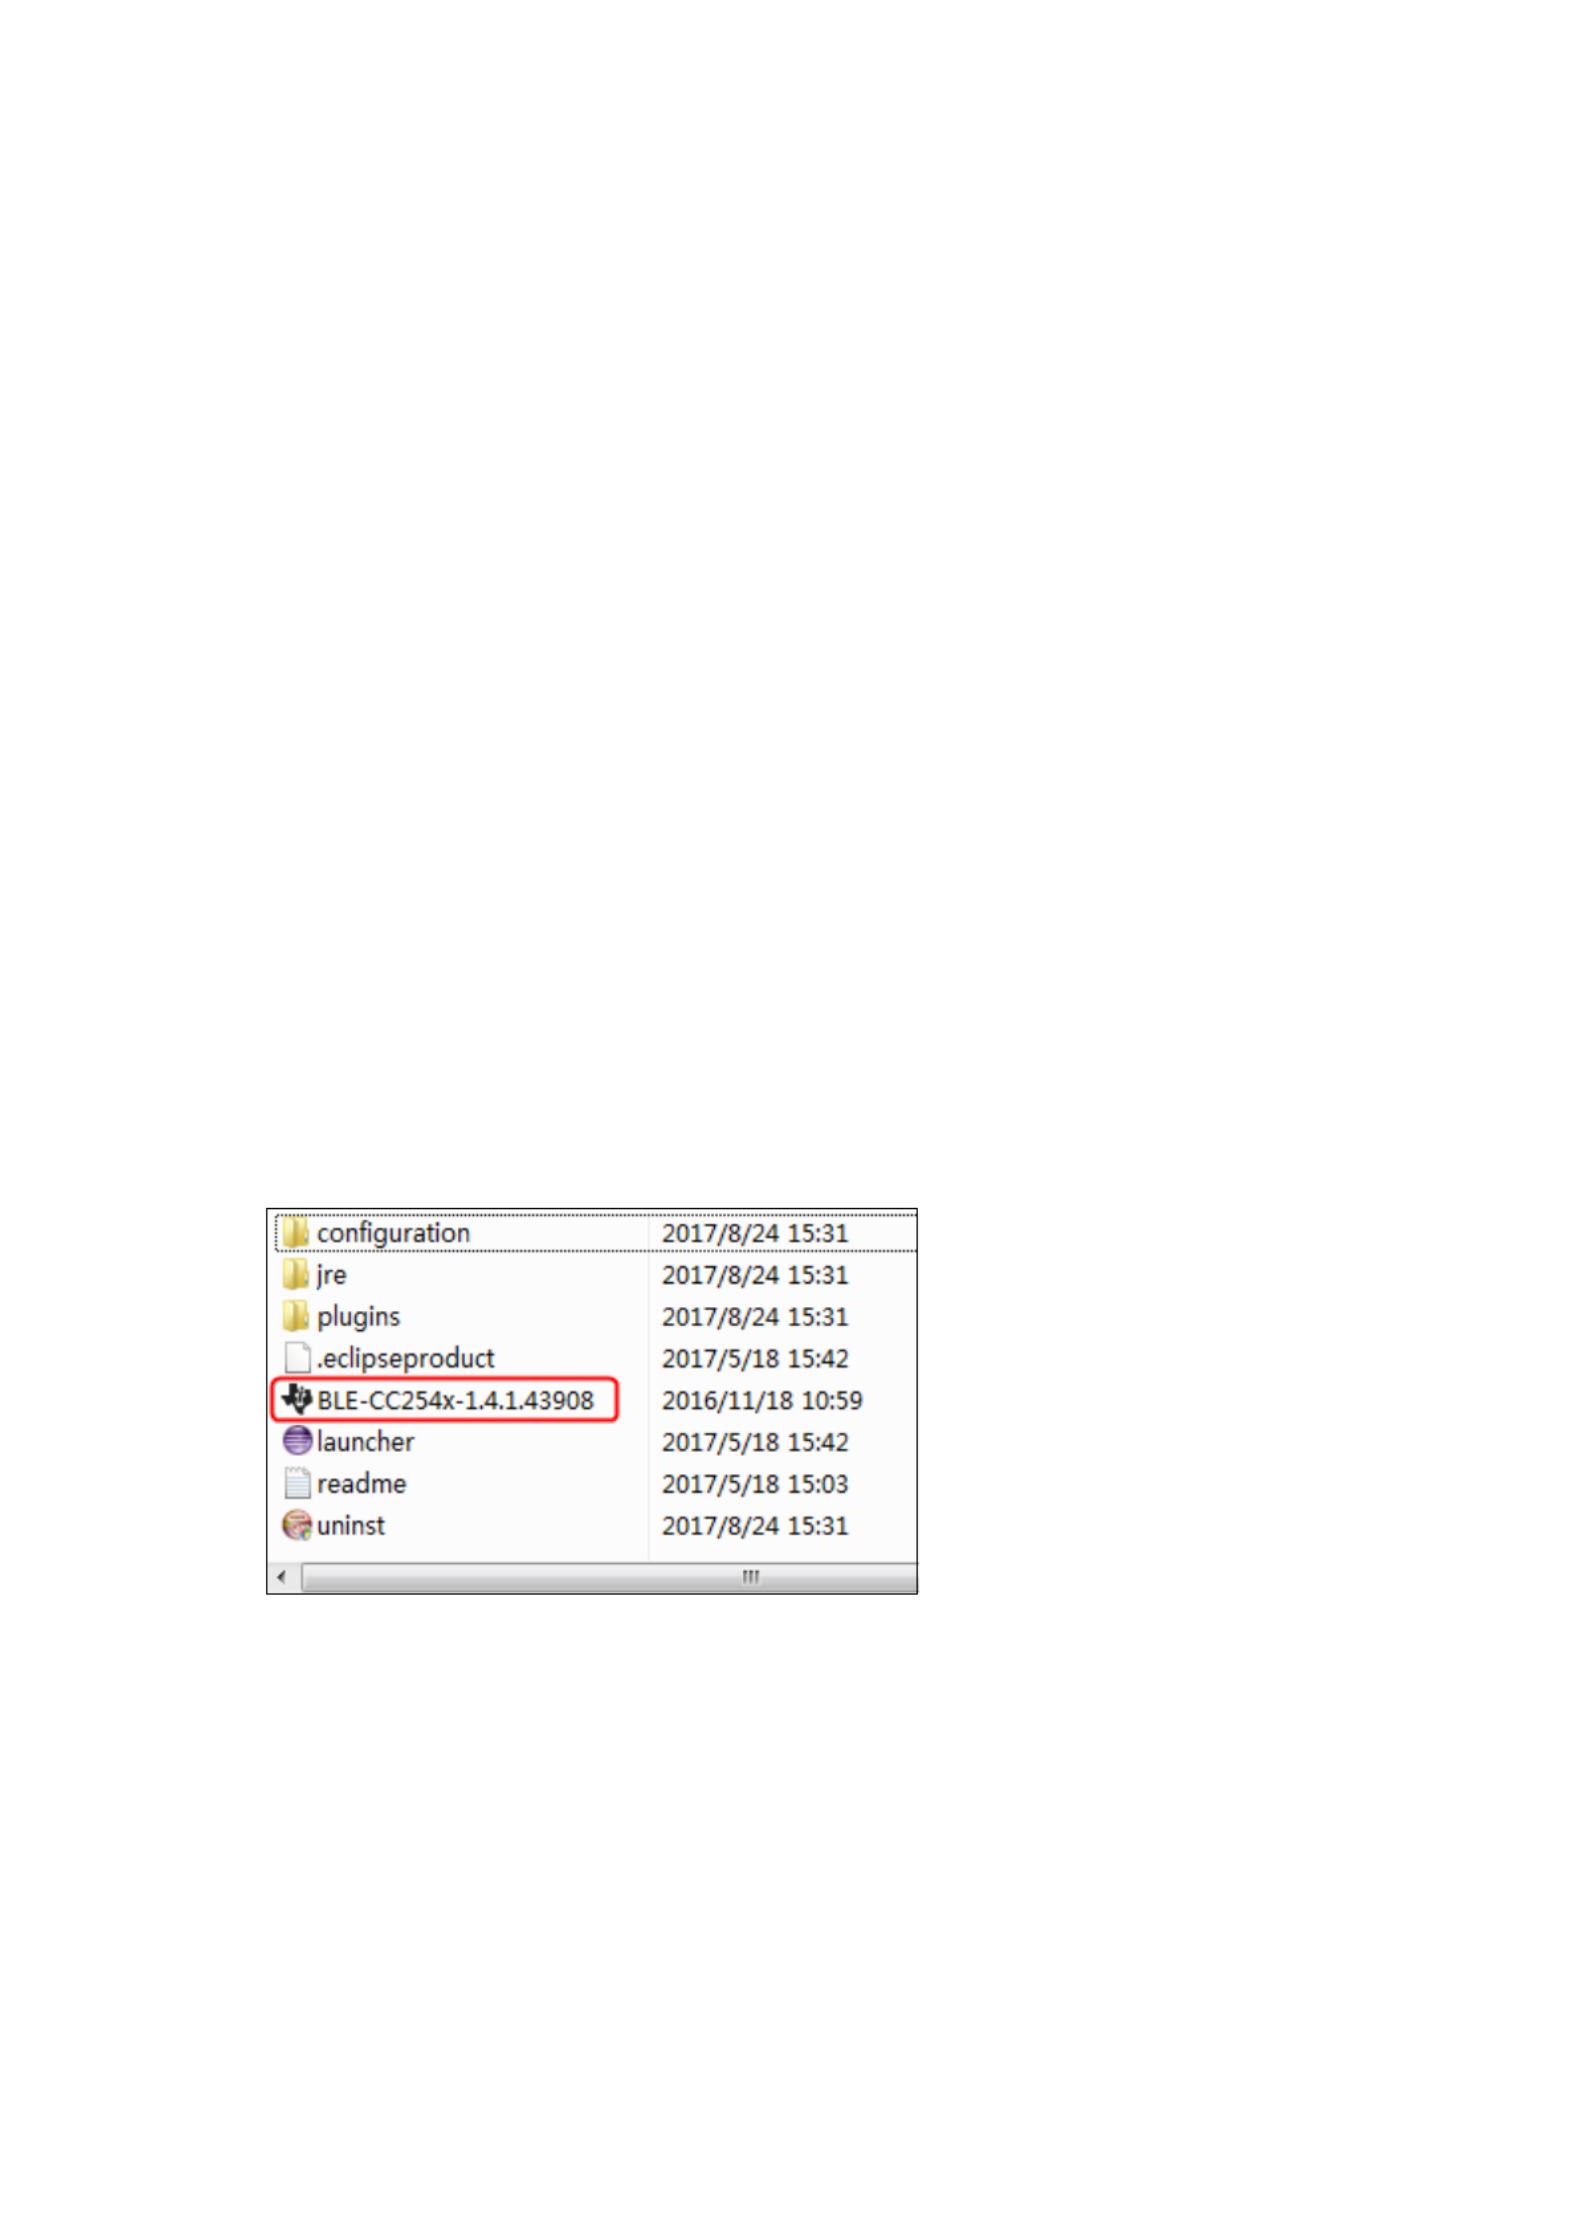
Step 2: Install driver of Bluetooth USB adapter
(1) Navigate to the software multimeterBLE installation folder (for example, C:\Program
Files\multimeterBLE).
Double-click BLE- -CC254x 1.4.1.43908.exe in this folder.
(2) Click "Next".
32

6.To Connect with Computer – Only for OW16B
(3) Select "I accept the agreement", and then click "Next".
33
Produkt Specifikationer
| Mærke: | Owon |
| Kategori: | Multimeter |
| Model: | OW16A |
Har du brug for hjælp?
Hvis du har brug for hjælp til Owon OW16A stil et spørgsmål nedenfor, og andre brugere vil svare dig
Multimeter Owon Manualer

27 Januar 2025
21 December 2024
18 December 2024
2 September 2024
25 Juli 2024
1 April 2024
22 Februar 2024
22 December 2022
28 November 2022
28 November 2022
Multimeter Manualer
- Multimeter Bosch
- Multimeter Hager
- Multimeter Extech
- Multimeter Silverline
- Multimeter Emos
- Multimeter Metrix
- Multimeter TFA
- Multimeter Pyle
- Multimeter Biltema
- Multimeter Abus
- Multimeter Keithley
- Multimeter Hama
- Multimeter Milwaukee
- Multimeter BENNING
- Multimeter Clas Ohlson
- Multimeter Metrel
- Multimeter Kyoritsu
- Multimeter Laserliner
- Multimeter Parkside
- Multimeter FERM
- Multimeter Stanley
- Multimeter Elro
- Multimeter REV
- Multimeter Elworks
- Multimeter Powerfix
- Multimeter Digitus
- Multimeter Alecto
- Multimeter Schneider
- Multimeter Basetech
- Multimeter Voltcraft
- Multimeter Testboy
- Multimeter Greenlee
- Multimeter Velleman
- Multimeter Somogyi
- Multimeter FLIR
- Multimeter Perel
- Multimeter JUNG
- Multimeter APPA
- Multimeter Amprobe
- Multimeter Fluke
- Multimeter Monacor
- Multimeter Brennenstuhl
- Multimeter Projecta
- Multimeter Maxwell
- Multimeter Testo
- Multimeter GW Instek
- Multimeter Brandson
- Multimeter Ideal
- Multimeter Multimetrix
- Multimeter Mastech
- Multimeter Högert
- Multimeter Brüder Mannesmann
- Multimeter Vimar
- Multimeter Klein Tools
- Multimeter PeakTech
- Multimeter Rigol
- Multimeter Uni-T
- Multimeter Joy-It
- Multimeter Wiha
- Multimeter HT Instruments
- Multimeter Chauvin Arnoux
- Multimeter Megger
- Multimeter Qian
- Multimeter Aim TTi
- Multimeter Steren
- Multimeter Gossen Metrawatt
- Multimeter Yato
- Multimeter Beha-Amprobe
- Multimeter Bearware
- Multimeter Sonel
- Multimeter Profile
- Multimeter Aldi
- Multimeter Amiko
- Multimeter Workzone
- Multimeter Tacklife
- Multimeter Etekcity
- Multimeter Digi-tool
- Multimeter Skandia
- Multimeter Elma
- Multimeter Hubinont
- Multimeter Kewtech
- Multimeter Strex
- Multimeter MBS
- Multimeter MGL Avionics
- Multimeter PCE Instruments
- Multimeter Micronta
- Multimeter CEM
- Multimeter Horex
- Multimeter Cosinus
- Multimeter Testec
- Multimeter Kurth Electronic
- Multimeter IWH
- Multimeter Weltron
- Multimeter Sanwa
- Multimeter Rohde & Schwarz
- Multimeter EEVBlog
- Multimeter Kingcraft
- Multimeter Weidmüller
- Multimeter Caltek
- Multimeter Noyafa
Nyeste Multimeter Manualer
9 April 2025
3 April 2025
3 April 2025
3 April 2025
3 April 2025
3 April 2025
3 April 2025
18 Marts 2025
14 Marts 2025
18 Februar 2025