Suunto Core Alu Manual
Læs nedenfor 📖 manual på dansk for Suunto Core Alu (58 sider) i kategorien Sport. Denne guide var nyttig for 40 personer og blev bedømt med 4.5 stjerner i gennemsnit af 2 brugere
Side 1/58

SUUNTO CORE
USER GUIDE
en

1 SAFETY 5. . . . . . . . . . . . . . . . . . . . . . . . . . . . . . . . . . . . . . . . . . . . . . . . . . . . . . . . . . . . . . . . . . . . . . . .
Types of safety precautions: 5. . . . . . . . . . . . . . . . . . . . . . . . . . . . . . . . . . . . . . . . . .
Safety precautions: 5. . . . . . . . . . . . . . . . . . . . . . . . . . . . . . . . . . . . . . . . . . . . . . . . . . . .
2 Welcome 7. . . . . . . . . . . . . . . . . . . . . . . . . . . . . . . . . . . . . . . . . . . . . . . . . . . . . . . . . . . . . . . . . . . . . .
3 Introduction 8. . . . . . . . . . . . . . . . . . . . . . . . . . . . . . . . . . . . . . . . . . . . . . . . . . . . . . . . . . . . . . . . . .
4 Getting started 9. . . . . . . . . . . . . . . . . . . . . . . . . . . . . . . . . . . . . . . . . . . . . . . . . . . . . . . . . . . . . . .
Basic settings 9. . . . . . . . . . . . . . . . . . . . . . . . . . . . . . . . . . . . . . . . . . . . . . . . . . . . . . . . . .
Modes 9. . . . . . . . . . . . . . . . . . . . . . . . . . . . . . . . . . . . . . . . . . . . . . . . . . . . . . . . . . . . . . . . .
Views 10. . . . . . . . . . . . . . . . . . . . . . . . . . . . . . . . . . . . . . . . . . . . . . . . . . . . . . . . . . . . . . . . .
Menu 11. . . . . . . . . . . . . . . . . . . . . . . . . . . . . . . . . . . . . . . . . . . . . . . . . . . . . . . . . . . . . . . . .
Backlight 11. . . . . . . . . . . . . . . . . . . . . . . . . . . . . . . . . . . . . . . . . . . . . . . . . . . .
Button lock 12. . . . . . . . . . . . . . . . . . . . . . . . . . . . . . . . . . . . . . . . . . . . . . . . .
Changing values 12. . . . . . . . . . . . . . . . . . . . . . . . . . . . . . . . . . . . . . . . . . . .
5 General settings 13. . . . . . . . . . . . . . . . . . . . . . . . . . . . . . . . . . . . . . . . . . . . . . . . . . . . . . . . . . . . .
5.1 Adjusting strap length 13. . . . . . . . . . . . . . . . . . . . . . . . . . . . . . . . . . . . . . . . . . .
5.2 Changing units 13. . . . . . . . . . . . . . . . . . . . . . . . . . . . . . . . . . . . . . . . . . . . . . . . . . .
5.3 Changing general settings 14. . . . . . . . . . . . . . . . . . . . . . . . . . . . . . . . . . . . . .
5.3.1 Button tone 14. . . . . . . . . . . . . . . . . . . . . . . . . . . . . . . . . . . . . . . . . . .
5.3.2 Tone guides 14. . . . . . . . . . . . . . . . . . . . . . . . . . . . . . . . . . . . . . . . . . .
5.3.3 Backlight 15. . . . . . . . . . . . . . . . . . . . . . . . . . . . . . . . . . . . . . . . . . . . . .
5.3.4 Language 15. . . . . . . . . . . . . . . . . . . . . . . . . . . . . . . . . . . . . . . . . . . . .
5.3.5 Activating button lock 16. . . . . . . . . . . . . . . . . . . . . . . . . . . . . . .
6 Using time mode 17. . . . . . . . . . . . . . . . . . . . . . . . . . . . . . . . . . . . . . . . . . . . . . . . . . . . . . . . . . . .
6.1 Changing time settings 17. . . . . . . . . . . . . . . . . . . . . . . . . . . . . . . . . . . . . . . . . .
6.1.1 Setting time 18. . . . . . . . . . . . . . . . . . . . . . . . . . . . . . . . . . . . . . . . . . .
2

8.1 Getting correct readings 37. . . . . . . . . . . . . . . . . . . . . . . . . . . . . . . . . . . . . . . .
8.1.1 Calibrating compass 37. . . . . . . . . . . . . . . . . . . . . . . . . . . . . . . . . .
8.1.2 Setting declination value 40. . . . . . . . . . . . . . . . . . . . . . . . . . . . .
8.2 Using compass 41. . . . . . . . . . . . . . . . . . . . . . . . . . . . . . . . . . . . . . . . . . . . . . . . . . .
8.2.1 Using bezel 42. . . . . . . . . . . . . . . . . . . . . . . . . . . . . . . . . . . . . . . . . . .
8.2.2 Using bearing tracking 42. . . . . . . . . . . . . . . . . . . . . . . . . . . . . . .
9 Using memory 44. . . . . . . . . . . . . . . . . . . . . . . . . . . . . . . . . . . . . . . . . . . . . . . . . . . . . . . . . . . . . .
9.1 Alti-baro memory 44. . . . . . . . . . . . . . . . . . . . . . . . . . . . . . . . . . . . . . . . . . . . . . . .
9.2 Viewing and locking logs 44. . . . . . . . . . . . . . . . . . . . . . . . . . . . . . . . . . . . . . . .
9.2.1 Viewing logs 45. . . . . . . . . . . . . . . . . . . . . . . . . . . . . . . . . . . . . . . . . .
9.2.2 Locking and unlocking logs 46. . . . . . . . . . . . . . . . . . . . . . . . . .
9.3 Choosing recording interval 46. . . . . . . . . . . . . . . . . . . . . . . . . . . . . . . . . . . . .
10 Replacing battery 48. . . . . . . . . . . . . . . . . . . . . . . . . . . . . . . . . . . . . . . . . . . . . . . . . . . . . . . . . .
11 Specifications 50. . . . . . . . . . . . . . . . . . . . . . . . . . . . . . . . . . . . . . . . . . . . . . . . . . . . . . . . . . . . . .
11.1 Technical data 50. . . . . . . . . . . . . . . . . . . . . . . . . . . . . . . . . . . . . . . . . . . . . . . . . .
11.2 Trademark 51. . . . . . . . . . . . . . . . . . . . . . . . . . . . . . . . . . . . . . . . . . . . . . . . . . . . . .
11.3 Copyright 51. . . . . . . . . . . . . . . . . . . . . . . . . . . . . . . . . . . . . . . . . . . . . . . . . . . . . . .
11.4 CE 52. . . . . . . . . . . . . . . . . . . . . . . . . . . . . . . . . . . . . . . . . . . . . . . . . . . . . . . . . . . . . . .
11.5 Patent notice 52. . . . . . . . . . . . . . . . . . . . . . . . . . . . . . . . . . . . . . . . . . . . . . . . . . .
12 Warranty 53. . . . . . . . . . . . . . . . . . . . . . . . . . . . . . . . . . . . . . . . . . . . . . . . . . . . . . . . . . . . . . . . . . .
12.1 Suunto Limited Warranty 53. . . . . . . . . . . . . . . . . . . . . . . . . . . . . . . . . . . . . .
Index 55..........................................................................
4
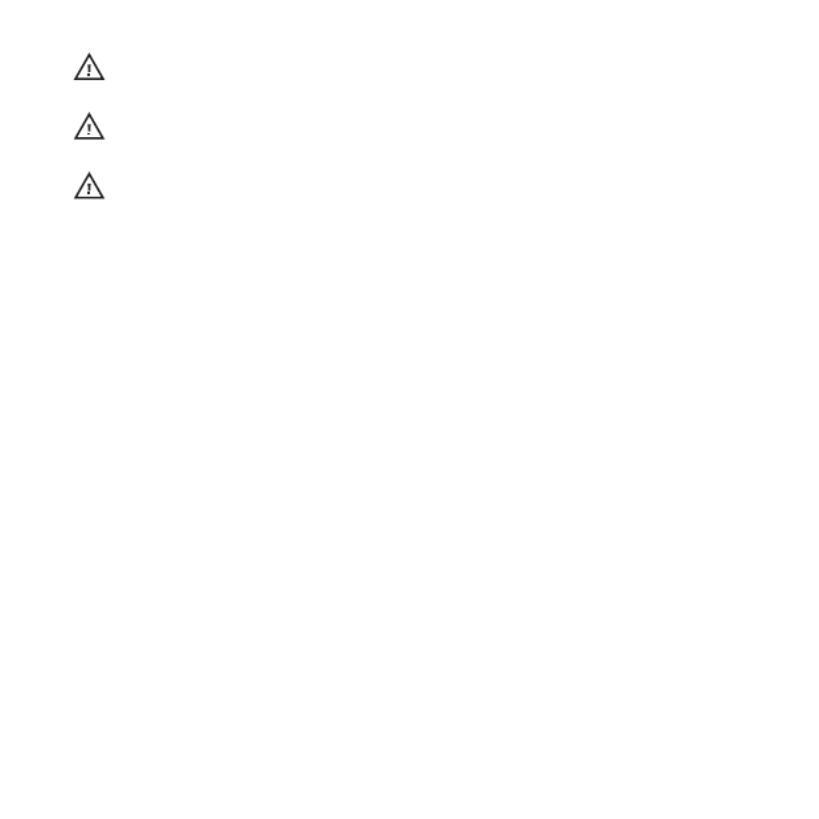
CAUTION: DO NOT APPLY INSECT REPELLENT.
CAUTION: TREAT AS ELECTRONIC WASTE.
CAUTION: DO NOT KNOCK OR DROP.
6

2 WELCOME
“For over 70 years Suunto has provided accurate, reliable information to people
in need of it. Our instruments enable our users to reach their goals more effectively
and get more out of their sports experience. Our products are often very critical to
the user. Therefore we at Suunto take pride in maintaining highest quality standards
for our products. “
Founded in 1936, Suunto is the world leader in precision compasses, dive
computers and wristop altimeters. Trusted by climbers, divers and explorers
on every continent, Suunto Outdoor instruments deliver legendary design,
accuracy and dependability. In 1987, Suunto pioneered the first dive computer,
followed by the first ABC wristop in 1998. Offering the latest advancements in
altimeter, sports fitness and GPS devices, Suunto remains the foremost choice
of today's outdoor professional. To learn more about Suunto Outdoor
instruments and the people who use them, visit www.suunto.com.
7
en

3 INTRODUCTION
Suunto Core has been designed for people like you, people who enjoy life
outdoors and activities like climbing, hiking, snorkeling and countless others
ranging from the recreational to the extreme. Your Suunto Core will help you
get maximum enjoyment from your favorite outdoor activities, whatever they
might be.
Suunto Core brings together an altimeter, barometer and an electronic compass
in one package. It also has clock, stopwatch and calendar functions.
This User Guide explains the Suunto Core features, how they work, and how
you access them. In addition, we have included examples of how you can use
them in real life situations.
Each main chapter explains a mode and its views. It also gives you information
on how to set and use these views.
Suunto Core gives you readings on time, barometric pressure and altitude.
Additional information is given for every reading so that you can make the
most of your favourite outdoor activities.
8

4 GETTING STARTED
Basic settings
Press any button and your Suunto Core will activate. You are then prompted
to set the language, units (imperial or metric), time and date. Use the upper
right [+] button and lower right [- Light] button to change the settings. Accept
and move to the next menu item by pressing the right middle [Mode] button.
You can always return to the preceding menu item by pressing the lower left
[View] button. When the settings are set as you want, you can start using the
basic time features of your Suunto Core.
NOTE: You need to set the altimeter, barometer and compass to get correct
readings. Please refer to the User Guide for detailed information on setting these
properly.
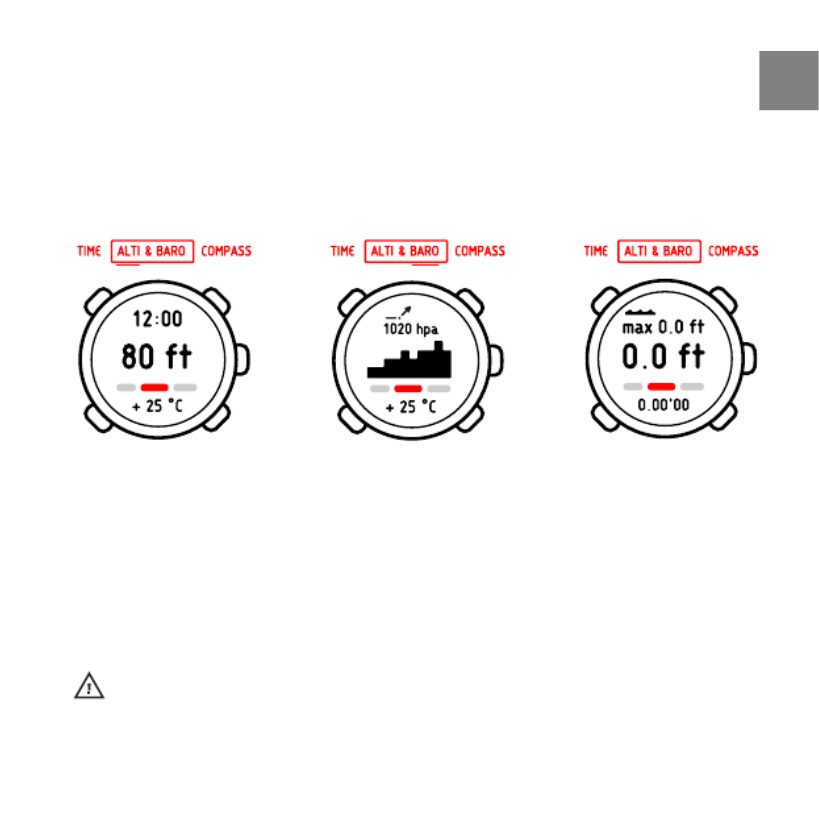
Modes
Your Suunto Core has three modes: , and . TheseTIME ALTI & BARO COMPASS
modes are explained in detail in the User Guide. The enabled mode is indicated
by a rectangle around the mode name. You switch between the main modes
with the right middle [Mode] button. Try it!
9
en

Views
Each mode has a set of views that you access with the lower left [View] button.
Views are presented in the lower part of the display. Views contain
supplementary information about the enabled mode, for example, viewing
seconds as supplementary information in the mode. Some views are alsoTIME
interactive.
Suunto Core has four interactive views:
●Stopwatch ( mode)TIME
●Countdown timer ( mode)TIME
●Log recorder ( mode)ALTI & BARO
●Altitude difference measurer ( mode)ALTI & BARO
When interactive views are enabled, you can start, stop and restart them with
the upper left [Start Stop] button and reset them by keeping the upper right
[+] button pressed. Enter the stopwatch in mode and try it out!TIME
10

20
Menu
In you can change values, change the general settings and units, or viewMENU
logs stored in the logbook. To enter , keep the middle right [Mode] buttonMENU
pressed while in the , or mode. The segments in theTIME ALTI & BARO COMPASS
outer part of the display indicate your transition time. Exit by pressingMENU
the upper left [Start Stop] button. Whenever an exit option is available in ,MENU
this is indicated with an "X" on the screen next to the [Start Stop] button. Get
familiar with entering and exiting !MENU
Backlight
You can activate the backlight in any mode by pressing the lower right [- Light]
button. The backlight turns off automatically after 5 seconds. If you want to
see the backlight when you are in , you need to activate it in the ,MENU TIME
ALTI & BARO COMPASS MENU or mode before entering . The backlight will return
to normal when you return to a mode.
11
en

Button lock
You can activate and deactivate the button lock by keeping the lower right
[-Light] button pressed.
NOTE: You can change views and use the backlight when the button lock is
activated.
Changing values
To change a setting, you have to be in . To enter , keep the rightMENU MENU
middle [Mode] button pressed down in the , or mode.TIME ALTI&BARO COMPASS
Any changes you make in take effect immediately. For example, if youMENU
enter TIME-DATE in and change the time from 12:30 to 11:30 and exit.MENU
The time will be set to 11:30.
12

5 GENERAL SETTINGS
Before you start to use your Suunto Core, it's a good idea to set the
measurement units and general settings according to your preferences. General
settings are changed in .MENU
5.1 Adjusting strap length
If you need to adjust the strap length of the metal strap, please contact your
nearest watch store to get the needed adjustments correctly done for you.
5.2 Changing units
In you select the measurement units, including:UNITS
●TIME : 24h/12h
●DATE: dd.mm/mm.dd
●TEMPERATURE : °C/°F (Celsius/Fahrenheit)
●AIR PRESSURE: hPa/inHg
●ALTITUDE: meters/feet
To enter in :UNITS MENU
1. Enter by keeping [Mode] pressed in the , orMENU TIME ALTI & BARO
COMPASS mode.
2. Scroll down to using [- Light].UNITS
3. Enter with [Mode].
To change units:
1. In , scroll between the list items using [+] and [- Light].UNITS
2. Enter with [Mode].
13
en

3. Change the values using [+] and [- Light], accept with [Mode].
4. Exit with [Start Stop].MENU
5.3 Changing general settings
In you set the general settings, including:GENERAL
●BUTTON TONE: on/off
●TONE GUIDE: on/off
●BACKLIGHT: light button/any button
●LANGUAGE: English, French, Spanish, German
To enter in :GENERAL MENU
1. Enter by keeping [Mode] pressed in the , orMENU TIME ALTI & BARO
COMPASS mode.
2. Scroll down to using [- Light].GENERAL
3. Enter with [Mode].
5.3.1 Button tone
In you turn the button tone on or off. A button tone is emittedBUTTON TONE
every time a button is pressed, confirming an action.
1. In , select .GENERAL BUTTON TONE
2. Switch the button tone on or off with [+] and [- Light].
5.3.2 Tone guides
In you turn the tone guides on or off. You will hear tone guidesTONE GUIDE
when:
●You change a setting value
●You set the altitude reference value
14

To choose a language:
1. In , select .GENERAL LANGUAGE
2. Select a language from the list with [+] and [- Light].
5.3.5 Activating button lock
You can activate and deactivate the button lock by keeping [-Light] pressed
down. When the button lock is activated, it is indicated with a lock symbol .
NOTE: You can change views and use the backlight when the button lock is
activated.
16

6 USING TIME MODE
The mode handles time measurement.TIME
20
With [View] you can scroll through the following views:
●Date: current weekday and date
●Seconds: seconds as numbers
●Dual time: time in another time zone
●Sunrise and sunset : time of sunrise and sunset at a specific location
●Stopwatch: sport timer
●Countdown timer: alarm goes off after a set duration
●Empty: no additional view
NOTE: The seconds view in the lower panel of the screen turns off after 2 hours
in idle state to save battery. Activate by re-entering the view.
6.1 Changing time settings
You change the time settings in .MENU
17
en

To enter time settings in :MENU
1. Enter by keeping [Mode] pressed down.MENU
2. Scroll down to using [- Light].TIME-DATE
3. Enter with [Mode].
6.1.1 Setting time
In you set the time.TIME
To set the time:
1. In , select .TIME-DATE TIME
2. Change the hour, minute and second values with [+] and [- Light].
6.1.2 Setting date
In you set the month, day and year.DATE
To set the date:
1. In , select .TIME-DATE DATE
2. Change the year, month and day values with [+] and [- Light].
To change the format in which the time is displayed, see Section 5.2 Changing
units on page 13.
6.1.3 Setting dual time
In you can set the time for a location in a different time zone.DUAL TIME
To set dual time:
1. In , select .TIME-DATE DUAL TIME
2. Change the hour, minute and second values with [+] and [- Light].
18

NOTE: We recommend that you set the current time at your current location
as the main time because the alarm clock emits alarms according to the main time.
Possible real life situation: Knowing the time at home
You are traveling abroad and you set the dual time to be the time at home. The
main time is the time at your current location. Now you always know the local time
and you can quickly check what time it is at home.
6.1.4 Setting sunrise and sunset times
In you select a reference city that your Suunto Core uses to give youSUNRISE
sunrise and sunset times.
To set sunrise and sunset times:
1. In , select .MENU SUNRISE
2. Scroll through the locations with [+] and [-Light].
3. Select a location with [Mode].
NOTE: If you want to set the sunrise and sunset times for a location that is not
listed in your device, select another reference city from the same time zone. Select
the closest city north or south from your location.
Possible real life situation: Hiking close to Toronto
You re hiking in Algonquin, a huge national park north of Toronto. You want to’
know when the sun sets, so that you know when to start putting up your tent for
the night. You choose Toronto as your reference sunrise-sunset city. Your Suunto“ ”
Core now tells you when the sun will set.
19
en

6.2 Using stopwatch
The stopwatch measures time. Its resolution is 0.1 seconds.
To use the stopwatch:
1. In the mode, select the stopwatch view.TIME
2. Start, stop and restart the stopwatch with [Start Stop].
3. Keep [+] pressed to reset the stopwatch.
Possible real life situation: Timing the 100m dash
Your friend is training for a running competition, and needs to know how long it
takes him to run the 100 m dash. You start the stopwatch the instant he breaks
from the blocks. You stop the stopwatch the instant he crosses the finish line. The
result: 11.3 seconds. Not bad!
6.3 Using countdown timer
In you can set the countdown timer to count down from a presetCOUNTDOWN
time to zero. It sounds an alarm when zero is reached. The default is 5 minutes.
To change the default countdown time:
1. In , select .MENU TIME-DATE
2. Select .COUNTDOWN
3. Set the timer minutes and seconds (maximum 99 minutes and 59
seconds).
4. Accept with [Mode].
To start counting down:
1. In mode, select the countdown timer view.TIME
2. Start, stop and restart with [Start Stop].
3. Keep [+] pressed to reset the timer.
20
Possible real life situation: Boiling eggs
You re on a hiking expedition. It s morning. You wake up, come out of your tent,’ ’
and start to make breakfast at your campfire. This time, you want 8-minute eggs.
You set the countdown timer to 8 minutes with your eggs in the pot and wait for
the water to come to a boil. When the water boils, you engage the countdown
timer. At the eight-minute point, your Suunto Core gives the alarm. Presto! Perfect
8-minute eggs.
6.4 Setting alarm
You can use your Suunto Core as an alarm clock.
To access the alarm clock and set the alarm:
1. In , select .MENU TIME-DATE
2. Select .ALARM
3. Switch the alarm on or off with [+] and [- Light].
4. Accept with [Mode].
5. Use [+] and [- Light] to set the hours and minutes.
When the alarm is switched on, the alarm symbol appears on the display.
When the alarm sounds, you can either snooze or turn the alarm off.
If you choose or do nothing, the alarm stops and restarts every 5 minutesYES
until you stop it. You can snooze up to 12 times for a total of 1 hour. If you
choose , the alarm stops and restarts the same time the following day.NO
21
en

5min24h
TIP: When the snooze is turned on, you can deactivate it in the TIME mode by
keeping [View] pressed down.
Possible real life situation: Waking up in the morning
You want to wake up early tomorrow morning. You set your Suunto Core alarm
for 6:30 before you go to bed. The alarm wakes you up at 6:30 the next morning
but you want to sleep for another 5 minutes. You choose when the device asksYES
you if you want to snooze. After 5 minutes the alarm goes off again. This time you
get up and happily start preparing for your trip. What a difference five minutes can
make!
NOTE: The alarm symbol is blinking when the snooze is activated. When snooze
is deactivated, the alarm symbol stops to blink.
22
7 USING ALTI & BARO MODE
In the mode you can view the current altitude, barometric pressureALTI & BARO
or snorkeling depth. It offers four profiles: , , AUTOMATIC ALTIMETER BAROMETER
and (see ). You can accessDEPTH METER Section 7.2.2 Setting profiles on page 26
different views depending on which profile is activated when you are in the
ALTI & BARO mode.
7.1 How Alti & Baro works
To get the right readings from , it is important to understand howALTI & BARO
Suunto Core calculates altitude and sea level air pressure.
Suunto Core constantly measures absolute air pressure. Based on this
measurement and reference values, it calculates altitude or sea level air
pressure.
CAUTION: Keep area around sensor free of dirt and sand. Never insert any
objects into the sensor openings.
23
en

7.1.1 Getting correct readings
If you are engaged in an outdoor activity that requires you to know the air
pressure, you need to enter the altitude reference value for your location. This
is found on most topographic maps. Your Suunto Core will now give you the
correct readings.
To get the correct altitude readings, you need to enter the sea level air pressure
reference value. The sea level air pressure reference value relevant to your
location can be found in the weather section of the local newspaper or on the
websites of national weather services.
Absolute air pressure is measured constantly
Absolute air pressure + altitude reference = Sea level air pressure
Absolute air pressure + sea level air pressure reference = Altitude
Changes in local weather conditions will affect altitude readings. If local weather
changes often, it is advisable to reset the current altitude reference value
frequently, preferably before starting your journey when the reference values
are available. If local weather is stable, you do not need to set reference values.
7.1.2 Getting incorrect readings
ALTIMETER profile + standing still + weather change
If your profile is on for an extended period of time with the deviceALTIMETER
in a fixed location while the local weather changes, the device will give incorrect
altitude readings.
24

ALTIMETER profile + altitude moving + weather change
If your profile is on and the weather changes frequently while youALTIMETER
climb in altitude or go down in altitude, the device will give you incorrect
readings.
BAROMETER profile + altitude moving
If the profile is on for an extended period of time as you climb inBAROMETER
altitude or go down in altitude, the device assumes that you are standing still
and interprets your changes in altitude as changes in sea level air pressure. It
will therefore give you incorrect sea level air pressure readings.
Possible real life situation: Setting the altitude reference value
You re on the second day of your two-day hike. You realize that you forgot to switch’
from the profile to the profile when you started moving inBAROMETER ALTIMETER
the morning.You know that the current altitude readings given by your Suunto
Core are wrong. So, you hike to the nearest location shown on your topographic
map for which a altitude reference value is provided. You correct your Suunto Core
altitude reference value accordingly. Your altitude readings are correct again.
7.2 Setting profiles and reference values
7.2.1 Matching profile to activity
The profile should be selected when your outdoor activity involvesALTIMETER
changes in altitude (e.g. hiking in hilly terrain). The profile shouldBAROMETER
be selected when your outdoor activity does not involve changes in altitude
(e.g. surfing, sailing). To get the correct readings, you need to match the profile
25
en

to the activity. You can either let Suunto Core decide which profile is most
suitable for you at the moment, or you can choose a suitable profile yourself.
7.2.2 Setting profiles
To set the profile:
1. In , select .MENU ALTI-BARO
2. Select .PROFILE
3. Choose a suitable profile.
Alternatively you can set the profile in the mode by keeping [View]ALTI & BARO
pressed down.
7.2.3 Setting reference values
To set the reference value:
1. In , select .MENU ALTI-BARO
2. Select and choose between the and .REFERENCE ALTIMETER SEA LEVEL
3. Set the known reference value using [+] and [- Light].
Possible real life situation: Correcting your altitude value
You re hiking and take a break when you see a sign with the current altitude. You’
check your Suunto Core altitude reading and discover a small difference between
26

the two numbers. You set the altitude reference value on your Suunto Core to match
that of the sign.
7.3 Using weather trend indicator
The weather trend indicator is located on the upper side of the display. It is
displayed in the and modes, providing you with quick referenceTIME ALTI & BARO
to check upcoming weather conditions. The weather trend indicator is
comprised of two lines forming an arrow. Each line represents a 3-hour period.
The right line represents the last 3 hours. The left line represents the 3 hours
prior to the last 3 hours. So the line can indicate 9 different patterns in the
barometric trend.
Situation last 3 hoursSituation 3-6 hours ago
Dropping heavily (>2 hPa/3hours)Dropped heavy (>2 hPa/3hours)
Rising heavily (>2 hPa/3hours)Remained stable
Dropping heavily (>2 hPa/3hours)Rose heavy (>2 hPa/3hours)
27
en

TIP: If the weather trend indicator shows that the air pressure is constantly
rising, there is a higher possibility of sunny weather upcoming. Again, if the air
pressure is constantly dropping, there is a higher possibility of rainy weather.
7.4 Activating storm alarm
The storm alarm notifies you that a pressure drop of 4 hPa / 0.12 inHg or more
has occurred during a 3-hour period. Suunto Core will activate an alarm and
flash an alarm symbol on the display for 20 seconds. The storm alarm only
works when you have activated the profile in the mode.BAROMETER ALTI & BARO
To activate the storm alarm:
1. In , select .MENU ALTI-BARO
2. Select .STORM ALARM
3. Switch the storm alarm on or off with [+] and [- Light].
TIP: You can stop the storm alarm by pressing any button.
Possible real life situation: Getting surprised by a storm while hiking
You are hiking in a dense forest when your Suunto Core activates the storm alarm.
The weather has taken a turn for the worse in the last 3 hours - the sky is getting
dark. Good thing your Suunto Core warned you, because you need to find shelter
from the hard rain that may soon fall.
7.5 Using altimeter profile
The profile calculates altitude based on the reference values. TheALTIMETER
reference values can either be sea level air pressure or a previous point of
28

altitude reference value. When the profile is activated, the word ALTIMETER ALTI
is underlined on the display.
When the profile is activated, you can access the following viewsALTIMETER
with [View]:
●Log recorder: records the altitude changes into logs
●Altitude difference measurer: measures the altitude difference from a
set point
●Temperature: measures the current temperature
●Empty: no supplementary information
7.5.1 Using altitude difference measurer
The altitude difference measurer shows the difference in altitude between a
set point and your current position. This feature is especially useful for mountain
climbing, for example when you want to track your progress in terms of altitude
climbed.
To use the altitude difference measurer:
1. In the mode, select the altitude difference measurer view.ALTI & BARO
29
en
Produkt Specifikationer
| Mærke: | Suunto |
| Kategori: | Sport |
| Model: | Core Alu |
| Vægt: | 70 g |
| Markedspositionering: | Sportsur |
| Vandtæt op til: | 30 m |
| Vandfast: | Ja |
| Urkassens materiale: | Aluminium |
| Kalender: | Ja |
| Højdemåler barometer: | Ja |
| Ur-indstilling: | 12t/24t |
| Stopur: | Ja |
| Timer: | Ja |
| Batteritype: | CR2032 |
| GPS (satellit): | Ingen |
Har du brug for hjælp?
Hvis du har brug for hjælp til Suunto Core Alu stil et spørgsmål nedenfor, og andre brugere vil svare dig
Sport Suunto Manualer

21 April 2024
23 Februar 2024
3 Februar 2024
21 Januar 2024
9 Januar 2024
14 November 2023
12 November 2023
26 Juli 2023
19 Juli 2023
29 Maj 2023
Sport Manualer
- Sport SilverCrest
- Sport Denver
- Sport Beurer
- Sport Medisana
- Sport VitalMaxx
- Sport Apple
- Sport Epson
- Sport TFA
- Sport Garmin
- Sport Asus
- Sport Bushnell
- Sport Livoo
- Sport Pyle
- Sport Nedis
- Sport Polar
- Sport Hama
- Sport Casio
- Sport Clas Ohlson
- Sport Sanitas
- Sport Trevi
- Sport Crivit
- Sport Mio
- Sport Geonaute
- Sport Medion
- Sport Huawei
- Sport Withings
- Sport Sigma
- Sport Cateye
- Sport Xiaomi
- Sport Oppo
- Sport Timex
- Sport MyKronoz
- Sport Adidas
- Sport TomTom
- Sport Honor
- Sport Fitbit
- Sport Inventum
- Sport Lamax
- Sport ADE
- Sport Alatech
- Sport Misfit
- Sport Runtastic
- Sport Oregon Scientific
- Sport Sportline
- Sport O-Synce
- Sport Steren
- Sport Goodis
- Sport Celly
- Sport Crane
- Sport Cressi
Nyeste Sport Manualer
26 Februar 2025
26 Februar 2025
26 Februar 2025
15 Januar 2025
1 December 2024
19 November 2024
4 November 2024
25 Juni 2024
25 Juni 2024
25 Juni 2024