Taga Harmony TWA-10B Manual
Taga Harmony
Medieafspiller
TWA-10B
Læs nedenfor 📖 manual på dansk for Taga Harmony TWA-10B (40 sider) i kategorien Medieafspiller. Denne guide var nyttig for 19 personer og blev bedømt med 4.5 stjerner i gennemsnit af 2 brugere
Side 1/40

TWA-10B
NETWORK PLAYER
Instruction Manual
Edition 03-2024
Firmware version: 4.6.606043.48


2
Introduction
Thank you for purchasing this TAGA Harmony Network Player.
TAGA Harmony TWA-10B allows to stream digital music content from smartphones,
tablets, music libraries on computers or network storage, as well as from the best
online streaming services and internet radio.
The TWA-10B can be quickly and easily connected to your existing audio system and
transform it to a thrilling digital smart system!
KEY FEATURES:
• With Apple AirPlay, you can enjoy your favorite music in any room.
• and Wi- Bluetooth® to wirelessly stream music from smartphones, tablets,
computers, online streaming services and internet radio.
• Support of many (incl. Spotify Connect, Tidal Connect) online streaming services
and to enjoy the best music and broadcasts from around the world.Internet radio
• Compatibility with high-resolution sources up to 24bit/192kHz (via wi-).
• High-quality sound utilizing ES9023 with ESS SABRE Premier Stereo DAC
Hyperstream™ architecture and Time Domain Jitter Eliminator.
• Support of a wide range of formats including high-resolution lossless FLAC and
ALAC uncompressed WAV, and to get the most natural and detailed sound.
• Compatible with any devices with audio inputs such as ampliers, receivers,
audio systems, soundbars etc. through 3 stereo outputs: gold-plated analog RCA,
digital Optical and gold-plated digital Coaxial.
• Compact size and elegant design utilizing to match with any aluminum housing
device.
• (for instance 4STREAM, WiiM Home) available Streaming via free applications
on the Apple App Store and the Google Play
® Store.
• Selected apps provide features - you can enjoy music simultaneously multiroom
on multiple TWA-10B players or other compatible devices in different zones and
control them via a single app interface.

3
Cleaning
Do not use strong or abrasive cleaners. Use a damp, soft cloth for cleaning.
Specications and the latest instruction manual edition
Full technical specications and the latest edition of the instruction manual
are available on www.TagaHarmony.com
Introduction

4
Contents
Safety Instructions 5
Front and Rear Panel 8
Hooking Up the Network Player 10
Input Indicator Status 12
Connection Options - Bluetooth® | Wireless (wi-) | LAN Wired 12
Connection Options - Apple AirPlay 18
Operation 18
Control Application 20
Playback from computers 32
Interferences with tube devices 32
Trademarks and Software Notice 33
Kit Content 34
Serial Number and MAC Address 34
Specications 34

5
IMPORTANT
READ THIS SECTION CAREFULLY BEFORE PROCEEDING!
WARNING: TO REDUCE THE RISK OF FIRE OR ELECTRIC SHOCK, DO NOT
EXPOSE THIS APPARATUS OR THE POWER ADAPTER TO RAIN OR MOISTURE,
AND OBJECTS FILLED WITH LIQUIDS, SUCH AS VASES, SHOULD NOT BE
PLACED ON THIS APPARATUS OR ON THE POWER ADAPTER.
CAUTION: TO PREVENT ELECTRIC SHOCK, FULLY AND SECURELY INSERT
THE POWER PLUG INTO THE POWER OUTLET, AND THE POWER CABLE
CONNECTORS INTO THE UNIT AND THE POWER ADAPTER SOCKETS (IF THE
POWER ADAPTER IS NOT EQUIPPED WITH AN INTEGRATED [ATTACHED] POWER
CORDS).
CAUTION: FOR CONTINUED PROTECTION AGAINST RISK OF FIRE, REPLACE
THE FUSE (IF THE UNIT OR THE POWER ADAPTER IS EQUIPPED WITH A USER
REPLACEABLE FUSE) ONLY WITH THE SAME AMPERAGE AND VOLTAGE TYPE.
IN CASE WHEN THE UNIT OR THE POWER ADAPTER IS NOT EQUIPPED WITH
A USER REPLACEABLE FUSE - REFER REPLACEMENT TO QUALIFIED SERVICE
PERSONNEL.
WARNING: THE UNIT AND THE POWER ADAPTER MAY BECOME HOT. ALWAYS
PROVIDE ADEQUATE VENTILATION TO ALLOW FOR COOLING. DO NOT PLACE
THE UNIT AND THE POWER ADAPTER NEAR A HEAT SOURCE, OR IN SPACES
THAT CAN RESTRICT VENTILATION.
Safety Instructions
An exclamation mark in a triangle is intended to alert the user to the presence
of important operating and maintenance (servicing) instructions in the literature
accompanying the appliance.
EN_safety_adapter_10-21

6
Safety Instructions
1. Read Instructions - All the safety and operating instructions
should be read before the product is operated.
2. Retain Instructions - The safety and operating instructions should
be retained for future reference.
3. Heed Warnings - All warnings on the product and in the operating
instructions should be adhered to.
4. Follow Instructions - All operating and use instructions should
be followed.
5. Cleaning - Unplug this product from the power outlet before
cleaning. Do not use liquid cleaners or aerosol cleaners.
6. Water and Moisture - Do not use this product near water - for
example, near a bath tub, wash bowl, kitchen sink or laundry tub;
in a wet basement; or near a swimming pool; and the like. These
precautions also apply to the power cords and power adapter.
7. Accessories - Do not place this product on an unstable cart,
stand, tripod, bracket or table. The product may fall, causing seri-
ous injury to a child or adult and serious damage to the product.
Use only with a cart, stand, tripod, bracket or table recommended
by the manufacturer or sold with the product. Any mounting of
the product should follow manufacturer’s instructions and should
use a mounting accessory recommended by the manufacturer.
8. Ventilation - This unit may be equipped with slots and openings
in the cabinet (housing) which are provided for ventilation and
to ensure reliable operation of the product and to protect it from
overheating and these openings must not be blocked or covered.
The openings should never be blocked by placing the product
on a bed, sofa, rug or other similar surface. This product should
be not placed in a built-in installation such as a bookcase or
rack unless proper ventilation is provided or the manufacturer’s
instructions have been adhered to. For products equipped with
separate power adapters, leave at least 5cm (2in.) of free space
on all sides and the top of the power adapter.
9. Power Sources - This product should be operated only from the
type of power source indicated on the marking label (placed on
the product and / or, if applicable, on a separate power adapter
unit). If you are not sure of the type of power supply in your home,
consult your product dealer or local power company. For products
intended to operate from battery power or other sources, refer to
the operating instructions.
10. Grounding and Polarity - some units for proper operation or
to take full advantage of their capabilities may require to be
connected to a grounded power outlet – refer to the user manual
for more information.
Some units or power adapters may have markings for the live
(L) and neutral (N) conductors for power - in order to take full
advantage of capabilities of such products, it is recommended to
properly connect the polarity according to the markings on the
unit - refer to the user manual for more information. Connecting
the polarity not in accordance with the markings will not aect
the durability and reliability of the device.
11. Power-cord Protection - Power supply cords should be routed
so that they are not likely to be walked on or pinched by items
placed upon or against them, paying particular attention to cords
at plugs, convenience receptacles and the point where they exit
from the product or the power adapter.
12. Lighting - For added protection for this product during a lighting
storm or when it is left unattended and unused for long periods
of time, unplug it from the wall outlet and disconnect the antenna
or system cables. This will prevent damage to the product due to
lighting and power-line surges.
13. Overloading - Do not overload wall outlets, extension cords or
integral convenience receptacles as this can result in a risk of fire
or electric shock.
14. Object and Liquid Entry - Never push objects of any kind into this
product through openings as they may touch dangerous voltage
points or short-out parts that could result in a fire or electric
shock. Do not expose this apparatus and the power adapter
to dripping or splashing and ensure that no objects filled with
water, such as vases are placed on the apparatus or on the power
adapter.
15. Servicing - Do not attempt to service this product yourself as
opening or removing covers may expose you to dangerous
voltage or other hazards. Refer all servicing to qualified service
personnel.
EN_safety_adapter_10-21

8
Front and Rear Panel
Front Panel:
1. Input Indicator
White – Network: Wireless (wi-) and Wired (LAN), Blue – Bluetooth
®,
Green – Spotify connect, Red – Standby mode
2. Touch 2-function Button:
- Standby Button
To turn the unit ON (when it is OFF) - press once
To turn the unit OFF - long press
- Input (Source) Selection Button - short press to select inputs
Note! The Touch 2-function Button is sensitive to electromagnetic radiation from external
electrical appliances. If you encounter any problems with its operation: disconnect the
power adapter and place the Network Player away from potential sources of
interferences.
1 2

9
Front and Rear Panel
Rear Panel:
3. Wireless (wi- and Bluetooth®) Antenna Socket
4. Connections Reset Button
Short press once – conguration (setup) of the Wireless (wi-) connection
Short press twice – pairing with Bluetooth
® connection
Long press – reset of both connections (wi- and Bluetooth
®)
5. Wired connection to the local network device
6. Analog Stereo RCA Output (R and L)
7. Digital Coaxial Output
8. Digital Optical Output
9. USB type-C DC Power Input
3 4 5 6 7 8 9

10
Hooking Up the Network Player
USB type-C
power cable
Power adapter
Digital
optical
cable
Digital
coaxial
cable
RCA-RCA
interconnect
RJ45
Ethernet
cable
Internet
Router
Amplier etc.
Wireless
antenna
Soundbar etc.
Receiver etc. Electrical outlet
Wired
Network
(LAN)
Smartphone,
tablet,
computer, etc.
Wireless
Network
(wi-)
Internet
Router

Signal TWA-10B
Output
Audio equipment
Input
Connection cable
Analog LINE OUT RCA sockets RCA-RCA interconnect
(supplied)
Digital OPTICAL OUT Optical socket Optical cable
(not supplied)
COAXIAL OUT Coaxial socket Coaxial cable
(not supplied)
11
1. Make sure the Network Player is turned off (the power adapter is disconnected
from the electrical outlet).
2. Make sure that external equipment which will be connected to the Network Player
is turned off.
3. Screw in the antenna into the Wireless antenna socket.
Note! Make sure the antenna is securely and rmly installed – otherwise the wi- or
Bluetooth® connection may not be established or may be unstable.
4. If you want to connect to the local area network by wire: using an RJ45 Ethernet
cable connect the Network Player to your local network device (router, access
point etc.). Check “Connection Options” for more details.
5. External audio equipment connection options:
Hooking Up the Network Player
6. Apple AirPlay - check “Connection Options - Apple AirPlay” for more details.
7. If you want to stream music via Wireless (wi-) or Bluetooth® from compatible
devices check “Connection Options” for more details.
The sockets shown for external equipment and connection options may differ depending on the
device.

12
Color Input / Mode
White Wireless (wi-)
LAN
Blue Bluetooth®
Green Spotify connect
Red Standby mode
Indication Status
Flashing rapidly System is booting
Flashing slowly System is ready
Illuminated
continuously
Wireless (wi-)
or LAN connected
Flashing rapidly System is booting
Flashing slowly System is ready
Illuminated
continuously
Bluetooth® connected
Illuminated
continuously
Spotify connected
Illuminated
continuously
System in the
Standby mode
(the unit turned off)
Input Indicator Status
Connection Options
The Network Player device name is “TWA-10B ####”, where #### is 4 last hex digits of
its unique MAC address.
BEFORE BEGINNING
1. After turned on for the rst time or after restoring factory setting, the Network Player
will start in the Bluetooth® input.
2. Make sure that your local network device (router, access point etc.) is connected to
the Internet.
3. Download the Control Application for mobile devices - check “Control Application”
for more details.
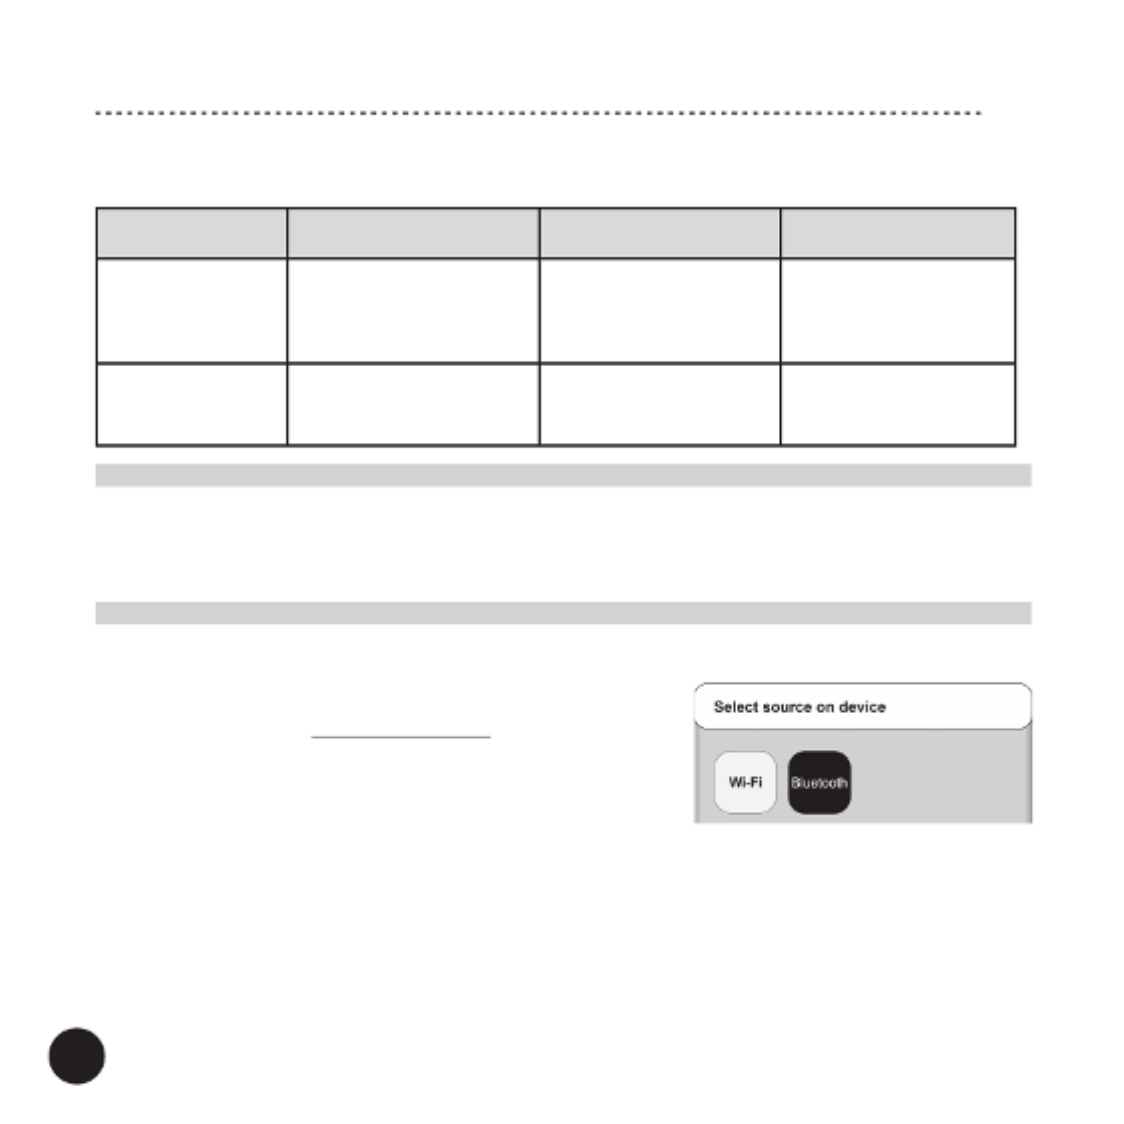
2. Select Bluetooth® in the settings of your audio
source device and start scanning for available
Bluetooth® devices.
3. After a short time “TWA-10B ####” will appear on the screen.
4. Select “Pair” on your audio source device to connect with the Network Player.
After the connection is successful the Input Indicator will be illuminated continuously
in blue and it will remain illuminated as long as the current connection is active.
5. You can start streaming music.
13
Wi- GPS Bluetooth®
Mobile device √ √
(required for the
setup)
√
Computer √
(not required for LAN)
√
Note! The Network Player operates only in 2.4 GHz wireless networks.
5. Make sure that the audio source device and the Network Player, and for mobile
devices the Control Application as well, are in the same network.
6. Turn the Network Player on by pressing the Standby Button.
I. Bluetooth® CONNECTION
1. If the Network Player is not in the Bluetooth
® input – select it in the Control
Application or by short pressing the Input (Source) Selection Button on the front
panel – the Input Indicator will be ashing in blue.
To start pairing short press twice the Reset Button.
4. Make sure to activate the following options in your audio source device setup
(mobile devices and computers):
Connection Options

14
Connection Options
Note!
- The audio source device must be within a range of approximately 5 meters from
the Network Player.
- Please refer to your audio source device user instruction for details on operating
the Bluetooth®. Operation and names of specic functions may vary on different
devices.
- Make sure the Wireless antenna is securely and rmly installed, and that there
are no objects placed between the audio source device and the Network Player
obscuring the Bluetooth® signal which may result in unstable or no connection.
- For some audio source devices it may take a shorter or a longer period of time to
reconnect to the Network Player or it may even require to repeat the pairing
procedure each time the Bluetooth® connection is lost.
For most audio source devices the connection will be automatically retrieved.
- When you want to pair another Bluetooth® audio source device than the currently
active, you have to start pairing (short press twice the Reset Button) and restart
the Bluetooth® connection procedure for the new audio source device.
- If your audio source device is not able to nd the “TWA-10B ####” Bluetooth
®
device or connect to it then start again pairing by short press twice the Reset
Button.
II. WIRELESS (wi-) CONNECTION (on mobile devices)
Wi- connection conguration
1. If the Network Player is not in the Network input – select it by short pressing the
Input (Source) Selection Button on the front panel – the Input Indicator will be
ashing in white.
To start the conguration (setup) short press once the Reset Button.
2. Open the Control Application - the system will ask for your permission to use
multimedia library and les, to nd and connect to devices on your local network, to

15
use your location (GPS), to use Bluetooth® – accept to continue.
The GPS use permission is required for the setup – once the setup is Note!
nished, you can disable it in the settings of your mobile device.
3. Application will start searching for compatible devices and when found will list out
all devices available for setup – select the Network Player you want to connect to.
Connection Options
4. The Control Application will list out all networks available for connection – select
the one you want to connect to.
5. Enter the password to the selected network.
6. Once the connection is set, the Control Application will automatically check for new
updates.
7. You can change the name for the device by selecting from a list or entering your
own.
8. The name of the device will be displayed in a list of added devices in the Control
Application.
9. You can start streaming music.
If the Control Application cannot nd a compatible device automatically
1. Tap on Add Device.

Status Data Status Internet
Off OffNo No
Y
Y
Y
Yellow(Blinking)
ellow(Blinking)
ellow(Blinking)
ellow(Blinking)
Yellow(Blinking) Yes Green
Green
Green
Green
Green Yes
ACTIVITY LED INTERNET LED
III. LAN WIRED CONNECTION (on mobile devices)
1. Connect the Network Player with the RJ45 Ethernet cable to your local network
device.
2. Open the Control Application - the system will ask for your permission to use
multimedia library and les, to nd and connect to devices on your local network, to
use your location (GPS), to use Bluetooth® – accept to continue.
Note! The GPS use permission is required for the setup – once the setup is nished,
you can disable it in the settings of your mobile device.
3. Once the connection is set, the Control Application will automatically check for new
updates.
4. You can change the name for the device by selecting from a list or entering your own.
5. The device name will be displayed in a list of added devices in the Control
Application.
6. You can start streaming music.
Connection Options
Note!
- Operation and user interface may vary depending on the mobile device model, its
operating system and application version.
- Your mobile device may ask for granting permission for the Control Application to
access to different mobile device resources.
Make sure to select the correct choices to avoid problems with the conguration.
- LAN connection has priority over the Wireless (wi-) connection.
- Make sure that the Internet transfer speed is sufcient - too slow transfer may
cause interruptions in playback of some content.
17
LAN
Produkt Specifikationer
| Mærke: | Taga Harmony |
| Kategori: | Medieafspiller |
| Model: | TWA-10B |
Har du brug for hjælp?
Hvis du har brug for hjælp til Taga Harmony TWA-10B stil et spørgsmål nedenfor, og andre brugere vil svare dig
Medieafspiller Taga Harmony Manualer

25 December 2024
Medieafspiller Manualer
- Medieafspiller QNAP
- Medieafspiller Denver
- Medieafspiller Sencor
- Medieafspiller Sony
- Medieafspiller Samsung
- Medieafspiller Philips
- Medieafspiller Lenco
- Medieafspiller LG
- Medieafspiller AEG
- Medieafspiller Pioneer
- Medieafspiller Apple
- Medieafspiller Qtx
- Medieafspiller Kenwood
- Medieafspiller EZCast
- Medieafspiller Google
- Medieafspiller Sanyo
- Medieafspiller D-Link
- Medieafspiller Motorola
- Medieafspiller Asus
- Medieafspiller Toshiba
- Medieafspiller Pyle
- Medieafspiller Denon
- Medieafspiller Yamaha
- Medieafspiller AVM
- Medieafspiller Logik
- Medieafspiller Hama
- Medieafspiller Auna
- Medieafspiller Creative
- Medieafspiller Thomson
- Medieafspiller Nokia
- Medieafspiller Belkin
- Medieafspiller AKAI
- Medieafspiller Teufel
- Medieafspiller DataVideo
- Medieafspiller Maxell
- Medieafspiller Trevi
- Medieafspiller Trust
- Medieafspiller JVC
- Medieafspiller Medion
- Medieafspiller Sweex
- Medieafspiller Linksys
- Medieafspiller Megasat
- Medieafspiller Haier
- Medieafspiller Cambridge
- Medieafspiller Cisco
- Medieafspiller Seagate
- Medieafspiller Loewe
- Medieafspiller Crosley
- Medieafspiller Netgear
- Medieafspiller EnVivo
- Medieafspiller Dantax
- Medieafspiller Tripp Lite
- Medieafspiller Packard Bell
- Medieafspiller Microsoft
- Medieafspiller Western Digital
- Medieafspiller Jensen
- Medieafspiller Xiaomi
- Medieafspiller Peerless-AV
- Medieafspiller Krüger&Matz
- Medieafspiller Viewsonic
- Medieafspiller Vivitek
- Medieafspiller MSI
- Medieafspiller NAD
- Medieafspiller Tascam
- Medieafspiller LevelOne
- Medieafspiller Energy Sistem
- Medieafspiller Zoom
- Medieafspiller Dual
- Medieafspiller ZyXEL
- Medieafspiller Teac
- Medieafspiller TrekStor
- Medieafspiller Nvidia
- Medieafspiller Overmax
- Medieafspiller Synology
- Medieafspiller Bluesound
- Medieafspiller Hikvision
- Medieafspiller Monacor
- Medieafspiller Sandisk
- Medieafspiller Numark
- Medieafspiller RCA
- Medieafspiller AVerMedia
- Medieafspiller FiiO
- Medieafspiller Devolo
- Medieafspiller Renkforce
- Medieafspiller Transcend
- Medieafspiller Olive
- Medieafspiller HTC
- Medieafspiller Eminent
- Medieafspiller LaCie
- Medieafspiller Intenso
- Medieafspiller Naim
- Medieafspiller Fantec
- Medieafspiller Evolveo
- Medieafspiller Xtreamer
- Medieafspiller Akasa
- Medieafspiller ACTi
- Medieafspiller Reloop
- Medieafspiller ATen
- Medieafspiller Power Dynamics
- Medieafspiller Aluratek
- Medieafspiller Smart-AVI
- Medieafspiller GPX
- Medieafspiller Dahua Technology
- Medieafspiller BrightSign
- Medieafspiller Terratec
- Medieafspiller Vonyx
- Medieafspiller StarTech.com
- Medieafspiller Conceptronic
- Medieafspiller S.M.S.L
- Medieafspiller Kunft
- Medieafspiller Rolls
- Medieafspiller Insignia
- Medieafspiller Adastra
- Medieafspiller Audac
- Medieafspiller Sitecom
- Medieafspiller LC-Power
- Medieafspiller Iomega
- Medieafspiller Xoro
- Medieafspiller Silverstone
- Medieafspiller Vu+
- Medieafspiller HiFi ROSE
- Medieafspiller Advance Acoustic
- Medieafspiller NuPrime
- Medieafspiller Media-Tech
- Medieafspiller Sonifex
- Medieafspiller Gefen
- Medieafspiller Ferguson
- Medieafspiller UPC
- Medieafspiller A.C.Ryan
- Medieafspiller Ziggo
- Medieafspiller Funai
- Medieafspiller Tevion
- Medieafspiller Marquant
- Medieafspiller Coby
- Medieafspiller Mede8er
- Medieafspiller Pure Acoustics
- Medieafspiller Dune
- Medieafspiller Humax
- Medieafspiller Pinnacle
- Medieafspiller Difrnce
- Medieafspiller Niagara
- Medieafspiller Emtec
- Medieafspiller Memup
- Medieafspiller SEH
- Medieafspiller Cowon
- Medieafspiller Stanton
- Medieafspiller Woxter
- Medieafspiller Popcorn Hour
- Medieafspiller Formuler
- Medieafspiller MXQ
- Medieafspiller Entone
- Medieafspiller Kodi
- Medieafspiller Verbatim
- Medieafspiller Adaptec
- Medieafspiller SIIG
- Medieafspiller Advantech
- Medieafspiller Astell&Kern
- Medieafspiller Orbsmart
- Medieafspiller Infomir
- Medieafspiller Approx
- Medieafspiller Tizzbird
- Medieafspiller In-akustik
- Medieafspiller Minix
- Medieafspiller Dane Elec
- Medieafspiller Nitek
- Medieafspiller TVIP
- Medieafspiller Storex
- Medieafspiller EKO
- Medieafspiller DXG
- Medieafspiller Zidoo
- Medieafspiller Roku
- Medieafspiller Reel
- Medieafspiller ZeeVee
- Medieafspiller Boxxpot
- Medieafspiller TVBox
- Medieafspiller Iconbit
- Medieafspiller XBMC
- Medieafspiller Magnavox
- Medieafspiller AC Ryan
- Medieafspiller AOpen
- Medieafspiller Truly
- Medieafspiller Atlona
- Medieafspiller Sumvision
- Medieafspiller TVX
- Medieafspiller Telekom
- Medieafspiller Konig Electronic
- Medieafspiller Kaser
- Medieafspiller JWIN
- Medieafspiller RIPTUNES
- Medieafspiller INOi
- Medieafspiller Blue Raven
- Medieafspiller Smartdisk
- Medieafspiller TViX
- Medieafspiller Voxx
- Medieafspiller VU
- Medieafspiller Syabas
- Medieafspiller Omnitron Systems
- Medieafspiller Sungale
- Medieafspiller Comtrend
- Medieafspiller Eversolo
- Medieafspiller Gold Note
- Medieafspiller Zappiti
Nyeste Medieafspiller Manualer

21 Marts 2025
9 Marts 2025
25 Februar 2025
4 Februar 2025
4 Februar 2025
3 Februar 2025
1 Februar 2025
1 Februar 2025
30 Januar 2025
30 Januar 2025