LG LFC22770SB Manual
Læs nedenfor 📖 manual på dansk for LG LFC22770SB (96 sider) i kategorien Køleskab. Denne guide var nyttig for 29 personer og blev bedømt med 4.5 stjerner i gennemsnit af 2 brugere
Side 1/96

OWNER’S MANUAL
FRENCH DOOR
REFRIGERATOR
Please read this owner’s manual thoroughly before
operating and keep it handy for reference at all times.
LFC22770**
LFC24770**
LFC24786**
GF24BGS
GF22BGS GF24BGSK
GF22BGSK1
GM-B223RSNM
LFNS22520*
LRFNS2200* GM22BIP LM22BGTK
LFCS22520* GF22BGSK LFNS22530*
P/No.: MFL67851601-16
Copyright © 2013 - 2022 LG Electronics Inc. All Rights Reserved.
ww w.lg.com
ENGLISH ESPAÑOL
Model Name/Nombre del modelo **=color number/número de color


2TABLE OF CONTENTS
3 PRODUCT FEATURES
4 IMPORTANT SAFETY
INSTRUCTIONS
7 COMPONENTS
7 Refrigerator Exterior
8 Refrigerator Interior
9 INSTALLATION
9 Installation Overview
11 Unpacking Your Refrigerator
11 Choosing the Proper Location
11 - Flooring
12 - Ambient Temperature
12 - Measuring the Clearances
12 Removing/Assembling the Refrigerator
Door Handles
13 Removing/Assembling the Freezer
Drawer Handle
13 Removing/Assembling the Doors and
Drawers
14 - Removing the Left Refrigerator Door
15 - Removing the Right Refrigerator Door
16 - Assembling the Right Refrigerator Door
17 - Assembling the Left Refrigerator Door
18 - Removing the Freezer Drawers
19 - Assembling the Freezer Drawers
20 Connecting the Water Line
20 - Before You Begin
20 - Water Pressure
20 - What You Will Need
22 - Water Line Installation Instructions
24 Turning On the Power
24 Leveling and Door Alignment
24 - Leveling
25 - Door Alignment
26 HOW TO USE
26 Before Use
27 Control Pad
27 - Control Pad Features
28 Automatic Icemaker
29 - Normal Sounds You May Hear
29 - Preparing for Vacation
30 Storing Food
30 - Food Preservation Location
31 - Food Storage Tips
31 - Storing Frozen Food
32 Humidity Controlled Crisper and
Glide’N’Serve
33 Detaching and Assembling the Storage Bins
34 Adjusting the Refrigerator Shelves
35 MAINTENANCE
35 Cleaning
36 SMART DIAGNOSISTM
36 Using Smart Diagnosis
TM
37 TROUBLESHOOTING
44 WARRANTY
TABLE OF CONTENTS
ENGLISH

3PRODUCT FEATURES
PRODUCT FEATURES
* Depending on the model, some of the following functions may not be available.
DOOR ALARM
The Door Alarm function is designed to prevent refrigerator malfunctioning
that could occur if a refrigerator door or freezer drawer remains open. If a
refrigerator door or freezer drawer is left open for more than 60 seconds,
a warning alarm sounds at 30 second intervals.
HUMIDITY CONTROLLED CRISPERS
The Humidity Controlled Crispers are designed to help keep your fruits
and vegetables fresh and crisp. You can control the amount of humidity
in the crispers by adjusting the settings between Low and High.
GLIDE‘N’SERVE
Glide‘N’Serve provides storage space with a variable temperature control
that keeps the compartment colder than the refrigerator. It is a convenient
place to store sandwiches or meat to be cooked.
AUTO CLOSING HINGE
The refrigerator doors and freezer drawers close automatically with a
slight push. (The door only closes automatically when it is open at an
angle less than 30°.)
ICE PLUS
Ice production can be increased by approximately 20 percent when the
freezer section is maintained at the coldest temperature for a 24-hour
period.
ENGLISH

5IMPORTANT SAFETY INSTRUCTIONS
This product is not to be used for special purposes such as the storage of medicine or test
materials or for use on ships, etc.
refrigerator and reset the control of thermostat (refrigerator or freezer) to the desire position.
power.
Do not modify or extend the power cord.
Do not use a dryer to dry the interior. Do not light a candle to remove interior odors.
For your safety, this appliance must be properly grounded. Have the wall outlet and the circuit
the user’s responsibility to replace a standard 2-prong wall outlet with a standard 3-prong wall
outlet.
Do not, under any circumstances, cut or remove the third (ground) prong from the power
cord.
Do not use an adapter plug and plug the power plug into a multi-outlet extension cord.
Disconnect the power cord immediately if you hear a noise, smell a strange odor or detect
smoke coming from the appliance.
Do not disassemble or modify the refrigerator.
Do not put hands, feet, or metal objects below or behind the refrigerator.
Do not operate the refrigerator or touch the power cord with wet hands.
In refrigerators with automatic icemakers, avoid contact with the moving parts of the ejector
hands on the automatic ice-making mechanism while the refrigerator is plugged in.
When dispensing ice from the dispenser, do not use crystal ceramics.
Do not touch the cold surfaces in the freezer compartment with wet or damp hands, when
your refrigerator is in operation.
Do not put glass containers, glass bottles or soda in the freezer.
This appliance is not intended for use by persons (including children) with reduced
phys ical, se nsory or me ntal capabilities , o r la ck of expe rie nce and kn owledge,
unless they have been given super vision or instruction concerning the use of the
appliance by a person responsible for their safety. Children should be supervised to assure that
they do not play with the appliance.
Do not refreeze frozen food that has thawed completely. Doing so may result in a serious
health issue.
If you ar e throwing away y our old re f rig erator, make sure t he CFC o r HCFC
HCFC coo lant, you may be
environmental law.
Junked or abandoned refrigerators are dangerous, even if they are sitting for only a few days.
the doors but leave the shelves in place so that children may not easily climb inside.
If the refrigerator is connected to a circuit protected by fuses, use time delay fuses.
If the use of this unit is no longer needed, please contact local authorities to dispose of this
Keep ventilation openings, in the appliance enclosure or in the built-in structure, clear of obstruction.
product in a safe way due contains Pentane-cycle or pentane like gas for insulation. Insulation
READ ALL INSTRUCTIONS BEFORE USING THE APPLIANCE.
safety precautions should be followed, including the following:
ENGLISH

6IMPO
Risk of Fire and Flammable Materials
RTANT SAFETY INSTRUCTIONS
CAUTION
Installation
The refrigerator must be properly installed in accordance with the Installer Instructions that
were taped to the front of the refrigerator.
Be careful when you unpack and install the refrigerator. Immediately dispose of plastic and
other packing materials out of the reach of children.
The appliance must be positioned for easy access to a power source.
Use
Close the door carefully when children are around.
ssarily small. Be careful closing doors when children are nearby.
If you store food improperly, be aware that it may fall and cause injury.
Do not use aerosols near the refrigerator.
Do not store articles on the top of the appliance.
Maintenance
Do not use strong detergents like wax or thinners for cleaning. Clean with a soft cloth.
areas regularly.
Do not store, disassemble or repair the refrigerator by yourself.
Remove any dust or foreign matter from the power plug pins.
Do not use a wet or damp cloth when cleaning the plug.
fore plugging it back in.
If you notice a chemical or burning plastic smell or see smoke, unplug the refrigerator imme-
diately and contact your LG Electronics Service Center.
SAVE THESE INSTRUCTIONS
READ ALL INSTRUCTIONS BEFORE USING THE APPLIANCE.
To reduce the risk of re, electric shock, or personal injury when using your product, basic
safety precautions should be followed, including the following:
ENGLISH
DO NOT USE MECHANICAL DEVICES
Do not use mechanical devices or other
means to accelerate the defrosting
process, only those recommended by
the manufacturer.
WARNING
DO NOT STORE ELECTRICAL
APPLIANCES, do not use electrical
appliances inside the food storage
compartment, unless they are
recommended by the manufacturer.
WARNING
This appliance contains a small amount of isobutane refrigerant (R600a), which is combus
*Refrigerant type is indicated in the label inside your refrigerator, this warning apply just for
models with R600a refrigerant.
-
tible. When transporting and installing the appliance, care should be taken to ensure that no
parts of the refrigerating circuit are damaged. Refrigerant squirting out of the pipes could
of ignition and air the room in which the appliance is standing for several minutes.
occurs, the size of the room in which the appliance may be sited depends on the amount of
refrigerant used. The room must be 10.8 square feet (1 square meter) in size for every 8g of
R600a refrigerant inside the appliance. The amount of refrigerant in your particular appliance
any signs of damage. If in doubt, consult your dealer.

7COMPONENTS
COMPONENTS
Use this page to become more familiar with the parts and features of your refrigerator. Page
references are included for your convenience.
Refrigerator Exterior
Handle
O p e n s a nd c l os e s
the door.
Refrigerator
Preserves food.
Freezer
Preserves frozen food.
Ez Handle
Easily open the freezer door.
ENGLISH

8COMPONENTS
Refrigerator Interior
LED interior lamps
The interior lamps light up the inside
of the refrigerator.
Durabase® and Durabase® Divider
T h e D u r a b a s e i s a s t o r a g e s p a c e
recommended for the preservation of large
food items. The Durabase Divider is used to
organize the Durabase area into sections.
It can be adjust ed f rom si de to side to
Ice Bin*
Icemaker*
Ice cubes are
(included with icemaker)
Can be removed to
or pitchers.
automatically produced.
Crisper
Controls humidit y and helps
vegetables and fruit to stay crisp.
Fixed Door Bin*
Used to preserve
ch i l l e d f o o d o r
drinks.
Pullout Drawer
Used for extra storage within the
freezer compartment.
Dairy Product Bin*
Used t o pr e ser v e
dairy products.
(some models only)
Adjustable Refrigerator Shelf
The shelves in your refrigerator are
adjust able to meet your individual
storage needs. (Half or full Type)
Modular Door Bins
Interchangeable bins
can be arranged to
su i t yo ur st o r a ge
needs.
Auto Closing Hinge
The ref ri gerat or doors
and freezer drawers close
automatically when you
push them slightly.
(The door on l y clos es
automatically when it is
open at an angle of less
than 30°.)
Glide'N'Serve
Used for large party trays,
deli items and beverages.
ENGLISH
* Optional Parts : Not included with all models.

9INSTALLATION
INSTALLATION
Installation Overview
to another location.
1 Unpacking your
refrigerator
2 Choosing the proper
location
3 Disassembling/Assembling
4 Connecting the water
supply and water line
5 Leveling and Door
Alignment
ENGLISH
“This appliance is intended to be used in household and similar applications such as:
motels and others residential type environments.
-Bed and breakfast type environments; catering and similar non-reatil applications.”

10INSTALLATION
Specications
The appearance and specications listed in this manual may vary due to constant product
improvements.
Dimensions
32 3/4" (W) X 35 1/2" (D) X 69 7/8" (H), 46" (D w/ door open)
833 mm (W) X 901 mm (D) X 1775.5 mm (H), 1168.5 mm (D w/
door open)
253 lb. (115 kg)
Width
32 3/4 in.
(833 mm)
Width
29 3/4 in.
(756 mm)
Width
29 3/4 in.
(756 mm)
Width
32 3/4 in.
(833 mm)
29 3/4" (W) X 35 1/2" (D) X 68 1/2" (H), 44 3/4" (D w/ door open)
756 mm (W) X 901 mm (D) X 1740 mm (H), 1137 mm
(D w/ door open)
Net weight
237.4 lb. (107.9 kg)
ENGLISH

11 INSTALLATION
Unpacking Your Refrigerator
To remove any remaining tape or glue, rub the
area briskly with your thumb. Tape or glue resi-
due can also be easily removed by rubbing a
small amount of liquid dish soap over the adhe-
sive with your fingers. Wipe with warm water
and dry.
Do not use sharp instruments, rubbing alcohol,
flammable fluids, or abrasive cleaners to remove
tape or glue. These products can damage
the surface of your refrigerator.
Refrigerator shelves are installed in the shi-
pping position. Please reinstall shelves according
to your individual storage needs.
Choosing the Proper Location
Select a place where a water supply can
be easily connected for the automatic
icemaker.
The refrigerator should al ways be plugged
into its own individual properly grounded
electrical outlet rated for 115/127 V ~ 60 Hz,
AC only, and fused at 15 or 20 A.
This provides the best performance
and also prevents overloading house
hazard from overheated wires. It is
recommended that a separate circuit
serving only this appliance be provided.
Flooring
To avoid noise and vibration, the unit must be
leveled and installed on a solidly constructed
floor. If required, adjust the leveling legs to
compensate for unevenness of the floor. The
front should be slightly higher than the rear to
aid in door closing. Leveling legs can be turned
easily by tipping the cabinet slightly. Turn the
leveling legs to the left to raise the unit or to
the right to lower it. (See Leveling and Door
Alignment.)
NOTE
The water pressure must be between
20 and 120 psi (0,14 - 0,82 MPa) on models
without a water lter and between 40 and
120 psi (0,28 - 0,82 MPa) on models with a
water lter
NOTE
Installing on carpeting, soft tile surfaces, a
platform or weakly supported structure is
not recommended.
WARNING
To reduce the risk of electric shock, do not
install the refrigerator in a wet or damp area.
WARNING
Use two or more people to move and
install the refrigerator. Failure to do so
can result in back or other injury.
Your refrigerator is heavy. When moving
the refrigerator for cleaning or service,
be sure to protect the floor. Always
pull the refrigerator straight out when
moving it. Do not wiggle or walk the
refrigerator when trying to move it, as
floor damage could occur.
Keep flammable materials and vapors,
such as gasoline, away from the
refrigerator. Failure to do so can result
in fire, explosion, or death.
ENGLISH
Remove tape and any temporary labels from
your refrigerator before using. Please remove
vinyl from doors before connecting unit to the
electrical supply (on some models). Do not
remove any warning type labels, the model
and serial number label, or the Tech Sheet that
is located under the front of the refrigerator.

12INSTALLATION
Ambient Temperature
Install this appliance in an area where the tem-
perature is between 55°F (13°C) and 110°F
(43°C). If the temperature around the appliance
is too low or high, cooling ability may be ad-
versely aected.
Measuring the Clearances
Too small of a distance from adjacent items
may result in lowered freezing capability and in-
creased electricity consumption charges. Allow
at least 24 inches (61 cm) in front of the refrig-
erator to open the doors, and at least 2 inches
(5.08 cm) between the back of the refrigerator
and the wall.
Removing/Assembling the
Refrigerator Door Handles
Removing the Handles
1 Loosen the set screws with a 3/32 in.
(2.5 mm)
Allen wrench and remove the handle.
2 Loosen the mounting fasteners that
connect to the refrigerator door and handle
using a ¼ in.
(6.35 mm)
Allen wrench,
remove the mounting fasteners.
Assembling the Handles
1 Assemble the mounting fasteners at
both ends of the handle using a in. ¼
(6.35 mm)
Allen wrench.
2 Place the handle on the door by tting
the handle footprints over the mounting
fasteners and tightening the set screws
with a 3/32 in.
(2.5 mm)
Allen wrench.
NOTE
When it is necessary to move the refrigerator
through a narrow opening, removing the
doors is the recommended procedure. If it
is necessary to remove the handles, follow
the directions below. The appearance of the
handle may vary from what is shown in the
illustrations
2” (5.08 cm)
24” (61 cm)
ENGLISH

13 INSTALLATION
Removing/Assembling the
Freezer Drawer Handle
Removing the Handle
1 Loosen the set screws located on the
lower side of the handle with a
3/32
in.
(2.5mm)
Allen wrench and remove the handle.
2 Loosen the mounting fasteners that
connect to the
freezer drawer
and handle
using a
(6.35 mm)
1
/
4
in.
Allen wrench,
and remove
the mounting
fasteners.
Assembling the Handle
1 Assemble the mounting fasteners at
both ends of the handle using a
1
/
4
in. Allen
(6.35 mm)
wrench.
2
handle
footprints over
the mounting
fasteners and
tightening the
set screws
with a 3/32 in.
(2.5 mm)
Allen wrench.
Removing/Assembling the
Doors and Drawers
When it is necessary to move the refrigerator
through a narrow opening, removing the doors
is the recommended procedure.
WARNING
When assembling or disassembling the
handle:
yGrasp the handle tightly to avoid drop-
ping it.
yDo not swing the handle into nearby
people or animals.
yMake sure that the bracket hole of the
bolt of the door. Assemble the set
yMake sure that there is not a gap
between the door and handle after
assembling the handle.
WARNING
yIf your entrance door is too narrow
for the refrigerator to pass through,
remove the refrigerator doors and move
the refrigerator side ways through the
doorway.
yUse two or more people to remove and
install the refrigerator doors. Failure to
do so can result in back or other injury.
yDisconnect the electrical supply to the
refrigerator before installation. Failure
to do so could result in serious injury or
death.
yDo not put hands, feet or other objects
into the air vents or bottom of the
refrigerator. You may be injured or
receive an electrical shock.
yBe careful when handling the hinge and
stopper. You may be injured.
yRemove food and bins before detaching
the doors and drawers.
ENGLISH

14INSTALLATION
Removing the Left Refrigerator Door
1 Remove the top hinge cover screws . Lift
the hook (not visible), located at the bottom
of the front side of the cover
head screwdriver.
2 Disconnect the wire harness 3.
3 Remove the grounding screw 4.
4 Remove the three bolts using a 10mm or
hinge. Set parts aside.
5 Lift the door from the middle hinge pin and
remove the door.
3
2
1
4
5
6
CAUTION
When lifting the hinge, be careful that the
door does not fall forward.
CAUTION
Place the door, inside facing up, on a
non-scratching surface.
2
ENGLISH

16INSTALLATION
Assembling the Right Refrigerator
Door
Install the right-side door rst.
1 Make sure that the plastic sleeve is
inserted in the bottom of the door. Lower
the door onto the middle hinge pin as
shown in the gure.
2 Align the door with the cabinet
3 Line up the holes in the top hinge with the
holes in the top of the refrigerator. Insert
and tighten the three bolts in the hinge.
4 Replace the hinge cover . Insert and
tighten the cover screws .
22
ENGLISH

17 INSTALLATION
Assembling the Left Refrigerator
Door
Install the left refrigerator door after the right
door is installed.
1
Make sure that the plastic sleeve is inserted
in the bottom of the door. Install the
refrigerator door onto the middle hinge.
2 Align the door with the cabinet
3 Line up the holes in the top hinge with the
holes in the top of the refrigerator. Insert
and tighten the three bolts in the hinge.
4 Replace the grounding screw 3.
5
Reconnect the wire harness 4.
6
Replace the hinge cover 5. Insert and
tighten the cover screws 6.
6
3
4
5
ENGLISH

18INSTALLATION
Removing the Freezer Drawers
The top, middle and bottom drawers are all
removed in the same way. In the following
freezer drawer is not shown for clarity.
1
Pull the drawer open to full extension.
2
Lift the DuraBase basket up and out, making
sure to clear the rail system.
3
Remove the screws at the ends of both rails
4
Slide out the bar.
5
Grip both sides of the drawer and pull it up
to remove it from the rails.
6
Holding one rail with each hand, push the
rails in simultaneously.
CAUTION
yUse two or more people to remove and
install the freezer drawer. Failure to do
so can result in back or other injury.
yDo not hold the handle when removing
or replacing the drawer. The handle may
yBe careful of sharp hinges on both sides
of the drawer.
yWhen you lay the drawer down, be
yDo not sit or stand on the freezer drawer.
yTo prevent accidents, keep children and
pets away from the drawer. Do not leave
the drawer open.
CAUTION
Do not hold the handle when removing or
replacing the drawer. The handle may come
ENGLISH

19 INSTALLATION
Assembling the Freezer Drawers
The top, middle and bottom drawers are all
assembled in the same way.
1
Using two hands, pull out both rails
simultaneously until they are fully extended.
2
Grasp the drawer on each side and hook the
drawer supports into the rail tabs located on
both sides.
3
Reinstall the bar in the drawer supports.
4
tighten the screws located on both sides.
5
With the drawer pulled out to full extension,
insert the lower basket in the rail assembly.
2
1
CAUTION
Do not hold the handle when removing or
replacing the drawer. The handle may come
3
ENGLISH

20INSTALLATION
Connecting the Water Line
(Ice Maker installed only)
Before You Begin
This water line installation is not covered by the
refrigerator warranty. Follow these instructions
carefully to minimize the risk of expensive water
damage.
Water hammer (water banging in the pipes)
in house plumbing can cause damage to
refrigerator parts and can lead to water leakage
water hammer before installing the water supply
line to the refrigerator.
If you use your refrigerator before connecting
the water line, make sure the icemaker power
switch is in the OFF (O) position.
Water Pressure
You will need a cold water supply. The water
pressure must be between 20 and 120 psi
(0.14 y 0.82 MPa) on models without a water
connected to your cold water supply, this water
line installation is not covered by the refrigerator
warranty. Follow the following instructions
carefully to minimize the risk of expensive water
damage.
connected to your cold water supply, the water
pressure to the reverse osmosis system needs
to be a minimum of
40 to 60 psi (0,28 y 0,41 MPa)
capacity
If the water pressure from the reverse osmosis
system is less than 21 psi or 0,14 MPa takes more
y
the reverse osmosis system is blocked.
yAllow the storage tank on the reverse
usage.
yIf the issue concerning water pressure
from reverse osmosis remains, call a
yAll installations must be in accordance
with local plumbing code requirements.
CAUTION
To prevent burns and product damage, only
connect the refrigerator water line to a cold
water supply.
CAUTION
Do not install the icemaker tubing in areas
where temperatures fall below freezing.
CAUTION
Wear eye protection during installation to
prevent injury.
ENGLISH
What You Will Need
Copper Tubing,
. ¼ in. (6.35 mm) outer
diameter, to connect the refrigerator to
the water supply. Be sure both ends of
.erauqs tuc era gnibut eht
To determine how
much tubing you need:
measure the distance
from the water valve on the back of the
refrigerator to the water supply pipe.
Then, add 8 feet (2.4 m).
(about 8 feet [2.4 m] coiled into three
turns of about 10 in. [25 cm] diameter)
to allow the refrigerator to move out
from the wall after installation.
Power drill.
.
½ in. (13 mm) or
.
adjustable wrench.
Flat blade and Phillips
.
head screwdrivers.
Two ¼ in. (6.35 mm)
.
outer diameter compression
nuts and 2 ferrules (sleeves) to connect the
the refrigerator water valve.

21 INSTALLATION
yIf your existing copper water line
will need an adapter (available at
plumbing supply stores) to connect
the water line
to the
refrigerator OR
with a tube cutter and then use a
yShutoff valve to connect to the cold
water line.
have a water inlet with a minimum
inside diameter of 5/32 in. (4 mm) at
the point of connection to the COLD
valves are included in many water
supply kits.
Before
purchasing,
make sure
a saddle-
type valve
complies with your local plumbing
codes.
NOTE
A self-piercing saddle type water valve
should not be used.
ENGLISH

22INSTALLATION
Water Line Installation Instructions
used drinking water line.
1 SHUT OFF THE MAIN WATER SUPPOLE
Turn on the nearest faucet to relieve the
pressure on the line.
2
CHOOSE THE VALVE LOCATION
C h o o s e a l o c a t i o n
for the valve that is
easily accessible. It is
best to connect into
the side of a vertical
water pipe. When it is
necessary to connect
into a horizontal water pipe, make the
connection to the top or side, rather
any sediment from the water pipe.
3 DRILL THE HOLE FOR THE VALVE
.
Drill a 1/4 in. (6.35 mm) hole in
the water pipe using
a sharp bit. Remove
any burrs resulting
f r o m d r i l l i n g t h e
h o l e i n t h e p i p e .
Be c a r e f u l no t to
allow water to drain into the drill. Failure to
drill a ¼ in. hole may result in reduced ice
production or smaller cubes.
4
FASTEN THE SHUTOFF VALVE
pipe with the pipe clamp.
5 TIGHTEN THE PIPE CLAMP
Tighten the clamp screws until the sealing
washer begins to swell.
NOTE: Do not overtighten clamp or
you may crush the tubing.
6 ROUTE THE TUBING
.
Route the tubing between the cold water
line and the refrigerator.
Route the tubing through a hole drilled in
adjacent base cabinet) as close to the wall
as possible.
NOTE
The hookup line cannot be white, plastic
tubing. Licensed plumbers must use only
copper tubing (NDA tubing #49595 or #49599)
or Cross Link Polyethylene (PEX) tubing.
WARNING
yWhen using any electrical device (such
as a power drill) during installation, be
sure the device is battery powered,
double insulated or grounded in a
manner that will prevent the hazard of
electric shock.
Pipe Clamp
Sa ddle- Typ e Vertical Cold
Water Pipe
NOTE
Commonwealth of Massachusetts Plumbing
Codes 248CMR shall be adhered to. Saddle
valves are illegal and use is not permitted in
Massachusetts. Consult with your licensed
plumber
by norms and regulations of your
country
.
Pipe Clamp
Clamp Screw
Washer
Inlet End
NOTE
8 feet [2.4 m] coiled into 3 turns of about
10 in. [254 mm] diameter) to allow the
refrigerator to move out from the wall after
installation.
ENGLISH

23 INSTALLATION
7
CONNECT THE TUBING TO THE VALVLE
Place the compression nut and ferrule
(sleeve) for copper tubing onto the end of
valve. Make sure the tubing is fully inserted
into the valve. Tighten the compression nut
securely.
8
FLUSH OUT THE TUBING
Turn the main water
out the tubing until the
water is clear.
the water valve after
a b o u t o n e q u a r t o f
9
CONNECT THE TUBING TO THE
REFRIGERATOR
NOTE: Before making the connection to
the refrigerator, be sure that the refrigerator
power cord is not plugged into the wall
outlet.
a
water valve.
b. Place the compression nut and ferrule (sleeve)
onto the end of the tubing as shown.
c. Insert the end of the copper tubing into the
connection as far as possible. While holding
10
TURN THE WATER ON AT THE
SHUTOFF VALVE
Tighten any connections that leak.
11
PLUG IN THE REFRIGERATOR
Arrange the coil of tubing so that it does not
vibrate against the back of the refrigerator or
against the wall. Push the refrigerator back
to the wall.
12 START THE ICEMAKER
Set the icemaker power switch to the ON
position.
The icemaker will not begin to operate until
it reaches its operating temperature of 15°F
(–9°C) or below. It will then begin operation
automatically if the icemaker power switch
is in the ON (I) position.
Saddle-Type
Packing Nut
Outlet Valve
Compression
Nut
Ferrule (sleeve)
Tubing Clamp
¼ in. Tubing
¼ in.
Compression
Nut
Refrigerator
Connection
Ferrule (sleeve)
CAUTION
Check to see if leaks occur at the water line
connections.
ENGLISH
WARNING
Never use old or used hoses. Always use
new ones to have a better use and
experience. Connect always to a potable
water source to avoid security and health
issues.

24INSTALLATION
Turning On The Power
1
Plug in the refrigerator.
Leveling and Door Alignment
Leveling
After installing, plug the refrigerator’s power
cord into a 3-prong grounded outlet and push
Your refrigerator has two front leveling legs—
one on the right and one on the left. Adjust the
legs to alter the tilt from front-to-back or side-to-
side. If your refrigerator seems unsteady, or you
want the doors to close more easily, adjust the
refrigerator’s tilt using the instructions below:
1
Turn the leveling leg to the left to raise
that side of the refrigerator or to the right
to lower it. It may take several turns of
the leveling leg to adjust the tilt of the
refrigerator.
2
Open both doors again and check to make
sure that they close easily. If the doors do
not close easily, tilt the refrigerator slightly
more to the rear by turning both leveling
legs to the left. It may take several more
turns, and you should turn both leveling legs
the same amount.
CAUTION
yConnect to a rated power outlet.
y
the wall outlet and wiring for proper
grounding.
y
terminal of the power plug.
NOTE
ENGLISH

25 INSTALLATION
Door Alignment (Type 1)
Door Alignment
Both the left and right refrigerator doors have
Identify your Refrigerator Doors alignment type according the accesory included in your owner’s manual.
an adjustable nut, located on the bottom hinge,
to raise and lower them to align properly. If the
space between your doors is uneven, follow the
instructions below to align the doors evenly:
Use the wrench (included with the Owner’s
Manual) to turn the nut in the door hinge to
adjust the height. To the right to raise or to the
left to lower the height.
ENGLISH
Door Alignment (Type 2)
If the spacing between the doors is uneven, follow the
instructions below to align them:
1. With one hand, lift up the door you want to raise at
middle hinge.
2.
With other hand, use pliers to insert snap ring as
shown.
3. Insert additional snap rings until the doors are aligned
(Three snap rings are provided per unit).
2
1
26HOW TO USE
HOW TO USE
Before use
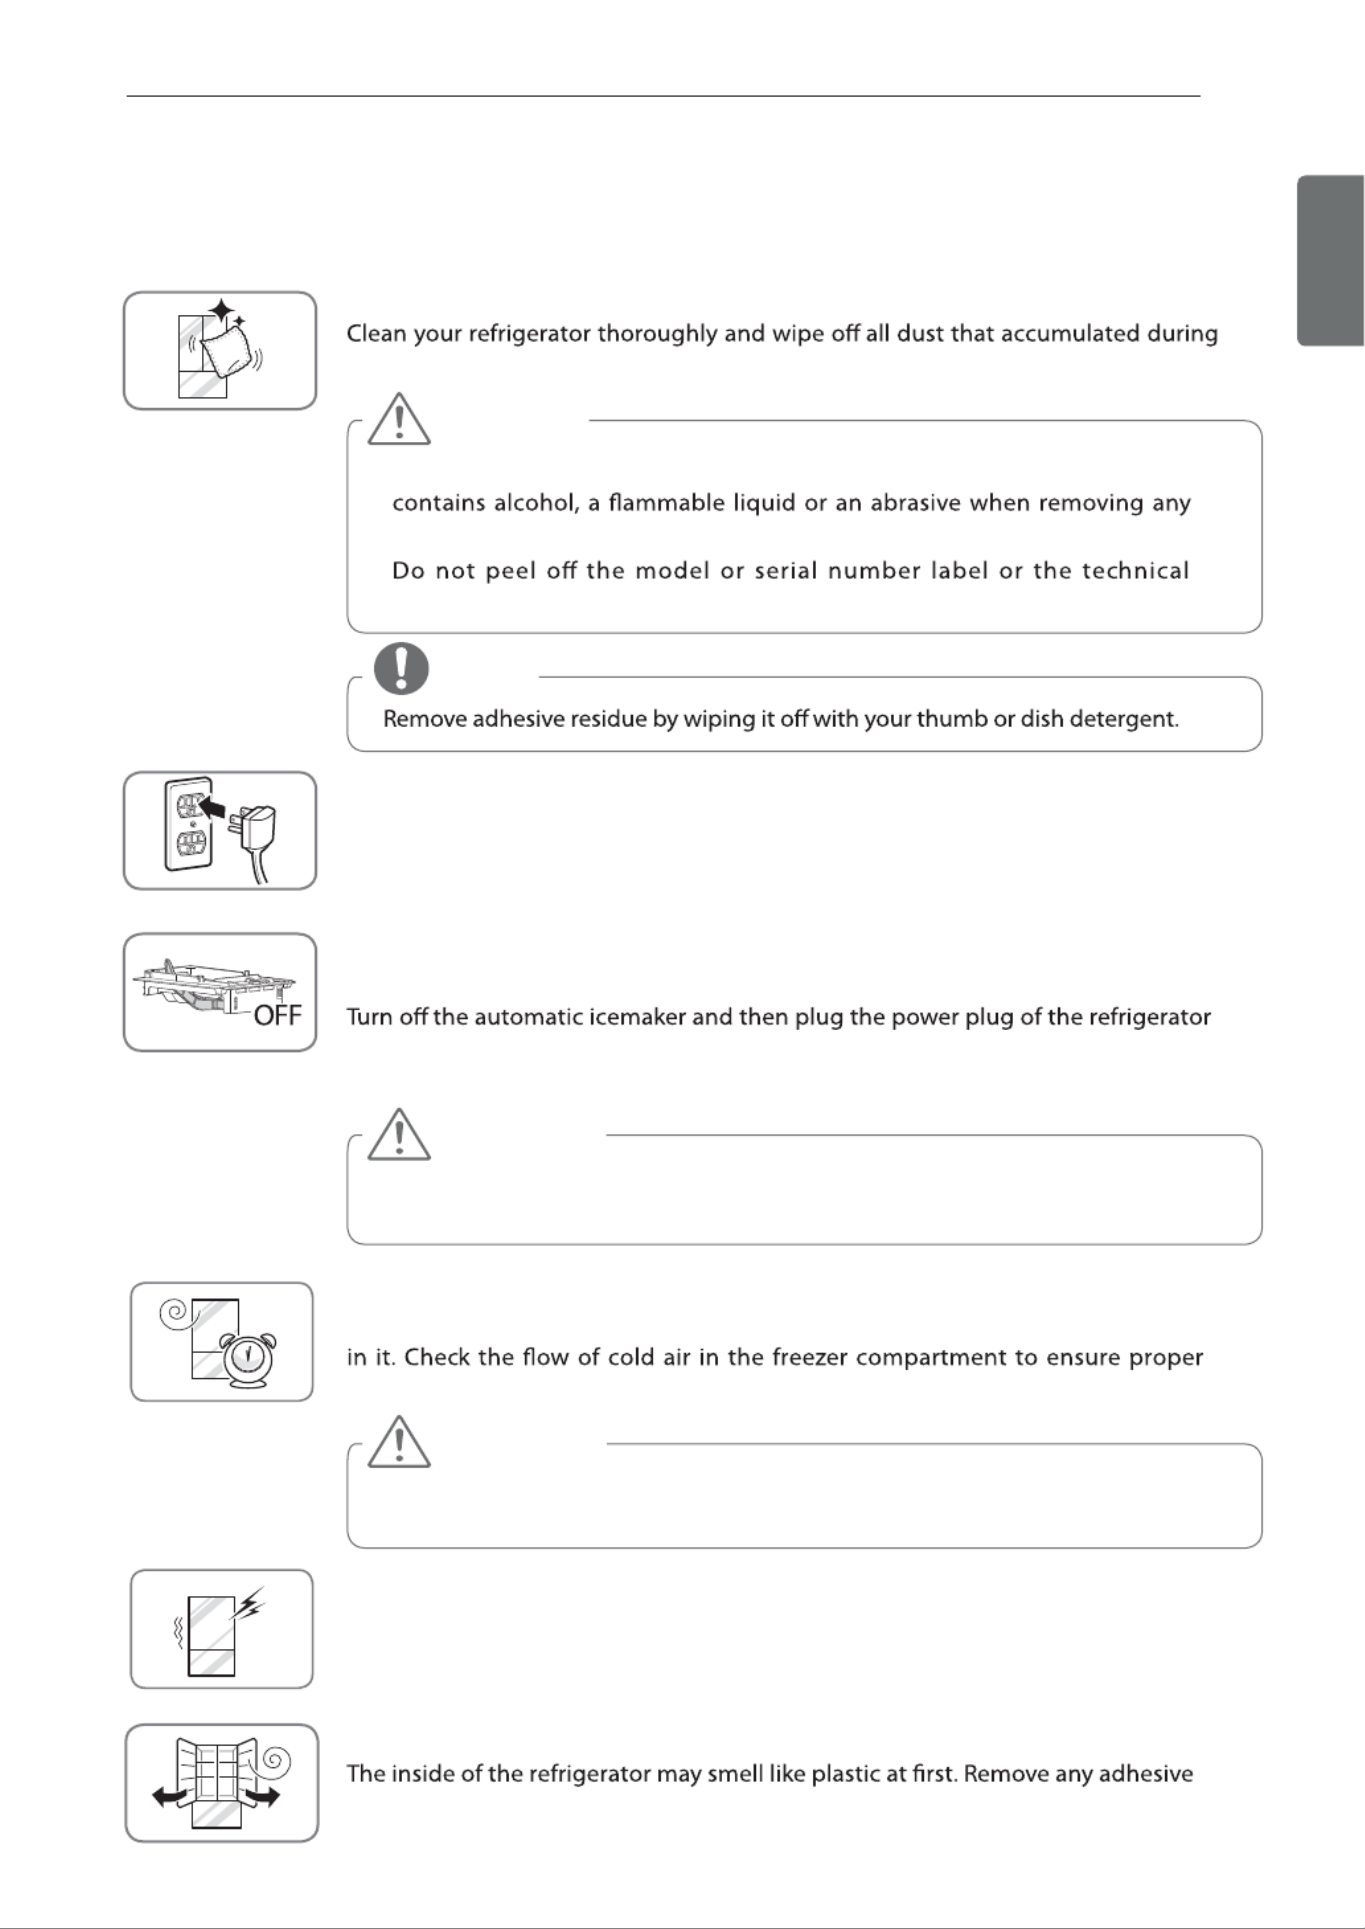
Clean the refrigerator.
shipping.
Connect the power supply.
Check if the power supply is connected before use.
Read the “Turning On The Power” section.
Turn off the icemaker if the refrigerator is not yet connected to
the water supply. (Ice Maker installed only).
into the grounded electric outlet.
* This is applicable only to certain models.
Wait for the refrigerator to cool.
Allow your refrigerator to run for at least two to three hours before putting food
cooling.
The refrigerator makes a loud noise after initial operation.
This is normal. The volume will decrease as the temperature lowers.
Open refrigerator doors and freezer drawers to ventilate the interior.
tape from inside the refrigerator and open the refrigerator doors and the freezer
drawers for ventilation.
CAUTION
Running the automatic icemaker before connecting it to the water supply
may cause the refrigerator to malfunction.
CAUTION
Putting food in the refrigerator before it has cooled could cause the food to
spoil, or a bad odor could remain inside the refrigerator.
CAUTION
yDo not scratch the refrigerator with a sharp object or use a detergent that
tape or adhesive from the refrigerator,.
y
information on the rear surface of the refrigerator.
NOTE
ENGLISH

27 HOW TO USE
Control Pad Features
Refrigerator Temperature
Indicates the set temperature of the refrigerator
compartment in Celsius (°C) or Fahrenheit (°F).
Freezer Temperature
Indicates the set temperature of the freezer
compartment in Celsius (°C) or Fahrenheit (°F).
To change the temperature mode from °F to °C
(or vice versa) press and hold the Refrigerator
and Freezer temperature buttons simultaneously
indicator on the display window switches
between Celsius and Fahrenheit.
Ice Plus
This function increases both ice making and
freezing capabilities.
yWhen you touch the Ice Plus button, the
graphic will illuminate in the display and
will continue for 24 hours. The function
yYou can stop this function manually by
touching the button one more time.
Door Alarm
yWh e n p o we r is c o n n e c t e d t o t h e
refrigerator, the door alarm is initially set
to ON. When you press the Door Alarm
button, the display will change to OFF and
the Door Alarm function will deactivate.
yWhen either the refrigerator or the
freezer door is left open for more than 60
seconds, the alarm tone will sound to let
you know that the door is open.
yWhen you close the door, the door alarm
will stop.
Control Button
LED Display Indicator
Control Pad
* Depending on the model, some of the following functions may not be available.
NOTE
The displayed temperature is the target
temperature, and not the actual temperature
of the refrigerator. The actual refrigerator
temperature depends on the food inside the
refrigerator.
CAUTION
Display Mode (For Store Use Only)
The Display Mode disables all cooling in
the refrigerator and freezer sections to
conserve energy while on display in a retail
store. When activated OFF will display
on the control panel and the display will
remain on for 20 seconds.
To deactivate / activate:
With either refrigerator door opened, press
and hold the Refrigerator and Ice Plus
The control panel will beep and the
that Display Mode is deactivated. Use the
same procedure to activate Display Mode.
ENGLISH
Door
Door

31 HOW TO USE
Food Storage Tips
* The following tips may not be applicable
depending on the model.
Wrap or store food in the refrigerator in airtight
and moisture-proof material unless otherwise
noted. This prevents food odor and taste
transfer throughout the refrigerator. For dated
products, check date code to ensure freshness.
Food How To
Butter or
Margarine
Keep opened butter in a covered
dish or closed compartment.
When storing an extra supply, wrap
in freezer packaging and freeze.
Cheese Store in the original wrapping
until you are ready to use it.
Once opened, rewrap tightly in
plastic wrap or aluminum foil.
Milk Wipe milk cartons. For coldest
milk, place containers on an
interior shelf.
Eggs Store in original carton on
interior shelf, not on door shelf.
Fruit Do not wash or hull the fruit
until it is ready to be used. Sort
and keep fruit in its original
container, in a crisper, or store in
a completely closed paper bag
on a refrigerator shelf.
Leafy
Vegetables
Remove store wrapping and
discolored areas. Wash in cold
water and drain. Place in plastic
bag or plastic container and
store in crisper.
Vegetables
with skins
(carrots,
peppers)
Place in plastic bags or plastic
container and store in crisper.
Fish Store
freezer section if they are not being
consumed the same day of purchase
It is recommended to consume
day purchased.
Leftovers Cover leftovers with plastic wrap
or aluminum foil, or store in plastic
containers with tight lids.
Storing Frozen Food
Freezing
Your freezer will not quick-freeze a large
quantity of food. Do not put more unfrozen food
into the freezer than will freeze within 24 hours
(no more than 2 to 3 lbs. of food per cubic foot
of freezer space). Leave enough space in the
freezer for air to circulate around packages. Be
careful to leave enough room at the front so the
door can close tightly.
Storage times will vary according to the quality
and type of food, the type of packaging or wrap
used (how airtight and moisture-proof) and
the storage temperature. Ice crystals inside a
sealed package are normal. This simply means
that moisture in the food and air inside the
package have condensed, creating ice crystals.
NOTE
Check a freezer guide or a reliable cookbook
for further information about preparing food
for freezing or food storage times.
NOTE
Allow hot foods to cool at room temperature
for 30 minutes, then package and freeze.
Cooling hot foods before freezing saves
energy.
ENGLISH

32HOW TO USE
ENGLISH
Humidity Controlled Crisper
and Glide’N’Serve
Humidity Controlled Crisper
* Depending on the model, some of the
following functions may not be available.
The crispers provide fresher tasting fruit
and vegetables by letting you easily control
humidity inside the drawer.
You can control the amount of humidity in the
moisture-sealed crispers by adjusting the control
to any setting between Vegetable and Fruit.
Vegetable
. keeps moist air in the crisper for
best storage of fresh, leafy vegetables.
Fruit
. lets moist air out of the crisper for
best storage of fruit.
Fruit Ve getable
FruitVe getable
Glide’N’Serve
This drawer can be used for large party trays,
deli items and beverages. (This drawer should
not be used for vegetables that require high
humidity.)
Storing Frozen Food (continued)
Packaging
Successful freezing depends on correct
packaging. When you close and seal the
package, it must not allow air or moisture in or
out. If it does, you could have food odor and
taste transfer throughout the refrigerator and
could also dry out frozen food.
Packaging recommendations:
Rigid plastic containers with tight-tting
.
lids
Straight-sided canning/freezing jars
.
Heavy-duty aluminum foil
.
Plastic-coated paper
.
Non-permeable plastic wraps
.
Specied freezer-grade self-sealing plastic
.
bags
Follow package or container instructions for
proper freezing methods.
Do not use
Bread wrappers
.
Non-polyethylene plastic containers
.
Containers without tight lids
.
Wax paper or wax-coated freezer wrap
.
Thin, semi-permeable wrap
.

33 HOW TO USE
To Remove the Glass
(Pantry drawer not shown for clarity)
Lift up the glass under the crisper cover, and
pull up and out.
Door Bins
The door bins are removable for easy cleaning
and adjustment.
1 To remove the bin, simply lift the bin up and
pull straight out.
2 To replace the bin, slide it in above the
desired support and push down until it
snaps into place.
NOTE
Some bins may vary in appearance and will
CAUTION
yDo not apply excessive force while
detaching or assembling the storage
bins.
yDo not use the dishwasher to clean the
storage bins and shelves.
yRegularly detach and wash the storage
bins and shelves; they can become
easily contaminated by the food.
ENGLISH
Detaching and Assembling the
Storage Bins
Glide’N’Serve and Humidity
Controlled Crisper
To remove the Humidity Controlled Crisper and
the Glide’N’Serve, pull out the Crispe and
Glide’N’Serve to full extension, lift the front
up, and pull straight out.
To install, slightly tilt up the front, insert the
drawer into the frame and push it back into
place.
ICE BIN (In some models)
Pull the drawer as much as possible (1).
Raise the ice box and take it out carefully (2).
ice bin in the right position (3).
rawer
c
12
3

35 MAINTENANCE
General Cleaning Tips
Unplug refrigerator or disconnect power.
Remove all removable parts, such as
shelves, crispers, etc.
Use a clean sponge or soft cloth and a
mild detergent in warm water. Do not
use abrasive or harsh cleaners.
Hand wash, rinse and dry all surfaces
thoroughly.
Exterior
For products with a stainless steel exterior,
use a clean sponge or soft cloth and a mild
detergent in warm water. Do not use abrasive
or harsh cleaners. Dry thoroughly with a soft
cloth.
Inside Walls (allow freezer to warm up so
the cloth will not stick)
To help remove odors, you can wash the inside
of the refrigerator with a mixture of baking soda
and warm water. Mix 2 tablespoons of baking
soda to 1 quart of water (26 g soda to 1 liter
water.) Be sure the baking soda is completely
dissolved so it does not scratch the surfaces of
the refrigerator.
Door Liners and Gaskets
Use a clean sponge or soft cloth and a mild
detergent in warm water. Do not use cleaning
waxes, concentrated detergents, bleaches,
or cleaners containing petroleum on plastic
refrigerator parts.
Plastic Parts (covers and panels)
Use a clean sponge or soft cloth and a mild
detergent in warm water. Do not use window
material.
Condenser Coils
Use a vacuum cleaner with an attachment to
clean the condenser cover and vents. Do not
remove the panel covering the condenser coil
area.
CAUTION
Do not use a rough cloth or sponge
when cleaning the interior and exterior
of the refrigerator.
Do not place your hand on the bottom
surface of the refrigerator when opening
and closing.
MAINTENANCE
Cleaning
Both the refrigerator and freezer sections defrost automatically; however, clean both sections
about once a month to prevent odors.
Wipe up spills immediately.
Always unplug the refrigeration before cleaning.
WARNING
ENGLISH
LIGHT (LED) REPLACEMENT
Note: Do not remove the LED, it is only to be
WARNING
In case of replacement, the new lamp should

36SMART DIAGNOSIS
ENGLISH
SMART FUNCTIONS
Smart Diagnosis
LG ThinQ Application
This feature is only available on models with the
or logo.
Use this feature to help you diagnose and solve
problems with your appliance.
This feature is only available on models with the
or logo.
The application allows you toLG ThinQ
communicate with the appliance using a
smartphone.
Search for the LG ThinQ application from the
Google Play Store or Apple App Store on a smart
phone.
•
Smart Diagnosis
If you experience a problem while using the
appliance, this smart diagnosis feature will help
you diagnose the problem.
Communicate with the appliance from a
smartphone using the convenient smart features.
Follow the instructions below to use the audible
diagnosis method.
• Launch the LG ThinQ application and select the
Smart Diagnosis feature in the menu. Follow the
instructions for audible diagnosis provided in the
LG ThinQ application.
• For reasons not attributable to LGE’s
negligence, the service may not operate due to
external factors such as, but not limited to, Wi-Fi
unavailability, Wi-Fi disconnection, local app
store policy, or app unavailability.
• The feature may be subject to change without
depending on where you are located.
• The application is subject to change for
appliance improvement purposes without
notice to users.
• Functions may vary by model
LG ThinQ Application Features
Installing the LG ThinQ
Application
Using Audible Diagnosis to
Diagnose Issues
Open the refrigerator doors.
Press and hold the button for 3 Freezer
seconds or longer.
Hold the phone on the upper right speaker
hole.
After the data transfer is complete, the
diagnosis will be displayed in the application.
1
2
3
4
NOTE
NOTE
• Follow instructions to download and install the
application.
• Run the LG ThinQ application and follow the
instructions in the application to register the
appliance.
• The control panel will be turned off, and
then ‘3’ will be displayed on the refrigerator
temperature display part.
• For best results, do not move the phone while
the tones are being transmitted.
NOTE
Keep the phone in place until the tone
transmission has finished. The display will
count down the time. Once the countdown
is over and the tones have stopped, the
diagnosis will be displayed in the application.
5

38TROUBLESHOOTING
Refrigerator or
Freezer section
is too warm.
Refrigerator was recently
installed.
It may take up to 24 hours for each compartment
to reach the desired temperature.
The air vents are blocked.
Cold air circulates from the
freezer to the fresh food
section and back again
through air vents in the wall
dividing the two sections.
Locate air vents by using your hand to sense
section.)
Doors are opened often or
for long periods of time.
When the doors are opened often or for long
periods of time, warm, humid air enters the
compartment. This raises the temperature and
moisture level within the compartment. To lessen
door openings.
Unit is installed in a hot
location.
The refrigerator should not be operated in
temperatures above 110°F (43 °C).
A large amount of food
or hot food was added to
either compartment.
Adding food warms the compartment requiring
the cooling system to run. Allowing hot food to
cool to room temperature before putting it in the
Doors not closed correctly. See the Doors will not close correctly or pop open
section in Parts & Features Troubleshooting.
Temperature control is not
set correctly.
If the temperature is too warm, adjust the
control one increment at a time and wait for the
temperature to stabilize. Refer to the Setting the
Controls section for more information.
Defrost cycle has recently
completed.
During the defrost cycle, the temperature of each
compartment may rise slightly and condensation
may form on the back wall. Wait 30 minutes and
once the defrost cycle has completed.
ENGLISH
Problem Possible causes Solutions

39 TROUBLESHOOTING
Interior
moisture
buildup.
Doors are opened often or
for long periods of time.
When the doors are opened often or for long
periods of time, warm, humid air enters the
compartment. This raises the temperature and
moisture level within the compartment. To lessen
door openings.
Doors not closed correctly. See the Doors will not close correctly section in
the Troubleshooting section.
Weather is humid. Humid weather allows additional moisture to enter
the compartments when the doors are opened
leading to condensation or frost. Maintaining a
reasonable level of humidity in the home will help
to control the amount of moisture that can enter
the compartments.
Defrost cycle recently
completed.
During the defrost cycle, the temperature of each
compartment may raise slightly and condensation
may form on the back wall. Wait 30 minutes and
restored once the defrost cycle has completed.
Food is not packaged
correctly.
Food stored uncovered or unwrapped, and damp
containers can lead to moisture accumulation
within each compartment. Wipe all containers
dry and store food in sealed packaging to prevent
condensation and frost.
Food is
freezing in the
refrigerator
compartment.
Food with high water content
was placed near an air vent.
Rearrange items with high water content away
from air vents.
Refrigerator temperature
control is set incorrectly.
If the temperature is too cold, adjust the
control one increment at a time and wait for the
temperature to stabilize. Refer to the Setting the
Controls section for more information.
Refrigerator is installed in a
cold location.
When the refrigerator is operated in temperatures
below 41°F (5°C), food can freeze in the refrigerator
compartment. The refrigerator should not be
operated in temperatures below 55°F (13°C).
Frost or ice
crystals form
on frozen food
(outside of
package).
Door is opened frequently
or for long periods of time.
When the doors are opened often or for long
periods of time, warm, humid air enters the
compartment. This raises the temperature and
moisture level within the compartment. Increased
moisture will lead to frost and condensation.
duration of door openings.
Door is not closing properly. Refer to the Doors will not close correctly or pop
open section in the Troubleshooting section.
Refrigerator or
Freezer section
is too cold.
Incorrect temperature
control settings.
If the temperature is too cold, adjust the control one
increment at a time and wait for the temperature to
stabilize. Refer to the Setting the Controls section
for more information.
ENGLISH
Problem Possible causes Solutions

41 TROUBLESHOOTING
Icemaker is not
making enough
ice (continued).
(Ice Maker
installed only).
Refrigerator was recently
installed or icemaker
recently connected.
It may take up to 24 hours for each compartment to
reach the desired temperature and for the icemaker
to begin making ice.
that it is in the ON (I) position.
The ice detecting sensor is
obstructed.
Foreign substances or frost on the ice-detecting
sensor can interrupt ice production. Make sure
that the sensor area is clean at all times for proper
operation.
The refrigerator is not
connected to a water
valve is not turned on.
Connect the refrigerator to the water supply and
sensor) obstructed. arm, make sure that the arm moves freely. If
your icemaker is equipped with the electronic ice
path between the two sensors.
Reverse osmosis water
connected to your cold
water supply.
the water pressure below the minimum amount
and result in icemaker issues. (Refer to the Water
Pressure section.)
Ice has bad
taste or odor.
(Ice Maker
installed only).
Water supply contains
minerals such as sulfur. taste and odor problems. NOTE: In some cases,
to remove all minerals/odor/taste in all water
supplies.
Icemaker was recently
installed.
Ice that has been stored for too long will shrink,
become cloudy, and may develop a stale taste.
Throw away old ice and make a new supply.
The food has not been
stored properly in either
compartment.
Rewrap the food. Odors may migrate to the ice if
food is not wrapped properly.
The interior of the
refrigerator needs to be
cleaned.
See the Care and Cleaning section for more
information.
The ice storage bin needs
to be cleaned.
Empty and wash the bin (discard old cubes).
Make sure that the bin is completely dry before
reinstalling it.
Icemaker is
making too
much ice.
(Ice Maker
installed only).
sensor) is obstructed
Empty the ice bin. If your icemaker is equipped
moves freely. If your icemaker is equipped with
there is a clear path between the two sensors.
proper operation.
ENGLISH
Problem Possible causes Solutions

42TROUBLESHOOTING
Clicking The defrost control will click when
the automatic defrost cycle begins
and ends. The thermostat control
(or refrigerator control on some
models) will also click when cycling
Normal Operation
Rattling Rattling noises may come from the
on the back of the unit, or items
stored on top of or around the
refrigerator.
Normal Operation
Refrigerator is not resting solidly on Floor is weak or uneven or leveling
legs need to be adjusted. See the Door
Alignment section.
Refrigerator with linear compressor
was jarred while running.
Normal Operation
Whooshing Evaporator fan motor is circulating
air through the refrigerator and
freezer compartments.
Normal Operation
Air is being forced over the
condenser by the condenser fan.
Normal Operation
cooling system.
Normal Operation
Popping Contraction and expansion of the
inside walls due to changes in
temperature.
Normal Operation
Sizzling Water dripping on the defrost heater
during a defrost cycle.
Normal Operation
Vibrating If the side or back of the
refrigerator is touching a cabinet or
wall, some of the normal vibrations
may make an audible sound.
To eliminate the noise, make sure that the
sides and back cannot vibrate against any
wall or cabinet.
Dripping Water running into the drain pan
during the defrost cycle.
Normal Operation
Pulsating or
High-Pitched
Sound
Your refrigerator is designed to run
items at the desired temperature.
cause your new refrigerator to run
longer than your old one, but it is still
models. While the refrigerator
is running, it is normal to hear a
pulsating or high-pitched sound.
Normal Operation
ENGLISH
Problem Possible causes Solutions

43 TROUBLESHOOTING
Doors will not
close correctly
or pop open.
Food packages are blocking
the door open.
Rearrange food containers to clear the door and
door shelves.
Ice bin, crisper cover, pans,
shelves, door bins, or
baskets are out of position.
Push bins all the way in and put crisper cover,
pans, shelves and baskets into their correct
positions. See the Using Your Refrigerator section
for more information.
The doors were removed
during product installation
and not properly replaced.
Remove and replace the doors according to the
Removing and Replacing Refrigerator Handles and
Doors section.
Refrigerator is not leveled
properly.
See Door Alignment in the Refrigeration
Installation section to level refrigerator.
Doors are
open.
The gaskets are dirty or
sticky.
Clean the gaskets and the surfaces that they
touch. Rub a thin coat of appliance polish or
kitchen wax on the gaskets after cleaning.
Door was recently closed. When you open the door, warmer air enters the
refrigerator. As the warm air cools, it can create
a vacuum. If the door is hard to open, wait one
minute to allow the air pressure to equalize, then
see if it opens more easily.
Refrigerator
wobbles
or seems
unstable.
Leveling legs are not
adjusted properly.
Refer to the Leveling and Door Alignment section.
Floor is not level. It may be necessary to add shims under the
leveling legs or rollers to complete installation.
Lights do not
work.
LED interior lighting failure. The refrigerator compartment lamp is LED interior
lighting, and service should be performed by
Replacement section.
Refrigerator
has an unusual
odor.
The Air Filter may need to
be set to the MAX setting
or replaced.
Set the Air Filter to the MAX setting. If the odor
need to be replaced. See the Replacing the Air
Filter section for replacement instructions.
The interior of
the refrigerator
is covered with
dust or soot.
The refrigerator is located
candle.
Make sure that the refrigerator is not located
candle.
ENGLISH
Problem Possible causes Solutions

45 LIMITED WARRANTY
ENGLISH
PROCEDURE FOR RESOLVING DISPUTES:
ALL DISPUTES BETWEEN YOU AND LG ARISING OUT OF OR RELATING IN ANY WAY TO THIS LIMITED WARRANTY
OR THE PRODUCT SHALL BE RESOLVED EXCLUSIVELY THROUGH BINDING ARBITRATION, AND NOT IN A COURT
OF GENERAL JURISDICTION. BINDING ARBITRATION MEANS THAT YOU AND LG ARE EACH WAIVING THE RIGHT
TO A JURY TRIAL AND TO BRING OR PARTICIPATE IN A CLASS ACTION.
Definitions. For the purposes of this section, references to “LG” mean LG Electronics U.S.A., Inc., its parents, subsidiaries
and affiliates, and each of their officers, directors, employees, agents, beneficiaries, predecessors in interest, successors,
assigns and suppliers; references to “dispute” or “claim” shall include any dispute, claim or controversy of any kind
whatsoever (whether based in contract, tort, statute, regulation, ordinance, fraud, misrepresentation or any other legal or
equitable theory) arising out of or relating in any way to the sale, condition or performance of the product or this Limited
Warranty.
Notice of Dispute. In the event you intend to commerce an arbitration proceeding, you must first notify LG in
writing at least 30
days in advance of initiating the arbitration by sending a letter to LG at LG Electronics, USA, Inc. Attn: Legal Department-
Arbitration 111 Sylvan Avenue, Englewood Cliffs, NJ 07632. You and LG agree to engage in good faith discussions in an
attempt to amicably resolve your claim. The notice must provide your name, address, and telephone number; identify the
product that is the subject of the claim; and describe the nature of the claim and the relief being sought. If you and LG
are unable to resolve the dispute within 30 days, either party may proceed to file a claim for arbitration.
Agreement to Binding Arbitration and Class Action Waiver. Upon failure to resolve the dispute during the 30 day period
after sending written notice to LG, you and LG agree to resolve any claims between us only by binding arbitration on an
individual basis, unless you opt out as provided below. Any dispute between you and LG shall not be combined or
consolidated with a dispute involving any other person’s or entity’s product or claim. More specifically, without limitation of
the foregoing, any dispute between you and LG shall not under any circumstances proceed as part of a class or represen-
tative action. Instead of arbitration, either party may bring an individual action in small claims court, but that small claims
court action may not be brought on a class or representative basis.
Arbitration Rules and Procedures. To begin arbitration of a claim, either you or LG must make a written demand for
arbitration. The arbitration will be administered by the American Arbitration Association (“AAA”) and will be conducted
before a single arbitrator under the AAA’s Consumer Arbitration Rules that are in effect at the time the arbitration is
initiated (referred to as the “AAA Rules”) and under the procedures set forth in this section. The AAA Rules are available
online at www.adr.org/consumer. Send a copy of your written demand for arbitration, as well as a copy of this provision, to
the AAA in the manner described in the AAA Rules. You must also send a copy of your written demand to LG at LG
Electronics, USA, Inc. Attn: Legal Department- Arbitration 111 Sylvan Avenue, Englewood Cliffs, NJ 07632. If there is a
conflict between the AAA Rules and the rules set forth in this section, the rules set forth in this section will govern. This
arbitration provision is governed by the Federal Arbitration Act. Judgment may be entered on the arbitrator’s award in any
court of competent jurisdiction. All issues are for the arbitrator to decide, except that issues relating to the scope and
enforceability of the arbitration provision and to the arbitrability of the dispute are for the court to decide. The arbitrator is
bound by the terms of this provision.
Governing Law. The law of the state of your residence shall govern this Limited Warranty and any disputes between us
except to the extent that such law is preempted by or inconsistent with applicable federal law.
Fees/Costs. You do not need to pay any fee to begin an arbitration. Upon receipt of your written demand for AAA unless
you seek more than $25,000 in damages, in which case the payment of these fees will be governed by the AAA Rules.
Except as otherwise provided for herein, LG will pay AAA filing, administration and arbitrator fees for any arbitration
initiated in accordance with the AAA Rules and this arbitration provision. If you prevail in the arbitration, LG will pay your
attorneys’ fees and expenses as long as they are reasonable, by considering factors including, but not limited to, the
purchase amount and claim amount. Notwithstanding the foregoing, if applicable law allows for an award of reasonable
attorneys’ fees and expenses, an arbitrator can award them to the same extent that a court would. If the arbitrator finds
either the substance of your claim or the relief sought in the demand is frivolous or brought for an improper purpose (as
measured by the standards set forth in Federal Rule of Civil Procedure 11(b)), then the payment of all arbitration fees will
be governed by the AAA Rules. In such a situation, you agree to reimburse LG for all monies previously disbursed by it
that are otherwise your obligation to pay under the AAA Rules. Except as otherwise provided for, LG waives any rights it
may have to seek attorneys’ fees and expenses from you if LG prevails in the arbitration.
Hearings and Location. If your claim is for $25,000 or less, you may choose to have the arbitration conducted solely on
the basis of (1) documents submitted to the arbitrator, (2) through a telephonic hearing, or (3) by an in-person hearing as
established by the AAA Rules. If your claim exceeds $25,000, the right to a hearing will be determined by the AAA
Rules. Any in-person arbitration hearings will be held at a location within the federal judicial district in which you reside
unless we both agree to another location or we agree to a telephonic arbitration.
Opt Out. You may opt out of this dispute resolution procedure. If you opt out, neither you nor LG can require the other to
participate in an arbitration proceeding. To opt out, you must send notice to LG no later than 30 calendar days from the
date of the first consumer purchaser’s purchase of the product by either: (i) sending an e-mail to optout@lge.com, with
the subject line: “Arbitration Opt Out” or (ii) calling 1-800-980-2973. You must include in the opt out e-mail or provide
by telephone: (a) your name and address; (b) the date on which the product was purchased; (c) the product model name
or model number; and (d) the serial number (the serial number can be found (i) on the product; or (ii) online by accessing
https://www.lg.com/us/support/repair-service/schedule-repair-continued and clicking on “Find My Model & Serial
Number”).
You may only opt out of the dispute resolution procedure in the manner described above (that is, by e-mail or telephone);
no other form of notice will be effective to opt out of this dispute resolution procedure. Opting out of this dispute
resolution procedure will not affect the coverage of the Limited Warranty in any way, and you will continue to enjoy the full
benefits of the Limited Warranty. If you keep this product and do not opt out, then you accept all terms and conditions of
the arbitration provision described above.

46LIMITED WARRANTY
LG ELECTRONICS CANADA, INC.
LG REFRIGERATOR LIMITED WARRANTY - Canada
ENGLISH
ARBITRATION NOTICE: THIS LIMITED WARRANTY CONTAINS AN ARBITRATION PROVISION THAT REQUIRES YOU
AND LG TO RESOLVE DISPUTES BY BINDING ARBITRATION INSTEAD OF IN COURT, UNLESS THE LAWS OF YOUR
PROVINCE OR TERRITORY DO NOT PERMIT THAT, OR, IN OTHER JURISDICTIONS, IF YOU CHOOSE TO OPT OUT. IN
ARBITRATION, CLASS ACTIONS AND JURY TRIALS ARE NOT PERMITTED. PLEASE SEE THE SECTION TITLED “PRO-
CEDURE FOR RESOLVING DISPUTES” BELOW.
Should your LG Refrigerator ("Product") fail due to a defect in materials or workmanship under normal and proper use, during
the warranty period set forth below, LG Electronics Canada, Inc. (“LGECI”) will, at its option, repair or replace the Product upon
receipt of proof of the original retail purchase. This limited warranty is valid only to the original retail purchaser of the Product
and applies only to a Product distributed, purchased and used within Canada, as determined at the sole discretion of LGECI.
•Replacement products and parts are warranted for the remaining portion of the original warranty period or ninety (90) days,
whichever is greater.
•Replacement products and parts may be new, reconditioned, refurbished, or otherwise factory remanufactured, all at the
sole discretion of LGECI.
•Proof of original retail purchase specifying the Product model and date of purchase is required to obtain warranty service
under this Limited Warranty.
LGECI’S SOLE LIABILITY IS LIMITED TO THE LIMITED WARRANTY SET OUT ABOVE. EXCEPT AS EXPRESSLY
PROVIDED ABOVE, LGECI MAKES NO, AND HEREBY DISCLAIMS, ALL OTHER WARRANTIES AND CONDITIONS
RESPECTING THE PRODUCT, WHETHER EXPRESS OR IMPLIED, INCLUDING BUT NOT LIMITED TO, ANY IMPLIED
WARRANTY OR CONDITION OF MERCHANTABILITY OR FITNESS FOR A PARTICULAR PURPOSE, AND NO REPRESEN-
TATIONS SHALL BE BINDING ON LGECI. LGECI DOES NOT AUTHORIZE ANY PERSON TO CREATE OR ASSUME FOR IT
ANY OTHER WARRANTY OBLIGATION OR LIABILITY IN CONNECTION WITH THE PRODUCT. TO THE EXTENT THAT
ANY WARRANTY OR CONDITION IS IMPLIED BY LAW, IT IS LIMITED TO THE WARRANTY PERIOD SET OUT ABOVE.
UNDER NO CIRCUMSTANCES SHALL LGECI, THE MANUFACTURER OR DISTRIBUTOR OF THE PRODUCT, BE LIABLE
FOR ANY INCIDENTAL, CONSEQUENTIAL, SPECIAL, DIRECT, INDIRECT, PUNITIVE OR EXEMPLARY DAMAGES,
INCLUDING, WITHOUT LIMITATION, LOSS OF GOODWILL, LOST PROFITS, LOSS OF ANTICIPATED PROFITS, LOST
REVENUE, LOSS OF USE, OR ANY OTHER DAMAGE, WHETHER ARISING DIRECTLY OR INDIRECTLY FROM ANY
CONTRACTUAL BREACH, FUNDAMENTAL BREACH, TORT OR OTHERWISE, OR FROM ANY ACTS OR OMISSIONS.
LGECI’S TOTAL LIABILITY, IF ANY, SHALL NOT EXCEED THE PURCHASE PRICE PAID BY YOU FOR THE PRODUCT.
This Limited Warranty gives you specific legal rights. You may also have other rights that vary from province to province
depending on applicable provincial laws. Any term of this Limited Warranty that negates or varies any implied condition or
warranty under provincial law is severable where ot conflicts with such provincial law without affecting the remainder of this
warranty’s terms.
THIS LIMITED WARRANTY DOES NOT COVER:
•Service trips to i) deliver, pick up, or install or; educate on how to operate the Product; ii) correct wiring or plumbing; or iii)
correct unauthorized repairs or installations of the Product;
•Damage or failure of the Product to perform during power failures and interrupted or inadequate electrical service;
•Damage or failure caused by leaky or broken water pipes, frozen water pipes, restricted drain lines, inadequate or interrupted
water supply or inadequate supply of air;
•Damage or failure resulting from operating the Product in a corrosive atmosphere or contrary to the instructions outlined in
the Product’s owner’s manual;
•Damage or failure to the Product caused by accidents, pests and vermin, lightning, wind, fire, floods, acts of God, or any other
causes beyond the control of LGECI or the manufacturer;
or failure resulting from misuse, abuse, improper installation, repair, or maintenance of the Product. Improper repair •Damage
includes use of parts not authorized or specified by LGECI. Improper installation or maintenance includes installation or
maintenance contrary to the Product’s owner’s manual;.
or failure caused by unauthorized modification or alteration of the Product, or if used for other than the intended •Damage
household purpose/use of the Product, or damage or failure resulting from any water leakage due to improper installation of
the Product;
•Damage or failure caused by incorrect electrical current, voltage or plumbing codes;
•Damage or failure caused by use that is other than normal household use, including, without limitation, commercial or indus-
trial use, including use in commercial offices or recreational facilities, or as otherwise outlined in thev Product’s owner’s manual;
•Damage or failure caused by the use of any accessories, components or cleaning products, including, without limitation, water
filters, that are not approved/authorized by LGECI;
•Replacement of the water filter cartridge due to water pressure that is outside the specified operating range or due to exces-
sive sediment in the water supply;
•Damage or failure caused by transportation and handling, including scratches, dents, chips and/or other damage to the finish
of the Product, such damage results from defects in materials or workmanship and is reported to LGECI within one (1) unless
week of delivery of the Products;
•Damage or missing items to any display, open box, refurbished or discounted Product;
•Refurbished Product or any Product sold “As Is”, “Where Is”, “With all Faults”, or any similar disclaimer;
•Products with original serial numbers that have been removed, altered or cannot be readily determined at the discretion of
LGECI;
•Increases in utility costs and additional utility expenses in any way associated with the Product;
(60) days from the date of manufacture)
WARRANTY PERIOD (Note: If the original date of purchase cannot be verified, the warranty will begin sixty
Refrigerator Sealed System (Condenser, Dryer, Connecting Tube
and Evaporator)
Linear / Inverter
Compressor
One (1) year from the
date of original retail
purchase
One (1) year from the
date of original retail
purchase
Seven (7) years from
the date of original retail
purchase
Ten (10) years from the
date of original retail
purchase
Parts and Labor (internal/
functional parts only) Parts and Labor Parts only (Consumer will
be charged for labor)
Part only (Consumer will
be charged for labor)

48LIMITED WARRANTY
ENGLISH
by the applicable arbitration rules. If your claim exceeds $25,000, the right to a hearing will be determined by the applicable
arbitration rules. Any in-person arbitration hearings will be held at the nearest, most mutually-convenient arbitration location
available within the province or territory in which you reside unless you and LG both agree to another location or agree to a
telephonic arbitration.
Severability and Waiver.
If any portion of this Limited Warranty (including these arbitration procedures) is unenforceable, the
remaining provisions will continue in full force and effect to the maximum extent permitted by applicable law. Should LG fail
to enforce strict performance of any provision of this Limited Warranty (including these arbitration procedures), it does not
mean that LG intends to waive or has waived any provision or part of this Limited Warranty.
Opt Out. You may opt out of this dispute resolution procedure. If you opt out, neither you nor LG can require the other to
participate in an arbitration proceeding. To opt out, you must send notice to LG no later than 30 calendar days from the date
of the first consumer purchaser’s purchase of the product by either (i) sending an e-mail to optout@lge.com, with the subject
line: “Arbitration Opt Out;” or (ii) calling 1-800-980-2973. You must include in the opt out e-mail or provide by telephone: (a)
your name and address; (b) the date on which the product was purchased; (c) the product model name or model number; and
(d) the serial number (the serial number can be found (i) on the product; or (ii) online by accessing
https://www.lg.com/ca_en/support/repair-service/schedule-repair and clicking on “Find My Model & Serial Number”).
In the event that you “Opt Out”, the law of the province or territory of your residence shall govern this Limited Warranty and
any disputes between you and LG except to the extent that such law is preempted by or inconsistent with applicable federal
or provincial/territorial law. Should arbitration not be permitted for any claim, action, dispute or controversy between you and
LG, you and LG agree to attorn to the exclusive jurisdiction of the courts of the province or territory of your residence for the
resolution of the claim, action, dispute or controversy between you and LG.You may only opt out of the dispute resolution
procedure in the manner described above (that is, by e-mail or telephone); no other form of notice will be effective to opt out
of this dispute resolution procedure. Opting out of this dispute resolution procedure will not affect the coverage of the Limited
Warranty in any way, and you will continue to enjoy the full benefits of the Limited Warranty. If you keep this product and do
not opt out, then you accept all terms and conditions of the arbitration provision described above.
Conflict of Terms. In the event of a conflict or inconsistency between the terms of this Limited Warranty and the End User
License Agreement (“EULA”) in regards to dispute resolution, the terms of this Limited Warranty shall control and govern the
rights and obligations of the parties and shall take precedence over the EULA.

49 NOTES
ENGLISH
Produkt Specifikationer
| Mærke: | LG |
| Kategori: | Køleskab |
| Model: | LFC22770SB |
Har du brug for hjælp?
Hvis du har brug for hjælp til LG LFC22770SB stil et spørgsmål nedenfor, og andre brugere vil svare dig
Køleskab LG Manualer

4 Februar 2025
28 Januar 2025
28 Januar 2025
28 Januar 2025
28 Januar 2025
17 Januar 2025
11 Januar 2025
11 Januar 2025
7 Januar 2025
7 Januar 2025
Køleskab Manualer
- Køleskab DeLonghi
- Køleskab Ikea
- Køleskab Bosch
- Køleskab SilverCrest
- Køleskab PKM
- Køleskab Gram
- Køleskab TCL
- Køleskab Wolkenstein
- Køleskab Siemens
- Køleskab Samsung
- Køleskab Scandomestic
- Køleskab GE
- Køleskab Daikin
- Køleskab Zanussi
- Køleskab Cylinda
- Køleskab Panasonic
- Køleskab Candy
- Køleskab Fisher & Paykel
- Køleskab Gorenje
- Køleskab Husqvarna
- Køleskab VOX
- Køleskab Miele
- Køleskab Silverline
- Køleskab Blomberg
- Køleskab Philips
- Køleskab Caso
- Køleskab Concept
- Køleskab Teka
- Køleskab OK
- Køleskab AEG
- Køleskab Electrolux
- Køleskab Thetford
- Køleskab Bauknecht
- Køleskab Elica
- Køleskab Whirlpool
- Køleskab Vestfrost
- Køleskab Mitsubishi
- Køleskab Sharp
- Køleskab Hotpoint
- Køleskab Dacor
- Køleskab Melissa
- Køleskab Atag
- Køleskab Kenwood
- Køleskab Mobicool
- Køleskab Omega
- Køleskab Hoover
- Køleskab Daewoo
- Køleskab Arçelik
- Køleskab Junker
- Køleskab JennAir
- Køleskab Waeco
- Køleskab Garmin
- Køleskab Sanyo
- Køleskab Grundig
- Køleskab Worx
- Køleskab Progress
- Køleskab De Dietrich
- Køleskab Indesit
- Køleskab GYS
- Køleskab Hotpoint Ariston
- Køleskab Livoo
- Køleskab Toshiba
- Køleskab Pyle
- Køleskab Klarstein
- Køleskab Ardo
- Køleskab Furrion
- Køleskab Etna
- Køleskab Yamaha
- Køleskab Infiniton
- Køleskab Trisa
- Køleskab Princess
- Køleskab Matsui
- Køleskab Nedis
- Køleskab Emerio
- Køleskab Severin
- Køleskab Scholtès
- Køleskab Hansa
- Køleskab Logik
- Køleskab Bartscher
- Køleskab Polar
- Køleskab Moulinex
- Køleskab Sauber
- Køleskab Westinghouse
- Køleskab Ilve
- Køleskab Element
- Køleskab Thomson
- Køleskab Constructa
- Køleskab Hyundai
- Køleskab AKAI
- Køleskab Hisense
- Køleskab TriStar
- Køleskab Porkka
- Køleskab Brandt
- Køleskab Adler
- Køleskab Camry
- Køleskab Crivit
- Køleskab Dometic
- Køleskab Mestic
- Køleskab Blaupunkt
- Køleskab Tomado
- Køleskab AEG-Electrolux
- Køleskab Asko
- Køleskab Atlas
- Køleskab Becken
- Køleskab BEKO
- Køleskab Elvita
- Køleskab Gaggenau
- Køleskab Helkama
- Køleskab Iberna
- Køleskab Ignis
- Køleskab Küppersbusch
- Køleskab Leonard
- Køleskab Neff
- Køleskab Privileg
- Køleskab Smeg
- Køleskab Viva
- Køleskab Costway
- Køleskab Honeywell
- Køleskab Quigg
- Køleskab Hitachi
- Køleskab Proficook
- Køleskab Medion
- Køleskab Liebherr
- Køleskab Ariston Thermo
- Køleskab Fagor
- Køleskab Haier
- Køleskab Bifinett
- Køleskab Bomann
- Køleskab Russell Hobbs
- Køleskab KitchenAid
- Køleskab United
- Køleskab Luxor
- Køleskab Rosieres
- Køleskab Boretti
- Køleskab Vivax
- Køleskab Mora
- Køleskab Crosley
- Køleskab UPO
- Køleskab Zanker
- Køleskab Galanz
- Køleskab Amana
- Køleskab Amica
- Køleskab Arthur Martin-Electrolux
- Køleskab Euromaid
- Køleskab Comfee
- Køleskab Sunny
- Køleskab Dimplex
- Køleskab Finlux
- Køleskab Telefunken
- Køleskab CaterCool
- Køleskab Kernau
- Køleskab Bertazzoni
- Køleskab Caple
- Køleskab SIBIR
- Køleskab Zerowatt
- Køleskab Cuisinart
- Køleskab Mercury
- Køleskab Primo
- Køleskab Orbegozo
- Køleskab Viking
- Køleskab Franke
- Køleskab Optimum
- Køleskab Veripart
- Køleskab Zenith
- Køleskab Balay
- Køleskab Cata
- Køleskab Exquisit
- Køleskab Hoover-Grepa
- Køleskab Pelgrim
- Køleskab Elba
- Køleskab Elektra Bregenz
- Køleskab Faure
- Køleskab Juno
- Køleskab Nodor
- Køleskab Respekta
- Køleskab Rommer
- Køleskab Stoves
- Køleskab Juno-Electrolux
- Køleskab Schneider
- Køleskab MPM
- Køleskab Profilo
- Køleskab Hanseatic
- Køleskab G3 Ferrari
- Køleskab Frigor
- Køleskab Thor
- Køleskab V-Zug
- Køleskab Maytag
- Køleskab Gourmetmaxx
- Køleskab Domo
- Køleskab Perel
- Køleskab Saro
- Køleskab Bush
- Køleskab Unold
- Køleskab Aspes
- Køleskab Bellini
- Køleskab Salora
- Køleskab Scancool
- Køleskab Nevir
- Køleskab Techwood
- Køleskab Inventum
- Køleskab Thorens
- Køleskab Swan
- Køleskab White Knight
- Køleskab Khind
- Køleskab Dunavox
- Køleskab Midea
- Køleskab Napoleon
- Køleskab CDA
- Køleskab Frigidaire
- Køleskab Frilec
- Køleskab Fridgemaster
- Køleskab Ardes
- Køleskab Husky
- Køleskab Esatto
- Køleskab SVAN
- Køleskab Everglades
- Køleskab Danby
- Køleskab Sogo
- Køleskab RCA
- Køleskab Koenic
- Køleskab Currys Essentials
- Køleskab ECG
- Køleskab General Electric
- Køleskab Eldom
- Køleskab H.Koenig
- Køleskab Proline
- Køleskab Stirling
- Køleskab Gladiator
- Køleskab Eta
- Køleskab Lynx
- Køleskab Lavorwash
- Køleskab Kalorik
- Køleskab Cecotec
- Køleskab Berg
- Køleskab Osprey
- Køleskab Onyx
- Køleskab Royal Catering
- Køleskab Friac
- Køleskab Seiki
- Køleskab Baumatic
- Køleskab Ideal
- Køleskab Cool Head
- Køleskab Chefman
- Køleskab Meireles
- Køleskab Marvel
- Køleskab Kenmore
- Køleskab Avanti
- Køleskab Vestel
- Køleskab U-Line
- Køleskab Continental Edison
- Køleskab Cookology
- Køleskab Corbero
- Køleskab Zephyr
- Køleskab CHiQ
- Køleskab MBM
- Køleskab Artusi
- Køleskab La Germania
- Køleskab Orima
- Køleskab Whynter
- Køleskab Magic Chef
- Køleskab True
- Køleskab Lamona
- Køleskab Philco
- Køleskab Zanussi-Electrolux
- Køleskab Benavent
- Køleskab Sôlt
- Køleskab Novy
- Køleskab Rex
- Køleskab Kunft
- Køleskab Climadiff
- Køleskab Euro Appliances
- Køleskab Summit
- Køleskab LeCavist
- Køleskab Kogan
- Køleskab LERAN
- Køleskab DCG
- Køleskab Coyote
- Køleskab New Pol
- Køleskab Ravanson
- Køleskab Matrix
- Køleskab Fulgor Milano
- Køleskab Hoshizaki
- Køleskab Airlux
- Køleskab Foster
- Køleskab NEO Tools
- Køleskab Avintage
- Køleskab Insignia
- Køleskab Sam Cook
- Køleskab Consul
- Køleskab Jocel
- Køleskab Heller
- Køleskab Signature
- Køleskab InAlto
- Køleskab Manta
- Køleskab FrigeluX
- Køleskab SanGiorgio
- Køleskab Electra
- Køleskab La Sommelière
- Køleskab Orava
- Køleskab NewAir
- Køleskab Kaiser
- Køleskab IFB
- Køleskab Haeger
- Køleskab Linarie
- Køleskab Create
- Køleskab Glem Gas
- Køleskab Premium Levella
- Køleskab Schaub Lorenz
- Køleskab Fhiaba
- Køleskab Lemair
- Køleskab Arktic
- Køleskab Beverage-Air
- Køleskab Thermador
- Køleskab Yolco
- Køleskab Kuhla
- Køleskab Atosa
- Køleskab Cooluli
- Køleskab Hestan
- Køleskab Aconatic
- Køleskab Wisberg
- Køleskab Aldi
- Køleskab Kluge
- Køleskab Leisure
- Køleskab Vintec
- Køleskab AYA
- Køleskab Vedette
- Køleskab Salton
- Køleskab Tricity Bendix
- Køleskab Palsonic
- Køleskab Arthur Martin
- Køleskab Nordland
- Køleskab Saba
- Køleskab BlueStar
- Køleskab John Lewis
- Køleskab Mabe
- Køleskab Monogram
- Køleskab Valberg
- Køleskab Accucold
- Køleskab Castor
- Køleskab Heinner
- Køleskab Nabo
- Køleskab Guzzanti
- Køleskab Defy
- Køleskab Igloo
- Køleskab Premium
- Køleskab Nordmende
- Køleskab Rangemaster
- Køleskab GOTIE
- Køleskab Kubo
- Køleskab WLA
- Køleskab Kelvinator
- Køleskab Steel Cucine
- Køleskab Jenn-Air
- Køleskab Limit
- Køleskab Freggia
- Køleskab Carpigiani
- Køleskab Listo
- Køleskab Edesa
- Køleskab Milectric
- Køleskab New World
- Køleskab WhiteLine
- Køleskab Bompani
- Køleskab Blaze
- Køleskab M-System
- Køleskab Changhong
- Køleskab Goddess
- Køleskab Godrej
- Køleskab Belling
- Køleskab BeefEater
- Køleskab Essentiel B
- Køleskab Edy
- Køleskab Altus
- Køleskab Edgestar
- Køleskab Parmco
- Køleskab Eurotech
- Køleskab Café
- Køleskab Equator
- Køleskab Electrolux-Rex
- Køleskab Brandy Best
- Køleskab Sub-Zero
- Køleskab Flavel
- Køleskab Teco
- Køleskab Bluesky
- Køleskab Tecnolux
- Køleskab Icecool
- Køleskab Cobal
- Køleskab Marynen
- Køleskab Gardenline
- Køleskab Lec
- Køleskab Oranier
- Køleskab Turbo Air
- Køleskab DAYA
- Køleskab CombiSteel
- Køleskab DCS
- Køleskab Perlick
- Køleskab Tisira
- Køleskab Unic Line
- Køleskab Gastro-Cool
- Køleskab Hiberg
- Køleskab Maxx Cold
- Køleskab Wells
- Køleskab Paulmann
- Køleskab Kucht
- Køleskab Avantco
- Køleskab Norlake
- Køleskab Arctic Air
- Køleskab Snaigė
- Køleskab Romo
- Køleskab Merax
- Køleskab Koolatron
- Køleskab Coca-Cola
- Køleskab Blucher
- Køleskab Silhouette
- Køleskab ColdTech
- Køleskab Magic Cool
- Køleskab Rhino
- Køleskab Le Chai
- Køleskab Gamko
- Køleskab IOMABE
- Køleskab APW Wyott
- Køleskab SPT
- Køleskab Kolpak
- Køleskab Hatco
- Køleskab High One
- Køleskab Les Petits Champs
- Køleskab Airflo
- Køleskab Moa
- Køleskab Master-Bilt
- Køleskab Hydra Kool
- Køleskab XO
- Køleskab Curtiss
- Køleskab Nemco
- Køleskab Winia
- Køleskab Delfield
- Køleskab Traulsen
- Køleskab Alto-Shaam
- Køleskab Simfer
- Køleskab Robinhood
- Køleskab Federal
- Køleskab Structural Concepts
- Køleskab Vinata
- Køleskab Acros
- Køleskab Adventure Kings
- Køleskab Avallon
- Køleskab Emperor's Select
- Køleskab Fisher Paykel
- Køleskab Cosmo
- Køleskab Wine Klima
- Køleskab Marbor
- Køleskab Engel
- Køleskab Americana
- Køleskab EvaKool
- Køleskab Coldtainer
- Køleskab Orien
- Køleskab Enofrigo
- Køleskab BSK
- Køleskab Techfrost
- Køleskab Irinox
- Køleskab Azure
- Køleskab Gecko
- Køleskab Bromic
- Køleskab MSW
- Køleskab Adora
- Køleskab Newpol
- Køleskab Brastemp
- Køleskab Haden
- Køleskab Sedona
- Køleskab Vinotemp
- Køleskab Norpole
- Køleskab Gasmate
- Køleskab Triomph
- Køleskab Schmick
- Køleskab Dellware
- Køleskab HABAU
- Køleskab Electroline
- Køleskab Tuscany
- Køleskab TESLA Electronics
- Køleskab Pando
- Køleskab Smart Brand
- Køleskab Brass Monkey
- Køleskab Waltham
- Køleskab Lec Medical
- Køleskab Kalamazoo
- Køleskab Koldfront
- Køleskab HomeCraft
- Køleskab Coors
- Køleskab Eqtemp
- Køleskab Uniprodo
- Køleskab Landmark
- Køleskab PITSOS
- Køleskab Corona
- Køleskab Coors Light
- Køleskab Miller Lite
- Køleskab Lanbo
- Køleskab Momcube
- Køleskab Sheffield
- Køleskab Imprasio
Nyeste Køleskab Manualer

26 Marts 2025
26 Marts 2025

25 Marts 2025

22 Marts 2025

21 Marts 2025
20 Marts 2025
16 Marts 2025
15 Marts 2025
13 Marts 2025

13 Marts 2025