StarTech.com STSDOCKU313E Manual
StarTech.com
Harddisk
STSDOCKU313E
Læs nedenfor 📖 manual på dansk for StarTech.com STSDOCKU313E (2 sider) i kategorien Harddisk. Denne guide var nyttig for 10 personer og blev bedømt med 4.5 stjerner i gennemsnit af 2 brugere
Side 1/2
Quick start guide
FR: Guide de l’utilisateur - fr.startech.com
DE: Bedienungsanleitung - de.startech.com
ES: Guía del usuario - es.startech.com
NL: Gebruiksaanwijzing - nl.startech.com
PT: Guia do usuário - pt.startech.com
IT: Guida per l’uso - it.startech.com
Manual Revision: 10/14/2015
For the latest information, technical specications, and support for
this product, please visit www.startech.com/SDOCKU313E.
Packaging contents
• 1 x USB 3.1 and eSATA SSD and HDD docking station
• 1 x universal power adapter (NA/EU/UK/AU)
• 1 x USB cable
• 1 x eSATA cable
• 1 x quick start guide
System requirements
• Computer system with an available USB Type A port or an eSATA
port
• A 2.5 in. or 3.5 in. SATA hard drive (HDD) or solid-state drive (SSD)
The SDOCKU313E is OS independent and doesn’t require any
additional drivers or software.
Note: To obtain the maximum USB throughput, you must use a
computer with a USB 3.1 Gen 2 (10Gbps) port.
System requirements are subject to change. For the latest
requirements, please visit www.startech.com/SDOCKU313E.
SDOCKU313E
USB 3.1 (10Gbps) and eSATA Docking Station for SATA Drives
*actual product may vary from photos
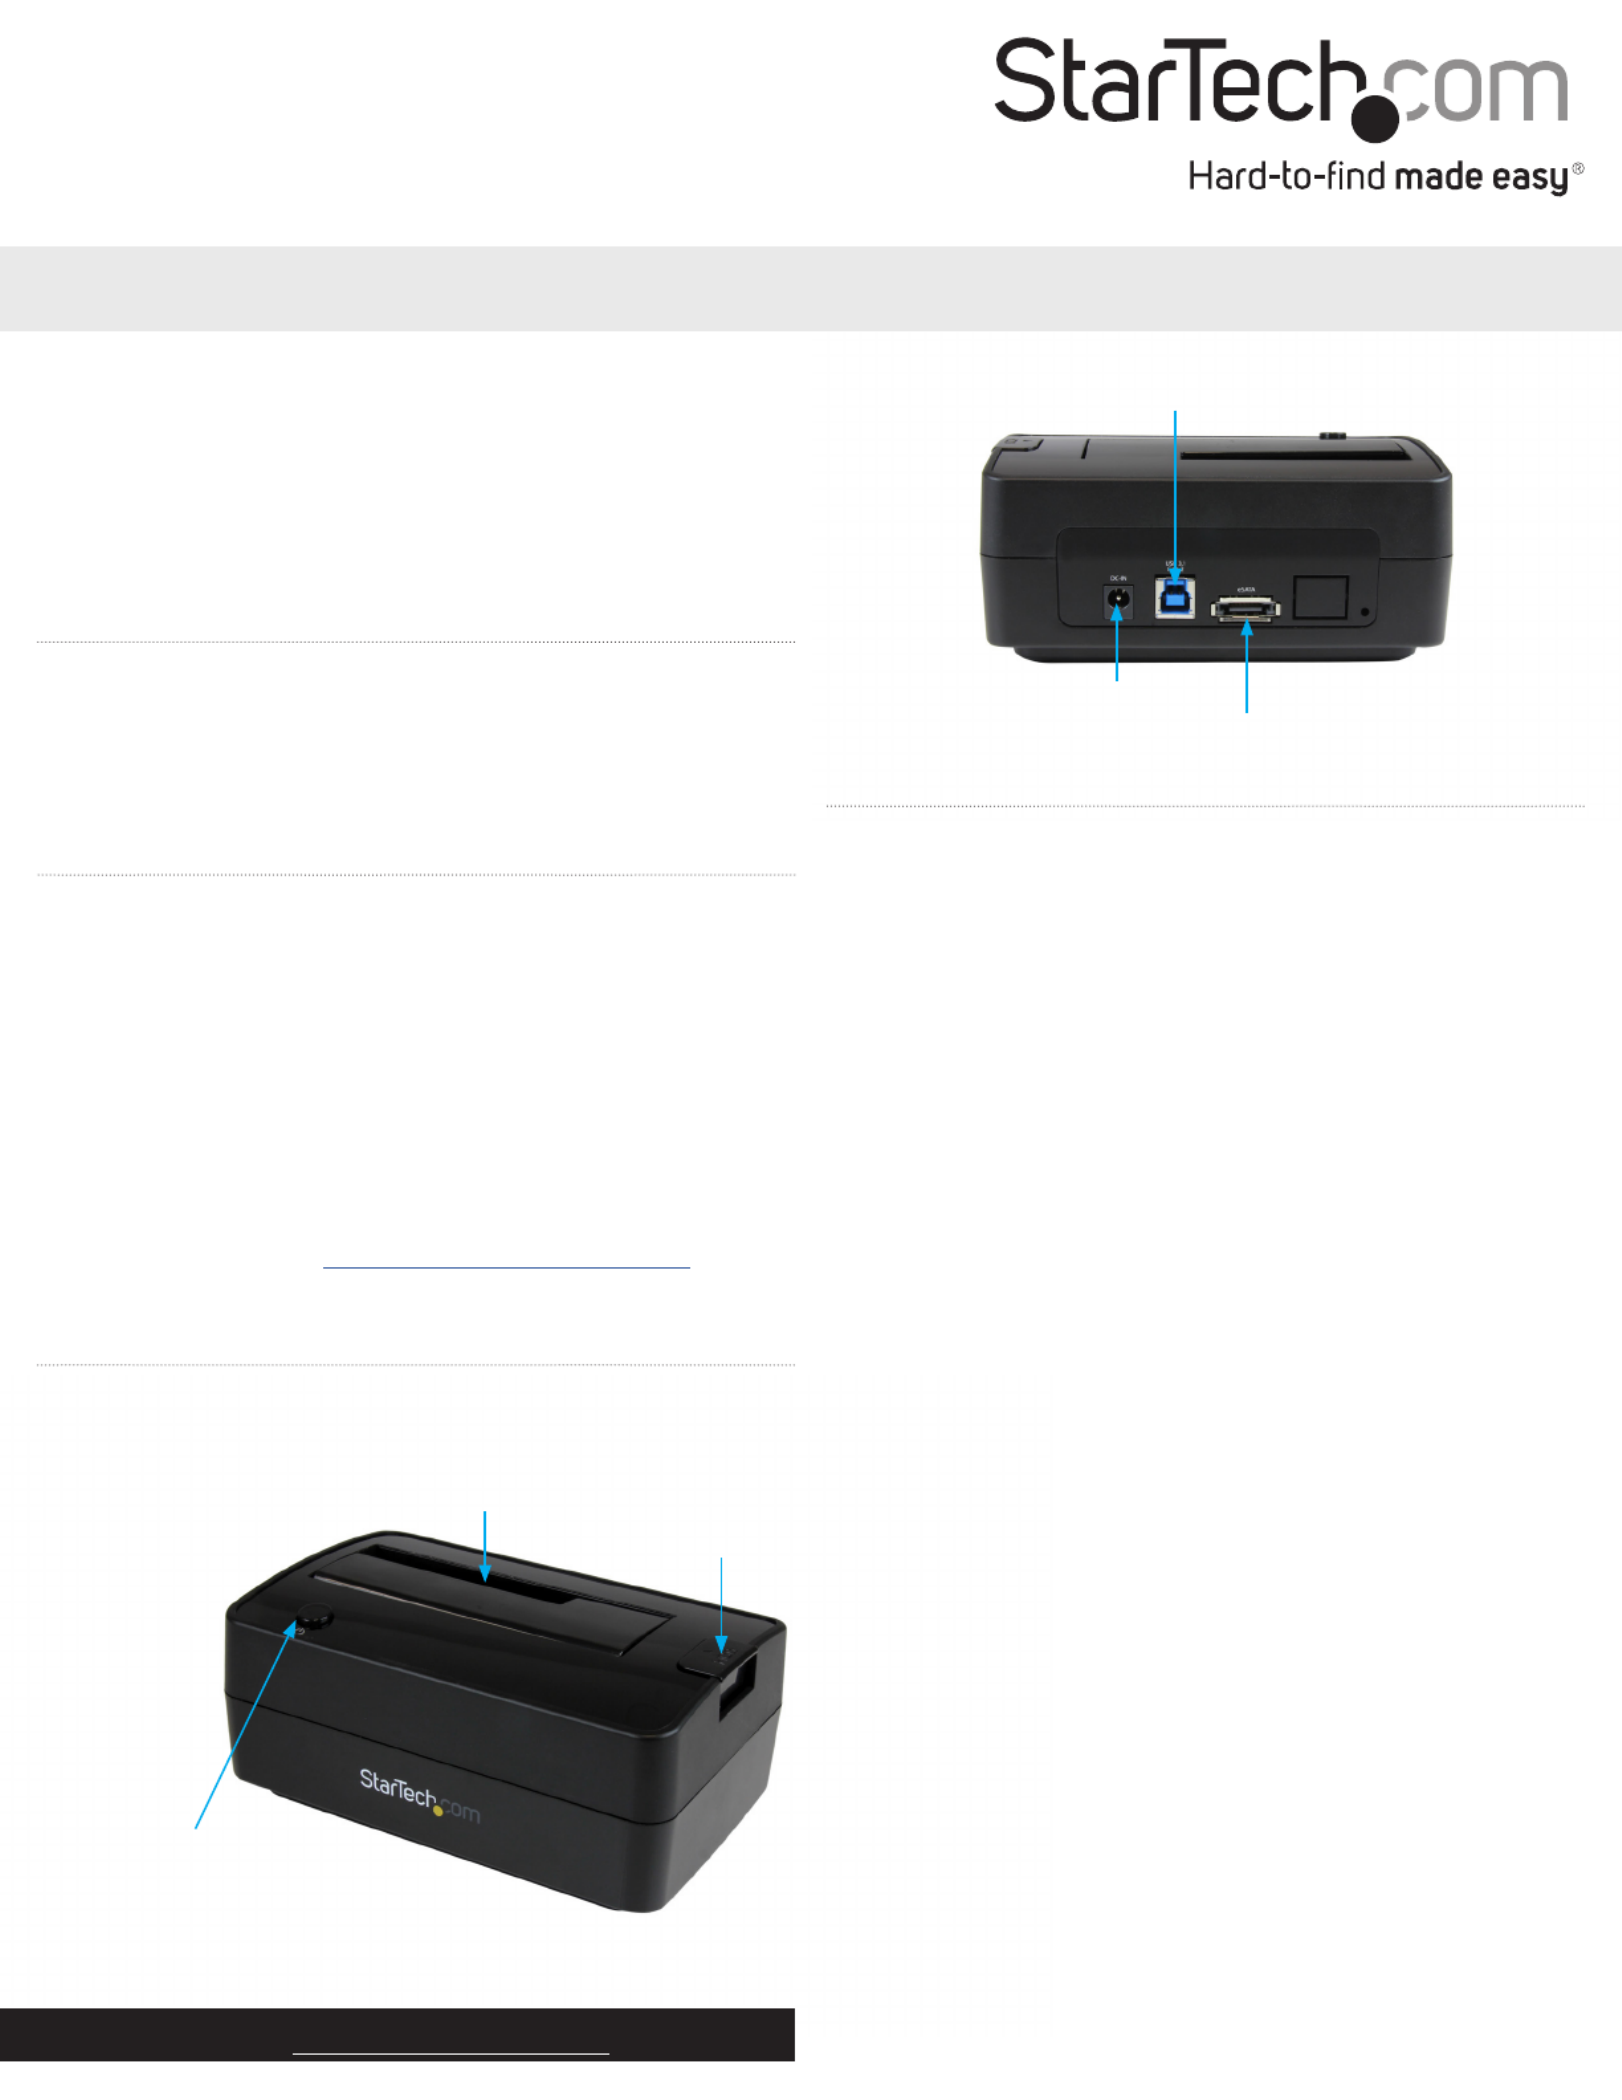
Product diagram
Front view
Power button and LED
Drive slot
Eject button
Rear view
DC power connector
USB 3.1 type B
connector (host)
eSATA connector
Installation
Connect the dock
Warning! Drives and storage enclosures should be handled carefully,
especially when they’re transported. If you’re not careful with your
drives, you may lose data as a result. Always handle storage devices
with caution.
1. Connect the external power adapter from the dock to a power
outlet.
2. Do one of the following:
• Connect the included USB cable from the dock to a USB port on
your computer system. Your computer can either be turned on
or turned o when you connect the USB cable.
• Connect the included eSATA cable from the dock to an eSATA
port on your computer system. Your computer can either be
turned on or turned o when you connect the USB cable.
Install a drive
Before you install a drive, make sure that the dock is turned o.
1. Carefully align a 2.5 in. or 3.5 in. SATA drive with the drive slot on
the dock, so that the SATA power and data connectors on the
drive are aligned with the corresponding connectors that are
inside of the drive slot.
2. Insert the 2.5 in. or 3.5 in. SATA drive into the slot.
3. Press the Power button to turn on the dock. The LED indicator
should light up to indicate that the dock is turned on.
After the drive is installed and the dock is turned on, your computer
automatically recognizes the drive and it’s accessible as though the
drive is installed internally in the system. If your computer doesn’t
automatically recognize the drive, see the Prepare a drive for use
topic.
About driver installation
No driver or software installation is required for this product because
the dock is natively supported and the drivers are already installed.
Produkt Specifikationer
| Mærke: | StarTech.com |
| Kategori: | Harddisk |
| Model: | STSDOCKU313E |
Har du brug for hjælp?
Hvis du har brug for hjælp til StarTech.com STSDOCKU313E stil et spørgsmål nedenfor, og andre brugere vil svare dig
Harddisk StarTech.com Manualer

3 September 2024
31 August 2024
31 August 2024
18 August 2024
17 August 2024
17 August 2024
Harddisk Manualer
- Harddisk Sony
- Harddisk Samsung
- Harddisk Pioneer
- Harddisk Sandberg
- Harddisk HP
- Harddisk Quark
- Harddisk Toshiba
- Harddisk Kodak
- Harddisk Buffalo
- Harddisk Medion
- Harddisk Sweex
- Harddisk Seagate
- Harddisk Western Digital
- Harddisk Dell
- Harddisk Fujitsu
- Harddisk TrekStor
- Harddisk Transcend
- Harddisk LaCie
- Harddisk Intenso
- Harddisk Fantec
- Harddisk Oyen Digital
- Harddisk Sharkoon
- Harddisk Rocstor
- Harddisk HGST
- Harddisk AudioControl
- Harddisk Kingston
- Harddisk Silverstone
- Harddisk CnMemory
- Harddisk OWC
- Harddisk Freecom
- Harddisk G-Technology
- Harddisk Areca
- Harddisk Verbatim
- Harddisk Apricorn
- Harddisk PNY
- Harddisk Sabrent
- Harddisk Hamlet
- Harddisk VisionTek
- Harddisk BLACKJET
- Harddisk Xcellon
Nyeste Harddisk Manualer

9 April 2025
1 Februar 2025
30 Januar 2025
29 Januar 2025
15 Januar 2025
14 Januar 2025
14 Januar 2025
14 Januar 2025
14 Januar 2025
14 Januar 2025